The Copilot control is a powerful AI assistant that allows users to engage with data in Canvas Apps using natural language conversations. By incorporating this AI-driven feature, app creators can offer users instant insights and automated solutions, greatly enhancing the user experience.
In this blog, we’ll guide you through the process of adding the Copilot control to a Canvas App and connecting it to data sources such as Contacts, Leads, or Cases.
If you want to integrate a custom Copilot into your Canvas App, check out this blog post for a detailed guide on enabling your custom Copilot without needing to place it on any specific screen in your app.
Why Use Copilot in Canvas Apps?
- AI-Powered Insights: Users can ask questions and receive instant insights based on app data.
- Data-Driven Decisions: Copilot suggests actions and insights derived from historical data.
- Enhanced Productivity: Automates repetitive tasks, enabling users to focus on high-priority actions.
Prerequisite
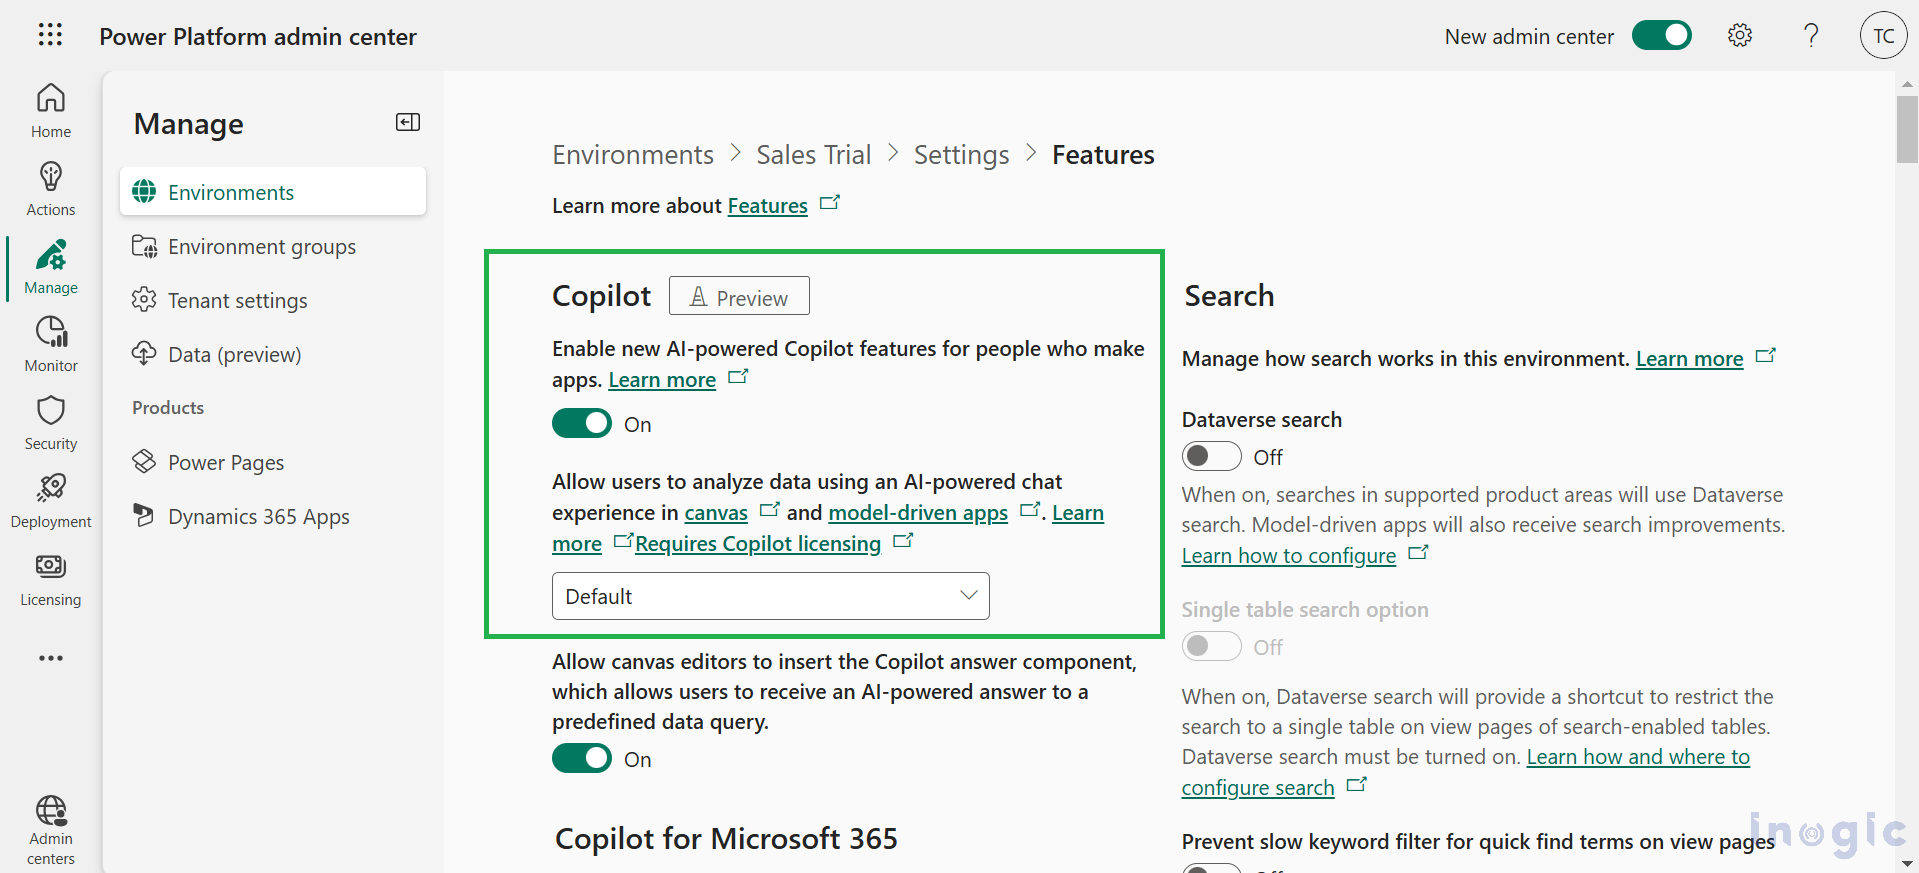
To enable users to access the Copilot chat feature in a Canvas App, a Power Platform administrator must first activate the setting that allows users to analyze data using an AI-powered chat experience in Canvas and model-driven apps.
Setting Up Copilot for Your Canvas App
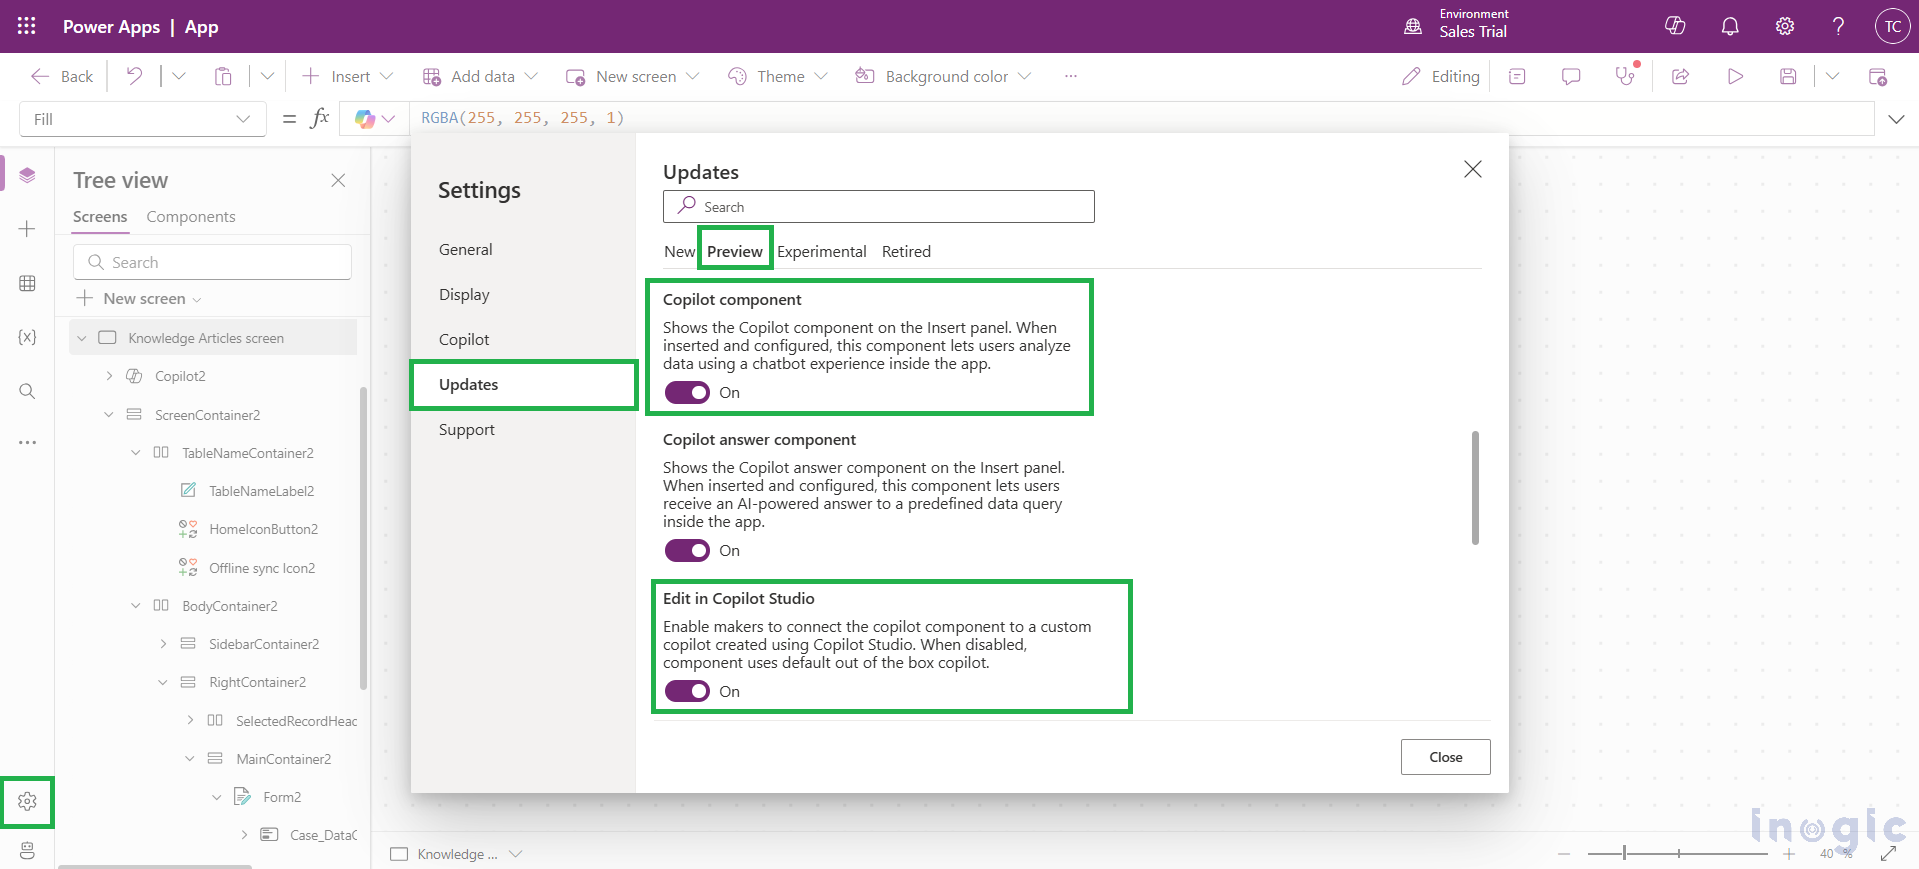
To integrate the Copilot control into your Canvas App, you’ll need to enable certain features in the app settings:
- Copilot Component: This option activates the Copilot feature, allowing you to add the Copilot control and connect it to a custom AI assistant.
- Edit in Copilot Studio: This option provides the ability to modify the Copilot using Copilot Studio. If disabled, only the default Copilot will be accessible in the app.
Launch your application in Power Apps, then, go to Settings in the command bar and select Updates. Next, within the Preview tab, turn on both the Copilot Component and Edit in Copilot Studio options to start customizing the Copilot functionality for your app.
Example Use Case: Managing Customer Support Cases
Imagine a customer support agent opening a case record. The Copilot control can:
- Suggest solutions based on similar resolved cases.
- Recommend relevant knowledge articles.
- Automate follow-up task creation if no action is taken within a specific timeframe.
By leveraging the Copilot control, users can work smarter, resolve issues faster, and deliver better customer service.
Step-by-Step Guide to Adding Copilot Control
1. Open or Create a Canvas App
- Sign in to Power Apps.
- You can either open a pre-existing Canvas App or begin a new one.
2. Add a Data Source
- Click Data in the left panel.
- Select Add data and choose Dataverse.
- Connect to the Cases, Contacts, or Leads
3. Insert the Copilot Control
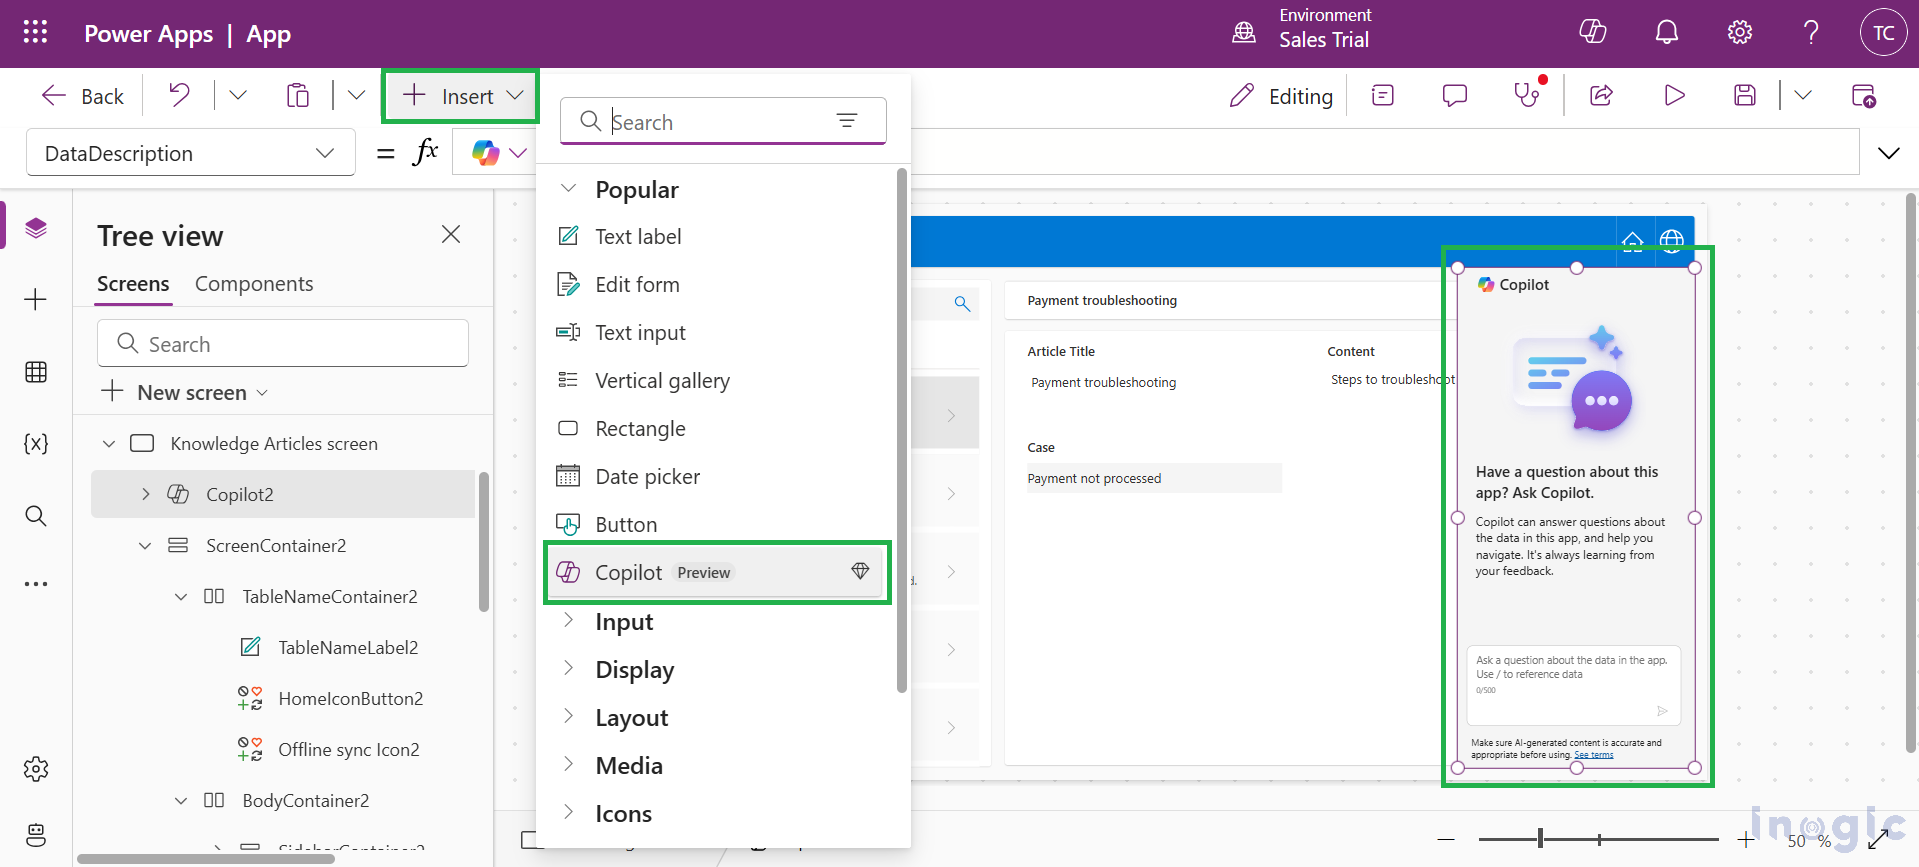
- Go to the Insert
- Choose AI Copilot from the AI Components section.
- Drag and drop the Copilot control onto the screen.
4. Configure the Copilot Control
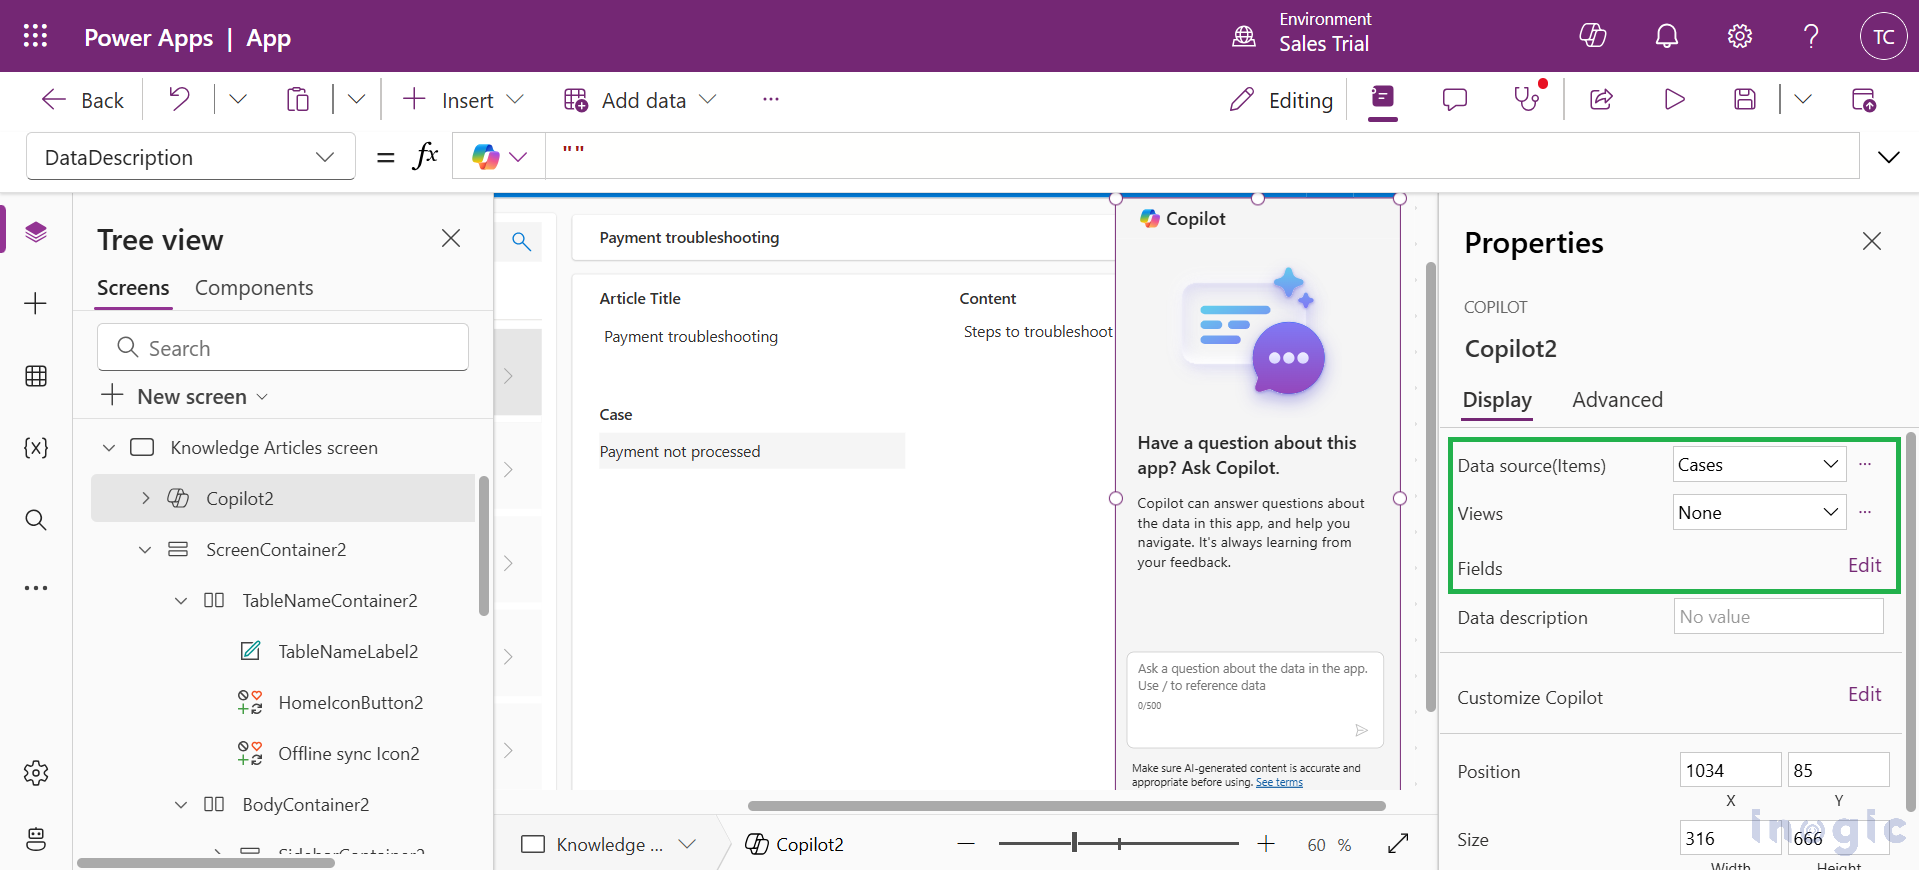
- Select the Copilot control and set the DataSource property to the desired table (e.g., Cases).
- Define the fields that Copilot should analyze for insights.
5. Customize and Save the App
- Adjust the Copilot’s size and position on the screen.
- Click on Save & Publish.
Customize the Copilot
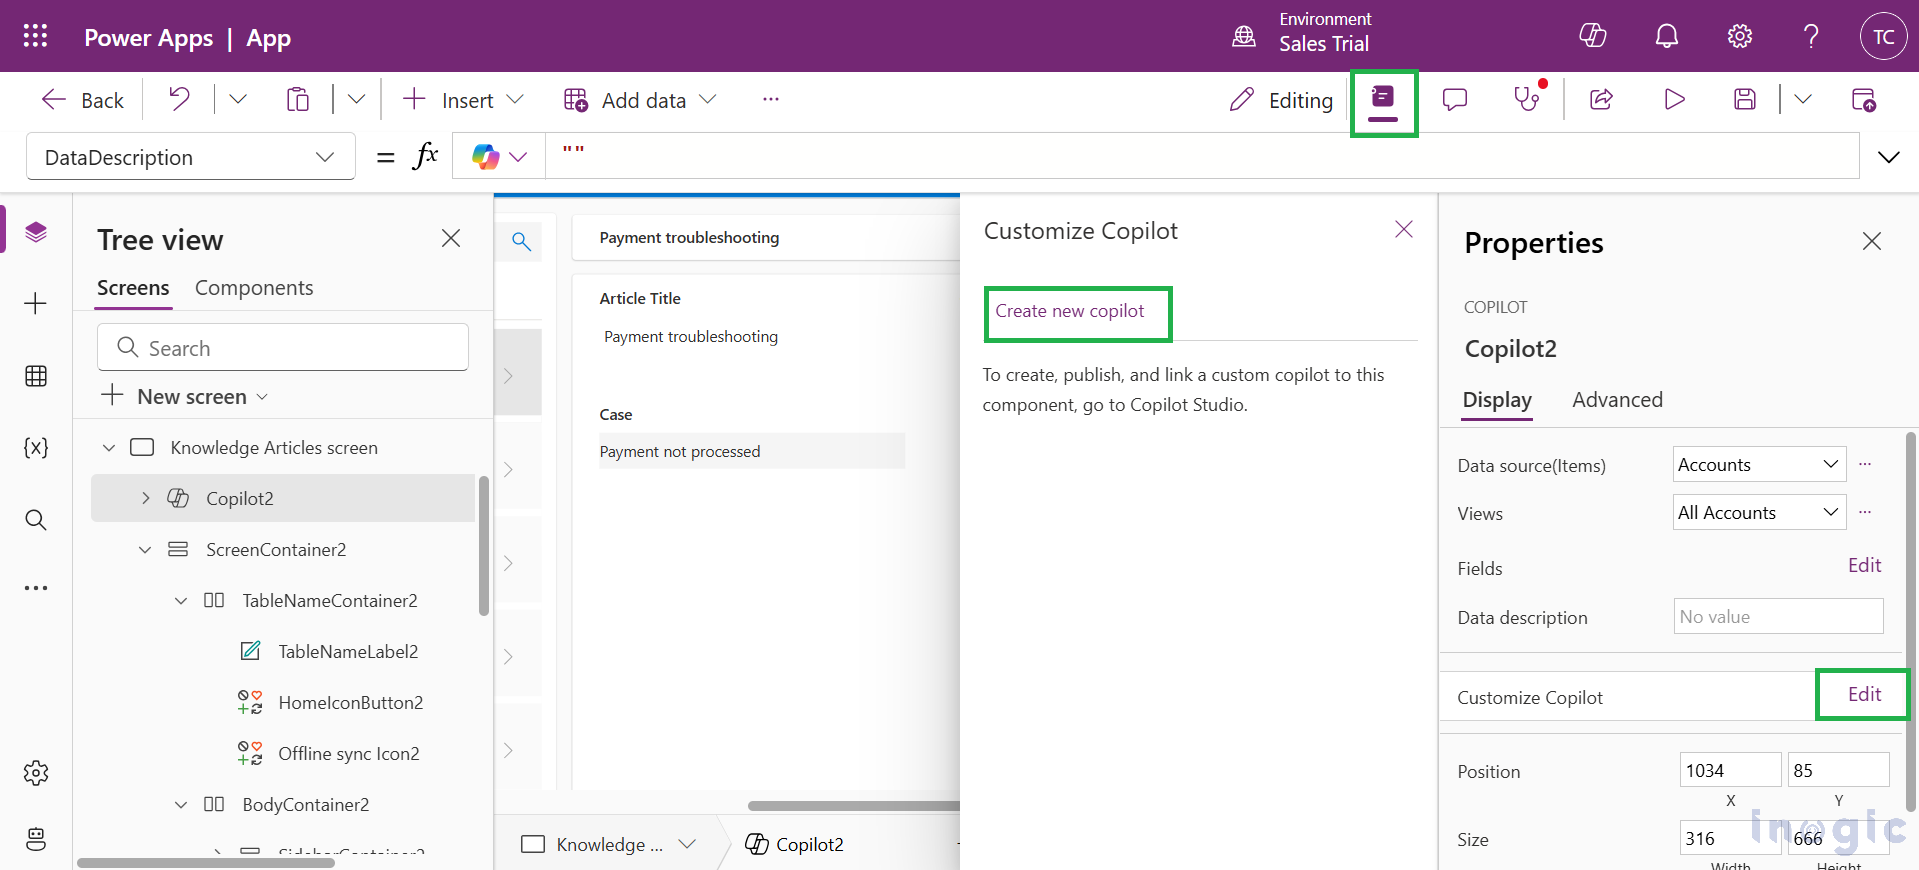
Select the Copilot control in your app, then go to the Properties pane. Click Edit next to the Customize Copilot option. If you haven’t created a Copilot yet, choose “Create new Copilot” in the Customize Copilot pane. Copilot Studio will open in a new browser window, where you can customize topics, responses, and actions. Any changes you make will be automatically reflected in the Copilot connected to your app.
Note: The Copilot control in Power Apps Studio cannot be linked to an existing Copilot from Copilot Studio.
Conclusion
Integrating the Copilot control into your Canvas App brings AI-powered insights and automation to your fingertips. This streamlines workflows, enhances decision-making, and improves user engagement. Start building smarter apps today with Copilot, and unlock new possibilities for your business.
