Introduction:-
In this blog, we will learn how to use the relate() and unrelate() functions in the Canvas App.
Hearing the word relate, you would have assumed that it was going to link to or relate to something. Bingo! With relate() function two records are linked with a one-to-many or many-to-many relationship in Microsoft Dataverse. Also, the unrelate() function acts the exact opposite by removing the link between two records, all in Microsoft Dataverse.
Syntax:-
Relate():- Relate(Table1RelatedTable, Table2Record) –For a record of Table1, the table of Table2 records related through a one-to-many or many-to-many relationship.
Unrelate():- Unrelate(Table1RelatedTable, Table2Record)– For a record of Table1, the table of Table2 records is related through a one-to-many or many-to-many relationship.
Let’s Understand things in detail. Suppose we have a table Teacher and Student where a teacher has a one-to-many relationship with the student table. That means one teacher can have multiple students.
Step 1:- Go to make.powerapps.com select the environment and go to solution and create a solution. Inside the Solution select New> App > Canvas App. Create a canvas app for a tablet with a blank screen.
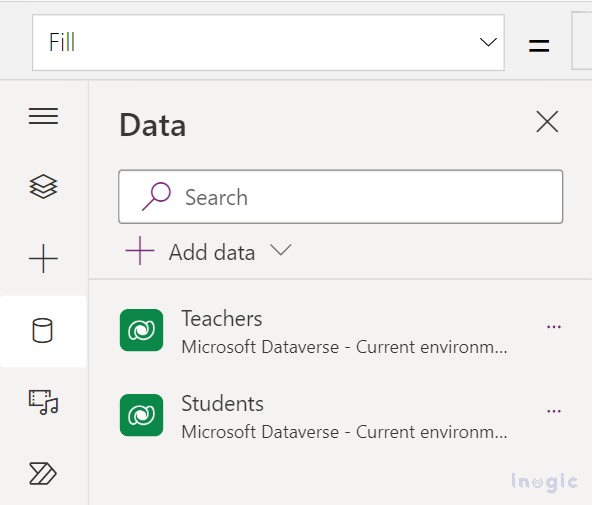
Step 2:- In the Data pane, select Add data > In the Data pane, select Add data > select the required tables in our example it is teacher and student.
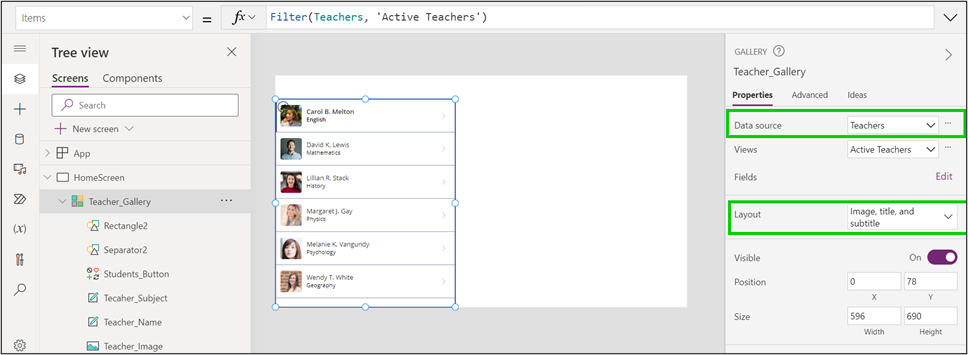
Step 3:- Follow the link to add a blank vertical Gallery control and name it “Teacher_Gallery”. On the Properties tab, set the “Teacher_Gallery” Items property to “Teachers” and its layout to “Image, title, and subtitle”.
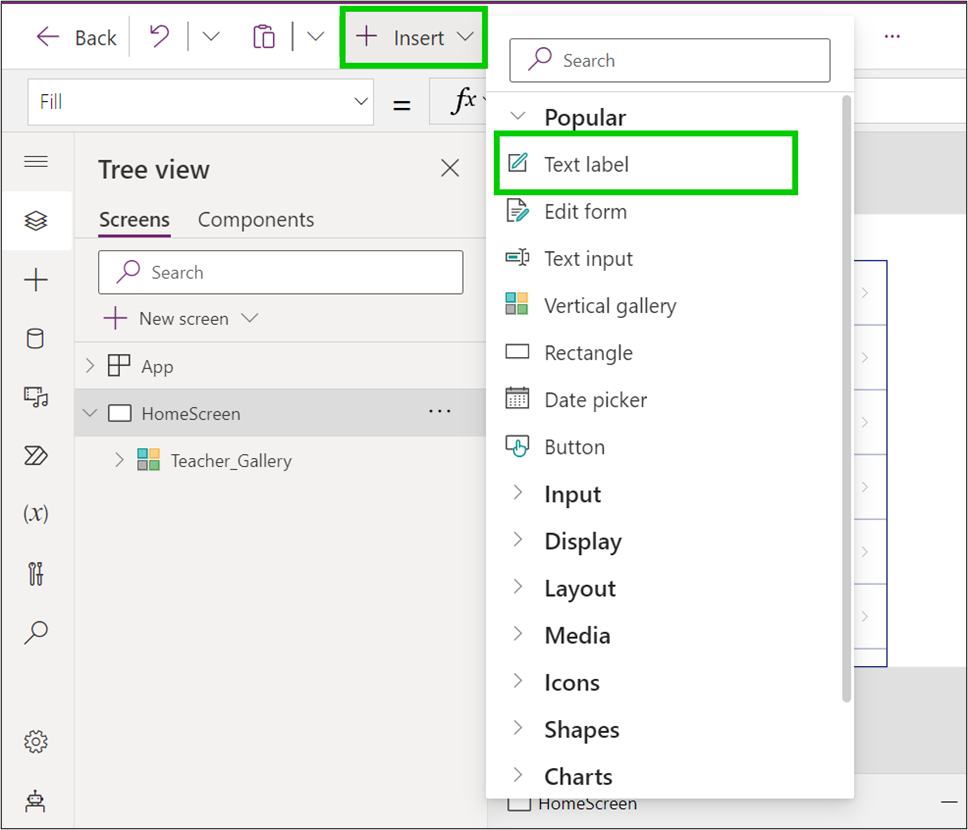
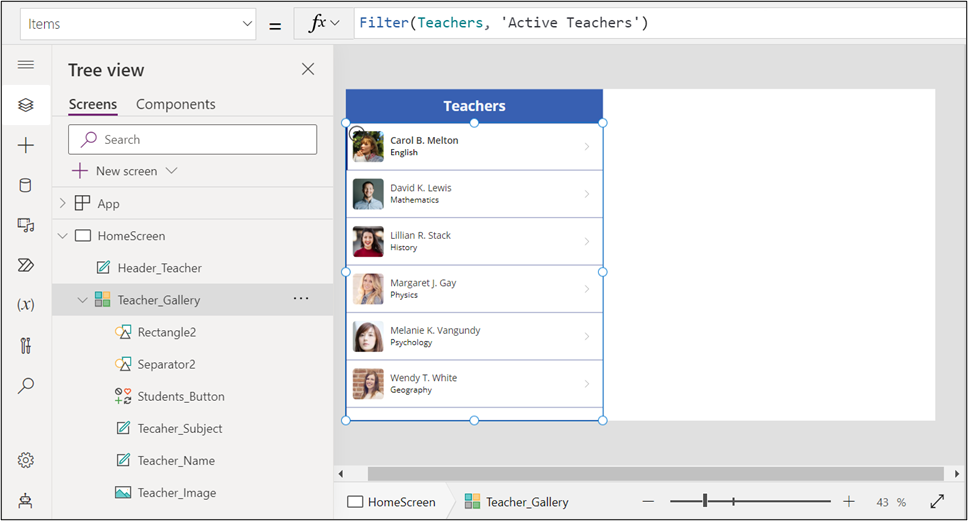
You can also add the “Teachers” label through the insert tab and name the element as “Header_Teacher”.
Give a proper name to the elements as shown in the below screenshot.
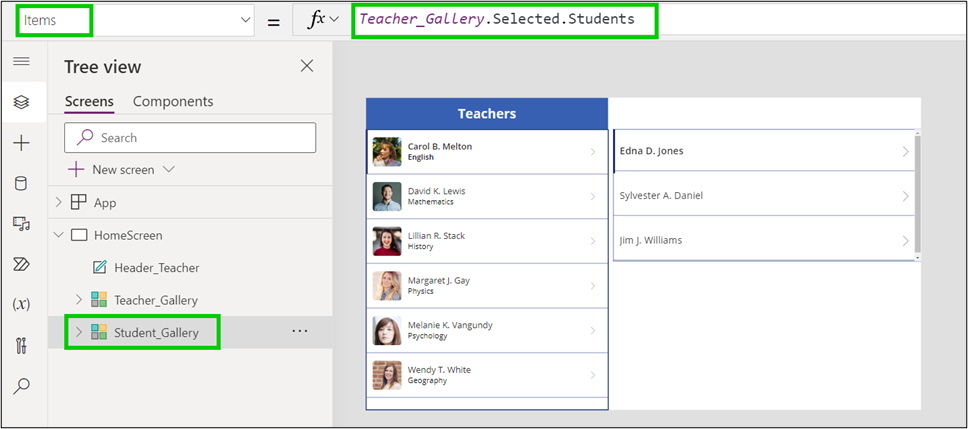
Step 4:-Here, let’s add a second blank vertical Gallery control, and ensure that it’s named “Student_Gallery”. On the Properties tab, set the “Student_Gallery” layout to the title.
In the formula bar, set the Items property of “Student_Gallery” to “Teacher_Gallery.Selected.Students”.
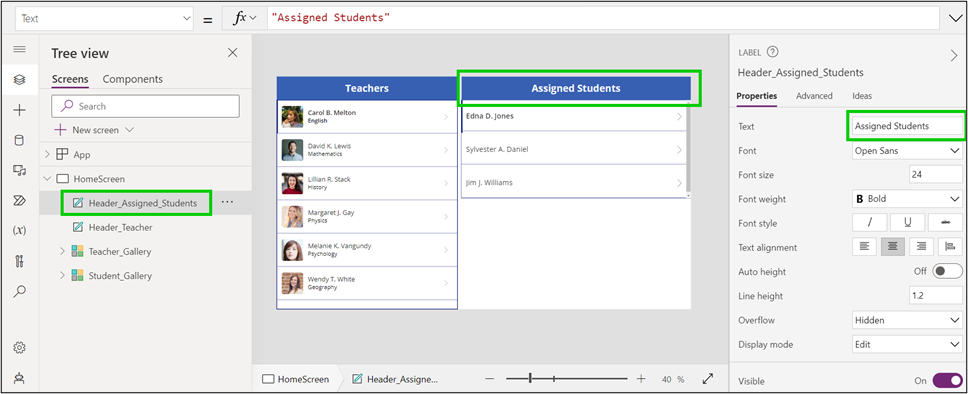
Add the label “Assigned Students” as we have done for the teacher label and name the element “Header_Assigned_Students”.
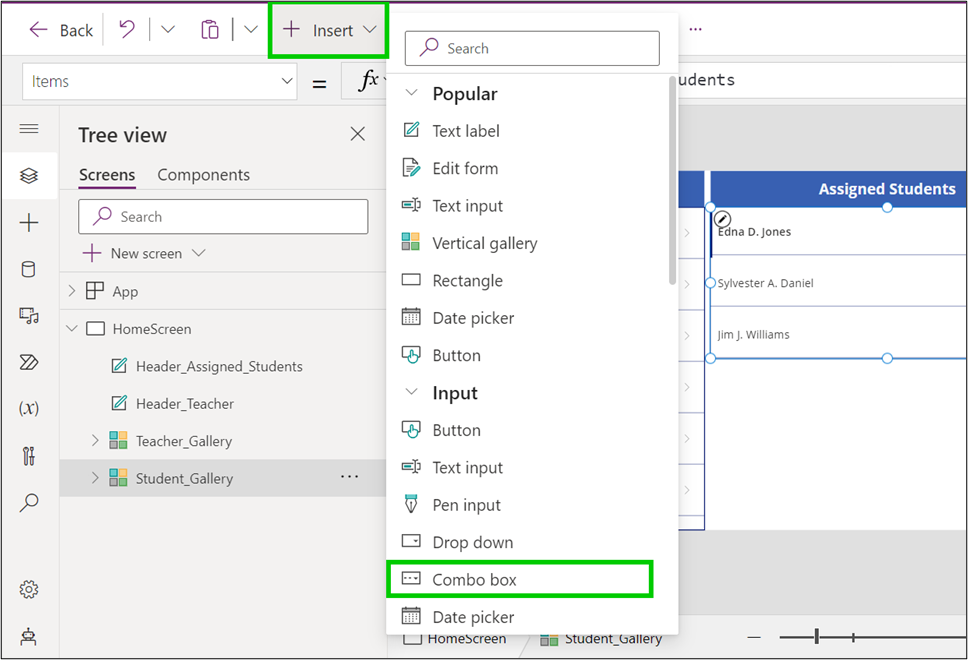
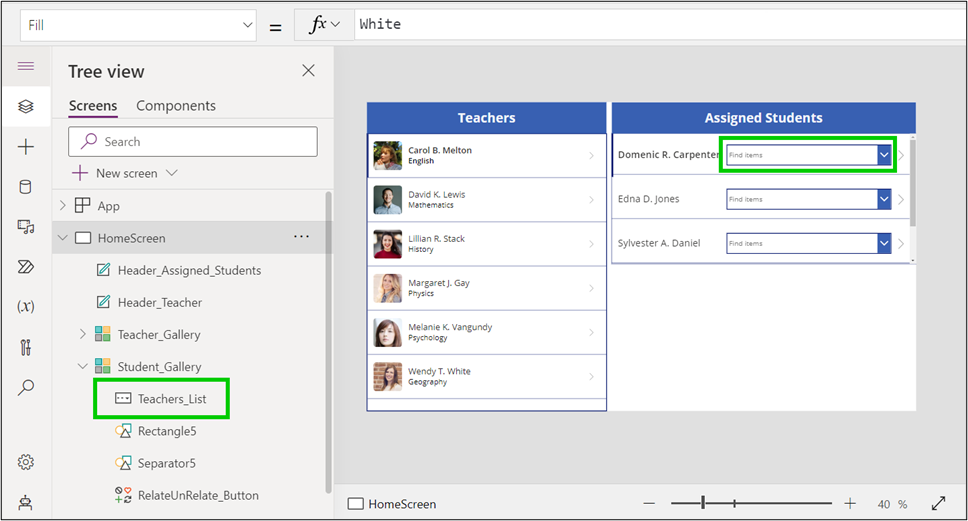
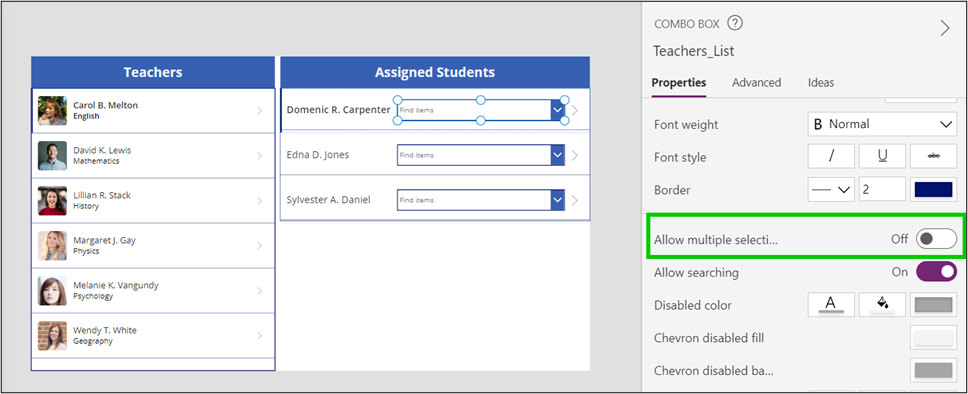
Step 5:- Add a Combo box control in front of the student’s name in the “Student_Gallery” and name it “Teachers_List”.
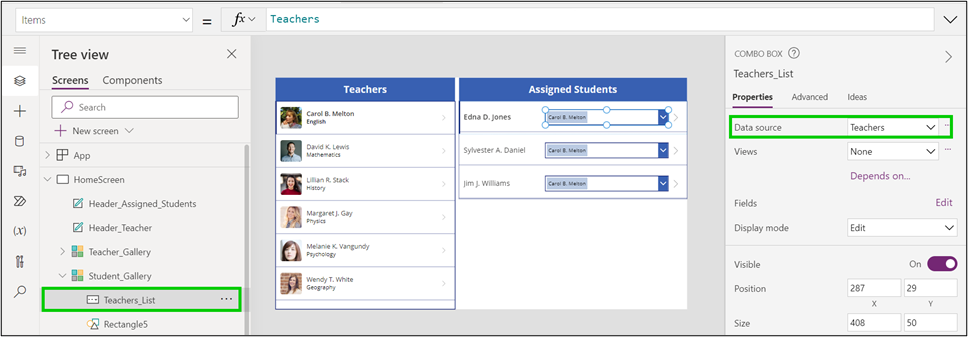
On the Properties tab set the “Teachers_List” Items property to Teachers and scroll down and turn off the “Allow multiple selection”.
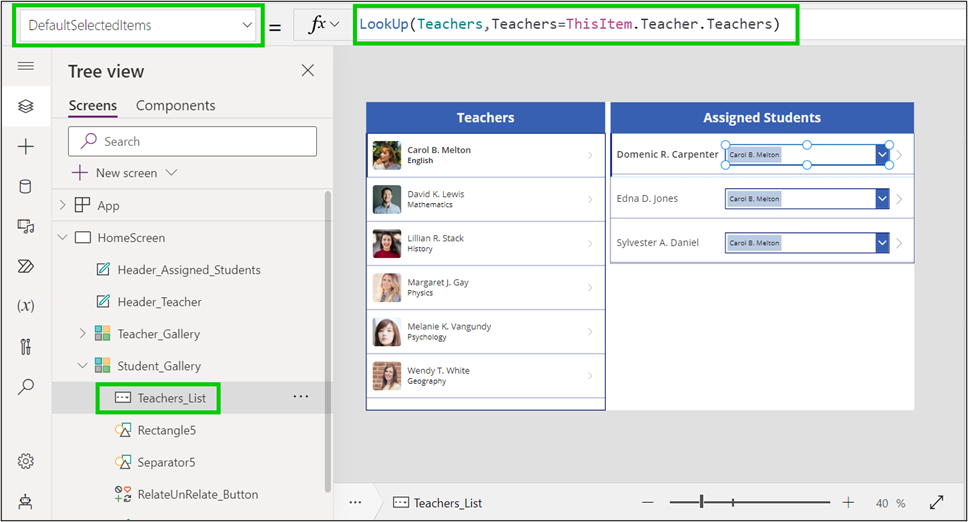
In the formula bar, set the “Teachers_List” DefaultSelectedItems property to “LookUp(Teachers,Teachers=ThisItem.Teacher.Teachers)”.
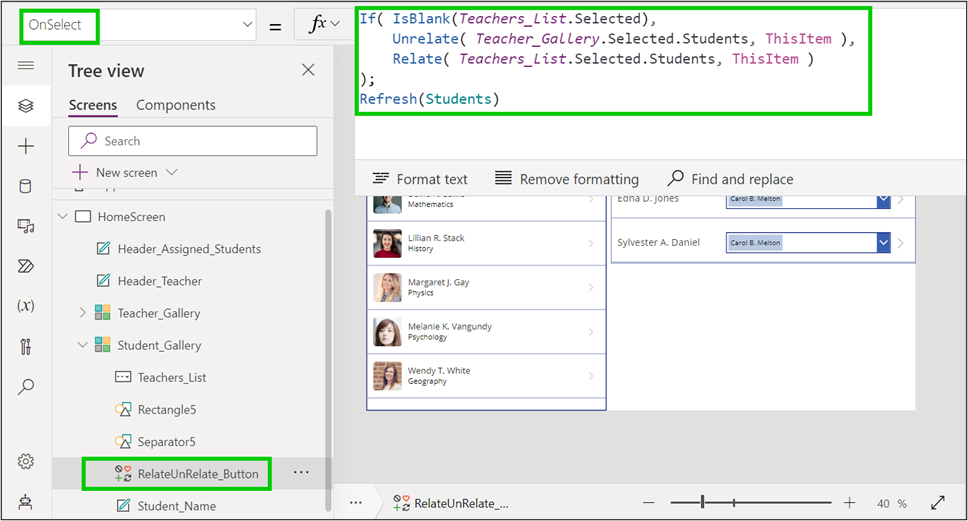
Step 6:- In the Student gallery, set the OnSelect formula for “RelateUnRelate_Button” to the below formula:
Formula:-
If( IsBlank(Teachers_List.Selected),
Unrelate( Teacher_Gallery.Selected.Students, ThisItem ),
Relate( Teachers_List.Selected.Students, ThisItem )
);
Refresh(Students)
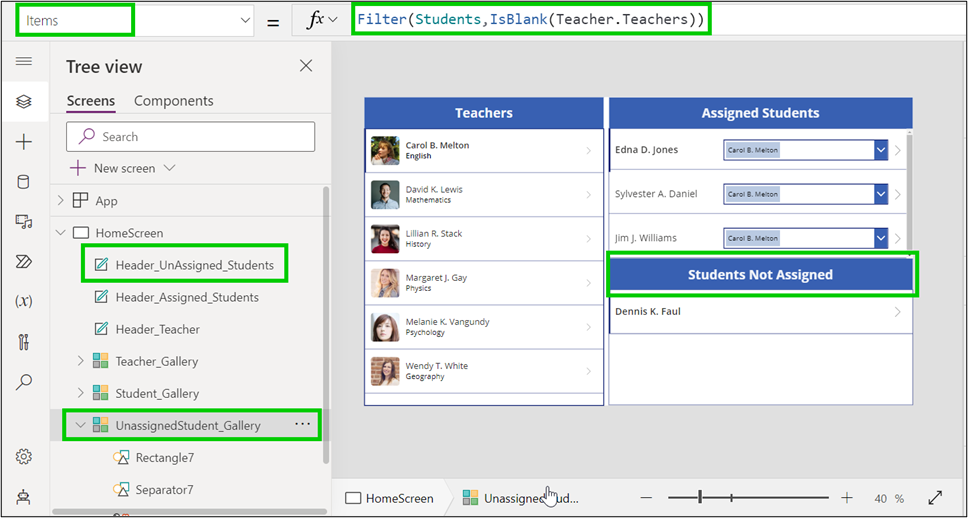
Step 7:-Insert new gallery named “UnassignedStudent_Gallery”. Add a label “Students Not Assigned” and a name element as “Header_UnAssigned_Students” as we did earlier for the two labels. In the formula bar set its Items property to formula “Filter(Students, IsBlank(Teacher.Teacher))“.
Note: To display a student on the gallery make sure that you have at least one student who has not been assigned to any teacher.
Add a Combo box again in “UnassignedStudent_Gallery” and name it “Teachers_List_1”. Disable multiple selections as done in Step 5.
OnSelect of “Relate_Button” write formula “Relate(Teachers_List_1.Selected.Students,ThisItem);
Refresh(Students)”.
Now play the canvas app we made by clicking on the play button.
As shown in the above images “Carol B. Melton” has three students. Now we are changing “Jim J. Williams” teacher from “Carol B. Melton” to “David K. Lewis” as shown below. Click on the button next to the dropdown to change the teacher:
As a result, we can see now there is no “Jim J. Williams” in the “Carol B. Melton” student list.
He has now been assigned under“David K. Lewis”.
Now if we select nothing for “Jim J. Williams” and click on the button then the link between “Jim J. Williams” and the assigned teacher is removed.
He is added to the “Students Not Assigned” list.
If we again select the teacher for “Jim J. Williams”.
And click on the button in front of the dropdown then “Jim J. Williams” will get assigned to that teacher.
Conclusion: – Thus, we learn how to use relate() and unrelate()e functions in Canvas App to associate or disassociate two records in Microsoft Dataverse.
