In this blog, we will see one of the features introduced in D365 Marketing. Marketing campaigns that include personalized messages can help achieve higher engagement rates. With a simple list of the most commonly used dynamic text, anyone can now personalize their content. Dynamic text (also known as a placeholder) automatically replaces the recipient’s details when the message is sent. Also, the team can share and create dynamic text which is unique to their business.
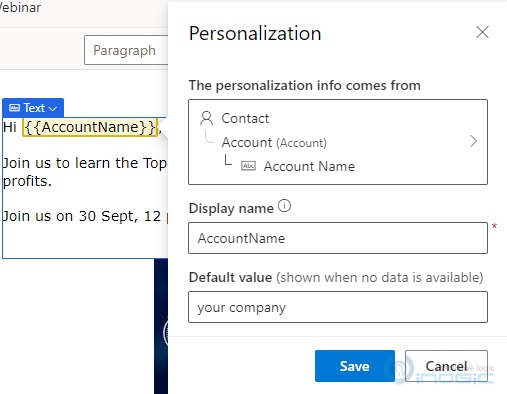
Using predefined dynamic text means using someone else’s defined text. As an example of predefined dynamic text, we can refer to {{Accountname}} as an instance of placeholder text. To use dynamic text, you need to define three factors:
- Data Binding: From where the dynamic text will be replaced (for example “Accountname” attribute of the account table).
- Label: Message text referring to dynamic text (for example {{Accountname}} )
- Default value: A text to use if there is no data in the source.
Create and Share pre-defined dynamic text:
The Marketing app doesn’t limit you to pre-defined dynamic text. Users can create new pre-defined dynamic text fragments, and add them to a list of dynamic text fragments to share with their team.
Following are the steps to define and share new pre-defined dynamic text:
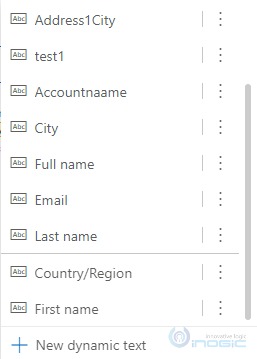
1. Place cursor in text element and click on personalization, pre-defined personalization list will get opened.
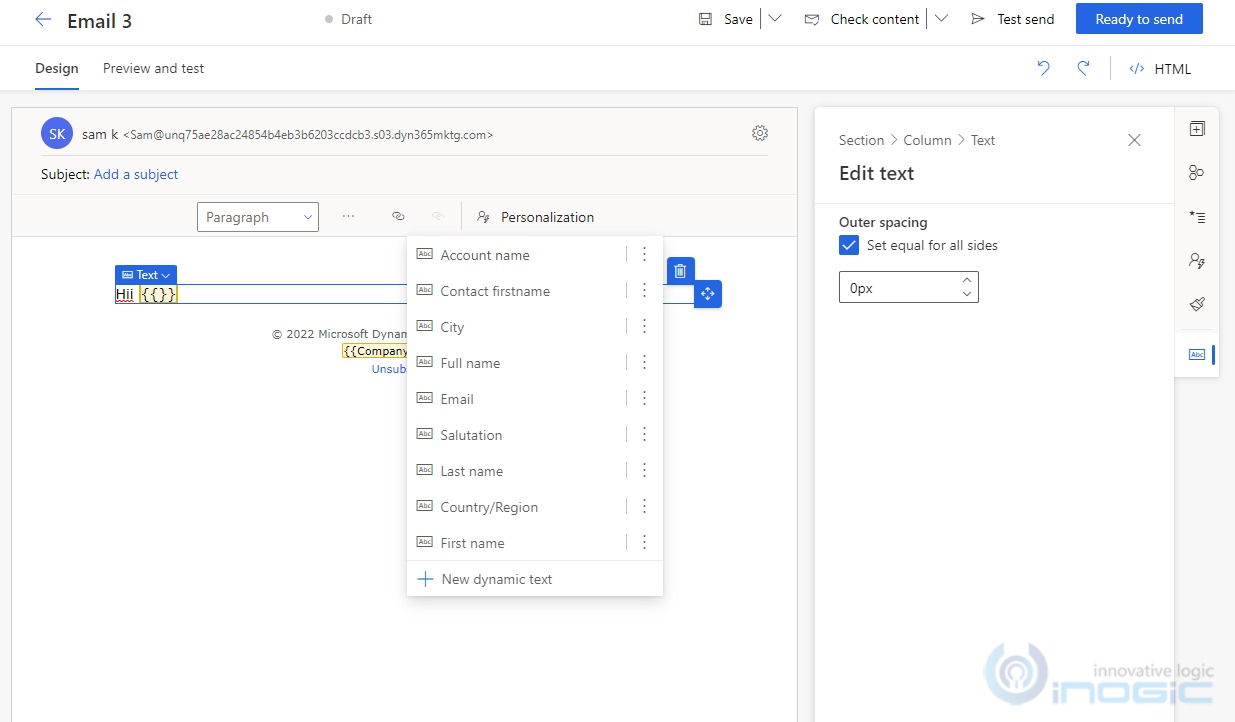
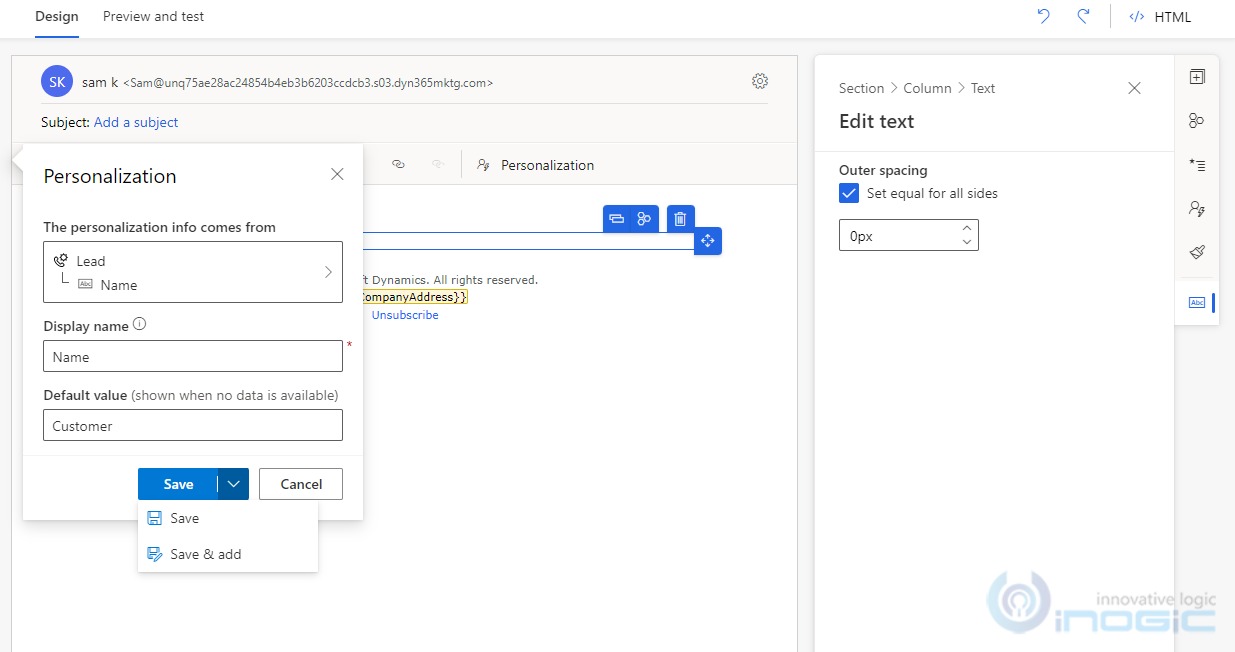
2. Click on the New dynamic text. A personalization window will appear.
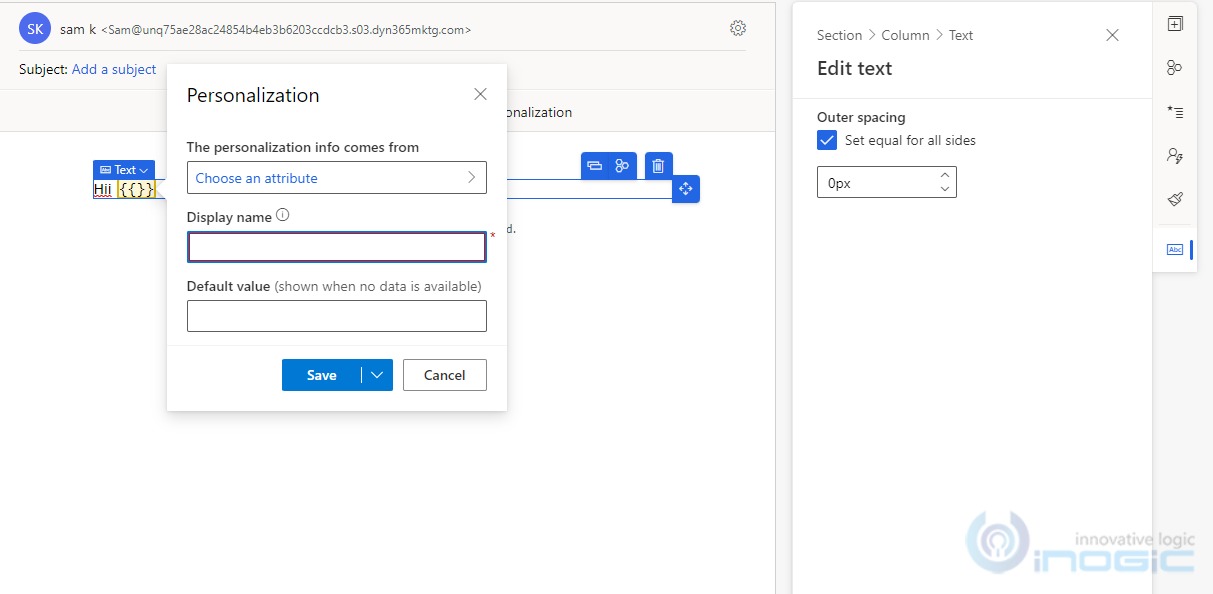
3. You can choose an attribute that you want.
4. Enter the display name and default value.
5. Click on save or to add it to the list click on the save and add button.
Using pre-defined dynamic text:
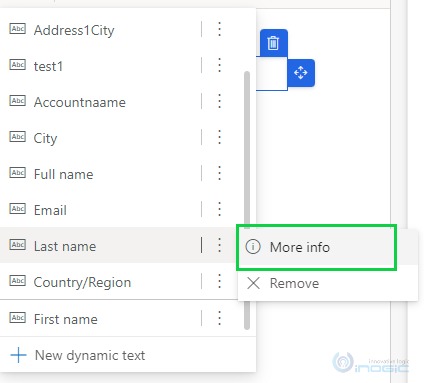
To see a list of pre-defined dynamic text, click on personalization in the text email editor. To insert it just simply click on any pre-defined dynamic text. Any user in the organization can create and share pre-defined dynamic text, the fragments will get added to the list. All fragments will be listed according to their usage in Organization. If there are more than 10 fragments in the list, then all other remaining fragments will get arranged according to alphabetical order after the top 10 fragments.
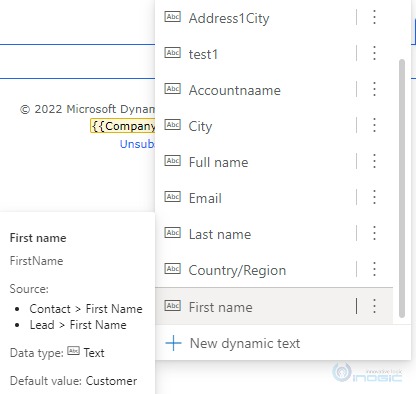
You can hover on any fragment listed in a pre-defined dynamic list to see its details.
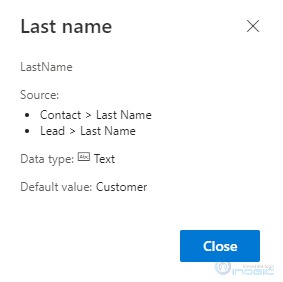
Also, you can click on the vertical ellipse present in the list next to dynamic text and click on more info.
Changing Default Value for the current message:
Pre-defined dynamic text may be used as-is most of the time, but sometimes it may need to be changed. In this case, select predefined dynamic text and click on personalization. Change the value in the default value field and click on the save button. Alternatively, you can double-click on the text editor’s dynamic text. This will save and change the default value of particular pre-defined text only for the current message.
Changing the Default Value Globally:
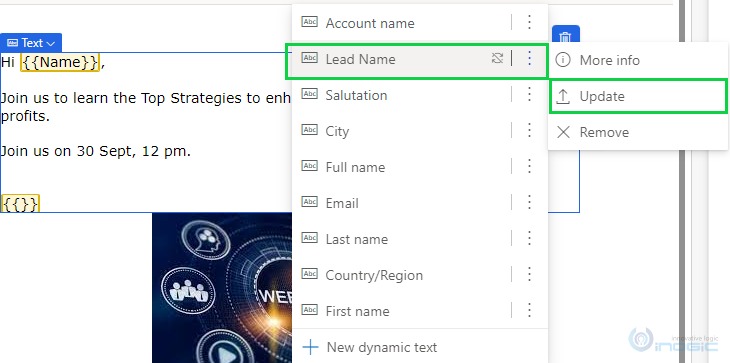
The default value can be changed for everyone in the organization. To change the default value globally, click on personalization. Click on the vertical ellipse icon next to dynamic text. Click on the update button, change the value in the default value field, and click on the save button. This will save and change the default value of particular pre-defined text globally.
Note: The update button is visible only when a user has changed some default value of particular dynamic text for the current message.
Remove pre-defined dynamic text:
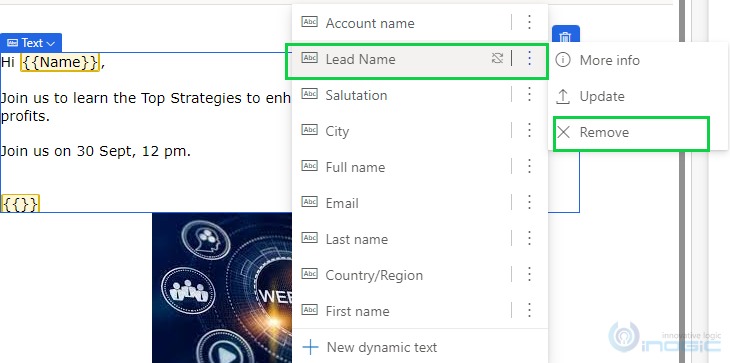
Click on the personalization menu. Select the dynamic text that you have to remove and click on the vertical ellipse icon next to the dynamic text. Click on the remove button. This action will remove dynamic text only from the list, it will not get removed from the message in which it was already used.
Conclusion
A quick list of the most commonly used dynamic text makes it easy to add a personal touch to your content.
