Introduction
Data breaches and unauthorized access are two of the prime headaches for any Dynamics 365 CRM Administrator. Sometimes, there can arise a situation where we want to block access of CRM to a specific location. This can be done using ‘Conditional access’ in Azure Portal. Below are the pre-requisites for the same:
- A subscription to Azure Active Directory Premium
- A federated Azure Active Directory tenant
Once you make sure you have the above requirements, follow the below steps to achieve conditional access.
This can be done with two different ways –
- By selecting a set of or any specific country.
- This can be used when we want to block the access to CRM from a specific country to make data more secure.
- By restricting a specific IP address range.
- This can be used when we want to block the access to CRM from a specific Public IP address domain.
So first, let’s see how to restrict by selecting a set of or any specific country.
1. Log-In to the Azure Portal.
2. In Services, search for Azure AD Conditional Access.
3. The conditional access works on two things –
-
-
- Named Locations
- Policies which consist of the above mentioned Named Locations
-
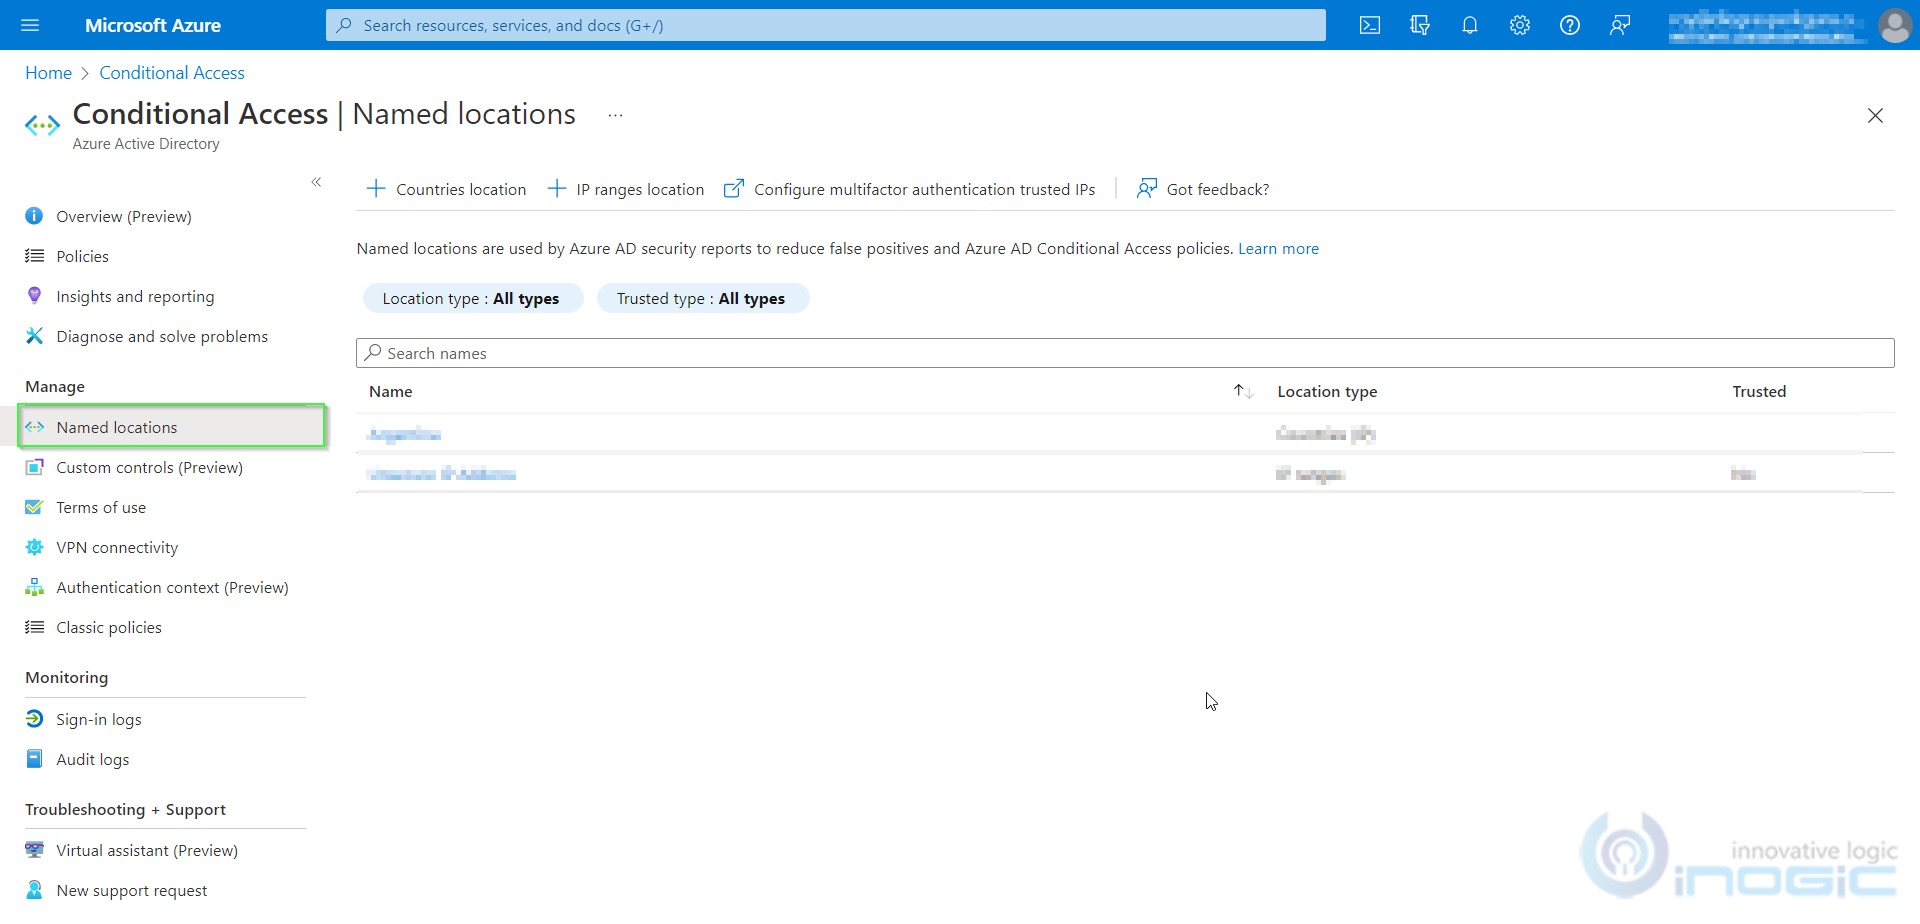
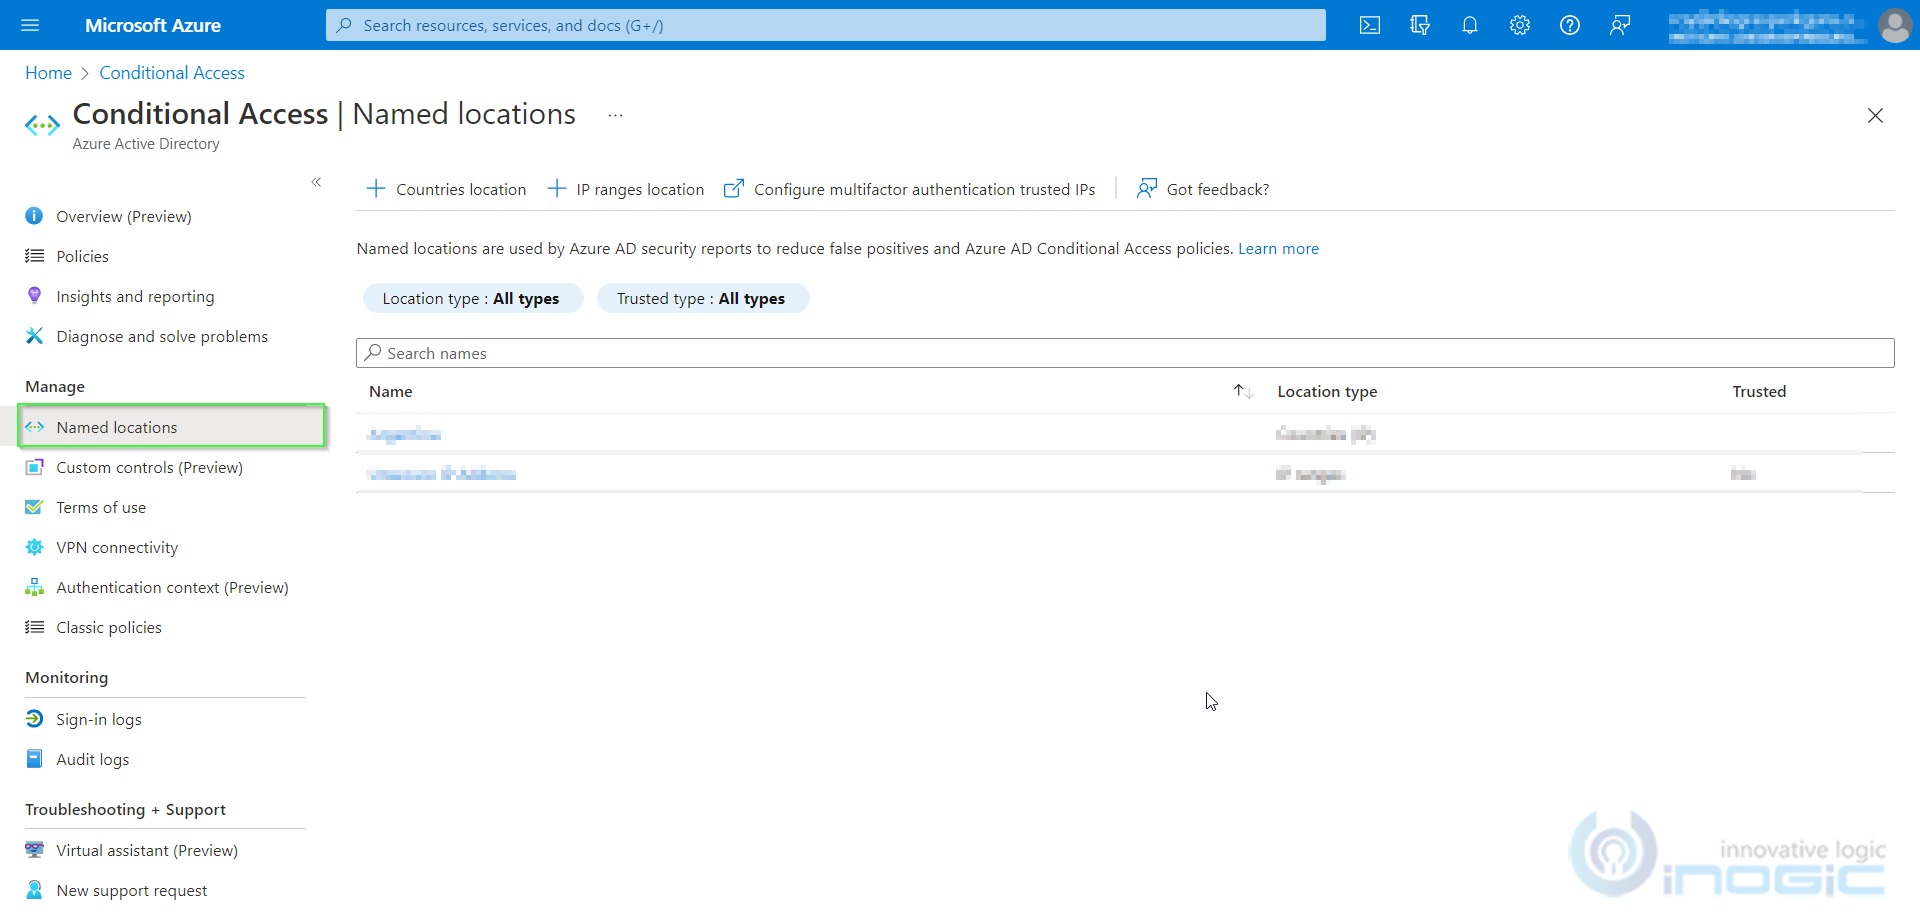
4. So, head over to the Named locations first.
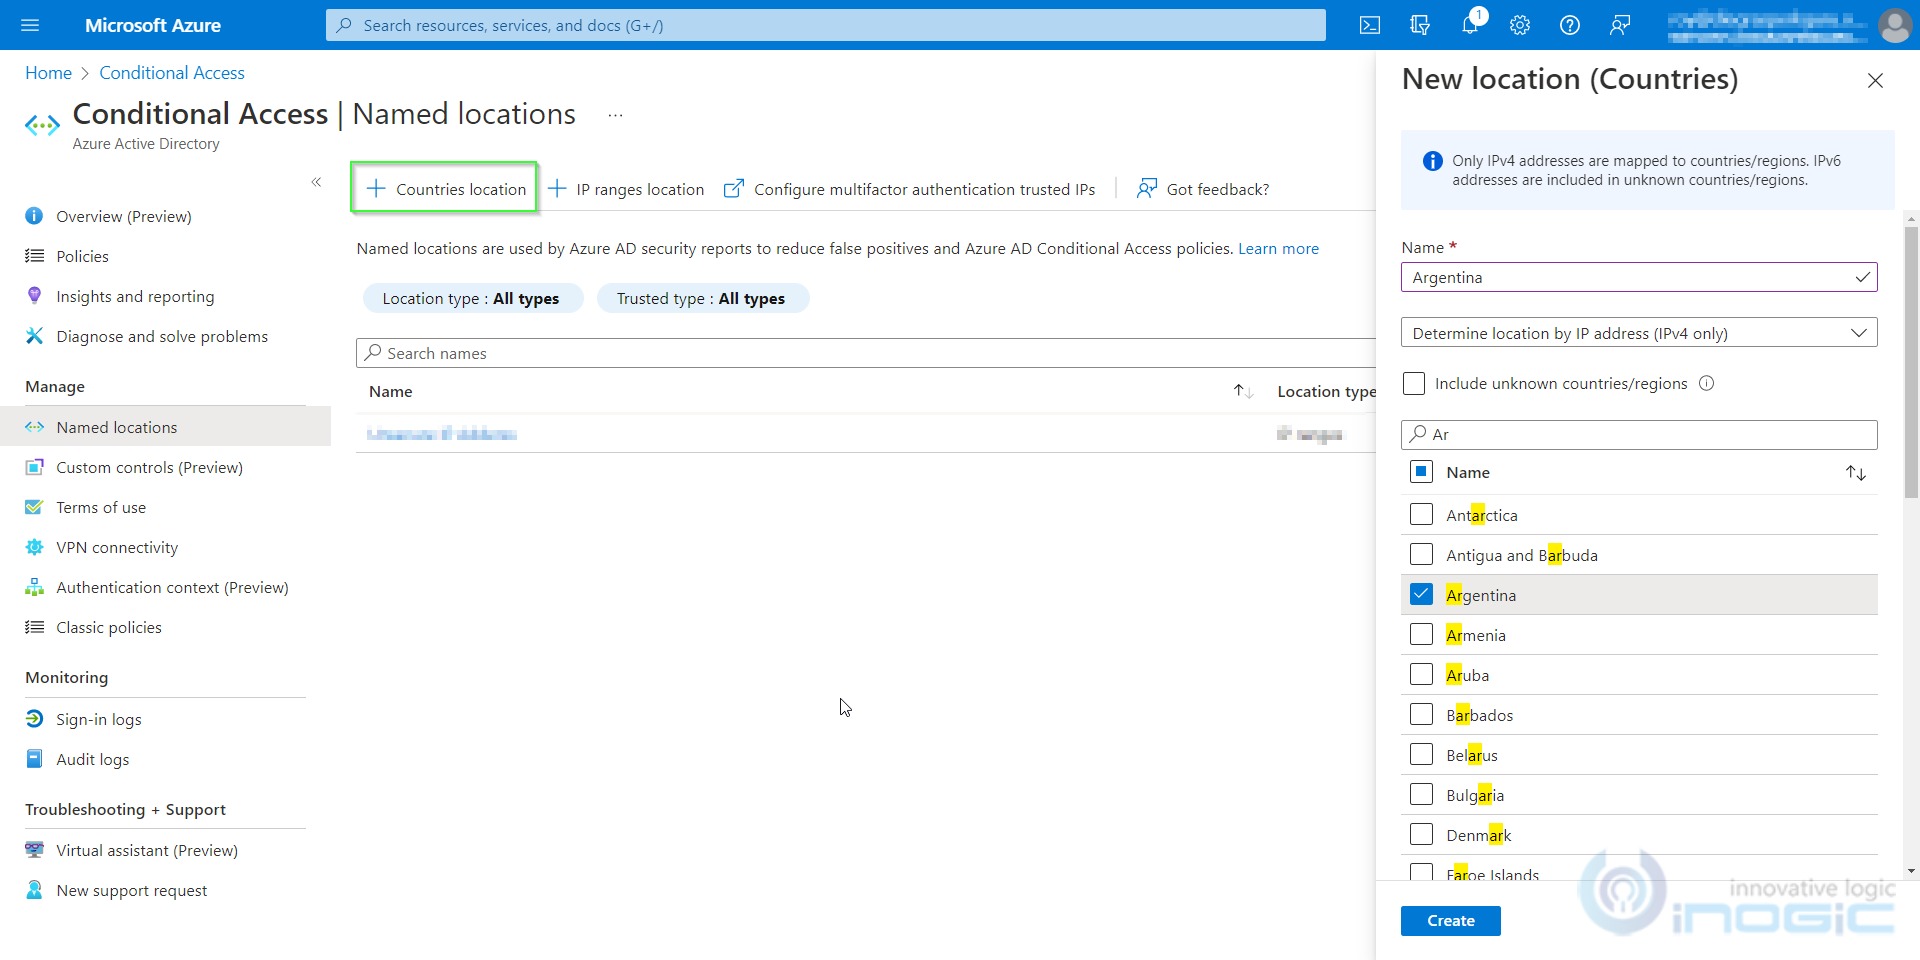
5. For demonstration purpose, we are blocking access from country Argentina.
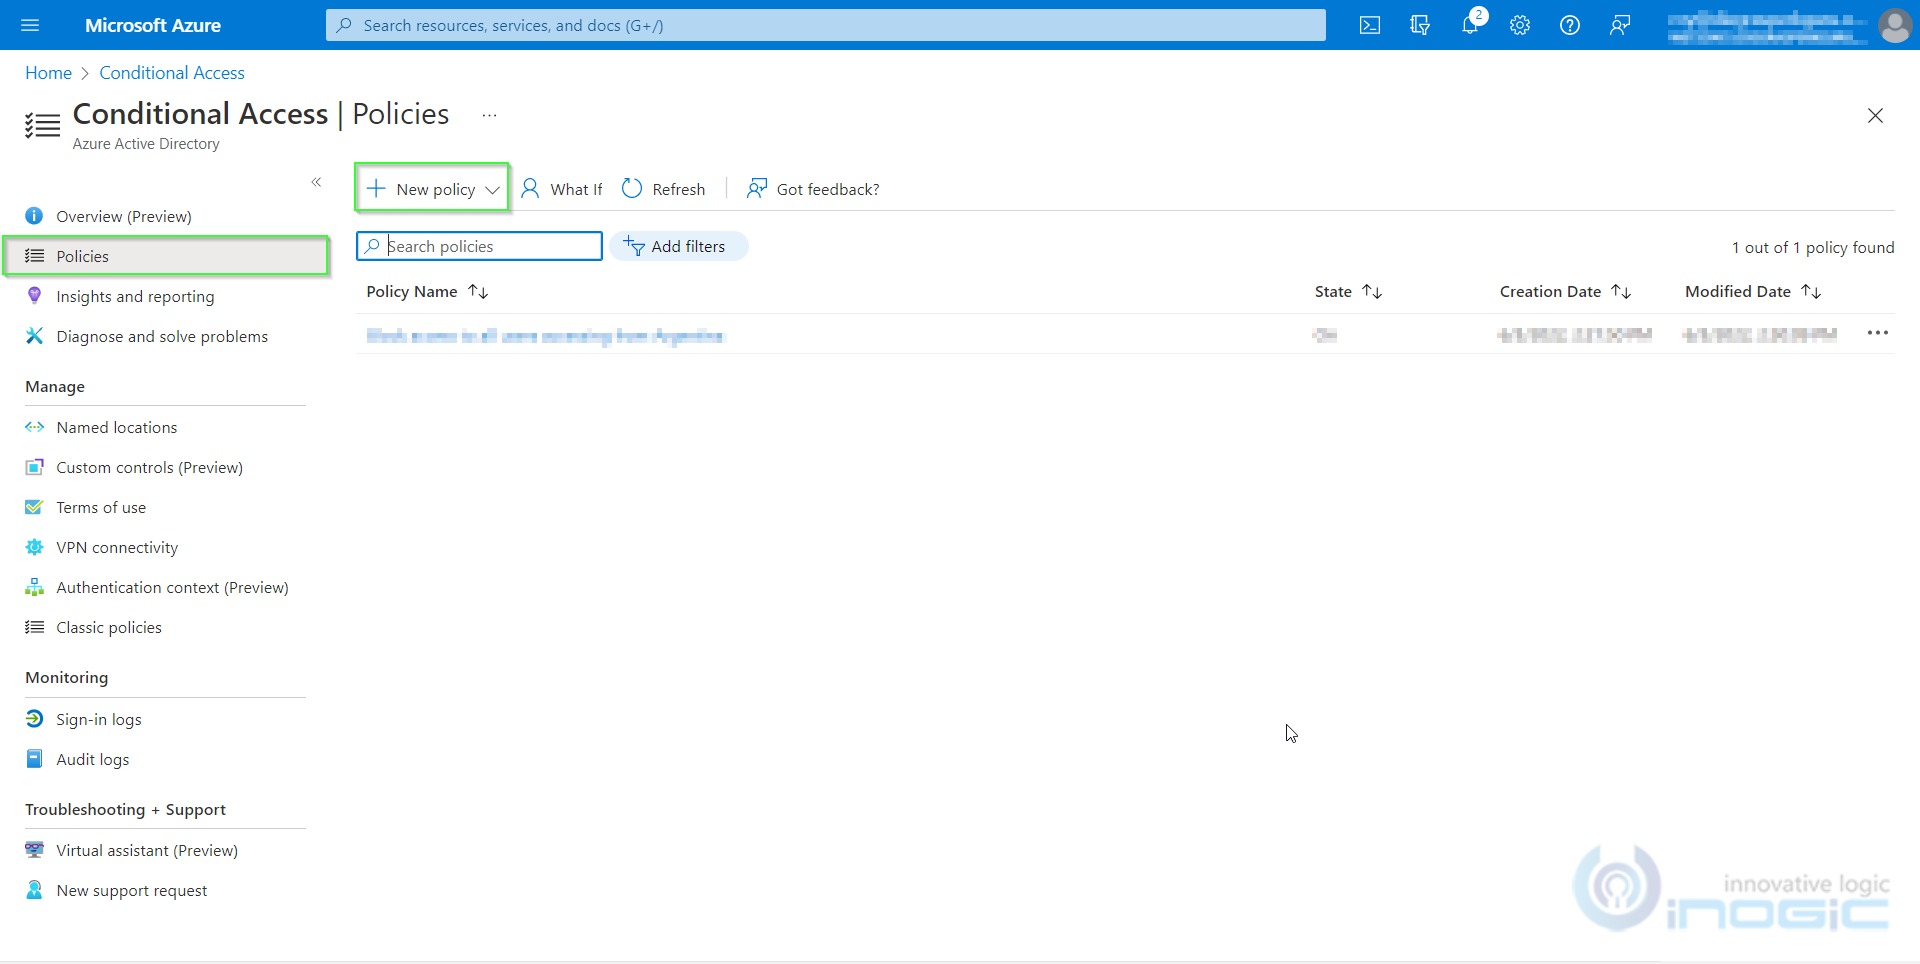
6. After creating a new location, click on Policies -> New Policy.
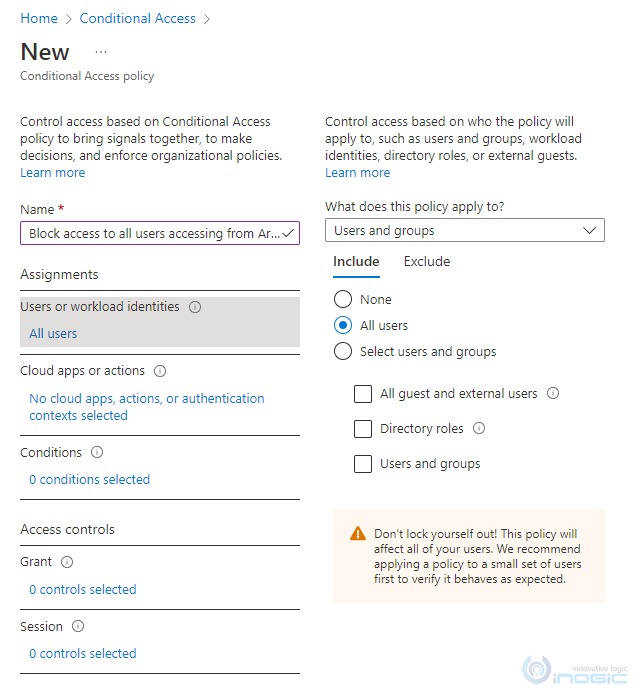
7. While creating a new policy, you can select to block either All Users or any number of particular users or azure group.
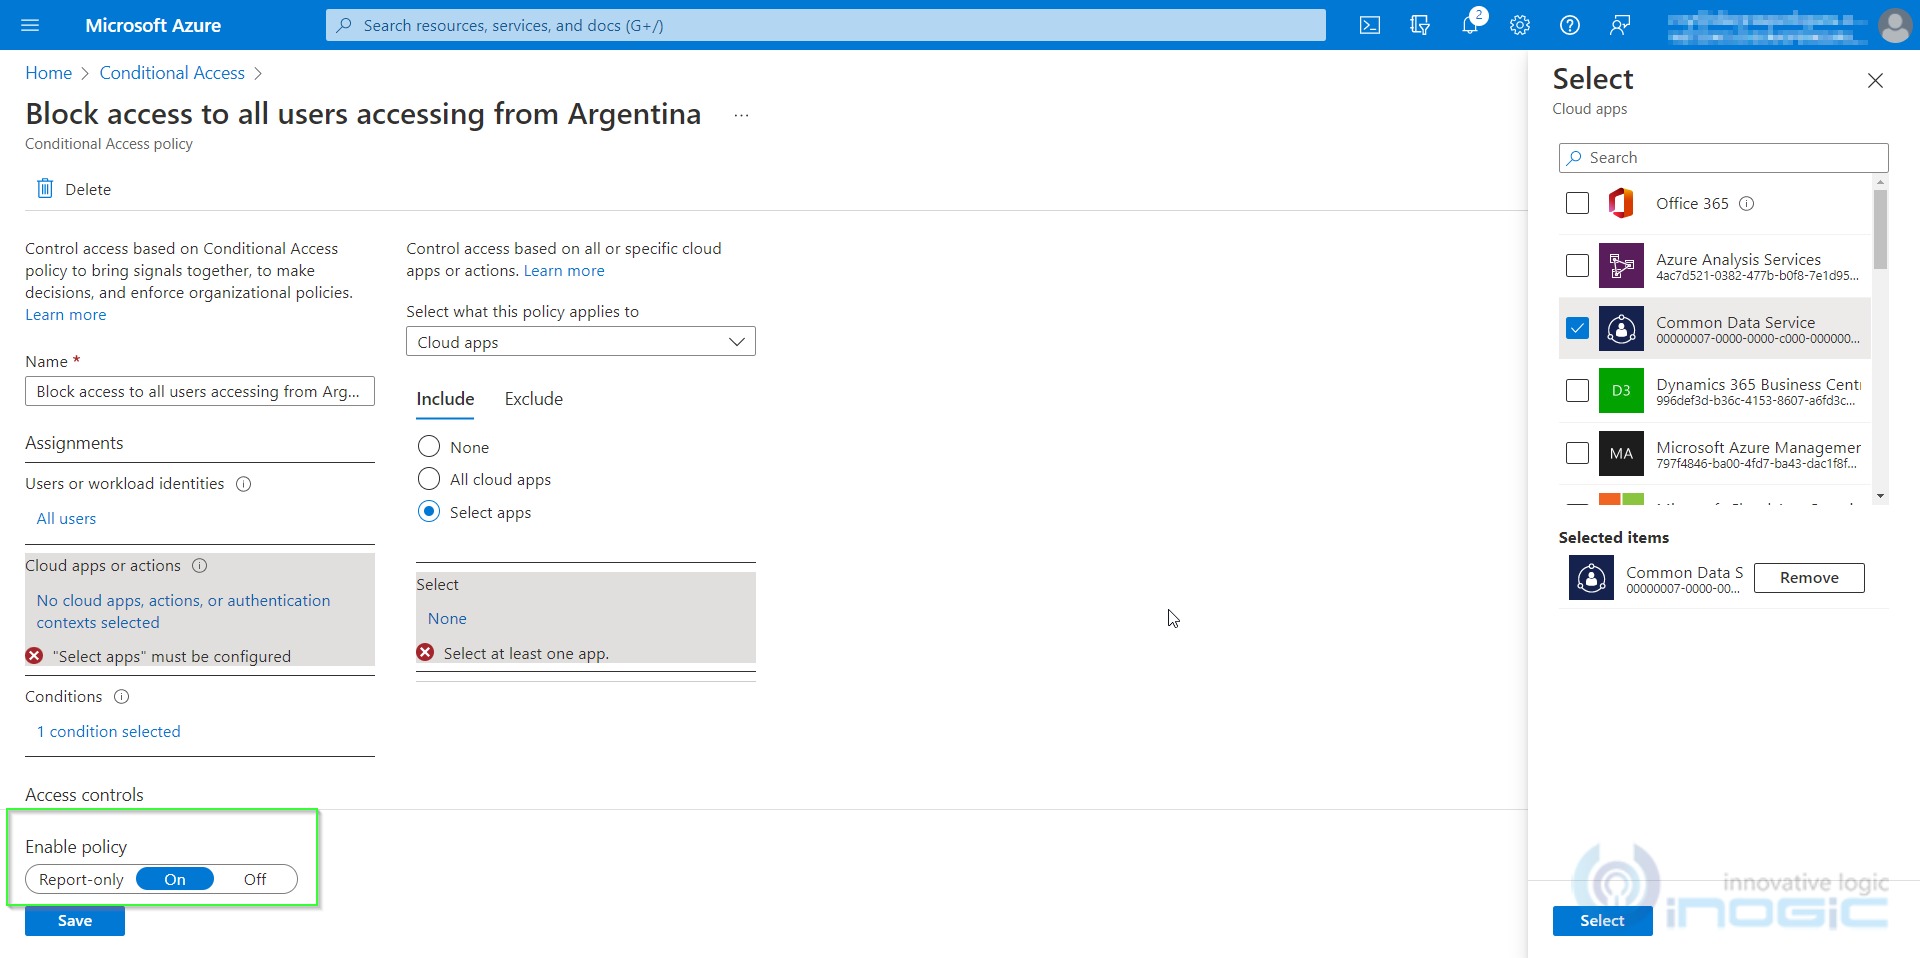
8. In the next step, choose which cloud apps should be blocked. Here, you can select either all cloud apps or any number of particular cloud apps. Here, I’m selecting Common Data Service (which will block out CRM access). Under ‘Enable Policy’, select ‘On’ and click on ‘create’, as shown in the below screenshot:
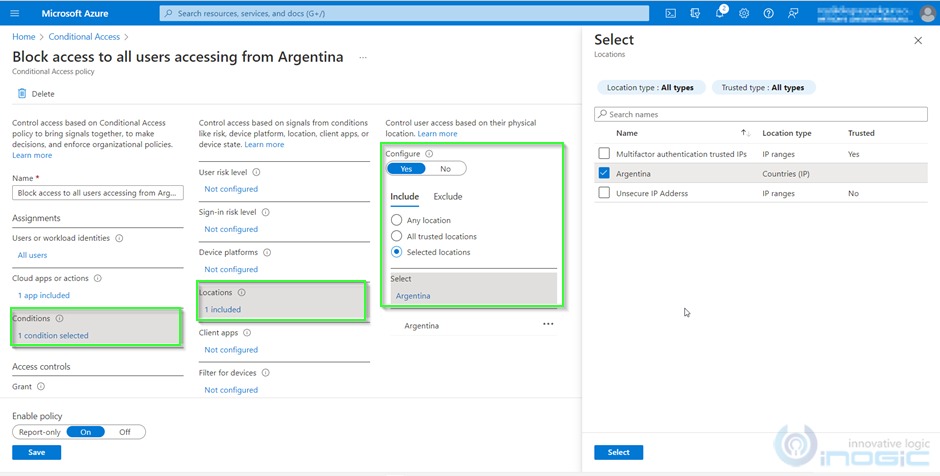
9. In the conditions, select the location that we recently created.
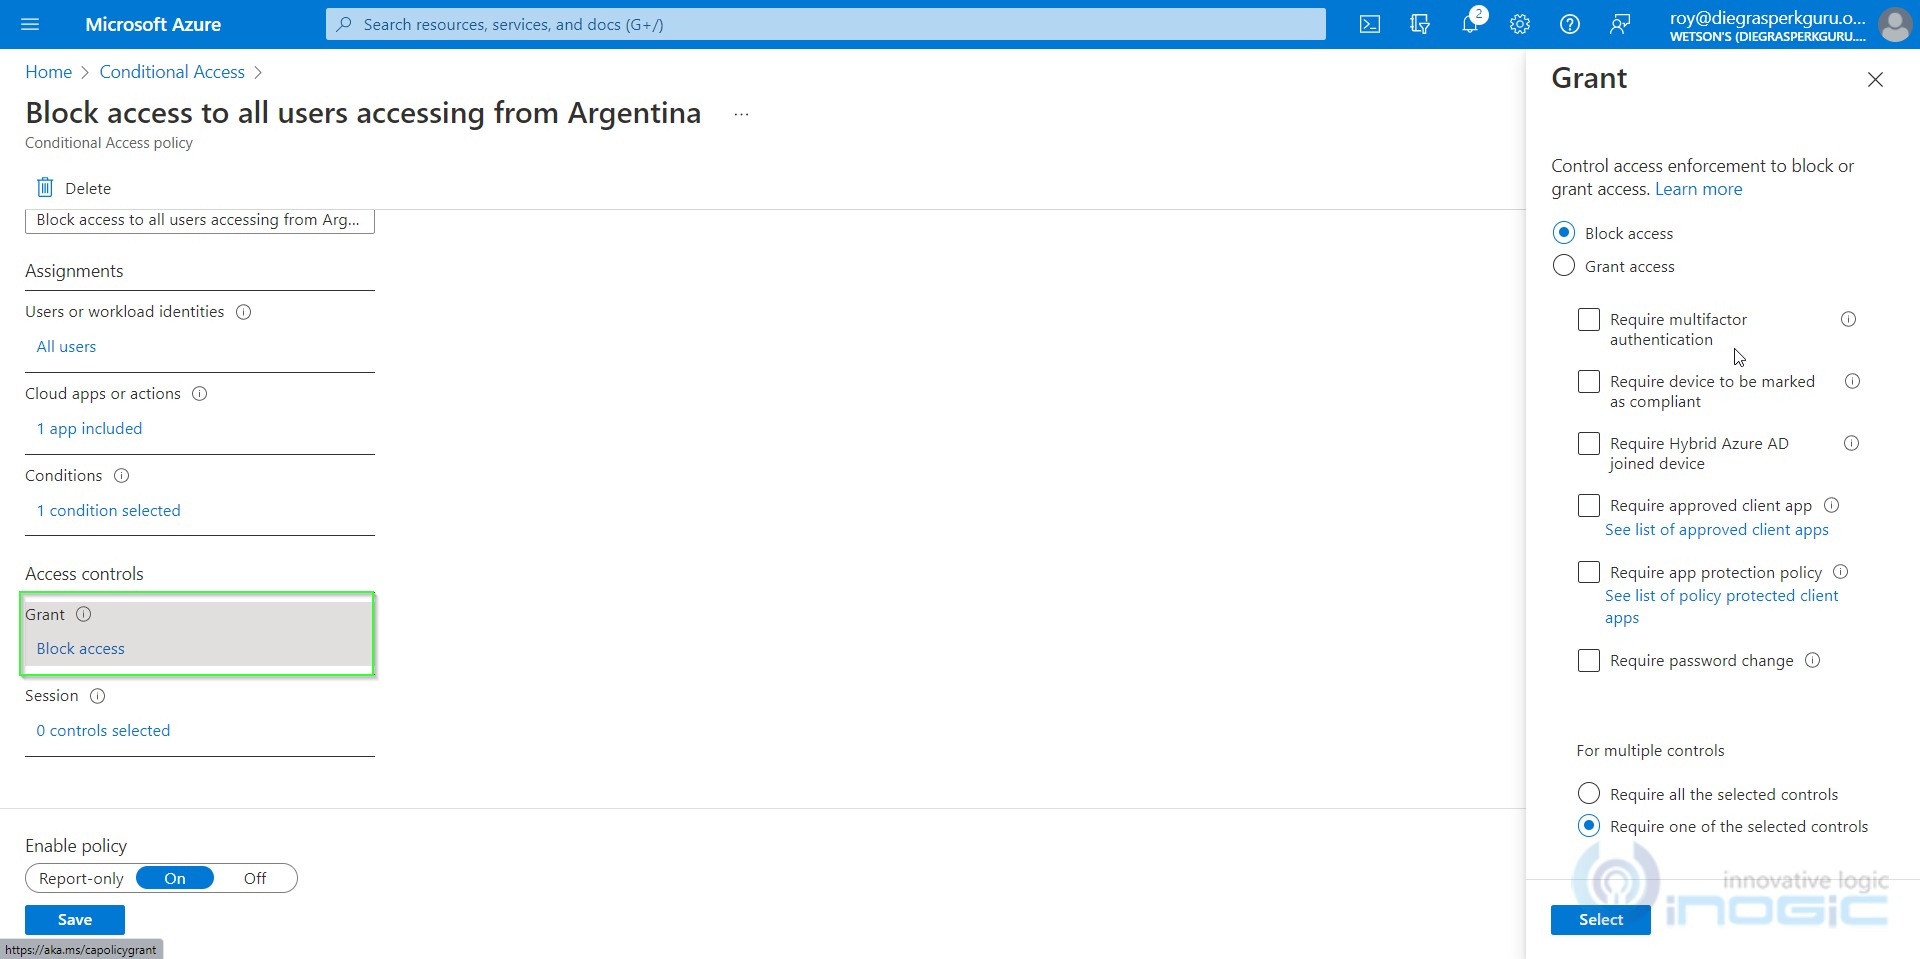
10. Go to Access controls -> Under ‘Grant’, select Block access.
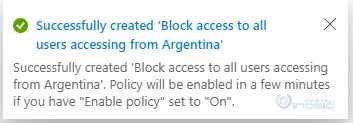
11. After successful creation, you will get the below notification:
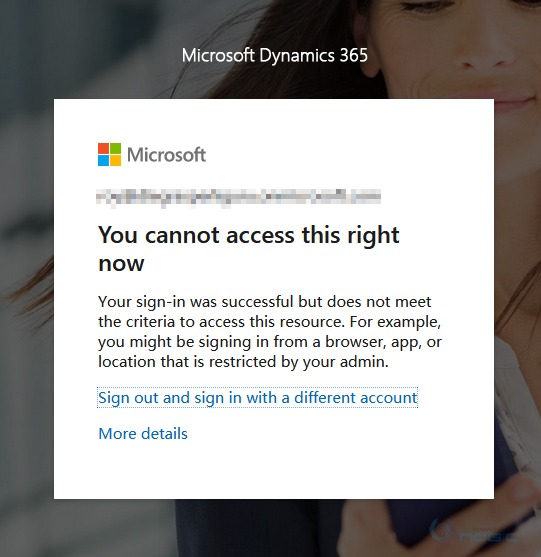
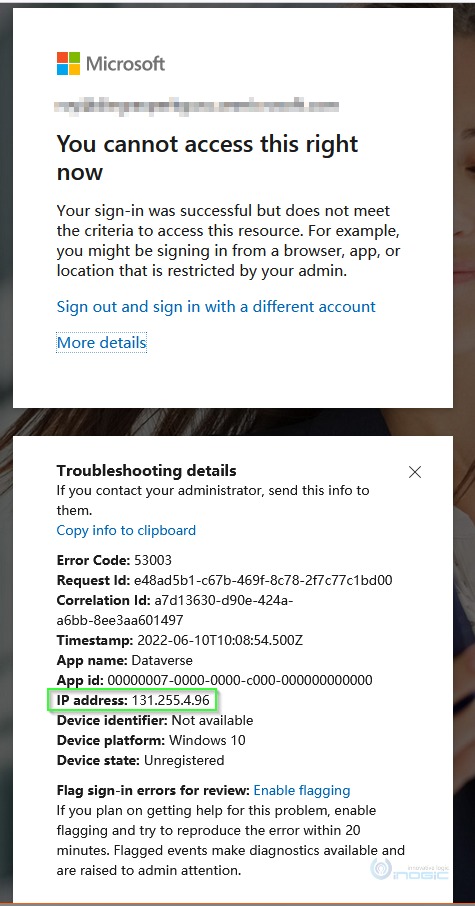
12. Now, when a user will try to access the CRM from Argentina, an error message will be shown as below:
Now, we will see how to restrict by a specific IP address range.
- Log-In to the Azure Portal.
- In Services, search for Azure AD Conditional Access.
- Head over to the Named locations first.
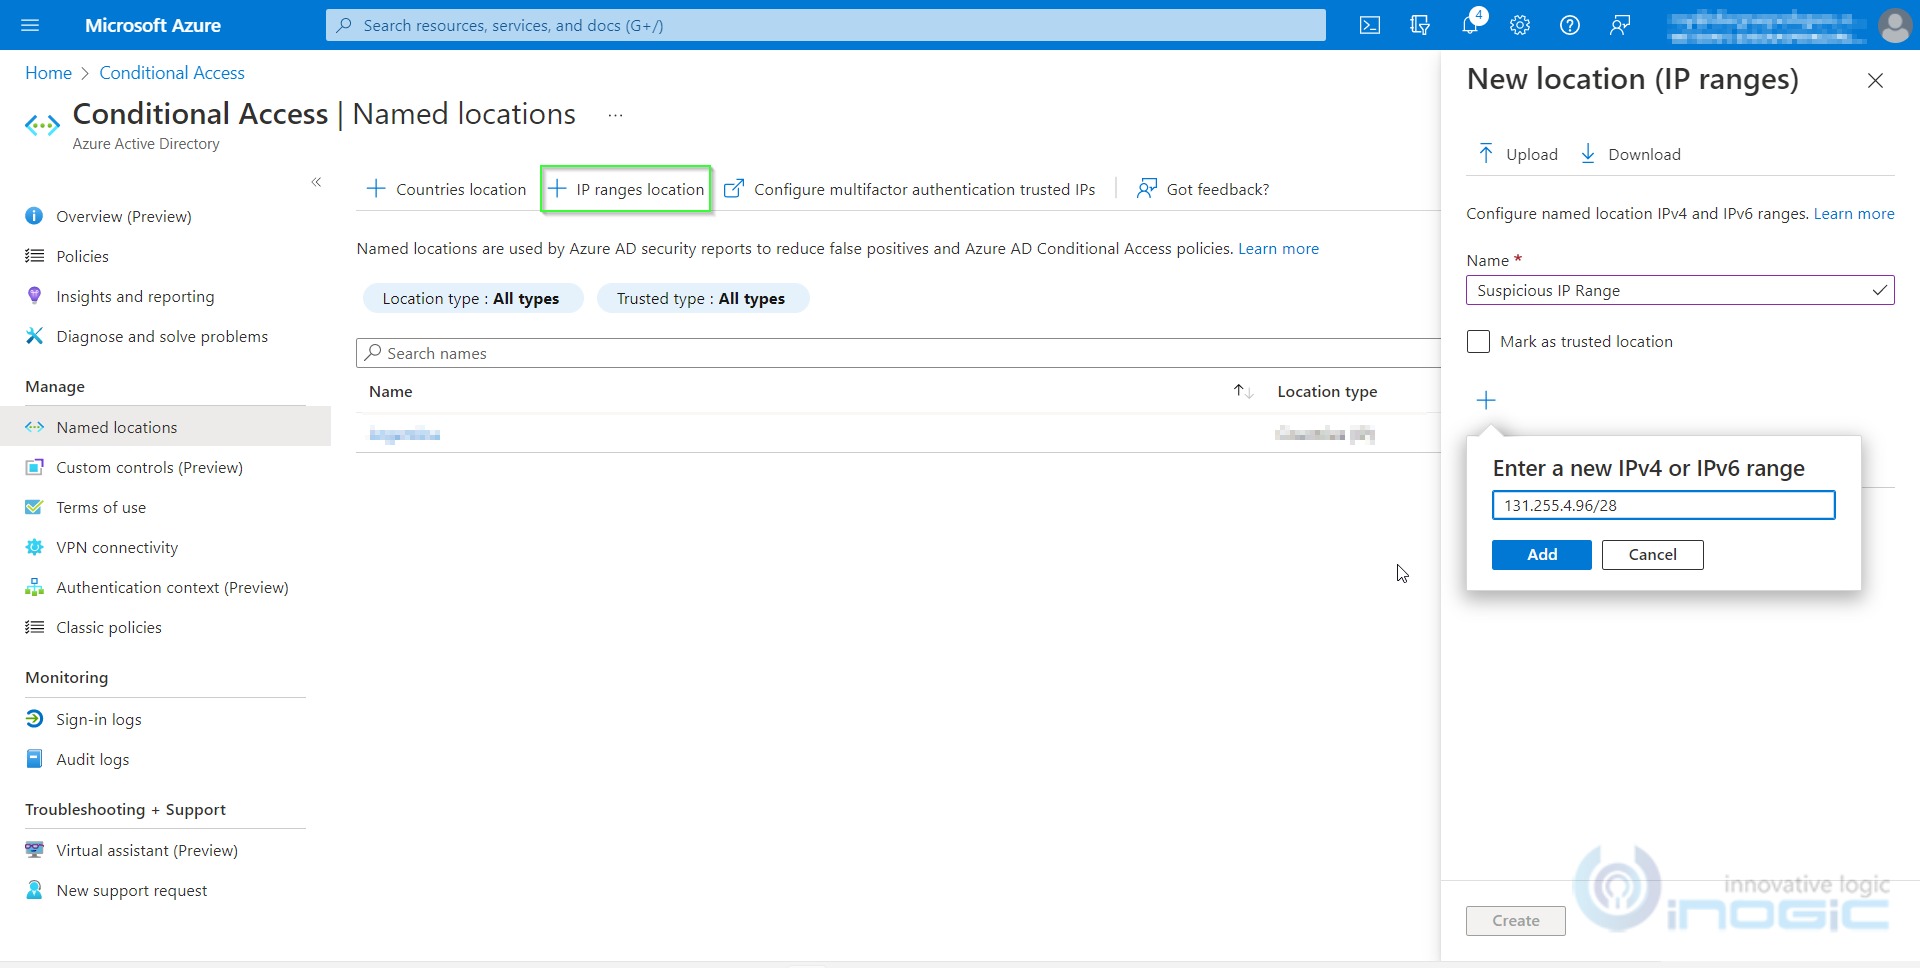
- In case of blocking access using IP address, follow the steps given below:
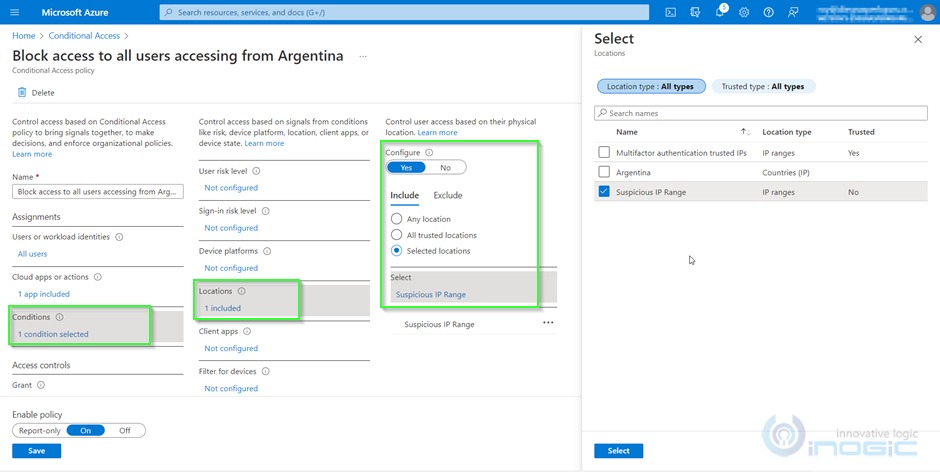
- And while creating Policy, select the location we created in step 4 (Suspicious IP Range).
- Now, when a user will try to access the CRM from the specific IP range, an error message will be shown as below:
Conclusion
In this way, you can easily restrict access from a specific country or a group of IP addresses from accessing any or all of your global apps.
