Introduction
In this AI Builder three-part blog series, first blog was about how to use AI Builder to extract Form document data and second blog highlighted the use of AI Builder Text classification model.
Now in the third and final blog we will see how to build an AI Object Detector using Power Platform.
Object detection refers to the capability of computer and software systems to detect images, locate objects in an image and identify each object. Object detection can be used to expedite or automate business processes in multiple industries.
AI Object detection is a new feature in Power Platform which can be accomplished using AI Builder. AI Builder allows you to add artificial intelligence to your apps even if you have no coding or data science skills.
Let’s see how an AI object detection model is built using AI builder. On the other hand, Object detection App is built using PowerApps and data is transferred from PowerApps to Dynamics 365 CRM using Microsoft Flow in Power Platform.
1. Build Object Detection Model using AI Builder
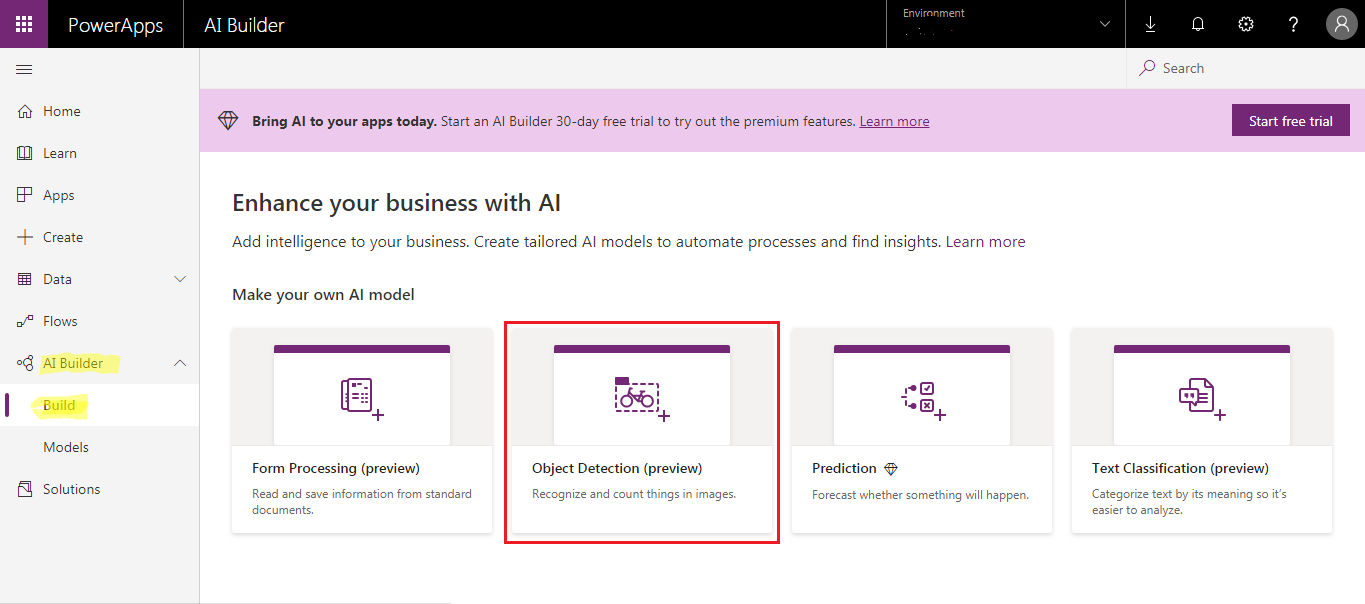
a. To build a model using AI Builder, sign in to PowerApps and, in the left navigation pane, select AI Builder > Build. Then select the Object Detection model type.
b. Name your model and Create
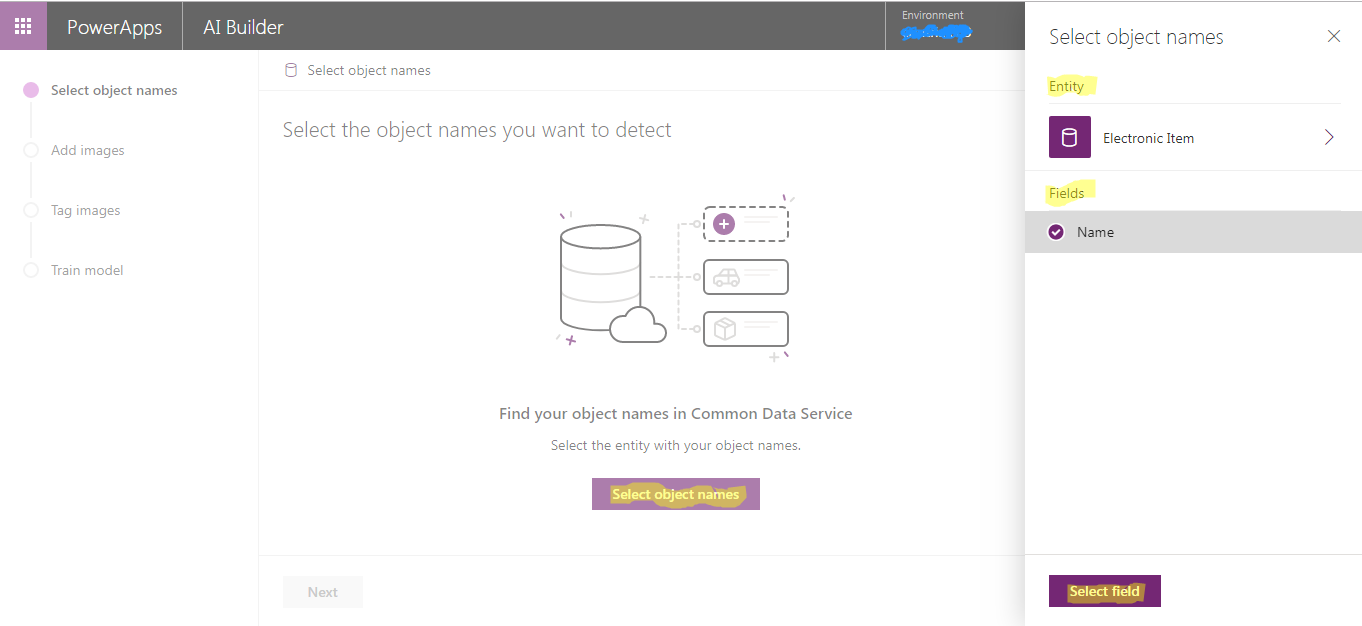
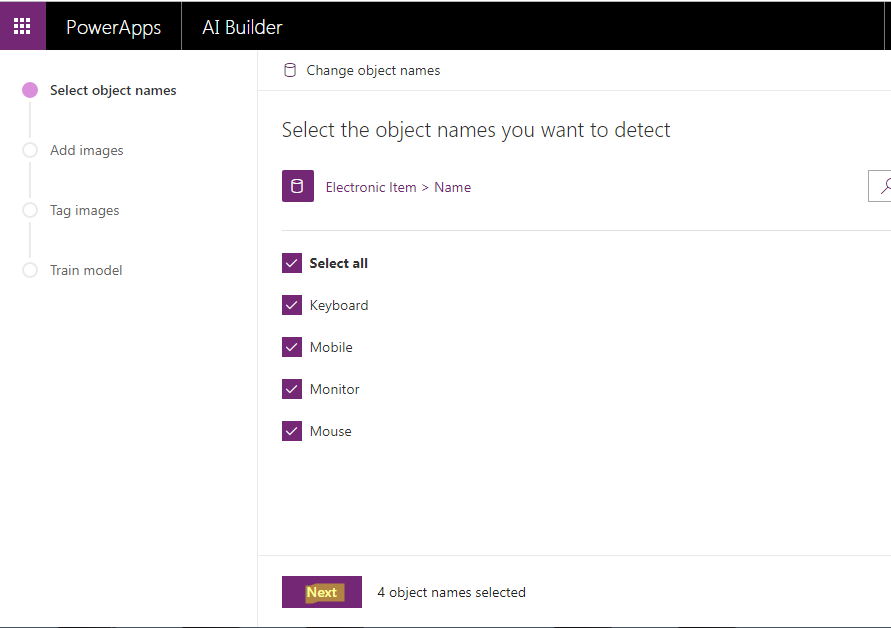
c. Select object names – Select the object names by selecting an entity from Common Data Service. Here, we have selected a custom entity with name ‘Electronic Item’ and Field ‘Name’. This entity has records with name of electronic items like Monitor, Keyboard, Mobile and Mouse.
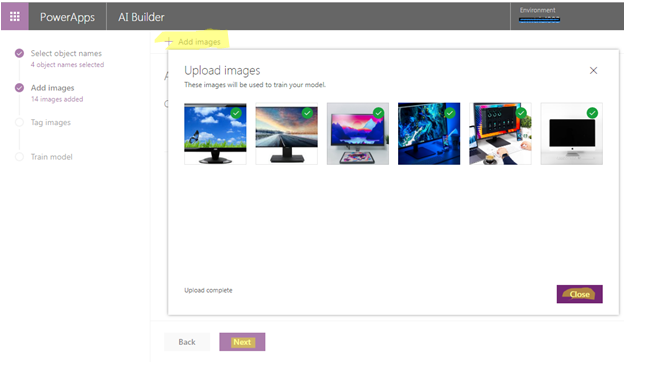
d. Add images – Click on ‘+Add Images’ button to upload images of objects that you want to detect and identify. Upload 15+ images of each object.
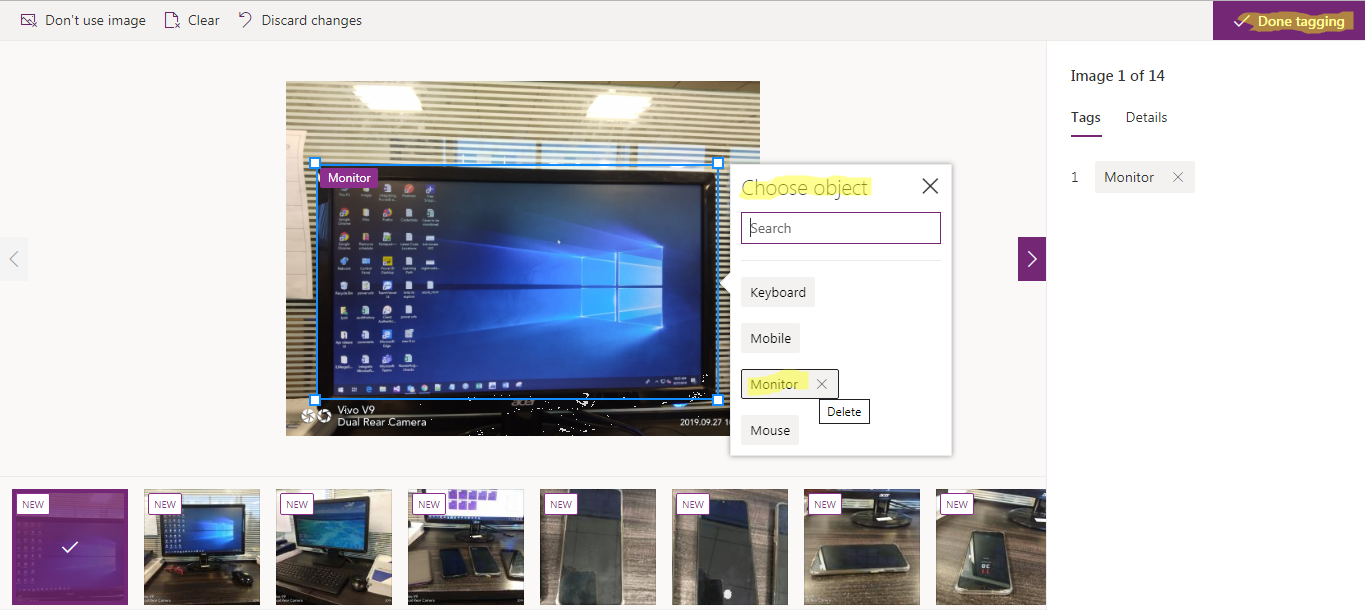
e. Tag images– Teach the model to identify objects by tagging and labeling them. For each image, draw a rectangle around the object which you want to identify and tag it with correct name. Go through all the images to tag the objects. Once all the images have been tagged, click on Done tagging.
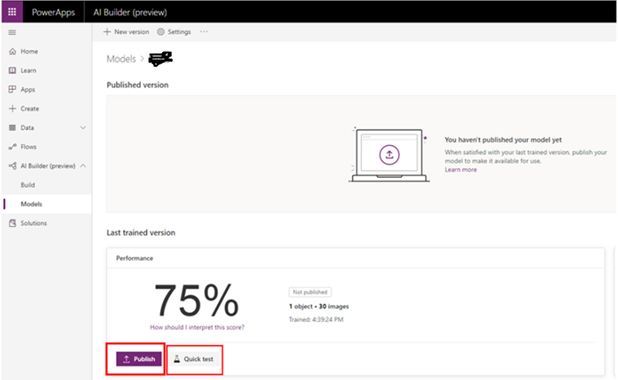
f. Train Model – Click on Next >Train. It will take several minutes to train the model. Use Quick Test to test the model’s accuracy and then Publish the model to consume it in the app.
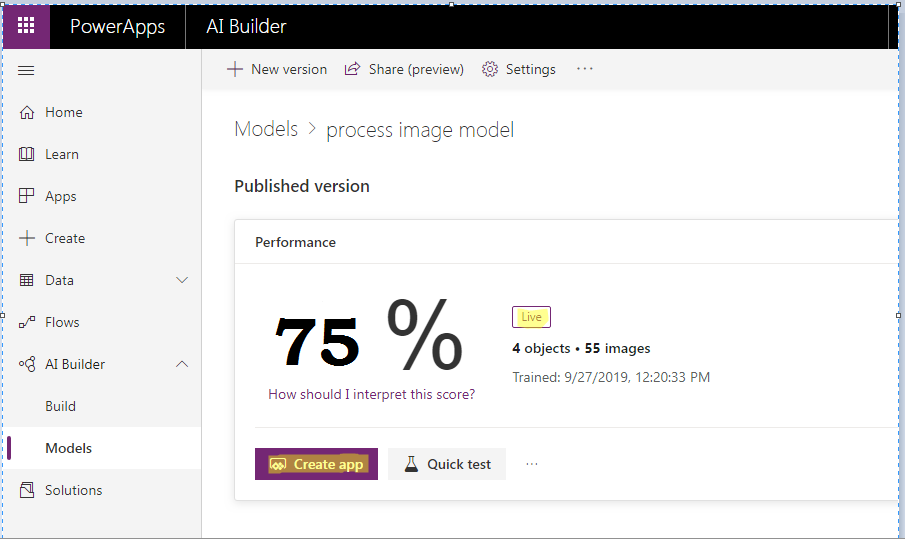
Once the model is published its status changes to Live from Draft.
2. Build Object Detector App using PowerApps
a. Click on Create app button shown in previous step. You can create a Canvas App or Model-driven App or Portal from blank depending upon your choice. In our example, we are creating a Mobile Canvas App.
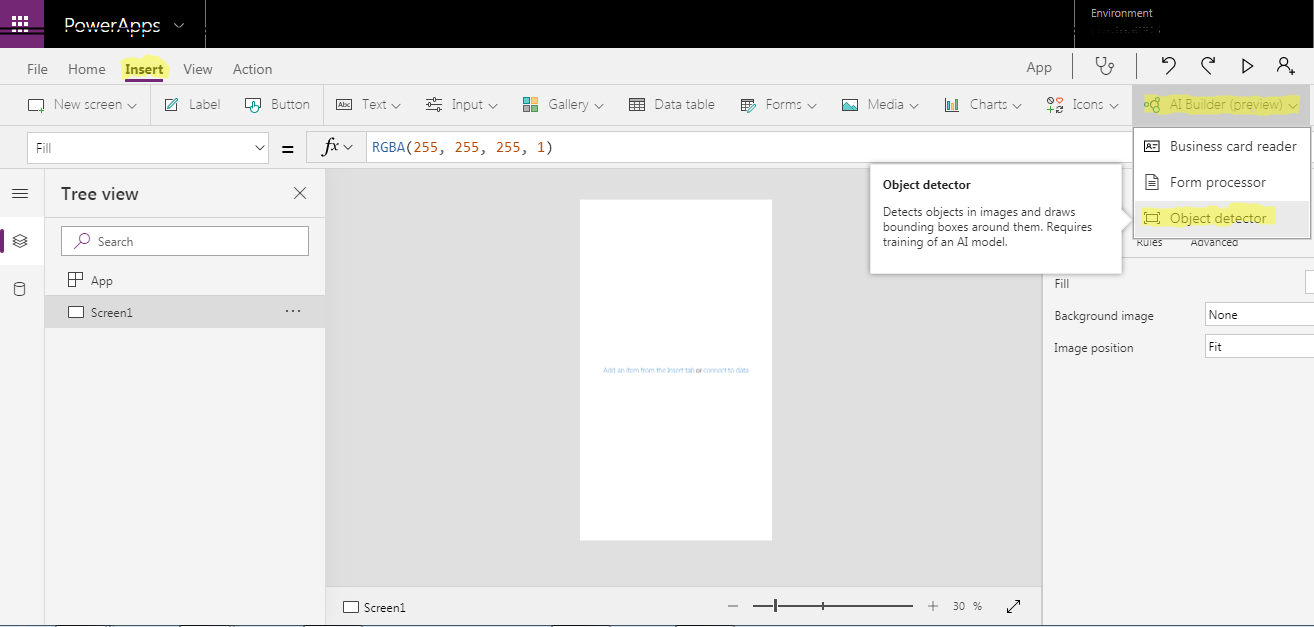
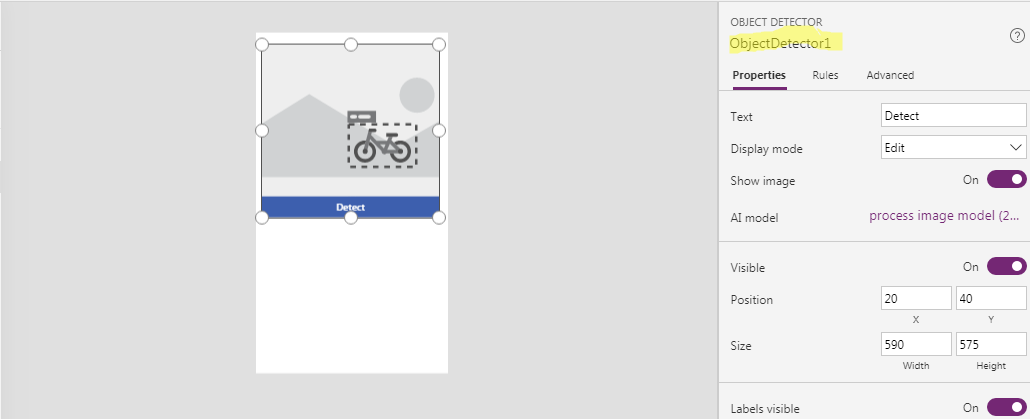
b. Insert Object Detector by navigating to Insert > AI Builder > Object detector. Drag the Object detector to your screen and select the existing object detector AI model.
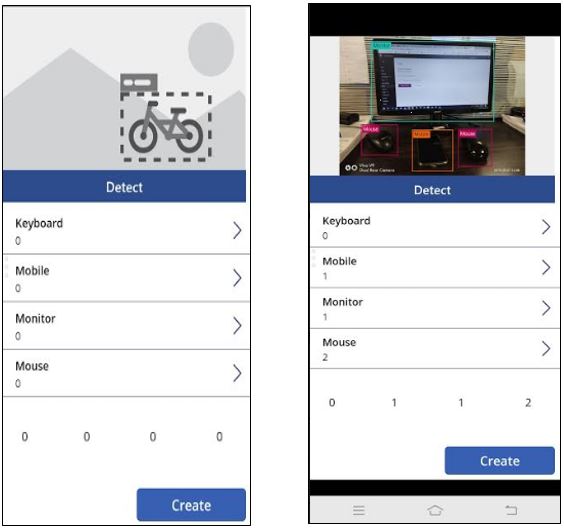
The object detector control looks like below:
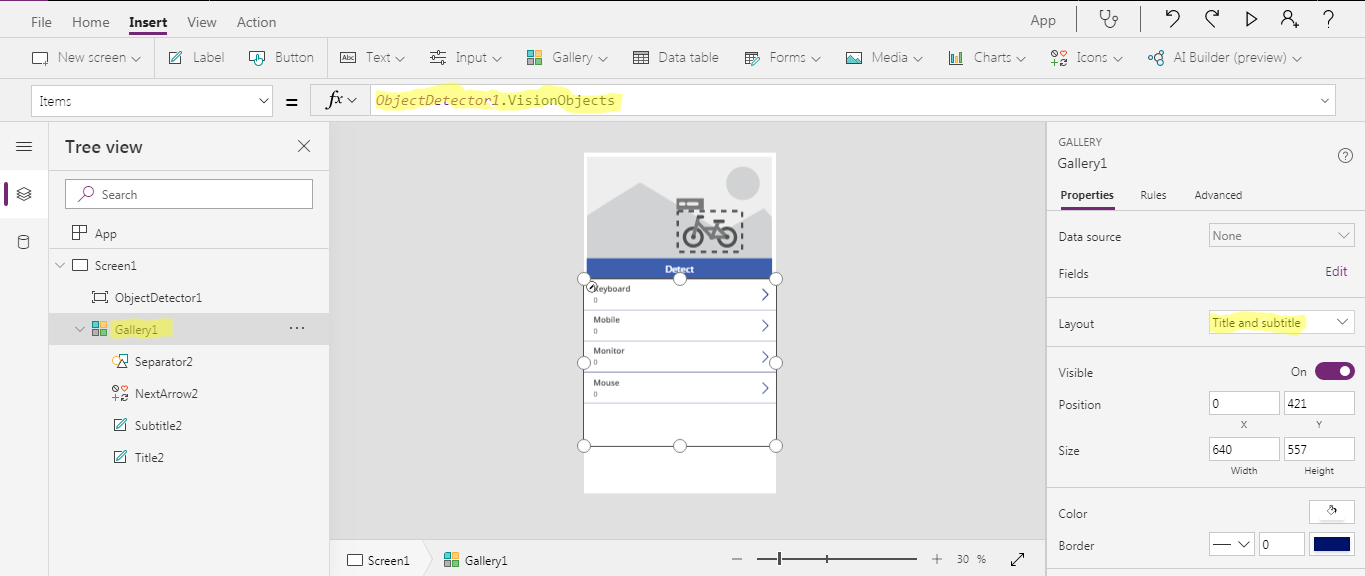
c. Insert a Gallery Control with Title and subtitle layout.
Set the properties of Gallery and its Title and SubTitle as follows:-
Gallery Items = ObjectDetector1.VisionObjects
Title Text = ThisItem.displayName
Subtitle Text = ThisItem.count
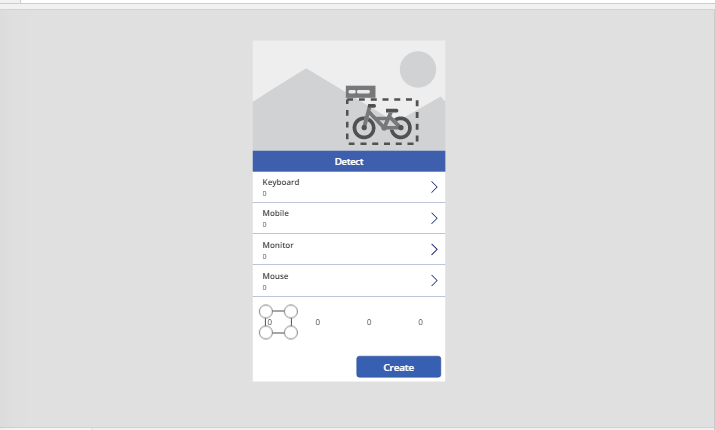
d. Insert some label controls for storing the values of Count for each individual item i.e. Monitor, Keyboard, Mobile and Mouse Counts and set their text properties.
For Example: –
lblKeyboard.Text =First(ObjectDetector1.VisionObjects).count
lblMobile.Text= First(Filter(ObjectDetector1.VisionObjects,StartsWith(displayName,”Mobile”))).count
lblMonitor.Text= First(Filter(ObjectDetector1.VisionObjects,StartsWith(displayName,”Monitor”))).count
lblMouse.Text= Last(ObjectDetector1.VisionObjects).count
You can make your own formula by utilizing the Gallery or Object Detector controls
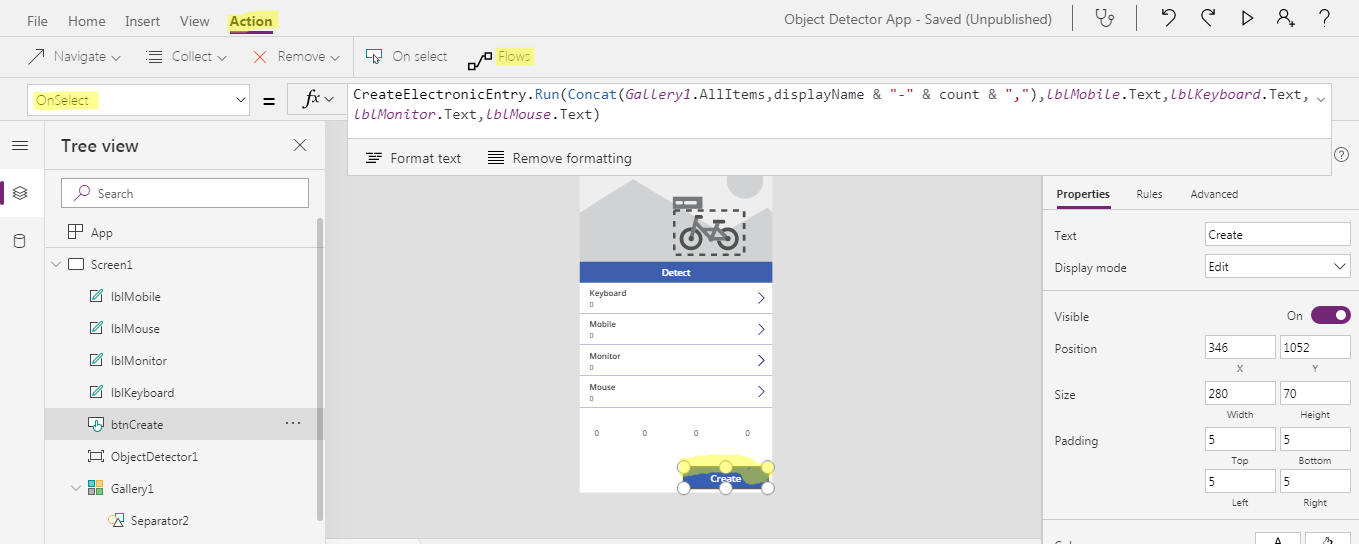
e. Insert a Create button. Click on Create button, navigate to Action > Flows > Select the existing flow or Create a new Flow as described in 3rd point. It will start processing and add the selected flow to PowerApp.
Modify the function of Onselect as shown below by passing the parameters to the flow. Here, CreateElectronicEntry is the name of flow.
OnSelect =CreateElectronicEntry.Run(Concat(Gallery1.AllItems,displayName & “-” & count & “,”),lblMobile.Text,lblKeyboard.Text,lblMonitor.Text,lblMouse.Text)
f. Save and Publish the App.
3. Pass data from PowerApps to Dynamics 365 CRM using Microsoft Flow
You can pass data to Dynamics 365 CRM using the Patch statement on click button in PowerApps itself but here we are showing it using a flow because Microsoft flow has many capabilities and you can perform so many tasks by connecting your app to different connectors depending on your business requirements.
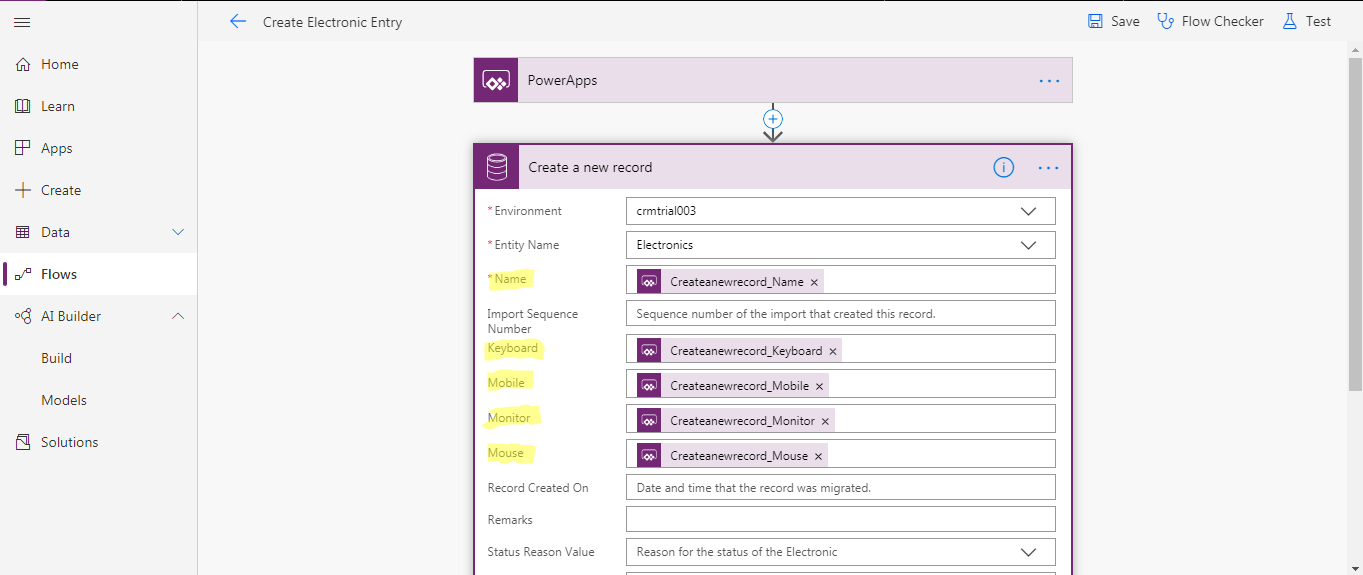
a. Create a new instant Flow with trigger of PowerApps.
b. Add New Step >> Search for an Action ‘Common Data Service’ >> Create a New record.
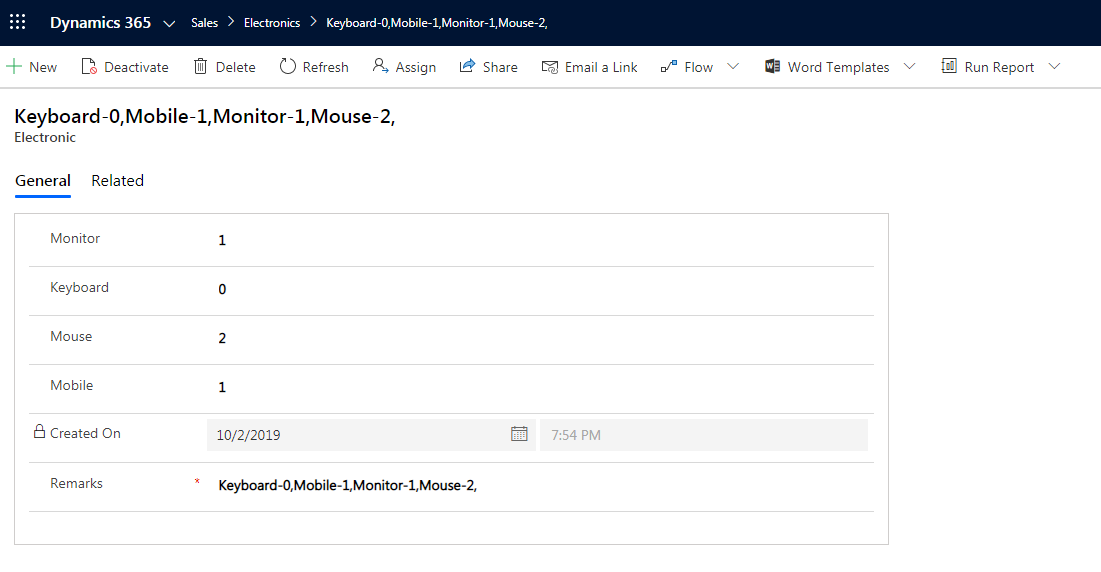
c. Select your ‘Environment’ and ‘Entity Name’. We have created another custom entity ‘Electronic Entry’ which has the fields Monitor, Keyboard, Mobile and Mouse which shows the count of these devices.
d. Map the fields by clicking on ‘Ask in PowerApps’. It will automatically map relevant PowerApps fields with the CRM fields.
e. Save the flow.
4. Run the App
You can capture an image from your mobile camera or select an existing image from Gallery. Click on the Detect button. The objects will be identified if it matches with trained objects and the list would show count of each object detected in the image.
When Create button is clicked it triggers the flow which creates a record in CRM as shown below: –
Conclusion
In this way, you can build AI Object detection App which is an easy to use tool, just point and click, to tailor AI in your business as per your requirements. Object Detection lets you to count, locate and identify selected objects within any image. You can use this model in PowerApps to extract information from pictures you take with the camera.

Nice Post
Awesome content. If the writer of this content is able to create such an app, I would appriciate more informatio regarding further specifics. If the write is able to get back to me about that. I would highly appriciatte it.
Please share additional details. If required you can connect with us offline at crm@inogic.com
Thanks!