Introduction:
Universal Resource Scheduling feature in Dynamics 365 Version 9.0 can be used to enable scheduling of any entity including custom entities on the Schedule Board.
Along with the Scheduling, we will also see how we can add the fields on the booking slot of the Schedule Board and also how to add different booking requirement tabs for different entities on the Schedule Board.
Before using Universal Resource Scheduling, we need to make sure that we have either Dynamics 365 for Field Service or Dynamics 365 for Project Service.
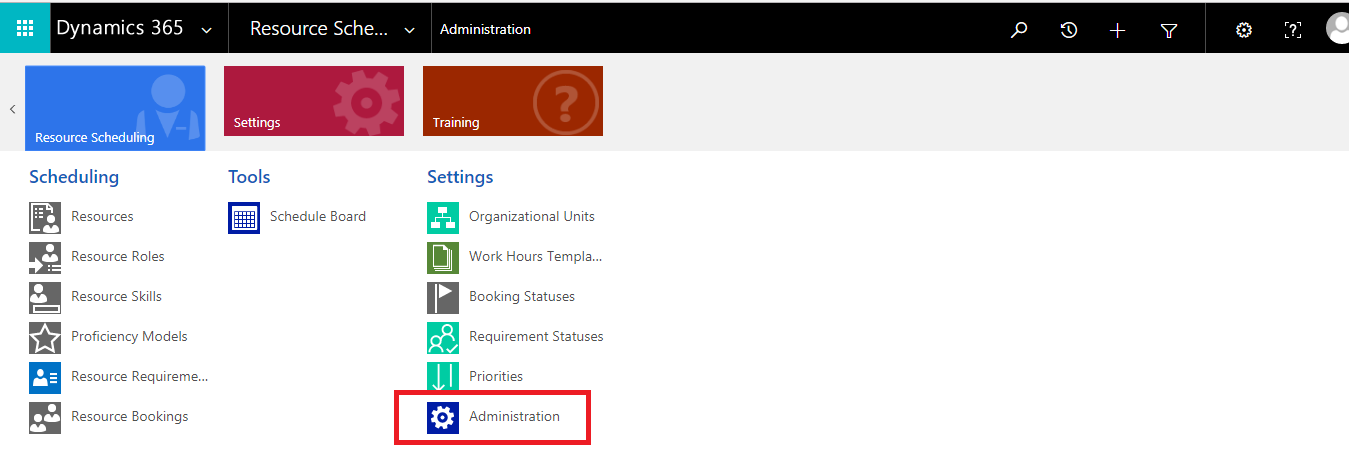
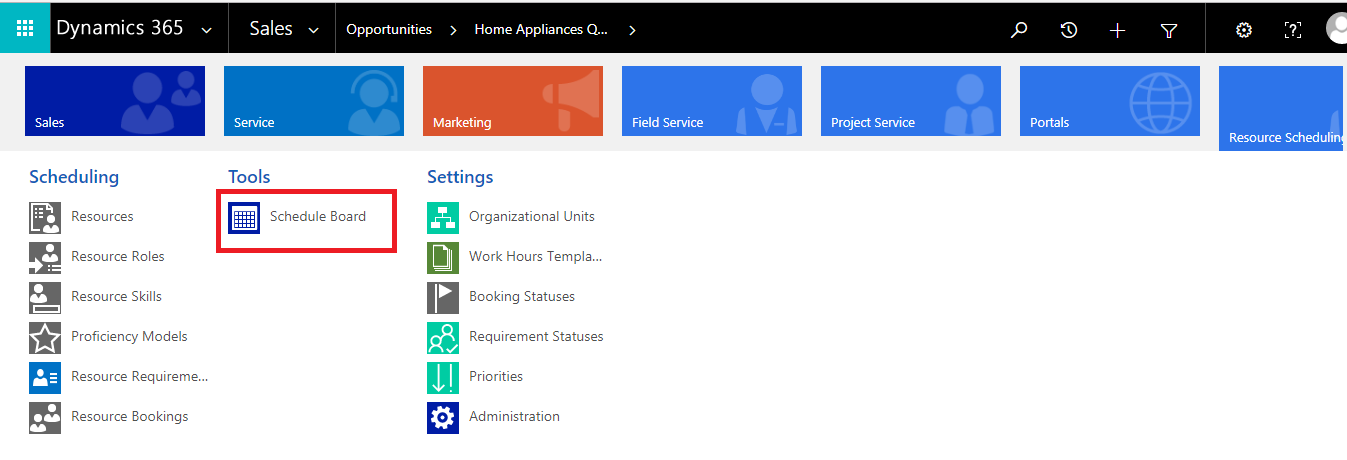
To enable the Entities for Scheduling, Navigate to Sitemap>> Resource Scheduling>>Administration
In Administration, Select Enable Resource Scheduling for Entities.
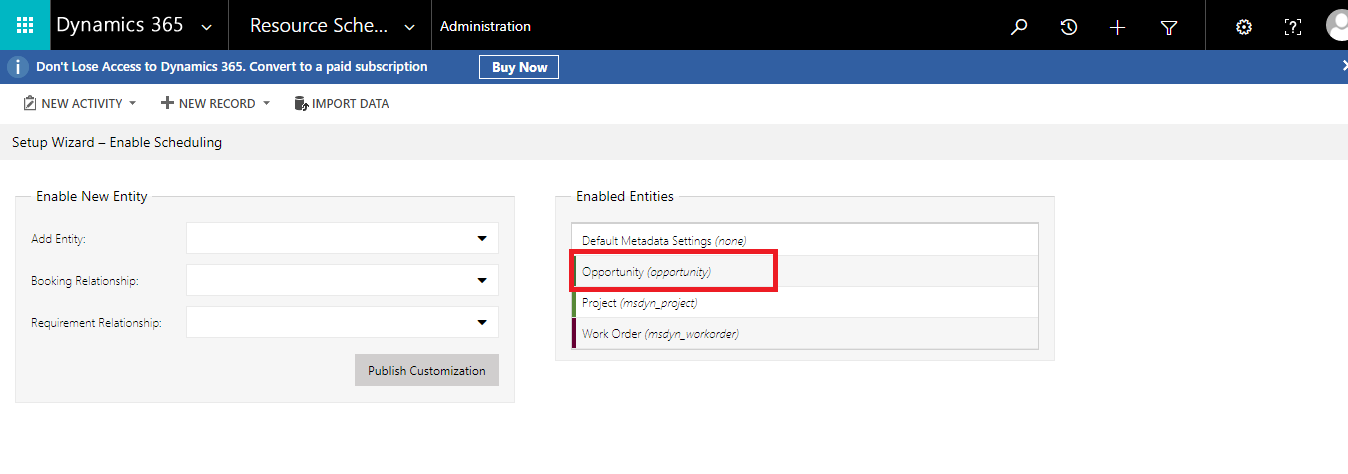
A Setup wizard will be displayed, in that perform the following:
1. Add Entity – Select the entity that you want to enable for scheduling. Here, we will select Opportunity.
2. Booking Relationship – Select Create New Relationship
3. Requirement Relationship – Select Create New Relationship
4. Click on Publish Customizations.
Once it is published, you can see that the Opportunity entity gets displayed in the list of Enabled Entities.
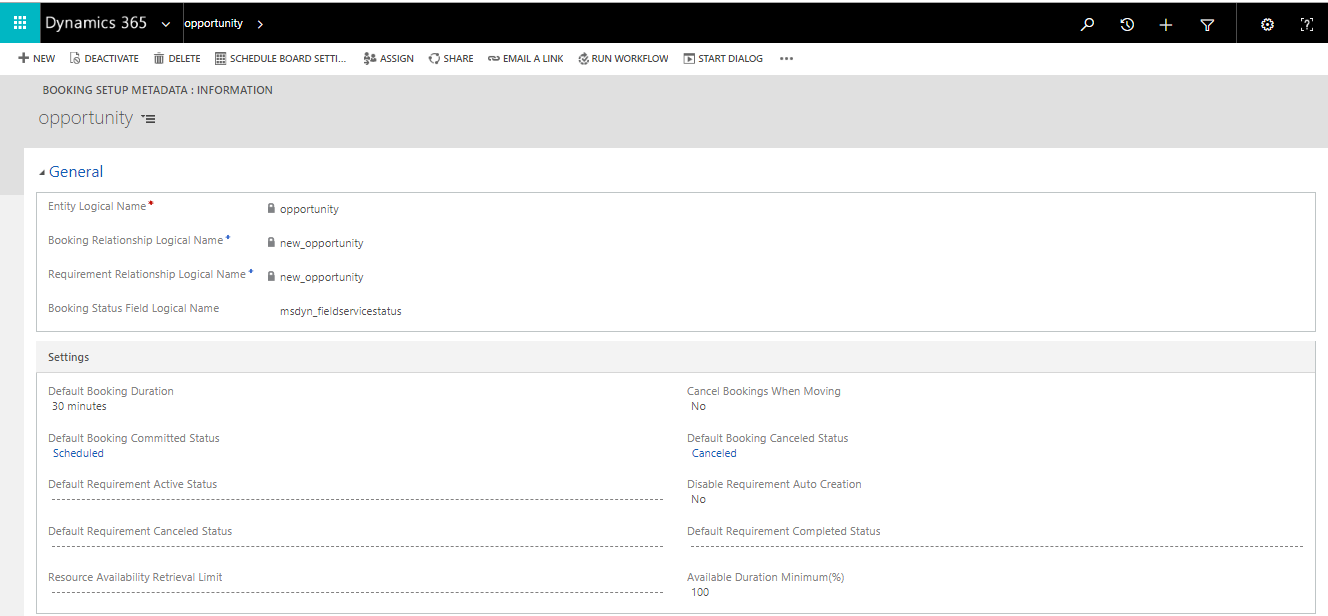
Double Click on the Opportunity Entity from the Enabled Entities table, Booking Setup MetaData form will get displayed.
Here, we can change the settings as per our requirement, so here we have made changes in the settings as follows:
1. Enter Booking Status Field Logical Name as “msdyn_fieldservicestatus”.
2. Select Default Booking Duration to 30 Minutes.
3. Select Default Booking Committed status to “Scheduled”.
4. Select Default Booking Canceled Status to “Canceled” and click Save on the lower right corner.
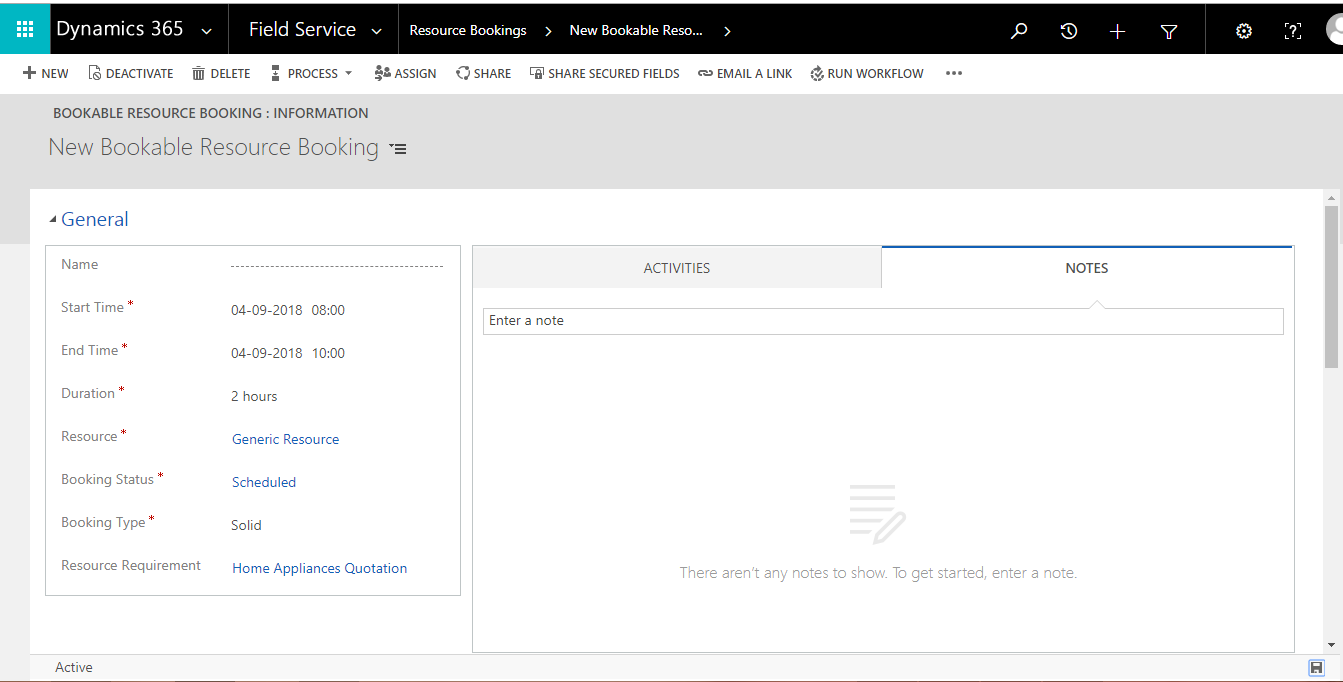
Now, Navigate to Site Map>> Opportunity>>Open an Opportunity record. From the associated drop-down menu select Bookable Resource Bookings.
Click on Add New Bookable Resource Booking and create the booking for the selected opportunity record.
Navigate to SiteMap>>Resource Scheduling>>Schedule Board
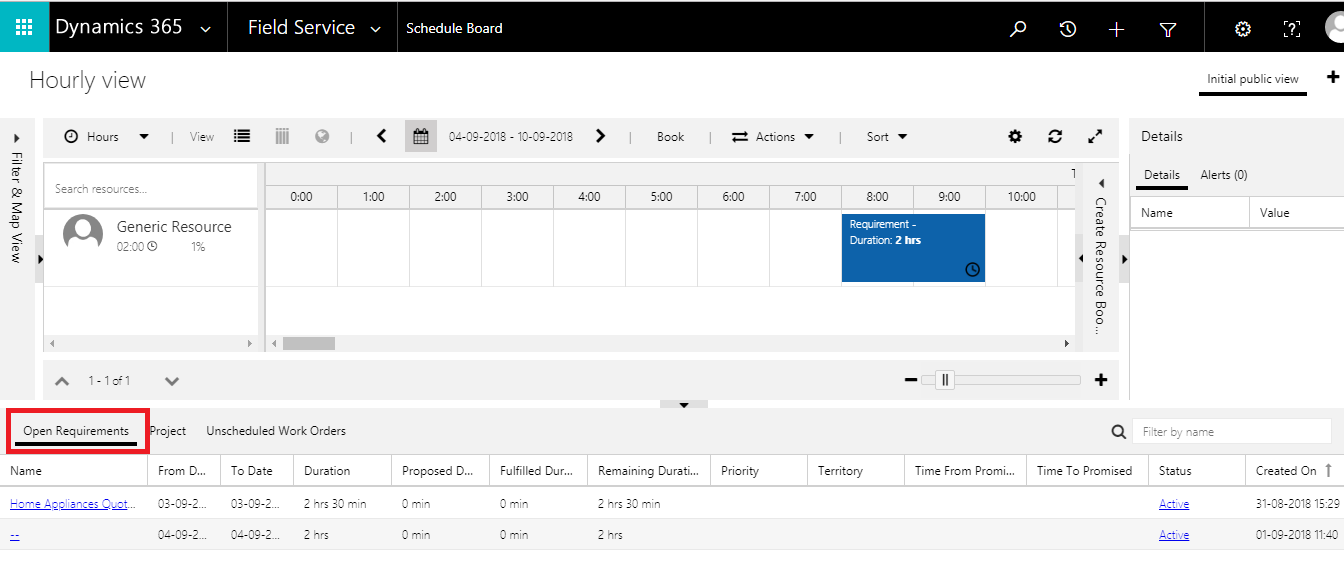
Here, we can see that the scheduled opportunity is getting displayed in Open Requirements tab.
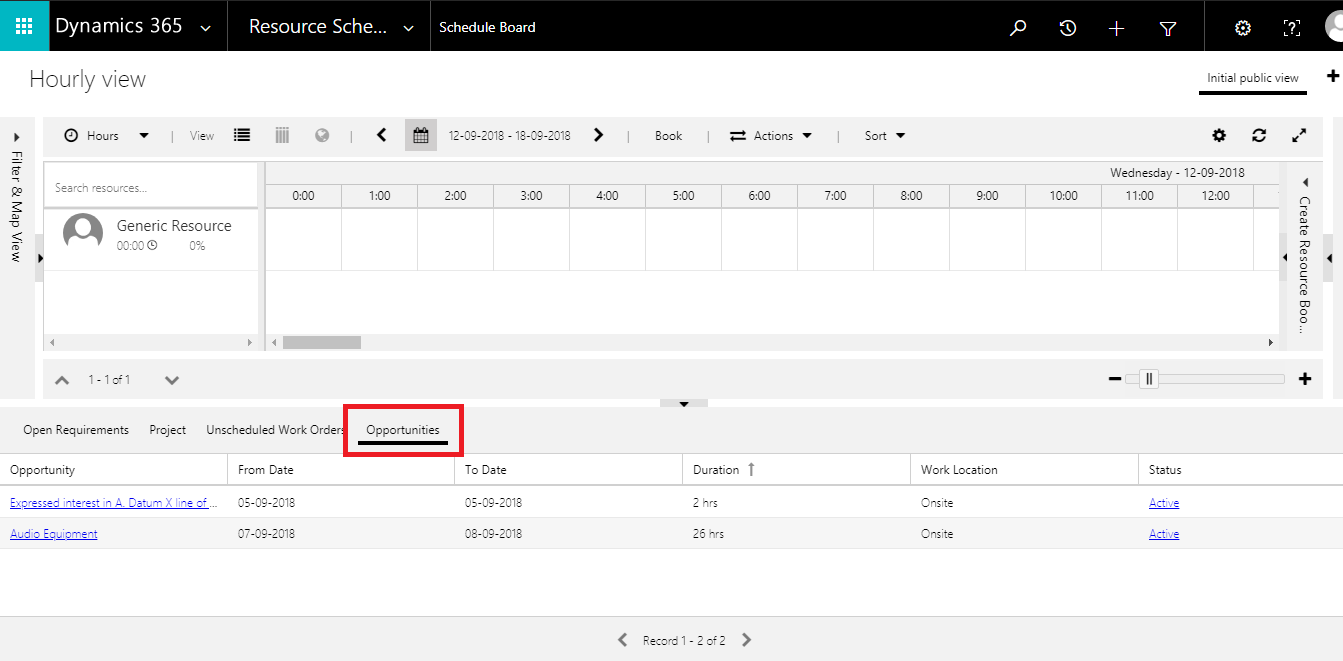
All the scheduled bookings get displayed in Open Requirements tab. In order to display the bookings as per entities, we can create different tabs for different entities. Here we will create an Opportunity tab to display all the bookings of the Opportunity Entity.
Before creating the Opportunity tab, we need to create a view for the Opportunity Resource Requirement so that we can display only the opportunities in the Opportunity tab.
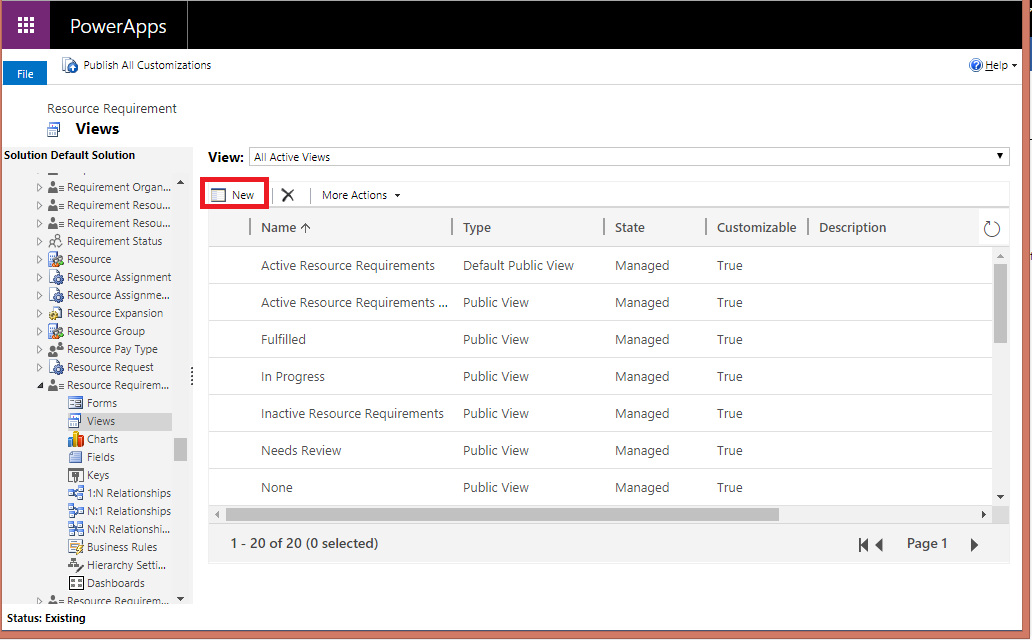
To create an Opportunity Resource Requirement view, Navigate to Sitemap>>Settings>>Customizations>>Resource Requirement>> Select Views>> Click on “New”
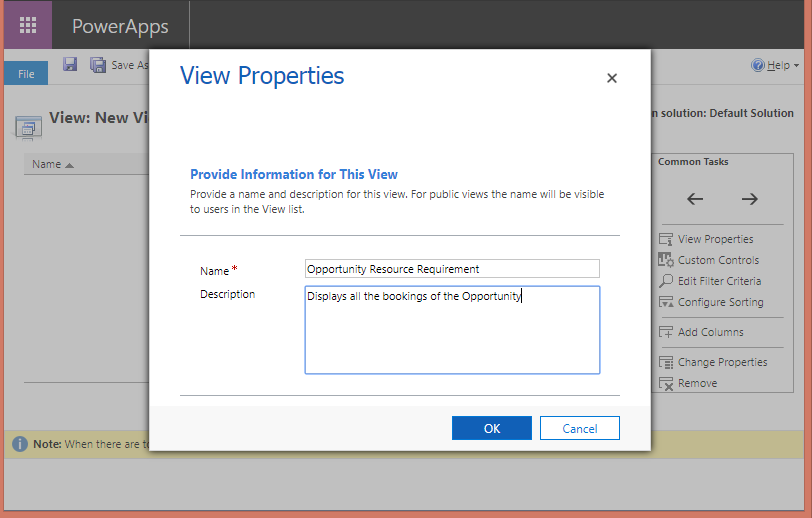
Enter Name and Description of the View and Click OK.
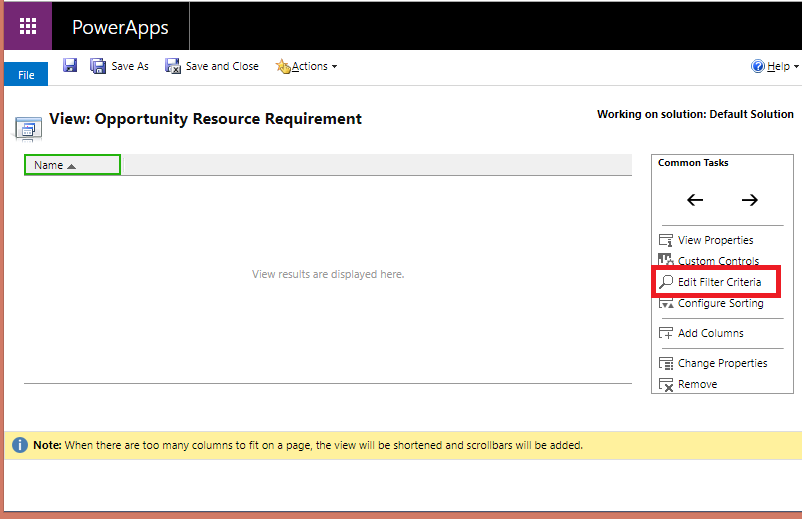
On the View form, click on Edit Filter Criteria.
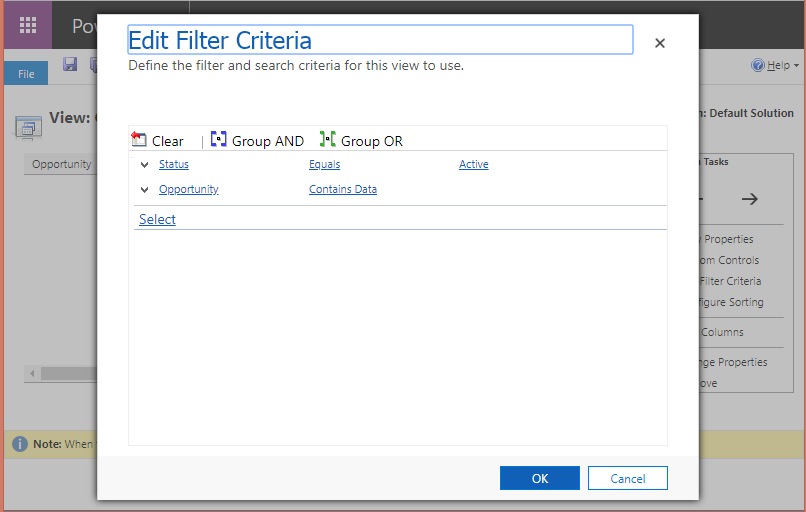
Enter the below conditions and select OK.
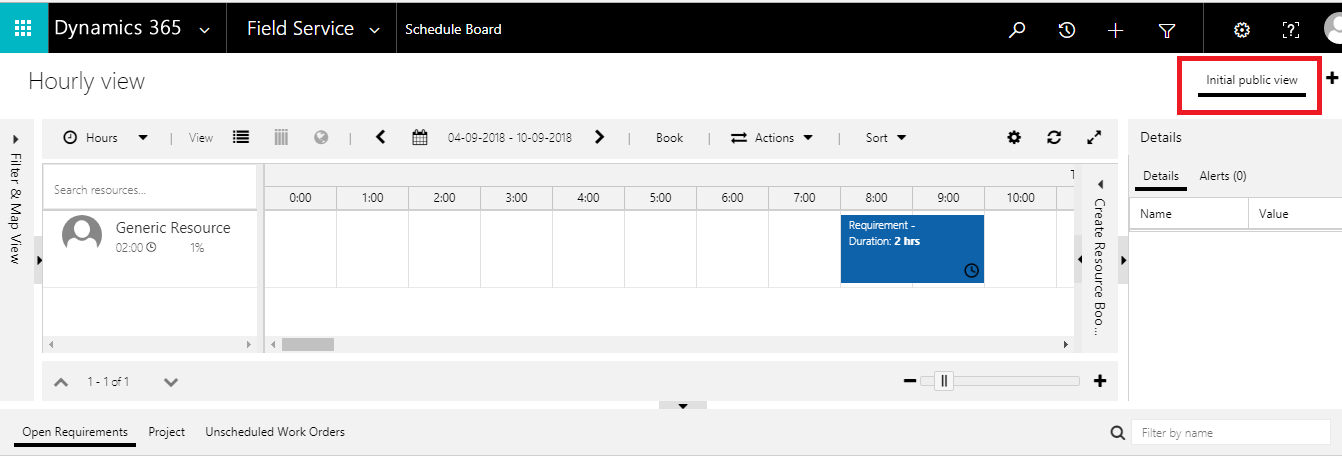
Now, in Order to create a new tab on the Schedule Board, double-click on the Initial Public View on the top right corner of the Schedule Board.
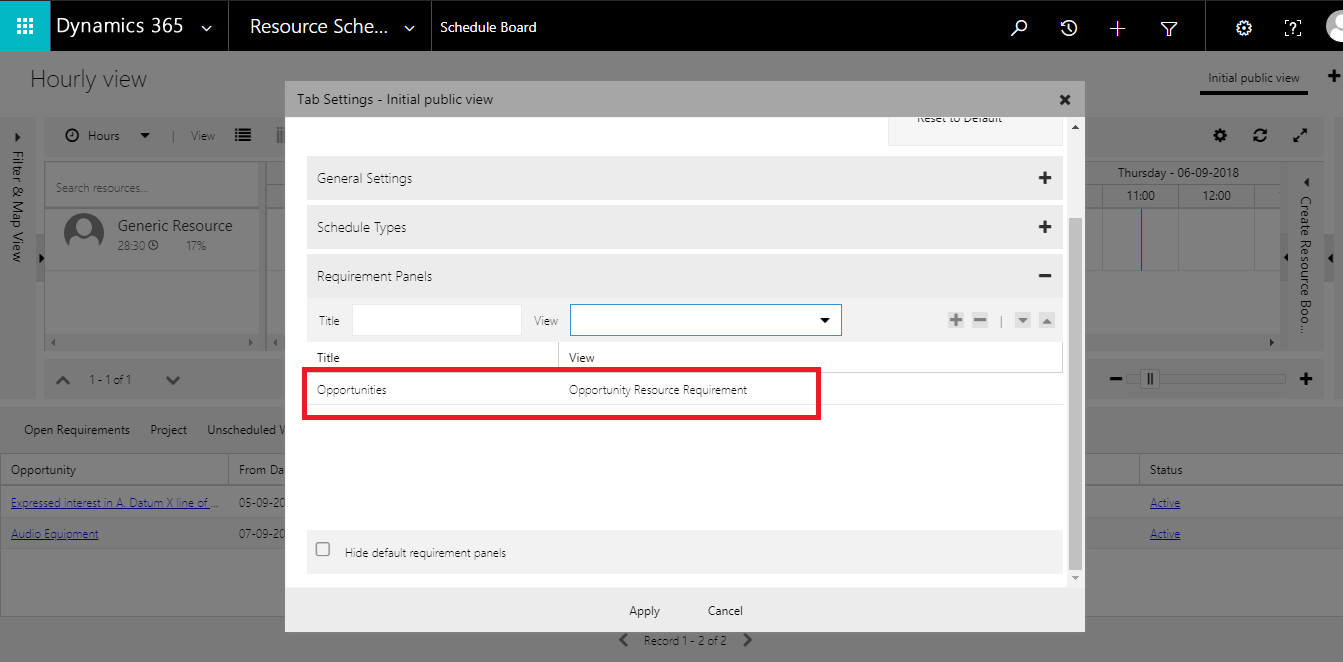
On Initial Public view Form Navigate to Requirement Panels. Select Title as Opportunities and select the view as Opportunity Resource Requirement and Click on “+” Button to add the Opportunities panel.
Once the Form gets refreshed, you can see the Opportunity tab.
We can also add different fields of the Opportunity entity on the Booking so that we can view the required information on the Booking of the Schedule Board.
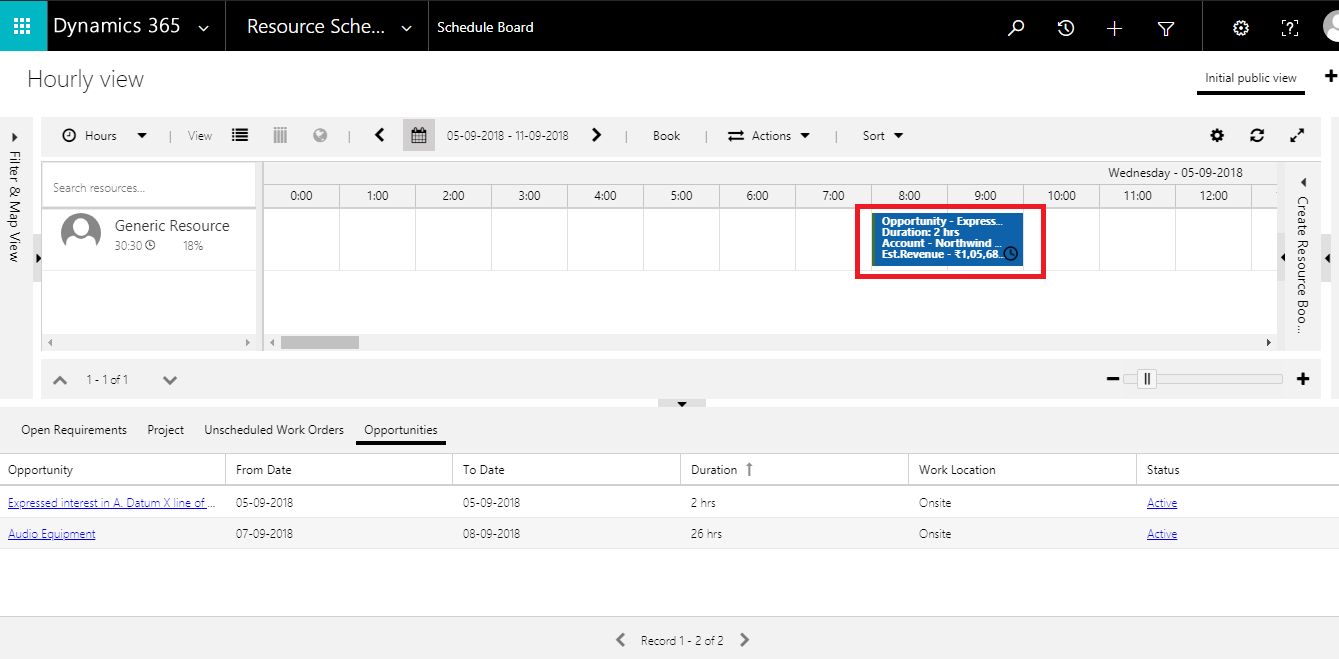
Here, we will add the Account Field, Topic and Est.Revenue on the Booking.
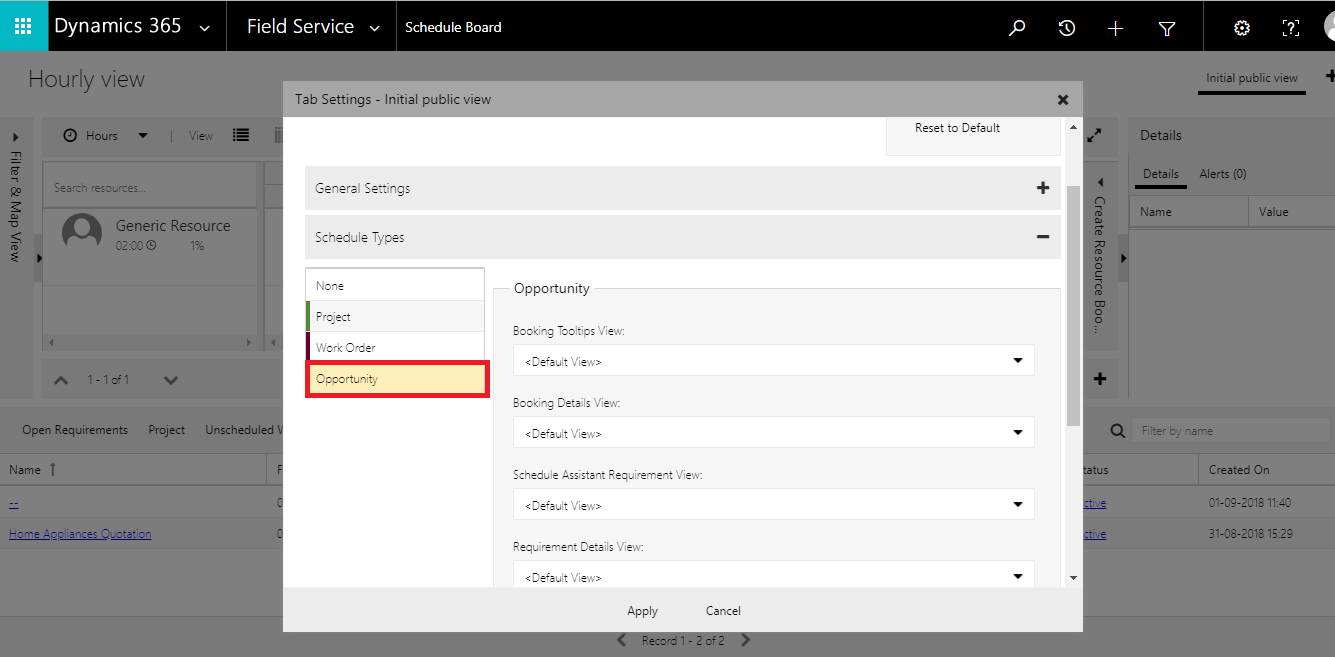
To add the Fields, again double click on the Initial Public View on the top right corner of the Schedule Board and navigate to Schedule Types and select the Opportunity Entity.
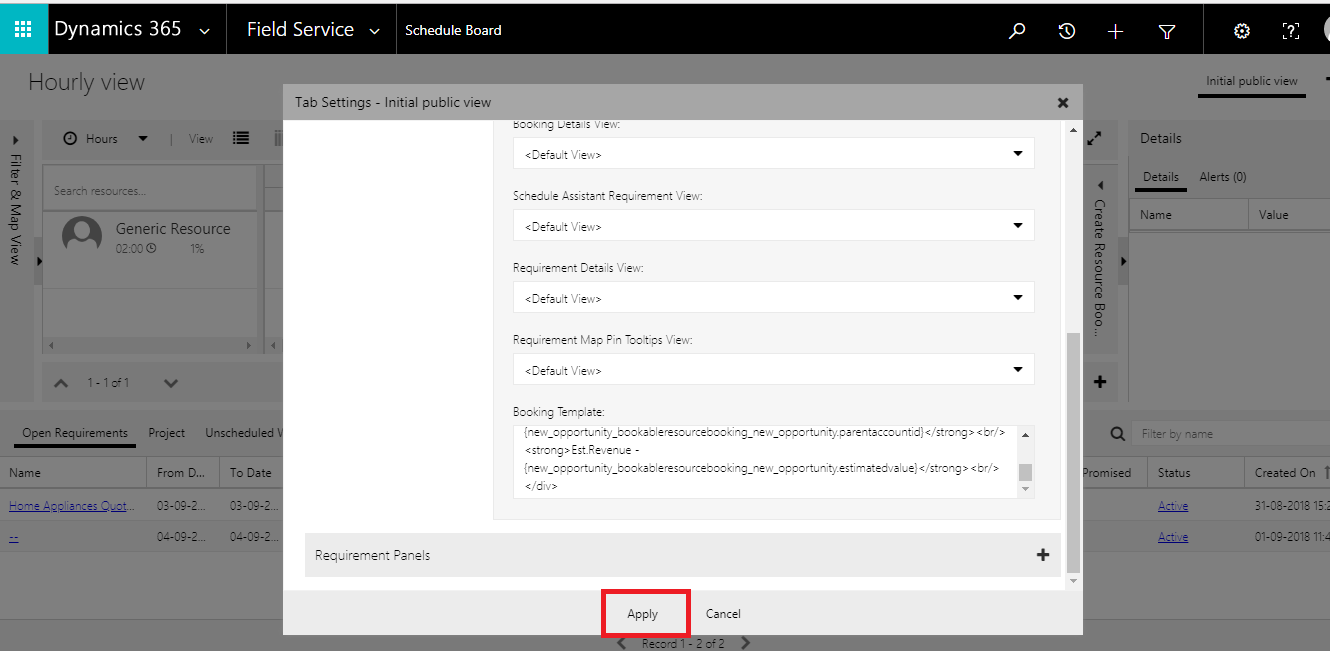
Scroll down and navigate to Booking Template and add the following.
Now, Click on Apply.
Here, we can see the Account, Topic and Est.Revenue on Booking on Schedule Board.
Conclusion:
Using the steps above the user can Configure Schedule Board to include Multiple Entities Booking Requirements using Universal Resource Scheduling. Similarly, we can add multiple fields on Bookings as per our requirement. Also, we can schedule Multiple Entities like Leads, Cases, Orders, etc for scheduling.
