In the previous blog, we have explored how to install and configure Azure OpenAI Service, now we will be unlocking its potential further by integrating the appropriate model in your projects by programmatically in Microsoft Dynamics 365 CRM.
Imagine a world where customer service agents don’t have to spend time searching through endless records to find the information they need. Thanks to Azure AI and its integration with Microsoft Dynamics CRM, this is now a reality. Instead of manually digging through customer data, agents can simply ask questions to AI assistant, like “What’s the status of this customer’s last order?” or “Has this customer raised any previous support tickets?” and get instant, accurate answers.
This seamless, AI-powered interaction transforms the customer service experience, enabling agents to respond quickly and provide personalized support without the hassle of searching for details. With natural language processing and real-time insights, Azure AI makes it easier than ever for agents to focus on what really matters—solving problems and delighting customers.
Prerequisites
Before getting started, ensure you have:
- An active Azure subscription.
Configuration
1. Creating a Service & Deploying a model:
You can follow the steps in the following article, if you are new to this concept and want to learn how to create an Azure OpenAI service & deploy an OpenAI model.
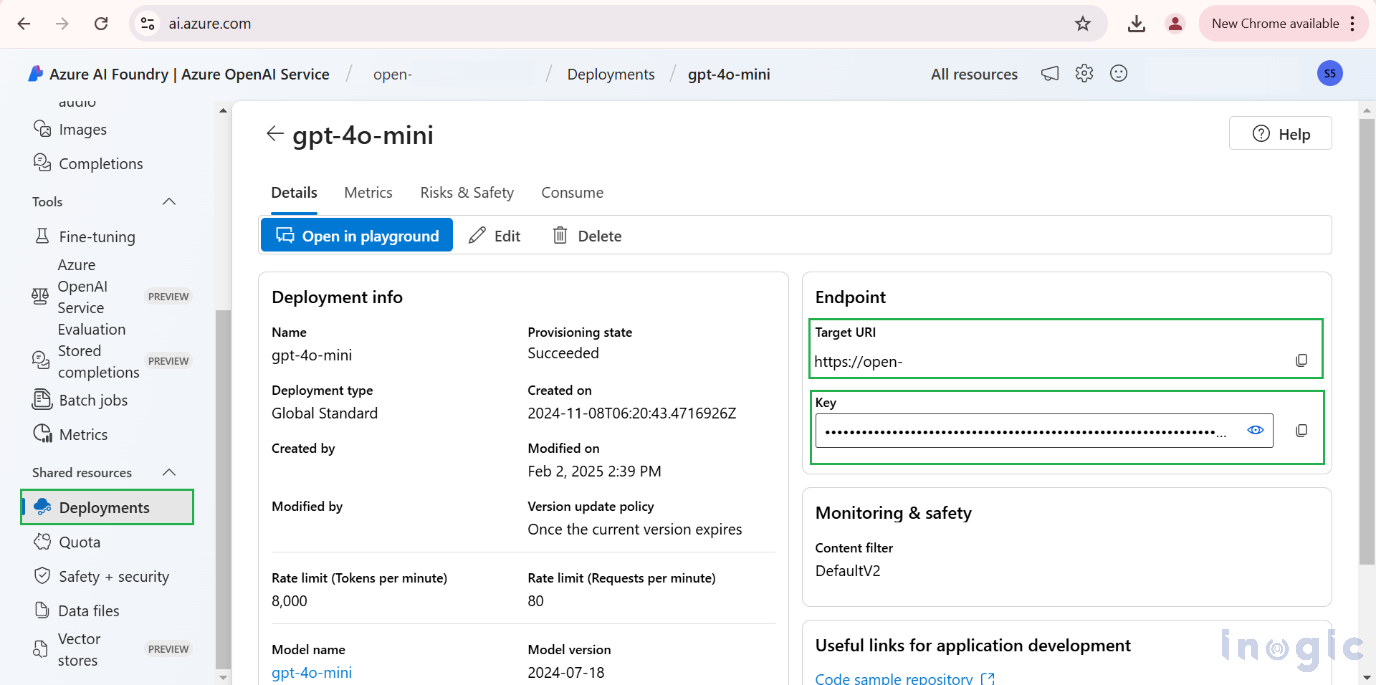
2. Access the API Key & Url :
- Once you are done with deploying the appropriate Model(as per your requirement), navigate to the Azure Portal
- Navigate to the resource section and click on Azure AI Foundry.
- Then go to Deployments tab which is located in the left side pane and select the deployed model.
- After clicking on the deployed model, you will find your Key and Target Uri present in the Endpoint tab
- Retrieve this Key and Target Uri as they are the contact points which will be further used in your code to access the Azure OpenAI service.
3. JavaScript Code for GPT-4o mini Integration:
Here’s the JavaScript code that will interact with the Azure OpenAI API using jQuery for AJAX requests. The code allows you to retrieve account data dynamically from the CRM, send it along with user queries to GPT-4o Mini, and display the response in a chatbot UI.
// Define the Azure OpenAI API endpoint and API key

var apiKey = "YOUR_API_KEY"; // Replace with your Azure OpenAI API key

var endpoint = "YOUR_ENDPOINT_URL"; // Replace with your Azure OpenAI API  endpoint

var model = "gpt-4o-mini"; //Replace with the appropriate model

// System message to guide the assistant's behaviour

var systemMessage = {

role: 'system',

content: "The intelligent assistant is designed to interpret user prompts and deliver
tailored responses for general queries. For general inquiries, such as informational or exploratory questions, the assistant utilizes its internal knowledge base to provide accurate, fact-based answers derived from historical data."

};

// Function to get the current Account ID dynamically from the CRM form

function getAccountId() {

var formContext = parent.Xrm.Page || window.formContext;

var accountId = formContext.data.entity.getId();

return accountId ? accountId.replace(/[{}]/g, '') : null;

}

// Function to retrieve account data using jQuery AJAX

function retrieveAccountData(accountId) {

var serverUrl = parent.Xrm.Utility.getGlobalContext().getClientUrl();

var query = `${serverUrl}/api/data/v9.2/accounts?$filter=accountid eq '${accountId}'`;

return $.ajax({

url: query,

method: "GET",

headers: { "Accept": "application/json" },

dataType: "json"

}).then(response => response, error => {

console.error('Error retrieving account data:', error);

return null;

});

}

// Function to send request to OpenAI API using jQuery AJAX

function getGPTResponse(query, accountData) {

var requestBody = {

model: model,

messages: [

systemMessage,

{ role: "user", content: `Here is some information about the account: ${JSON.stringify(accountData)}. ${query}` }

]

};

return $.ajax({

url: endpoint,

method: "POST",

headers: {

"Content-Type": "application/json",

"api-key": apiKey

},

data: JSON.stringify(requestBody),

dataType: "json"

}).then(response => response.choices[0].message.content, error => {

console.log("Error calling OpenAI API:", error);

return "Sorry, I couldn't process your request.";

});

}

// Function to send the user query and get a response

function sendQuery() {

var userQuery = $('#user-input').val();

if (!userQuery) return;

// Display user query in chat box

var chatBox = $('#chat-box');

chatBox.append(`<div><b>You:</b> ${userQuery}</div>`);

// Get Account ID dynamically

var accountId = getAccountId();

if (!accountId) {

alert("No account ID found.");

return;

}

// Retrieve account data, then send it to OpenAI API

retrieveAccountData(accountId).then(accountData => {

return getGPTResponse(userQuery, accountData);

}).then(response => {

chatBox.append(`<div><b>Bot:</b> ${response}</div>`);

$('#user-input').val('');

chatBox.scrollTop(chatBox[0].scrollHeight);

});

}

// Bind the send button click event

$(document).ready(() => {

$('#send-btn').on('click', sendQuery);

});
In this code:
- Replace YOUR_API_KEY and YOUR_ENDPOINT_URL with your actual API key and endpoint.
- The getAccountId function retrieves the account Id dynamically from the CRM form.
- The retrieveAccountData function uses jQuery’s ajax to fetch account data from Dynamics 365 CRM via the Web API.
- The getGPTResponse function sends the user’s query and account data to Azure OpenAI and displays the response in the chat UI.
4. Integrate the agent in CRM dynamics 365.
To upload and integrate a web resource in Dynamics 365 CRM, go to Settings > Solutions, create or select a solution, paste the above code under Web Resources, save and publish it, then navigate to the form, insert the web resource, position it, and publish the form.
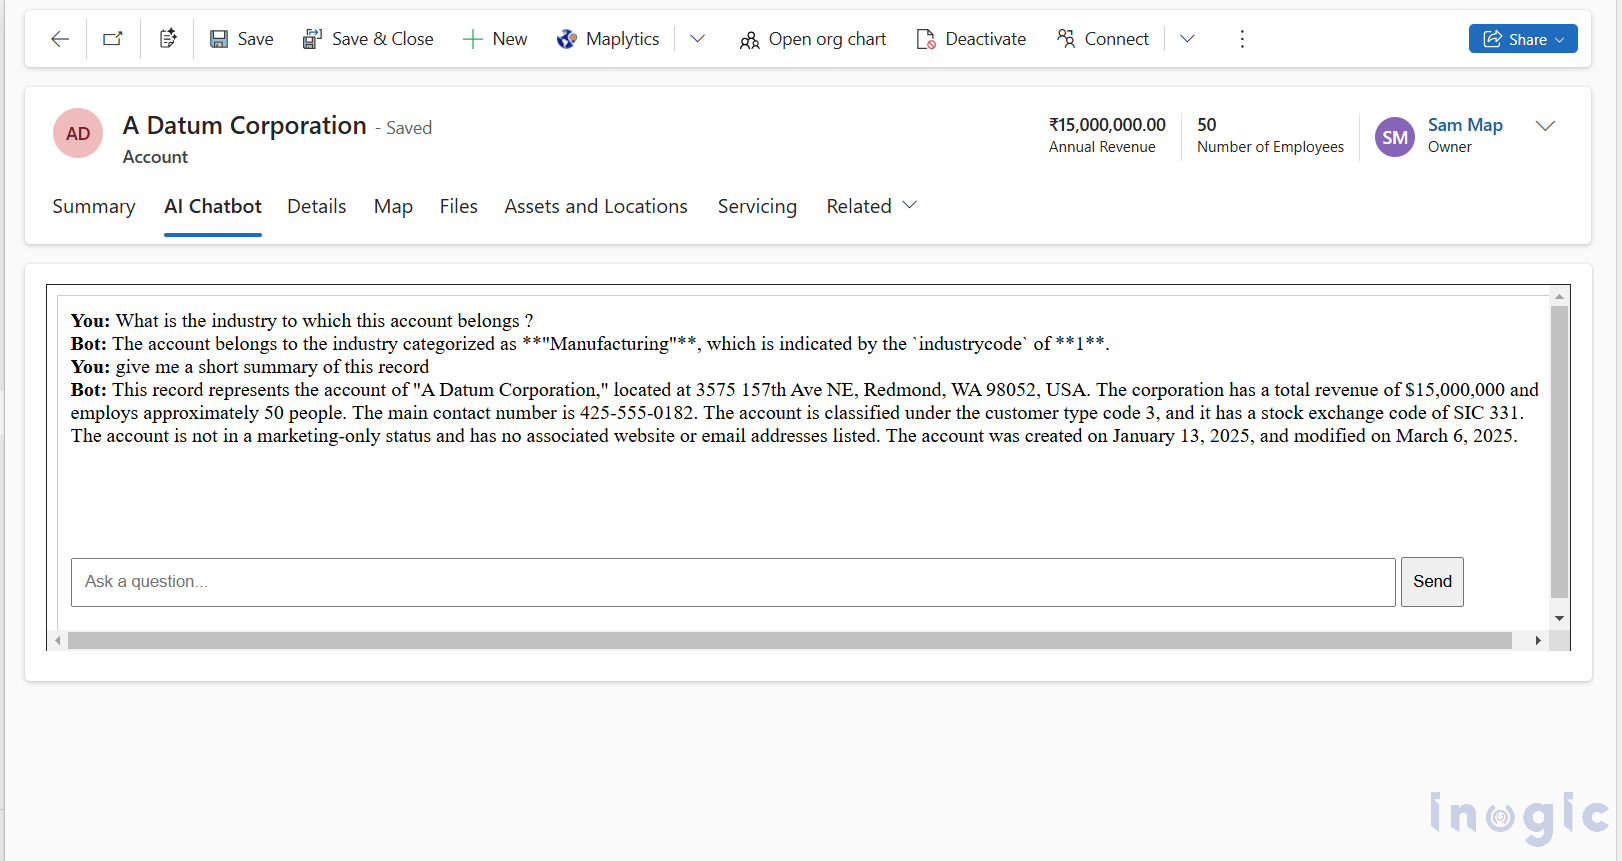
5. Test the Chatbot (Once everything is set up, test the integration):
- Go to Dynamics 365 CRM and redirect to form where the web resource is added.
- Type a query in the input field and click Send as shown below in screenshot.
- The chatbot should respond with information related to the current account, retrieved dynamically from Dynamics 365 CRM, enhanced with GPT-4o Mini’s response.
Conclusion
Integrating Azure AI Services, specifically the GPT-4o Mini model, into your Dynamics 365 CRM using JavaScript and jQuery can provide a highly interactive and intelligent chatbot feature. By following the steps outlined in this blog, you can easily set up an AI-driven chatbot that leverages real-time data from Dynamics 365 CRM, helping improve user engagement and automate responses to common queries.