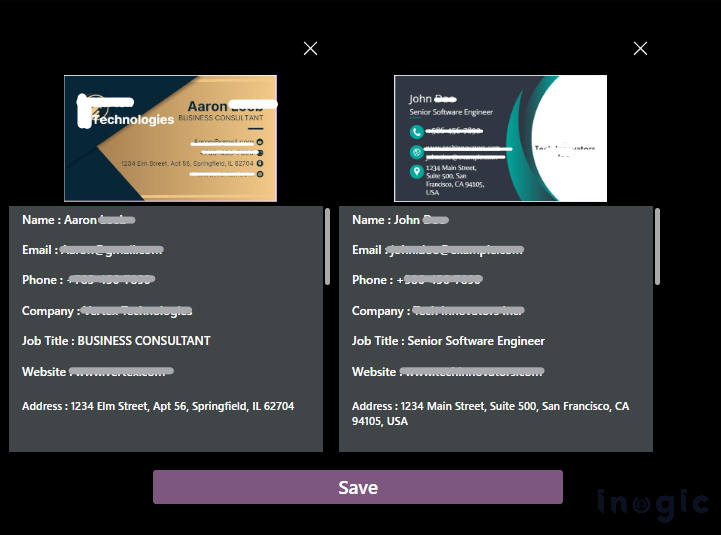
In a recent client requirement, we developed a solution to streamline business card processing by leveraging AI and Power Apps. The goal was to scan business cards, extract their data, and display it seamlessly on a custom page. To achieve this, we built a custom page in Power Apps where users can upload a business card image. This triggers a Power Automate flow integrated with an AI model that extracts key details like name, company, and contact information. The processed data is then passed back to the custom page. We implemented the following steps to achieve this.
Steps to create an AI model
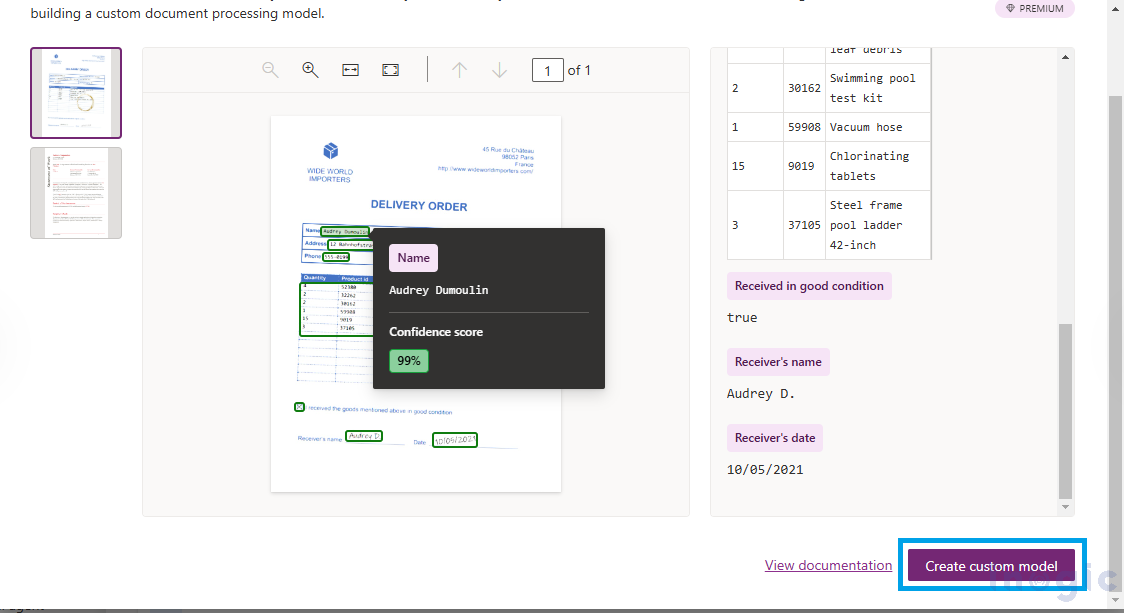
1. Open https://make.powerapps.com/ -> Navigate AI hub -> AI models -> Choose Document processing template
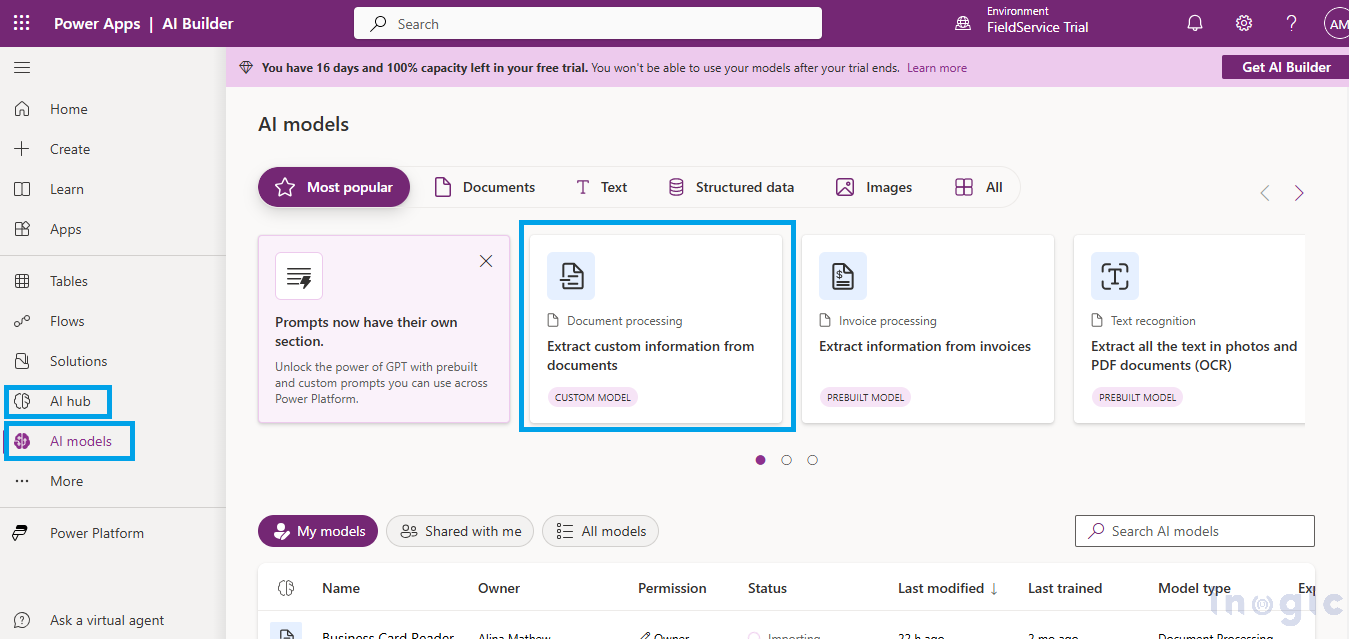
2. Click on Create custom model
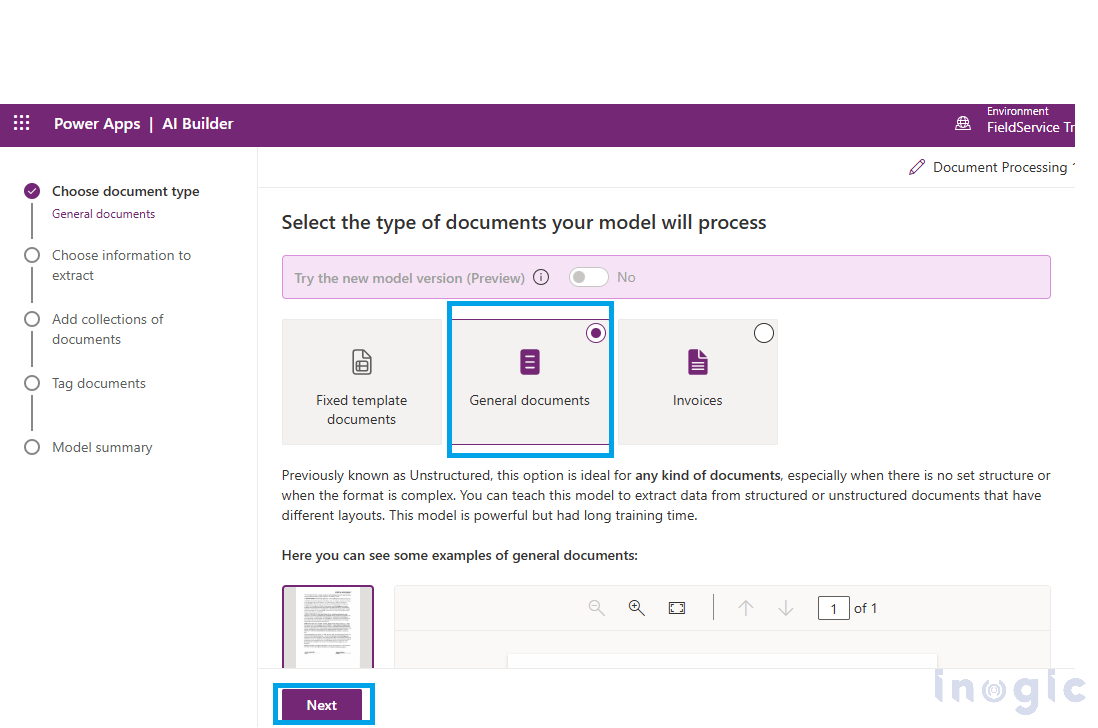
3. Choose Document type -> Next
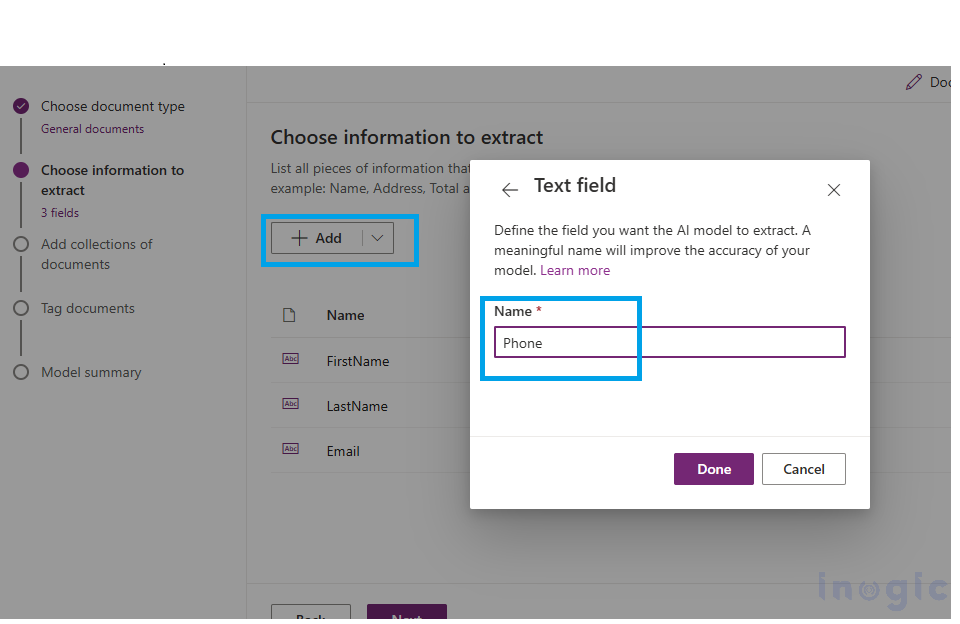
4. Click on ADD -> Define the variables for the data you want to extract from the image ->Done->Next
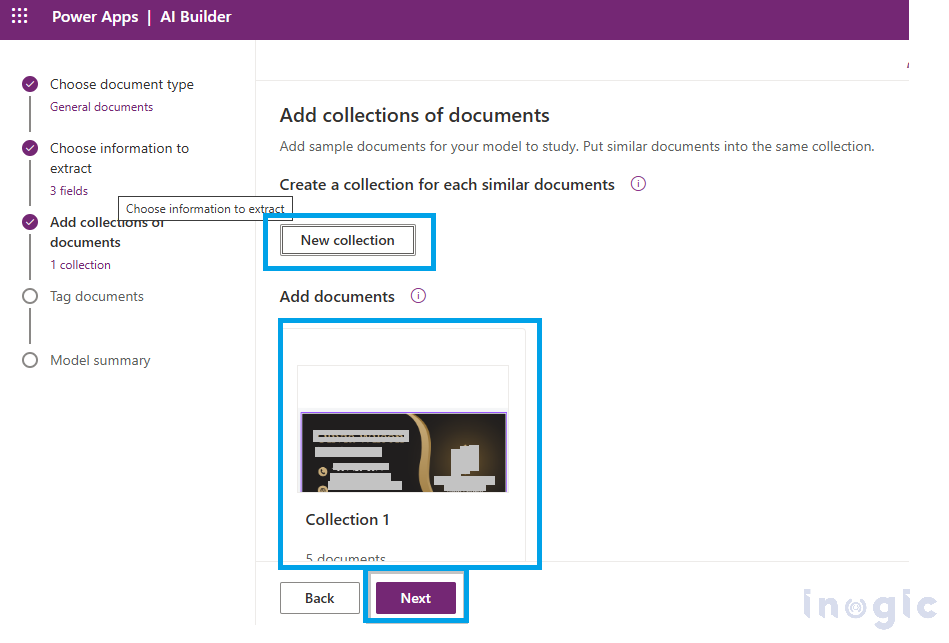
5. Create a New Collection or Add documents -> Next
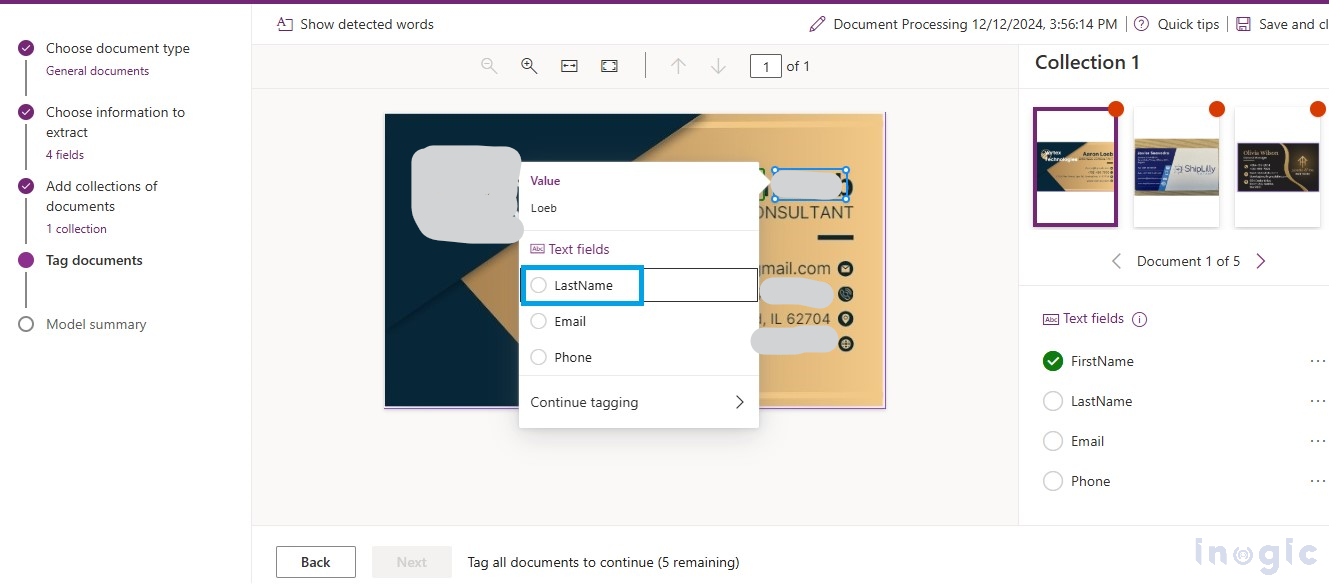
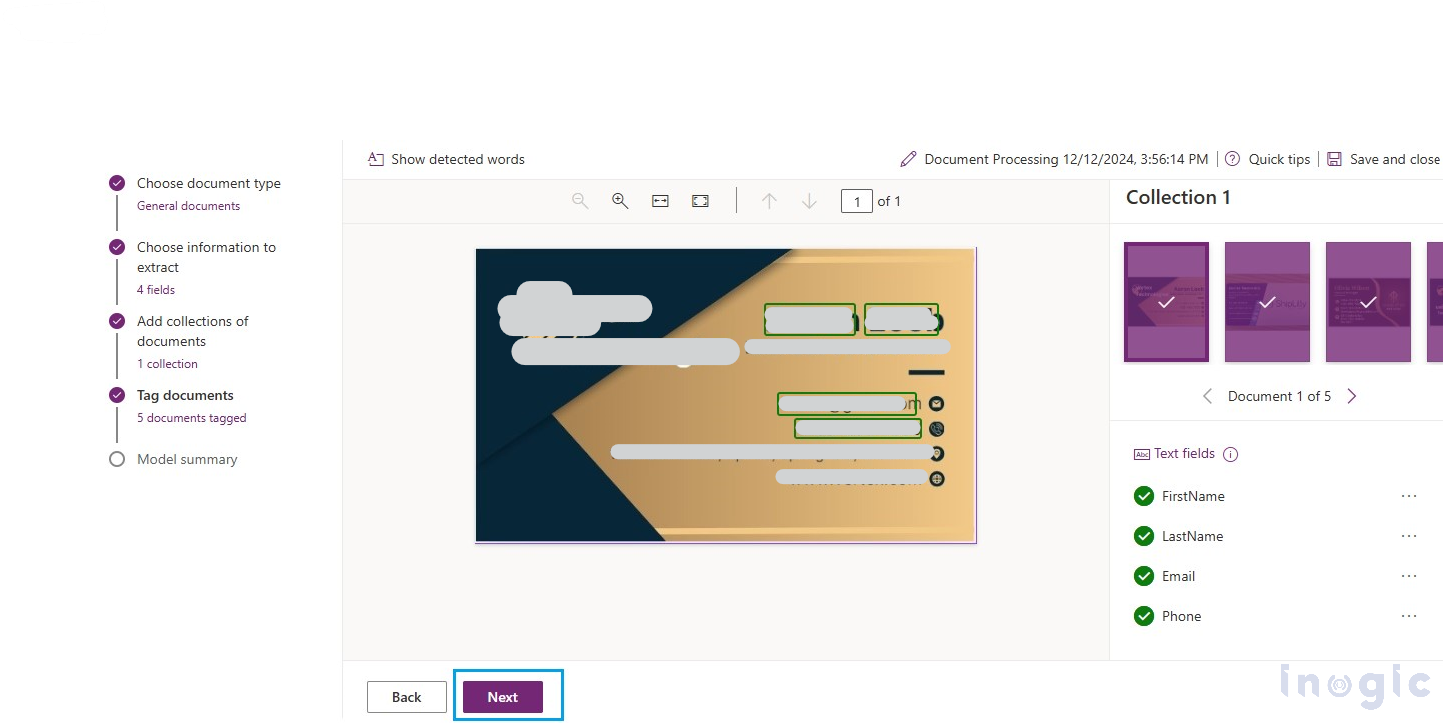
6. Tag the documents by selecting fields such as first name, last name, and others and mapping them to the corresponding variables ->Next
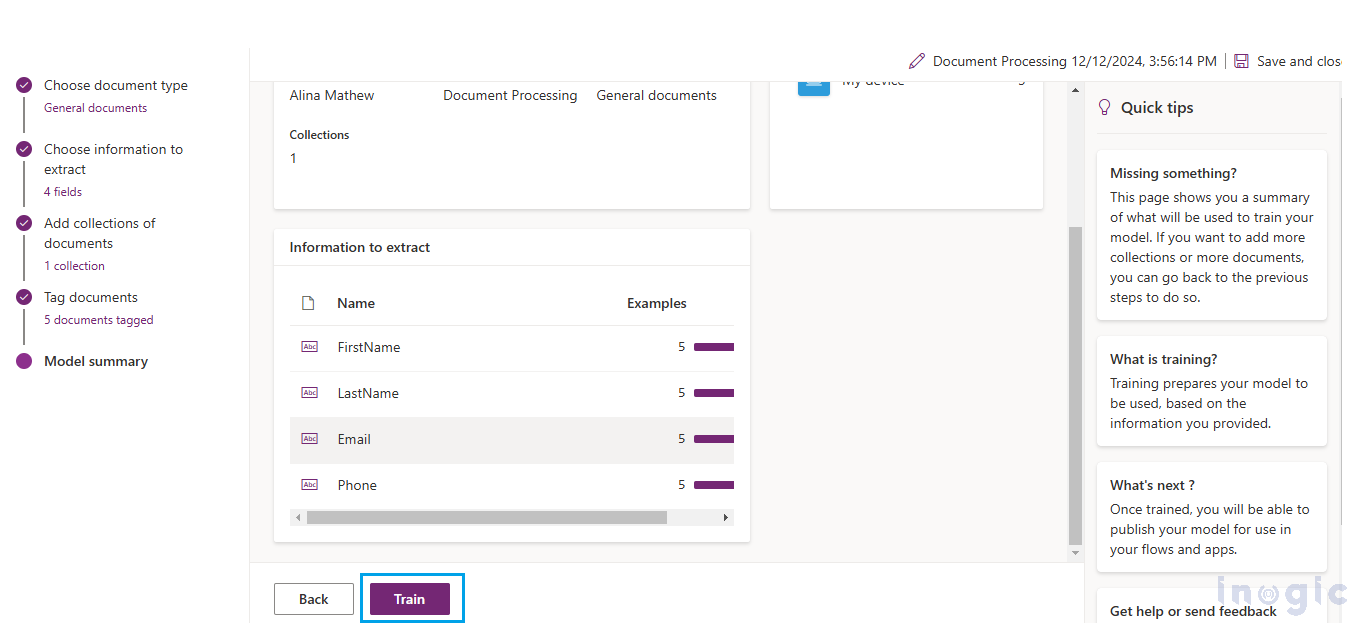
7. Train and publish the AI model.
- Create a Custom Page and Power Automate Flow
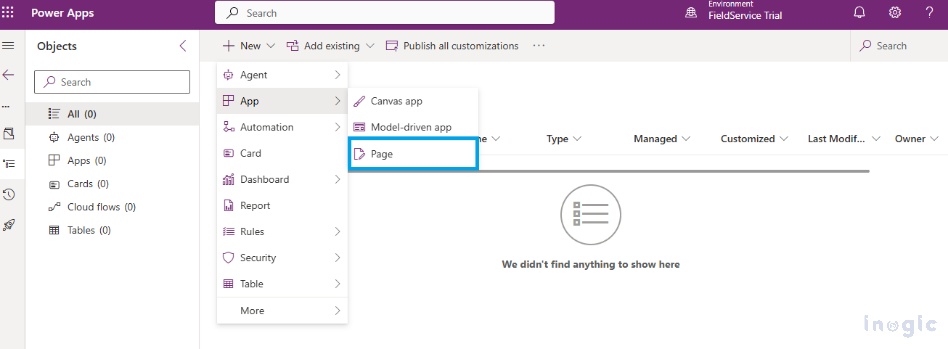
1. Create a solution in your environment -> Add a custom page to the solution.
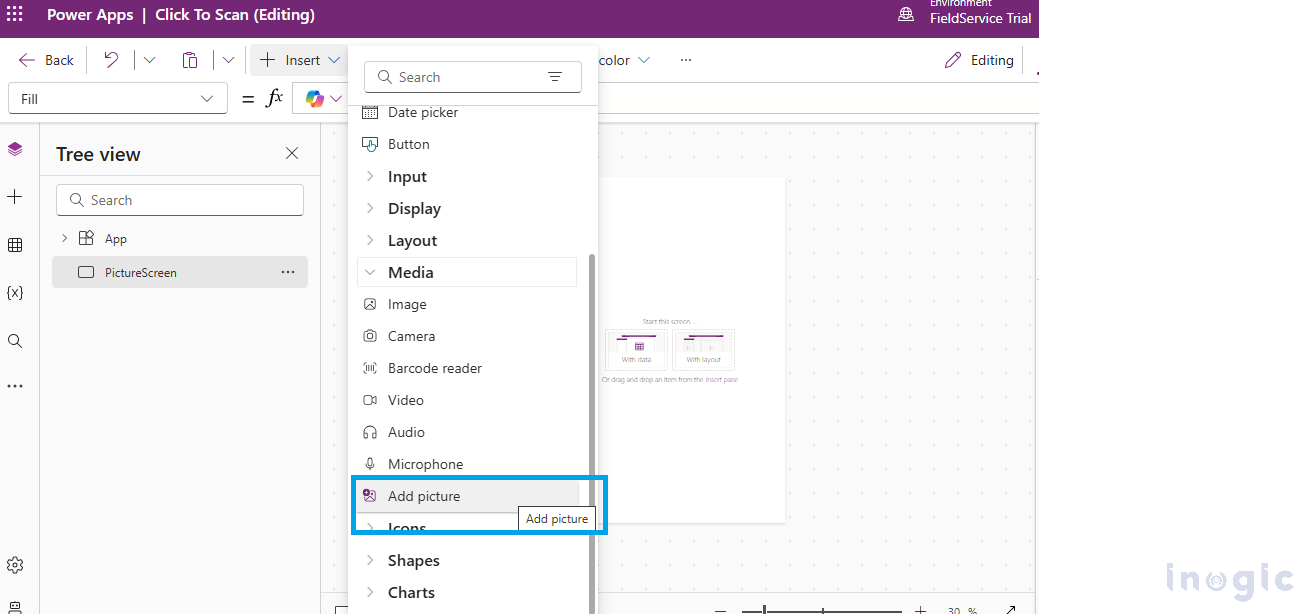
2. Name the page accordingly -> Click on Insert -> “Add Picture“.
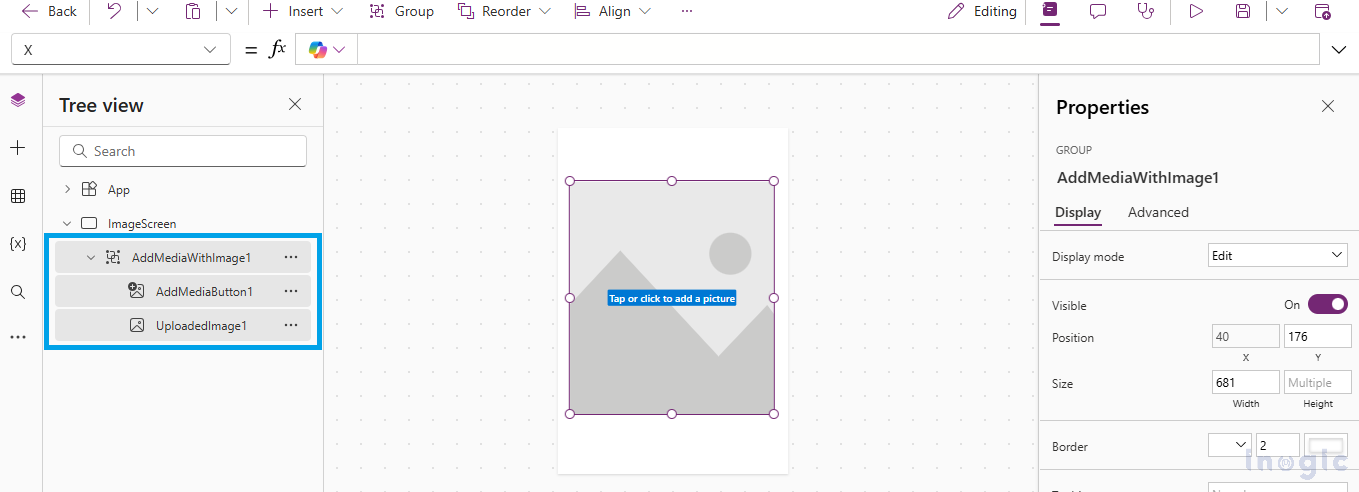
3. The page will appear like this. After adding the ‘Add Picture’ Then you can design the page according to your requirements.
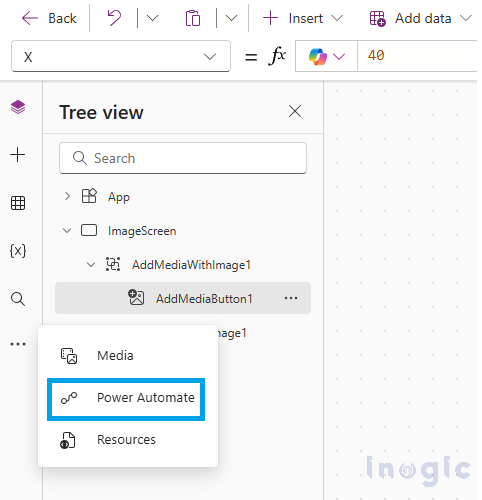
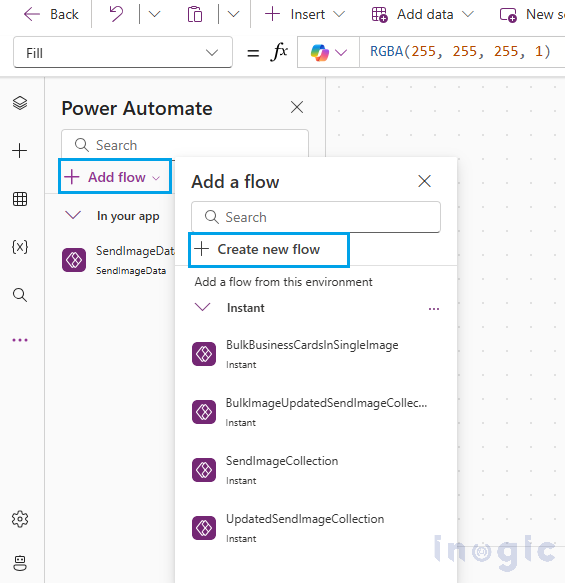
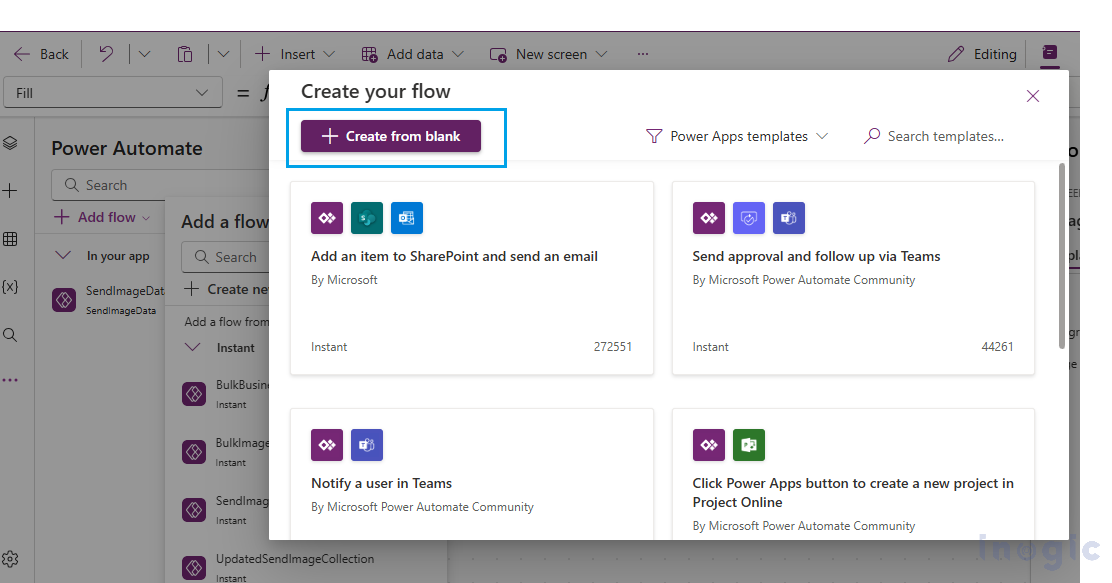
4. Click on ellipsis -> Power Automate -> Add Flow -> Create new flow -> Create from Blank.
5. Give the name for the flow and add a text input to store the JSON-formatted image, which we will pass from the custom page.
6. Create a variable to store the image’s base64 data.
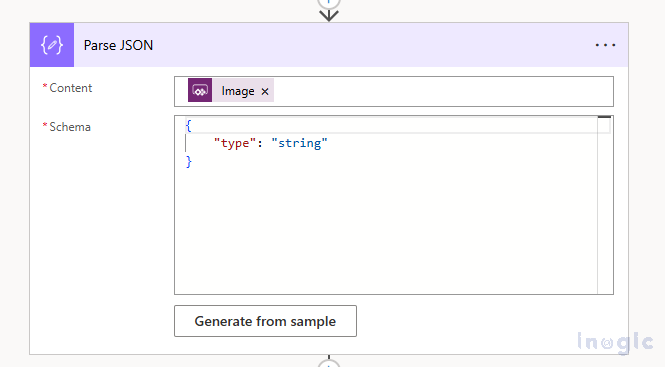
7. Parse the JSON-formatted image using the ‘Parse JSON’
8. Set the variable base64ImageVar to store the base64 image data.
split(string(body(‘Parse_JSON’)), ‘,’)
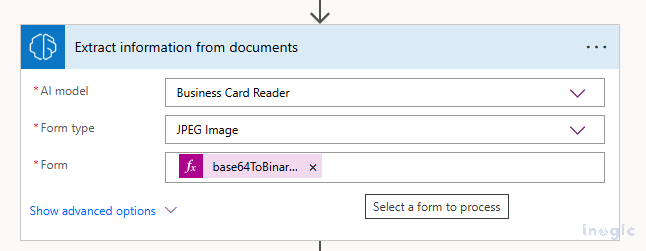
9. Use the AI model to extract data from the image.
base64ToBinary(replace(variables(‘base64ImageVar’)[1], ‘\””}’, ”))
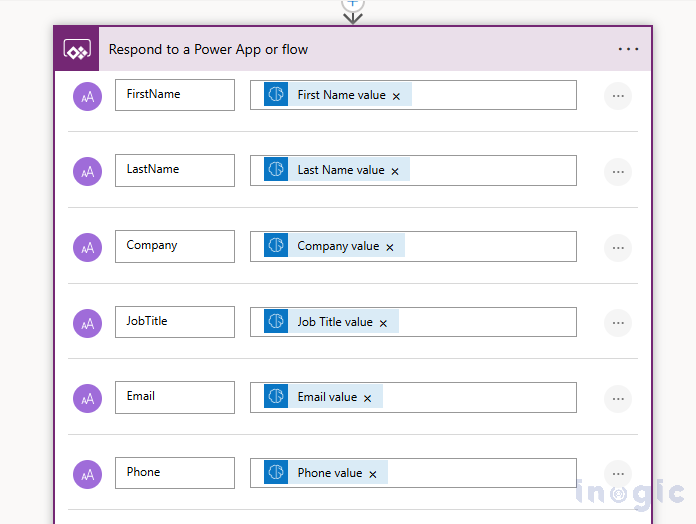
10. Return the extracted data as a response to the Power App.
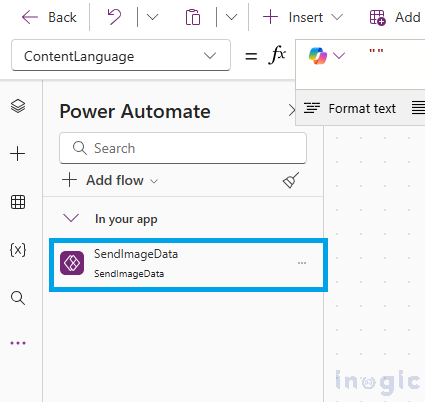
11. Save the flow and go to the custom page. Now you can see your flow in the Power app
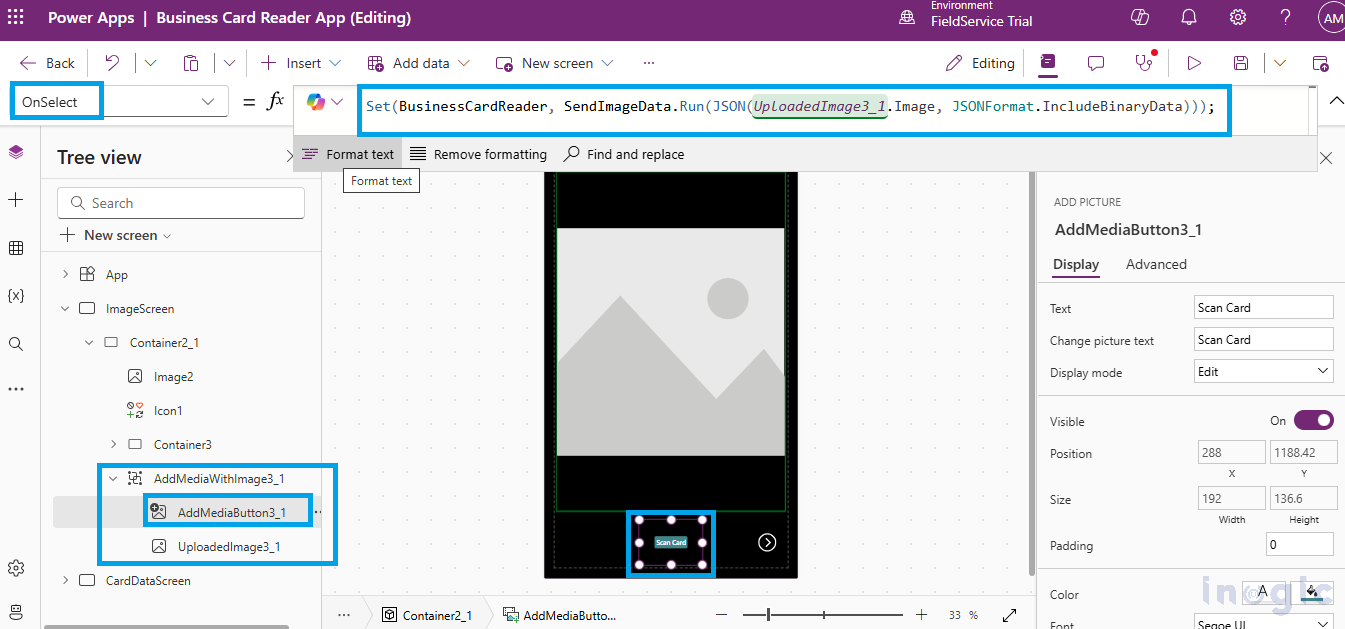
12. Design the page as required. In the ‘OnSelect’ property of the AddMediaButton, call the Power Automate flow with its name (in our scenario the name is ‘SendImageData’), which will take a JSON-formatted image as an argument and store the response in a variable called ‘BusinessCardReader.
Set(BusinessCardReader,SendImageData.Run(JSON(UploadedImage3_1.Image, JSONFormat.IncludeBinaryData)));
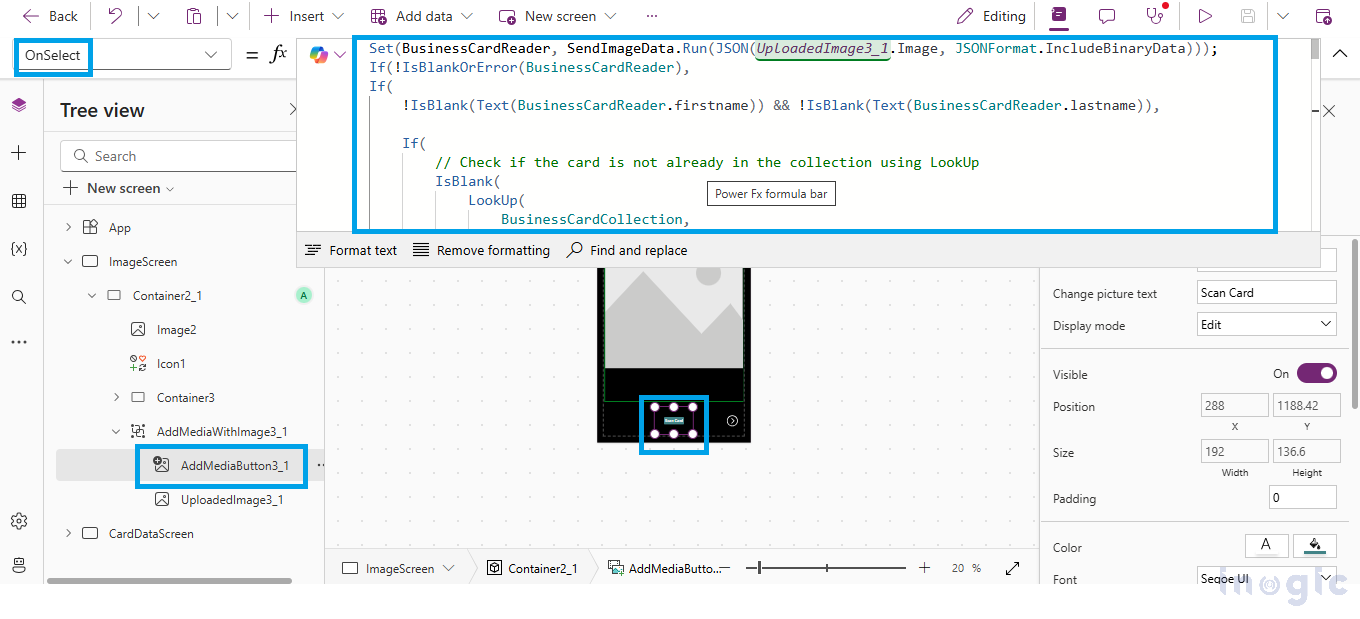
13. Read the response from the Power Automate flow, which is stored in BusinessCardReader. Below is the code snippet that stores data in BusinessCardCollection. You can add the code for other fields and give validation.
Set(BusinessCardReader, SendImageData.Run(JSON(UploadedImage3_1.Image, JSONFormat.IncludeBinaryData)));

If(!IsBlankOrError(BusinessCardReader),

Collect(

BusinessCardCollection,

{

FirstName: Text(BusinessCardReader.firstname),

LastName : Text(BusinessCardReader.lastname),

Email: Text(BusinessCardReader.email),

Company: Text(BusinessCardReader.company)

}

)

)
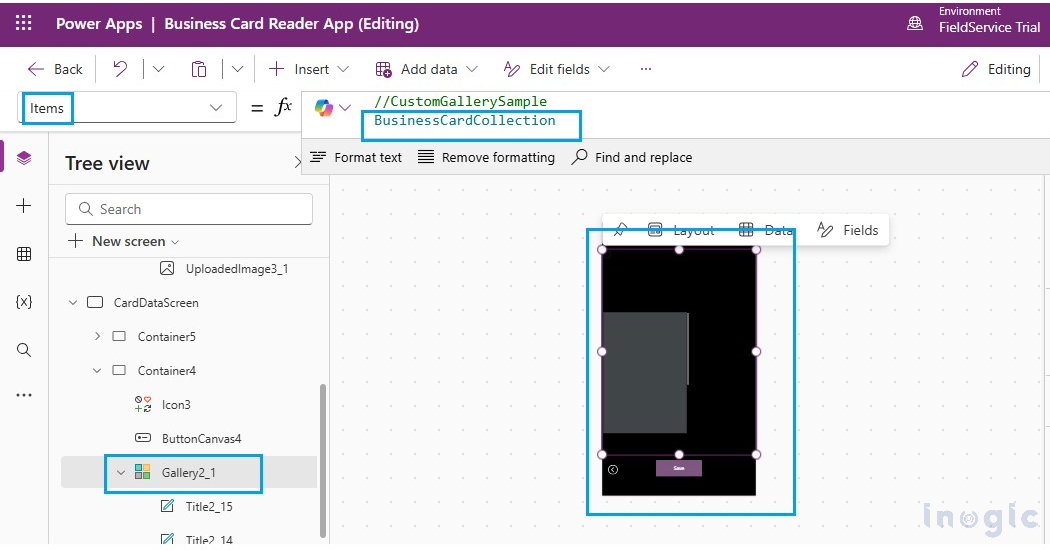
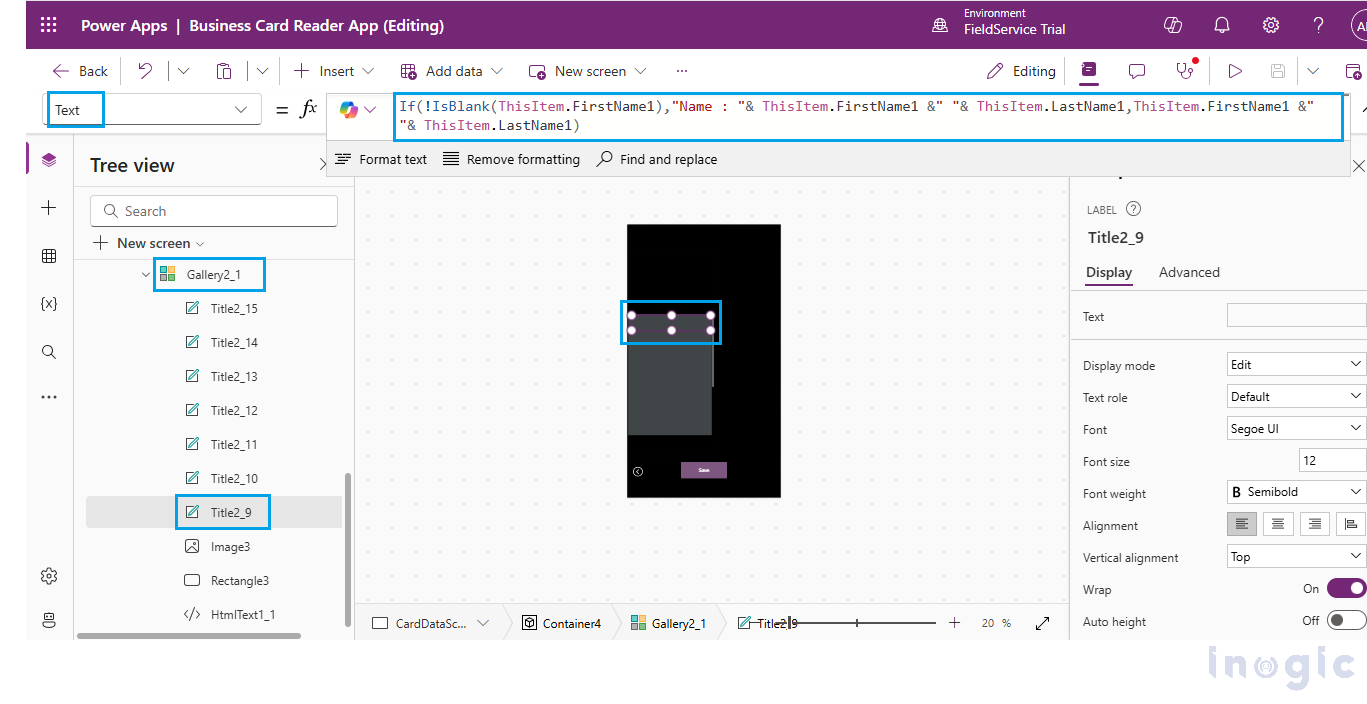
14. Add a Gallery control on the second screen and display the data by setting the Items property of the Gallery to BusinessCardCollection. This will allow the gallery to show the extracted information from the business card images.
If(!IsBlank(ThisItem.FirstName),”Name : “& ThisItem.FirstName &” “& ThisItem.LastName,ThisItem.FirstName &” “& ThisItem.LastName)
15. Apply this to all text fields and display them in the gallery. After running the application, it will appear as shown below.
Conclusion
This solution shows how AI and automation can make manual tasks easier and faster while improving accuracy. By using AI with custom apps, businesses can manage their data better and stay ahead in today’s digital world.
