In today’s workplaces, staying in sync with your team’s availability is key to smooth collaboration. Fortunately, tools like Power Automate offer an easy way to monitor when your colleagues are in or out of the office. In this guide, we’ll walk through the process of setting up an automated system using Power Automate’s Outlook connector to effortlessly keep tabs on users’ availability statuses.
Before starting, some customization needs to be done prior to creating the Power Automate flow. Under the user entity, create an “Availability” Boolean field. Rename “Yes” to “Available” and “No” to “Unavailable,” then add it to the user entity form.
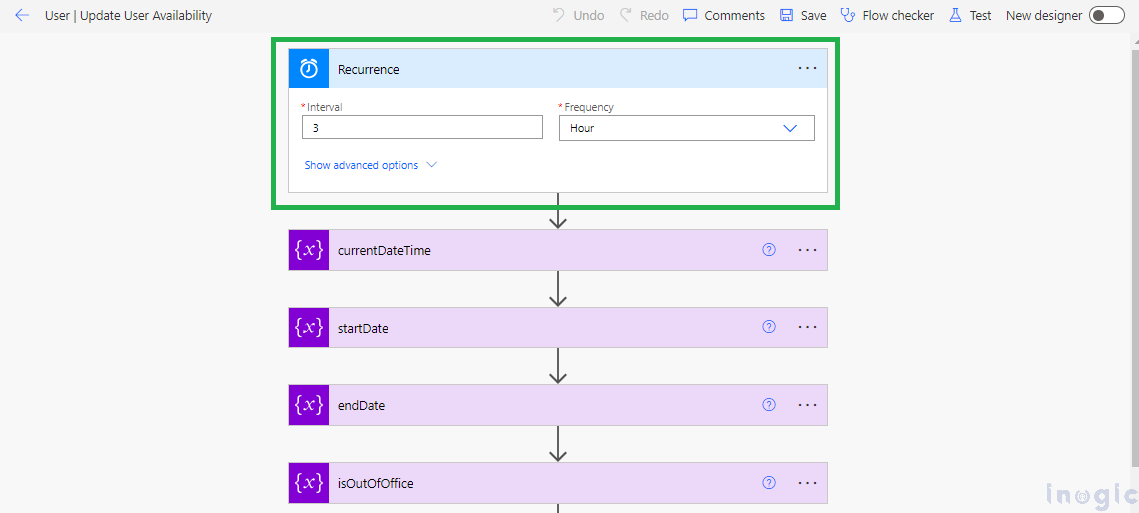
Step 1: This step involves setting up a scheduled trigger in Power Automate to execute the flow daily. To do this, create a recurrence flow (as shown below) and set the interval and frequency according to your requirements. Within the flow, initialize new variables to store the current date and time (currentDatetime), as well as the start and end dates (startDate and endDate) for checking the out-of-office status. Additionally, initialize a Boolean variable, isOutOfOffice, to track whether the user is currently out of the office.
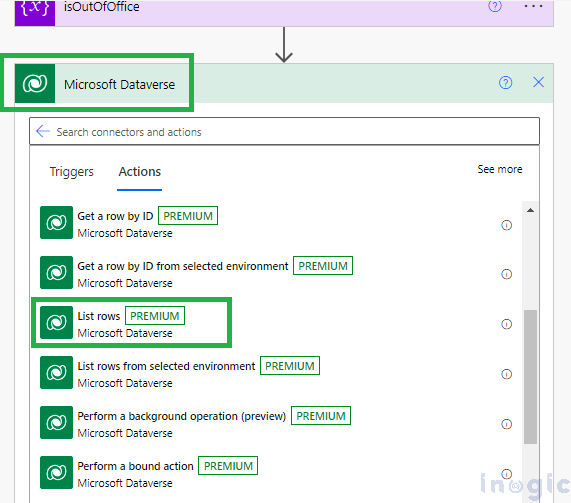
Step 2: To access the List row action, add a new step and use the Microsoft Dynamics connector (as indicated below). Here, we need to provide the fetchXML to retrieve the list of active users. Under the “Fetch XML Query” field, enter the XML mentioned below.
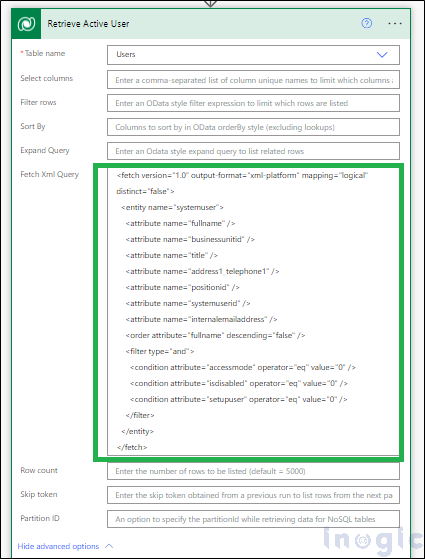
FetchXmL:
<fetch version="1.0" output-format="xml-platform" mapping="logical" distinct="false">
<entity name="systemuser">
<attribute name="fullname" />
<attribute name="businessunitid" />
<attribute name="title" />
<attribute name="address1_telephone1" />
<attribute name="positionid" />
<attribute name="systemuserid" />
<attribute name="internalemailaddress" />
<order attribute="fullname" descending="false" />
<filter type="and">
<condition attribute="accessmode" operator="eq" value="0" />
<condition attribute="isdisabled" operator="eq" value="0" />
<condition attribute="setupuser" operator="eq" value="0" />
</filter>
</entity>
</fetch>
Step 3: Iterate through the list of users obtained in the previous step, and for each user, utilize the “Get mail tips for a mailbox (V2)” action from the Outlook connector in Power Automate. Pass the user’s primary email address as input to the email address Item. The output will provide details such as Out of Office status, Mailbox Full status, and Automatic Replies status.

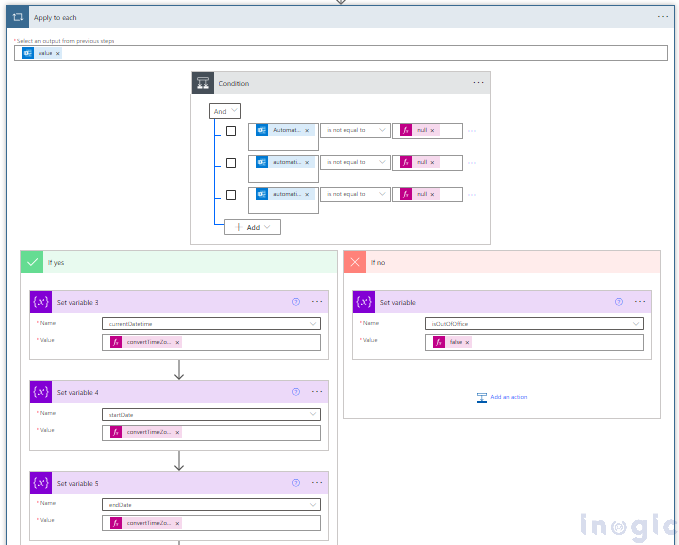
Step 4: After retrieving the mail tips for each user, verify whether the fields containing information about Automatic Replies Message, Scheduled Start Time, and Scheduled End Time are not null. To implement this verification, add a new condition and apply the following rules as such to fulfil the condition shown in the snippet.
Snippet: Automatic Replies Message! = null && Scheduled Start Time! = null && Scheduled End Time! = null
Upon examination of the snippet, it is evident that if any of these fields are null, it signifies that the user has not configured an out-of-office message. In such instances, set the ‘isOutOfOffice’ variable to false for that user.
Step 5: If the fields for Automatic Replies Message, Scheduled Start Time, and Scheduled End Time are not null, it signifies that the user has configured an out-of-office message. So, in the true section, convert the UTC timestamps provided in the mail tips to the customer’s time zone to ensure an accurate comparison with the current datetime. Store these converted timestamps in respective variables as shown below.
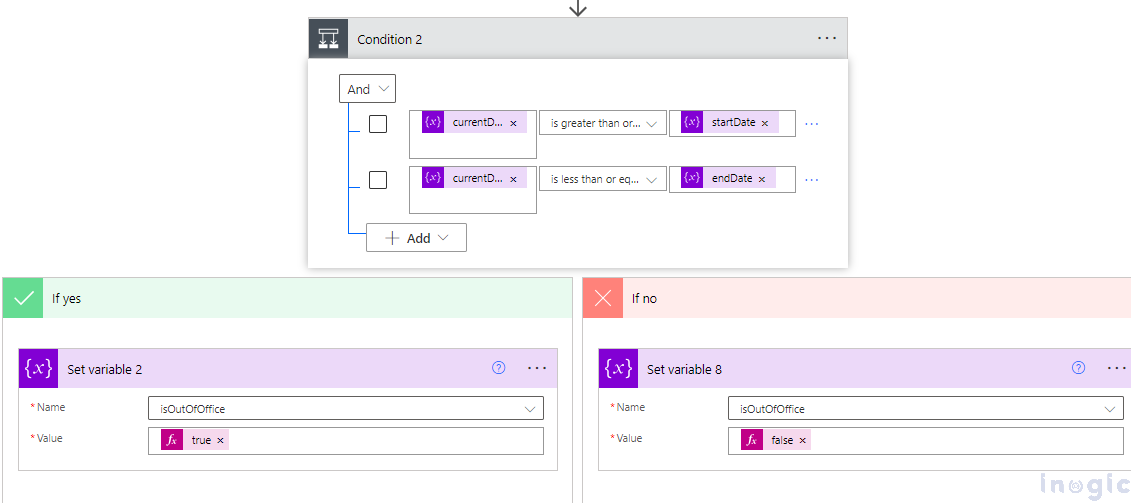
Step 6: Compare the current datetime with the converted Scheduled Start Time and Scheduled End Time. If the current datetime falls within the range of the user’s out-of-office period, set the isOutOfOffice variable to true, indicating that the user is currently out of the office. Otherwise, set it to false. To determine if the user’s schedule is currently active, compare the Scheduled Start Time with the currentDatetime by checking if the Scheduled Start Time is less than or equal to the currentDatetime, and if the Scheduled End Time is greater than or equal to the currentDatetime using the query:
Query: Scheduled Start Time <= currentDatetime && Scheduled End Time >= currentDatetime
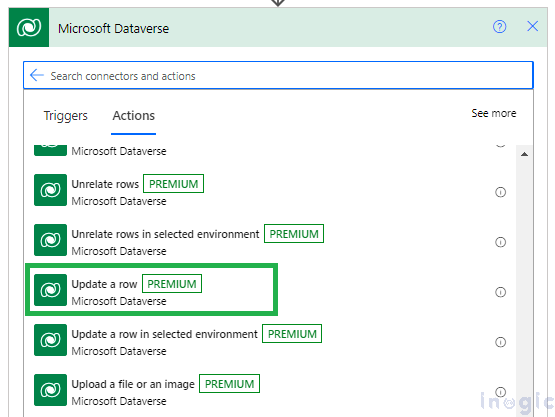
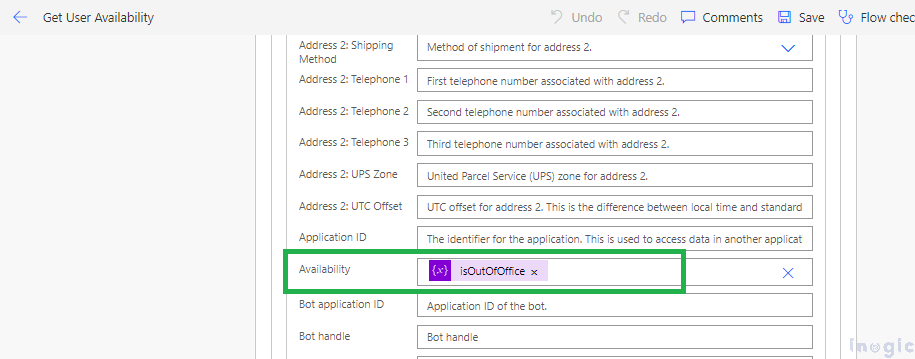
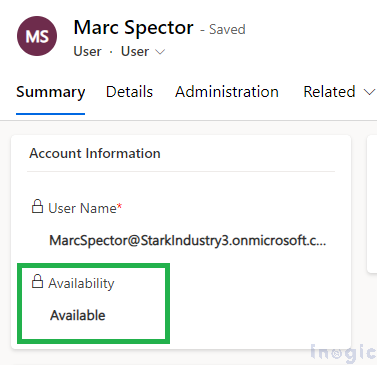
Step 7: Below the condition section, add the “Update a row” action under the Microsoft Dataverse connector. Select the user entity and set the “isOutOfOffice” value in the “Availability” field.
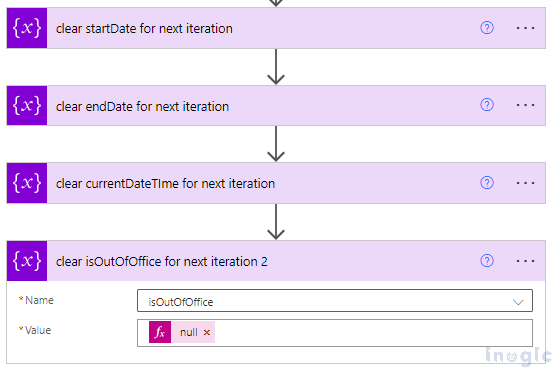
Step 8: Clear the variable values after updating the user entity. Once the flow is triggered and the user entity is updated, we will be able to see the user’s availability as shown below.
Conclusion:
By following these steps, you can easily capture the user availability defined in Outlook and maintain it in Dynamics 365 CRM.