Nowadays, Power Pages sites are gaining popularity for their responsive design interface, security features, and built-in templates. Power Pages allow users to create professional websites using Dynamics 365 data and services. However, not all data may reside in Dynamics 365, and replicating structures solely for Power Pages can be time-consuming and impractical. This limitation restricts Power Pages to using only Dynamics 365 data.
In a recent Microsoft update, it’s now possible to integrate external data sources such as SQL Server or Microsoft Fabric into Power Pages websites. This blog will discuss using SQL data for Power Pages sites.
Consider an IT Helpdesk scenario where ticket management occurs in SQL, and IT agents update ticket statuses directly from SQL. They aim for a centralized system where users can log tickets, which are then synchronized with SQL for IT agents to process.
In this use case, the centralized system referred to is the Power Pages Site. Each user has their login to log tickets, which are automatically synced with SQL without requiring additional integration setup.
To achieve this, we first need to create virtual tables for entities like Accounts, Contacts, Tickets, and Users within Power Pages.
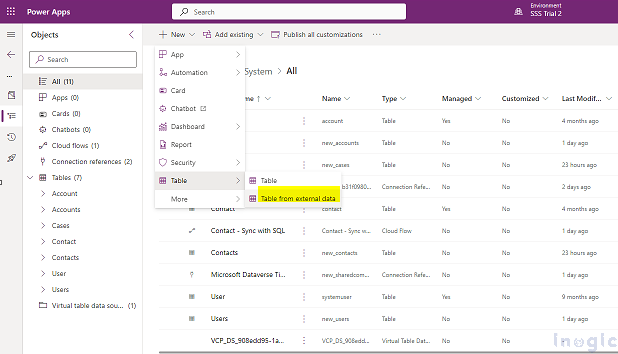
Within your solution, click on “New” and then choose “Table from external data”.
Then it will new page and will ask you for a connection, so we will click on new to add a new connection.
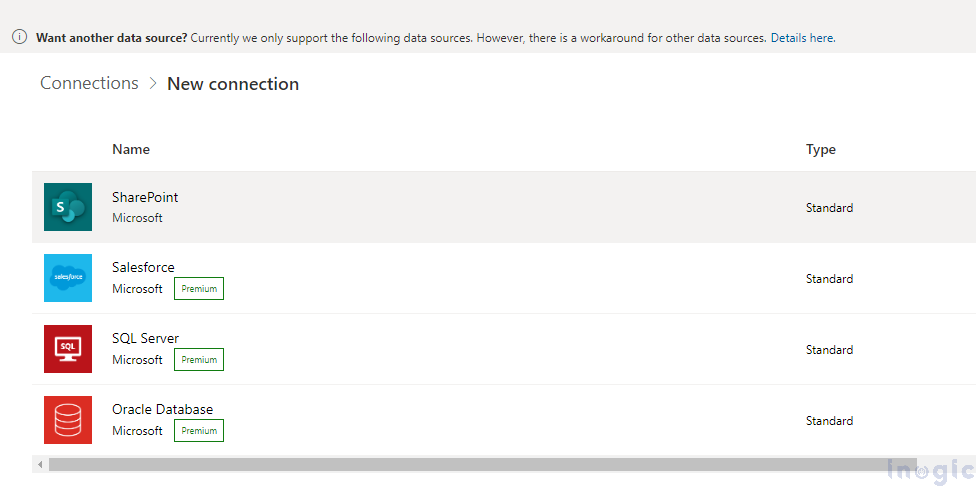
Here you can select the data source which you want to connect. In our case, we will select SQL server as we have data stored in SQL Server.
Then add in the connection details like Server name, Database name Username, Password, etc. Also, select the gateway which will have access to this server and database in SQL.
Note: If your SQL server is hosted in a local machine or any on-premise machine then you need to setup an On-Premise Gateway on the machine to establish a connection with Dynamics 365. You can refer to the below link for setting up and installing the on-premise gateway on the local machine.
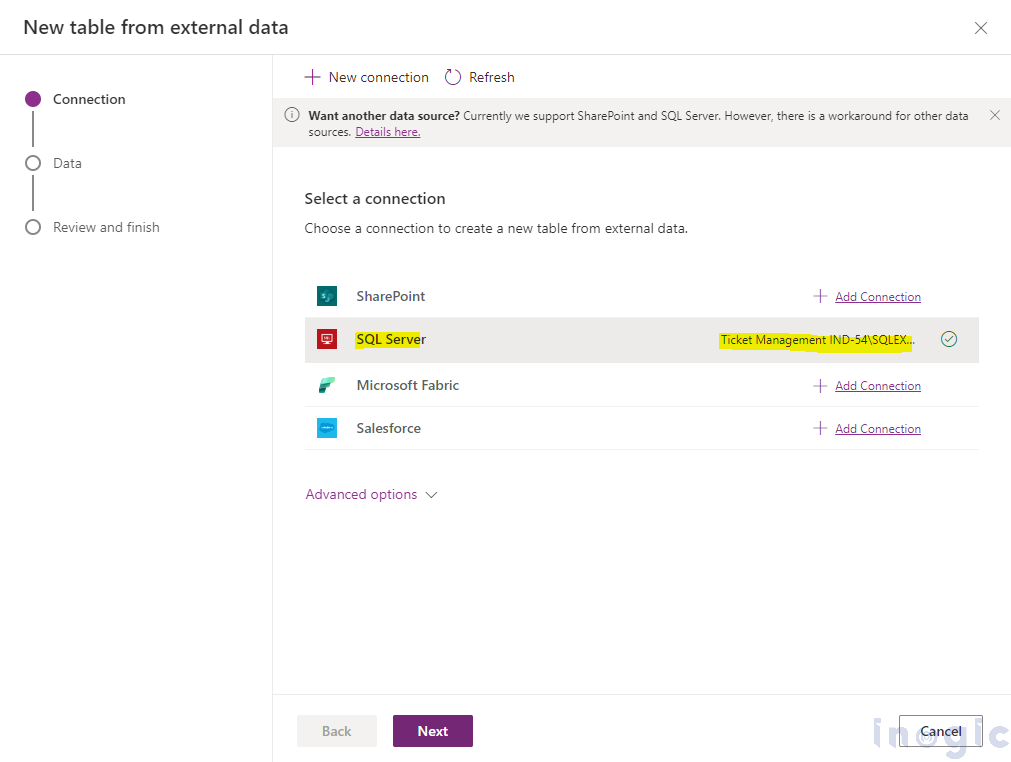
Now once the connection is added, you can select the connection and click on next to fetch the tables available in the external data source.
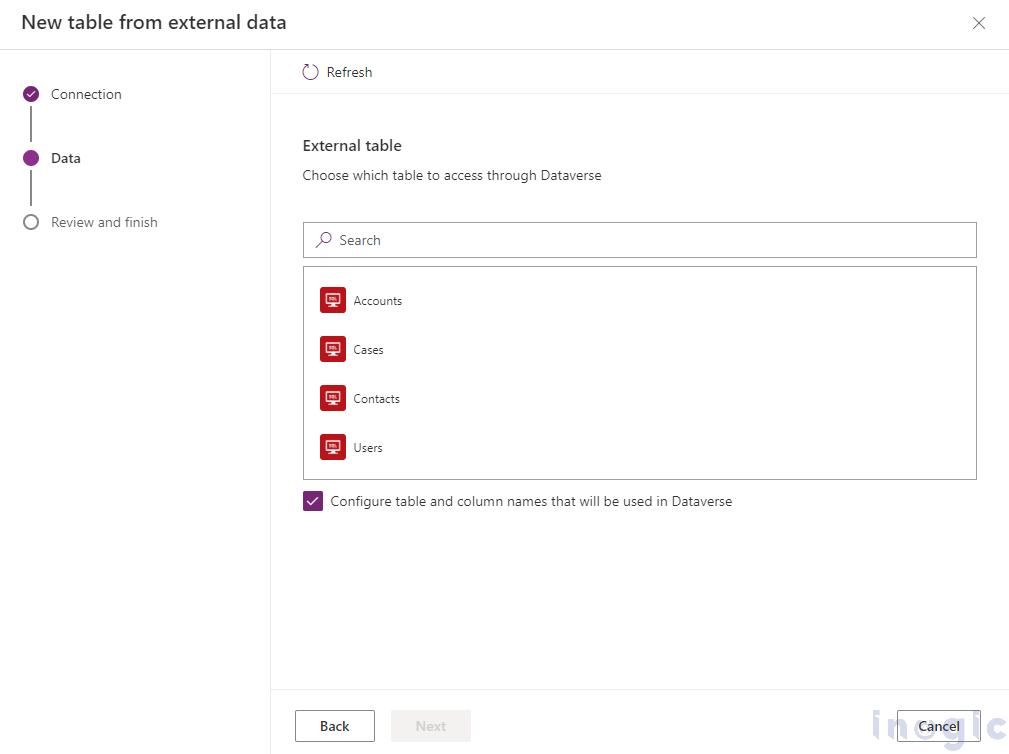
The tables available in the database will automatically be loaded.
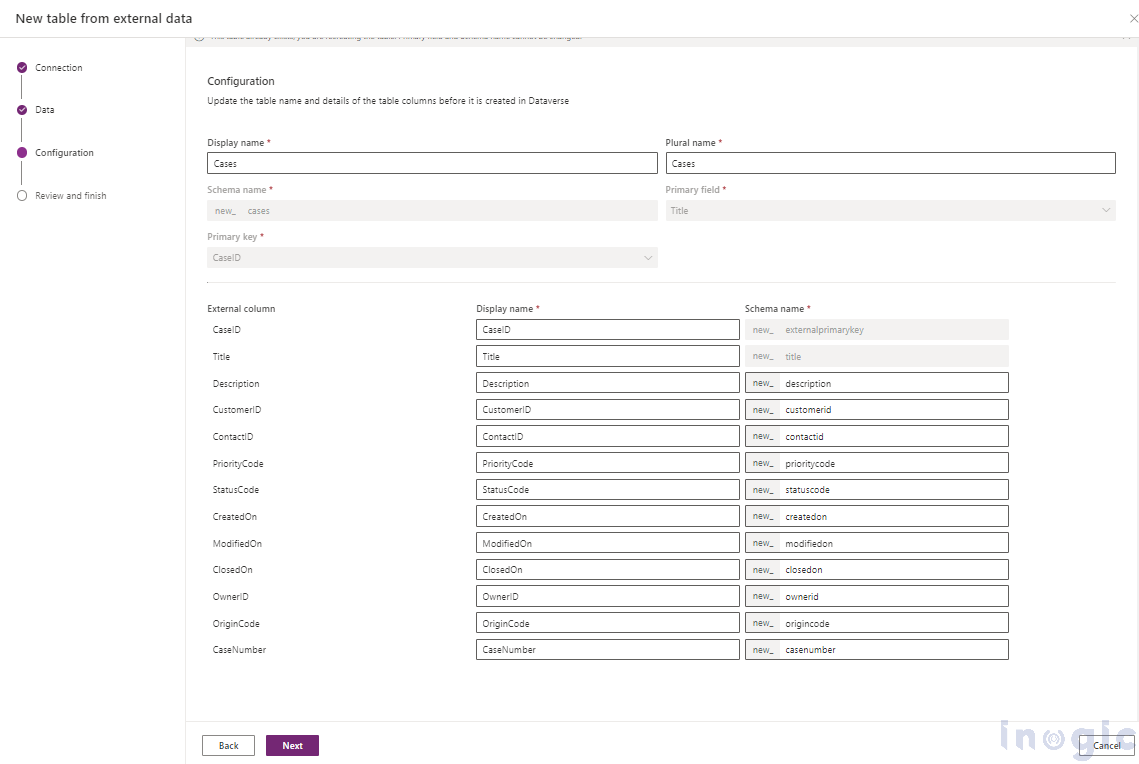
Now we need the Cases table, so we will select the cases from the available tables. Now once you select the table it will take you through the configuration page and automatically populates the mapping for the virtual table with the SQL server table.
When you click on next, your table will be added as the virtual table in Dynamics 365. Similarly, we will add the Accounts, Contacts, and Users table.
The virtual table created in CRM will be an exact replica of the columns in the SQL server table. You cannot add new columns in the table.
But you can design the form and views for the virtual table as per your need in CRM.
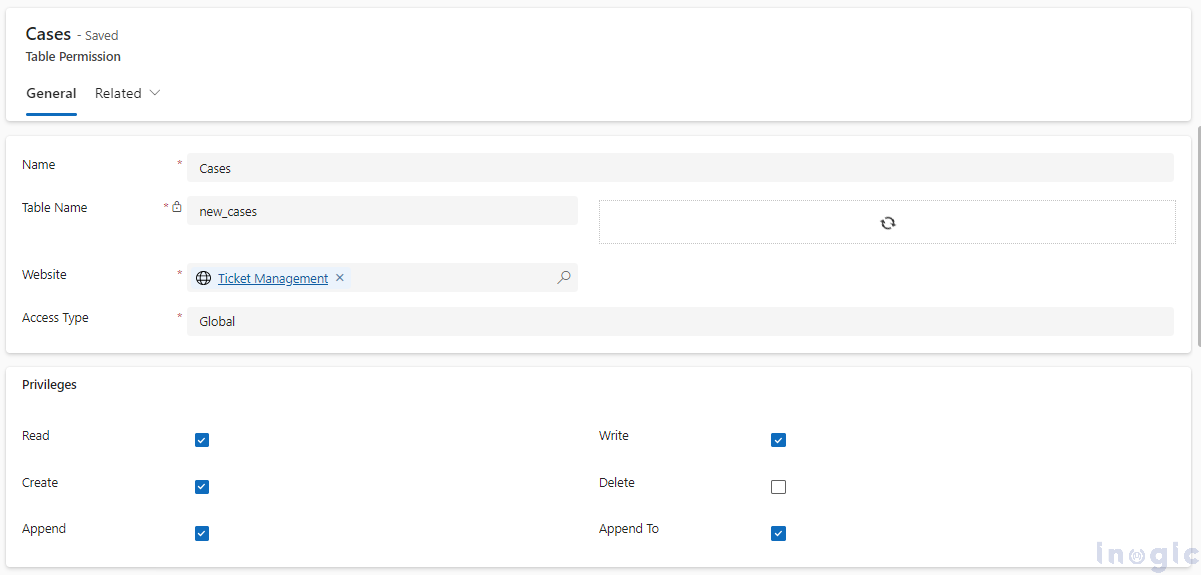
Now we will go to the Power Page site and enable the virtual entity for the Power Pages site.
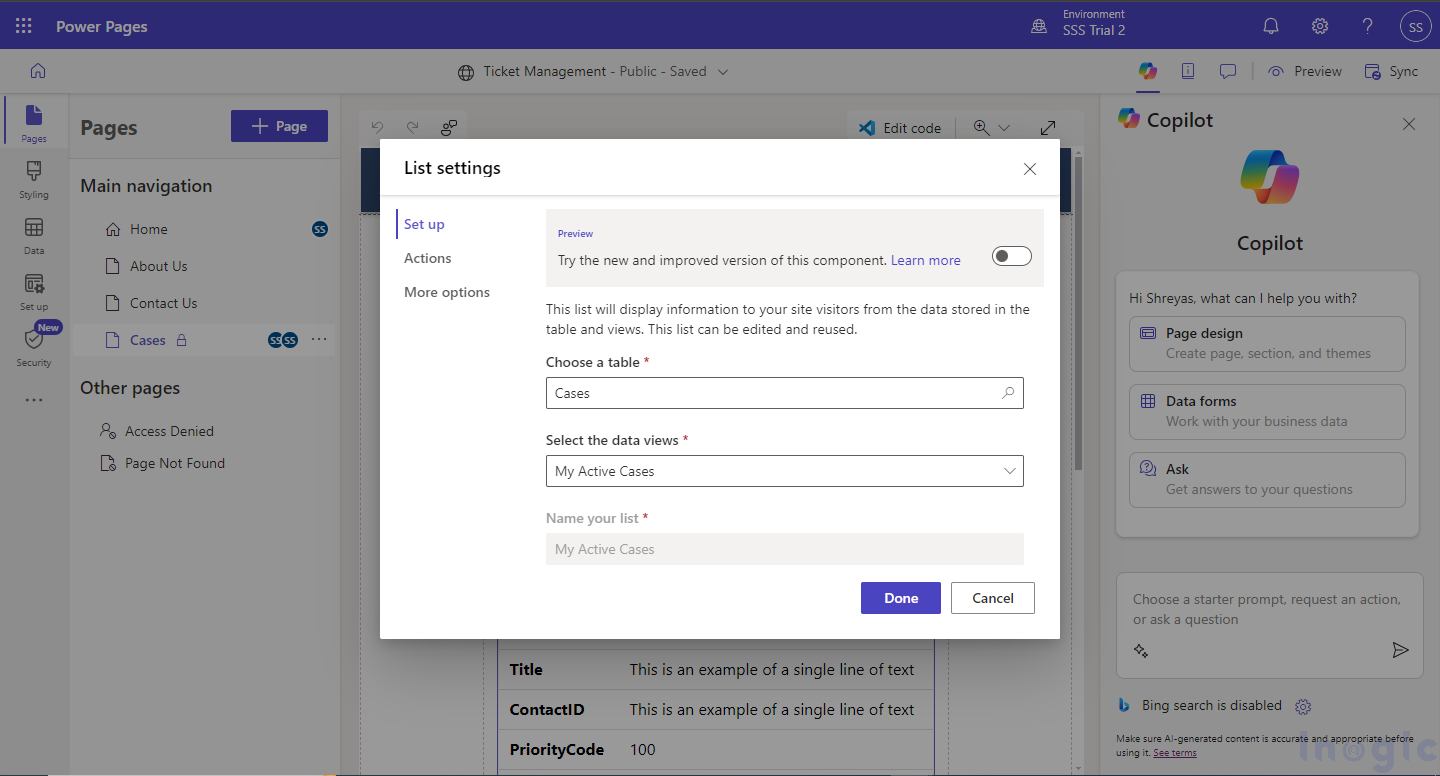
Now will add a new page and create a new entity list targeting to Cases table in CRM.
Similarly, you can create basic forms of mode create and edit to allow case creation and modification from the power pages site.
Once the configuration is done, sync the changes to reflect it on the power pages site.
Now we will login using the user credentials and log the ticket and see how it is getting synced with SQL.
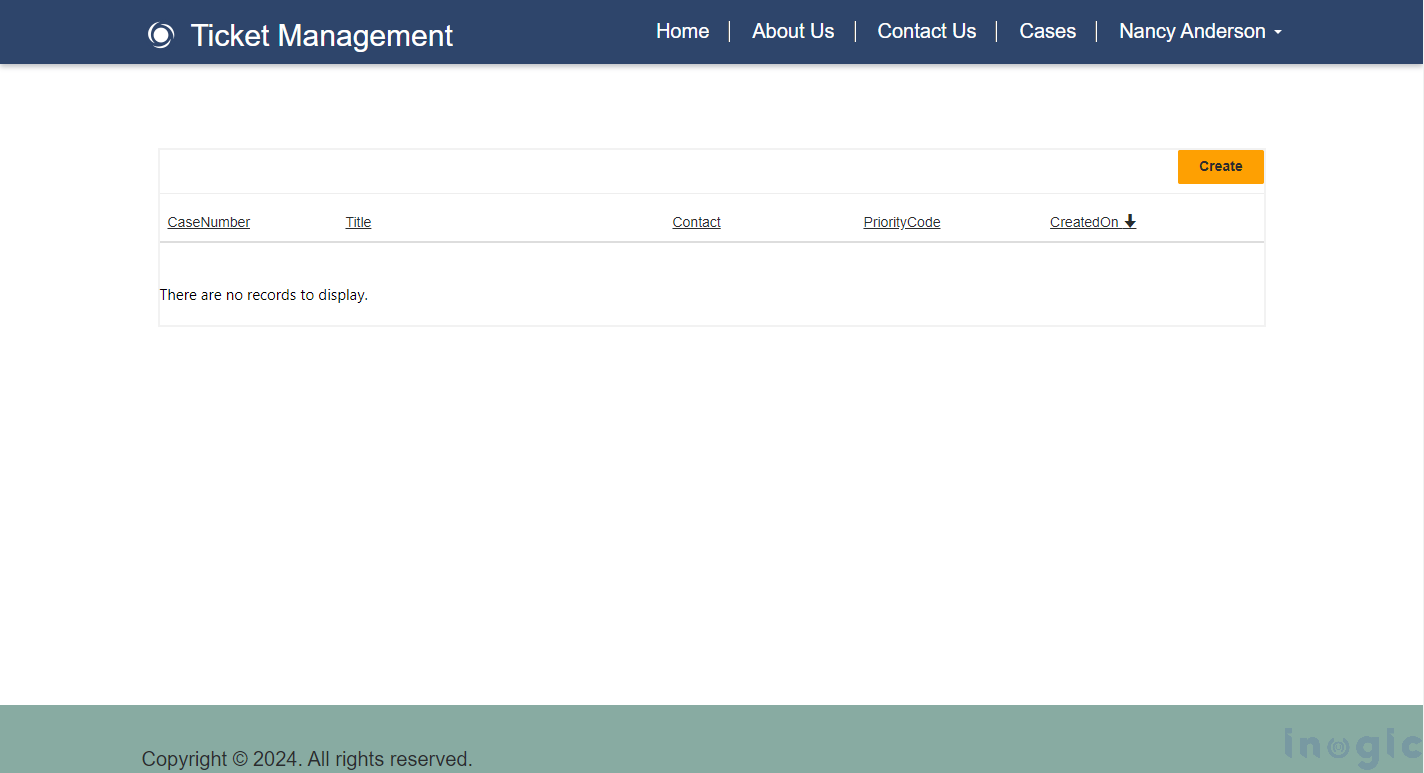
We have logged in with one of the users and currently, we don’t have any cases so it’s showing blank on the portal.
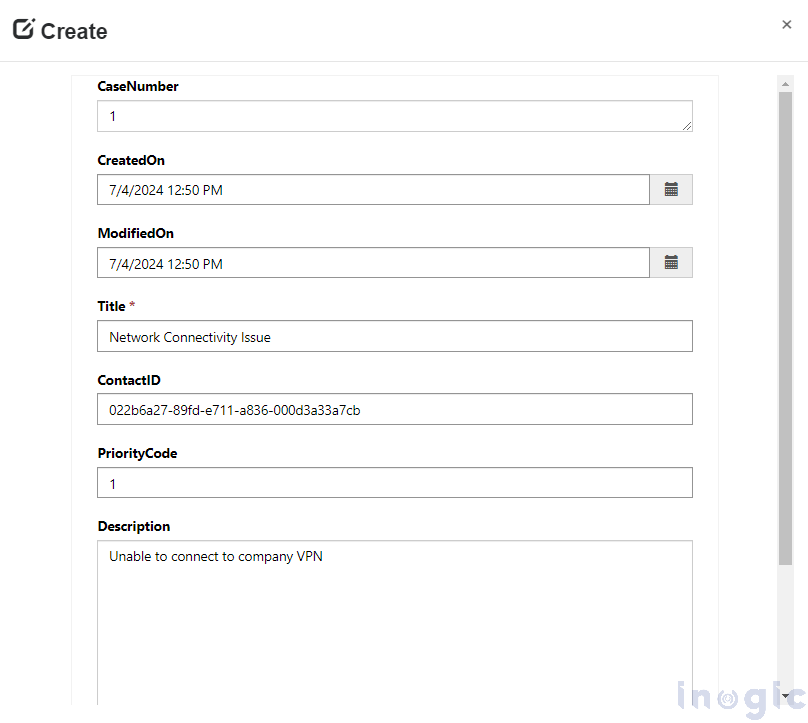
So now we will create a case from the portal.
Once the case is created, it gets auto-synced with the SQL server.
The contact ID gets auto-set from the currently logged-in user and the case ID gets generated when the case is created and that is sent to the SQL server.
Similarly, it works for update and delete as well.
The case got deleted from the SQL server as well.
Conclusion:
Integrating external data sources in Dynamics 365 Power Pages enables dynamic website creation with centralized data management and seamless synchronization.
