
Welcome to our guide on designing your marketing calendar in Dynamics 365 CRM! In today’s dynamic business landscape, having a well-organized calendar is essential for managing and optimizing your marketing efforts.
This feature not only allows you to tailor your calendar to fit your unique preferences but also helps you effortlessly schedule meetings, avoid conflicts, track task progress, monitor user schedules, and visualize time-box activities using a calendar view. Admins and customizers can add to and optimize the calendar for any form or entity in the system because it is given as a control.
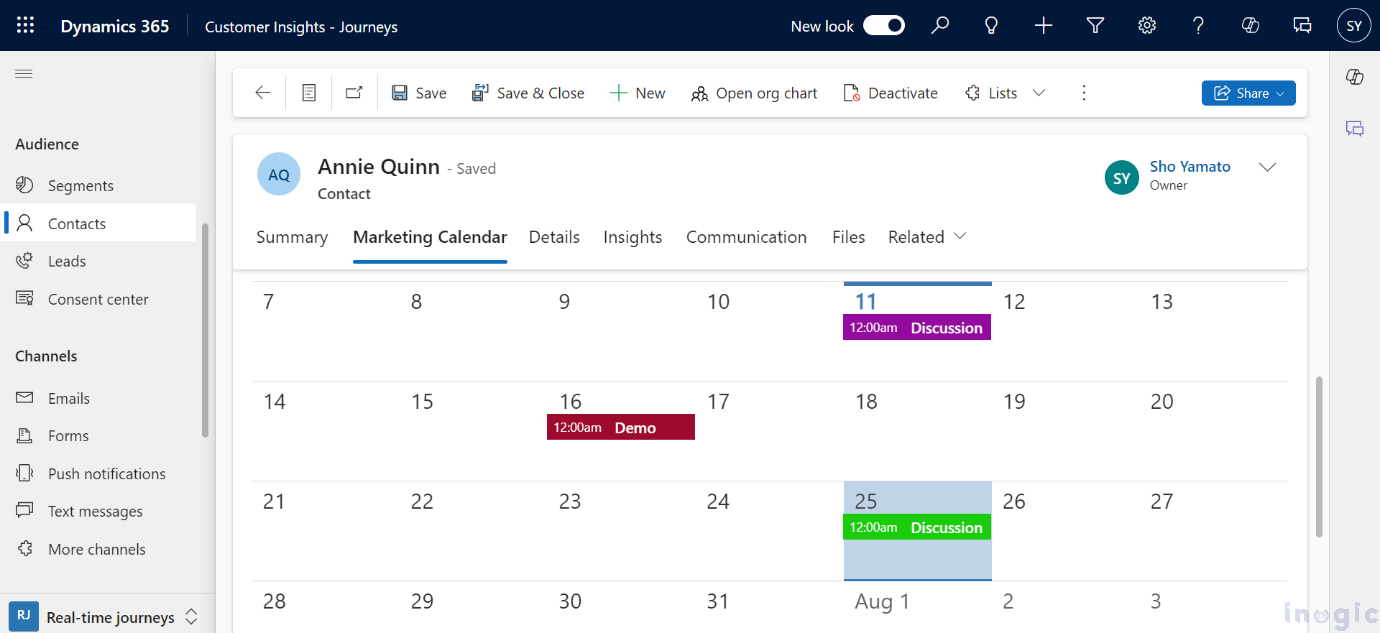
With the marketing calendar, you can observe and create time-based things like journeys, events, sessions, and appointments in a view that resembles a calendar. In terms of both design and functionality, it is similar to Microsoft Outlook.
Dive in to learn how to set up and make the most of your marketing calendar, and watch your strategic planning reach new heights!
Marketing Calendar Types and where you can utilize them:
There are two basic types of Marketing calendars:
- Entity Level Calendar: When you initially access an entity from the main navigation, entity-level calendars like events, customer journeys, or the main marketing calendar appear. When they are present, you can toggle between the calendar view and list view. They appear where a list view would ordinarily be. You can open any listed record from this page. Relevant records are plotted on the calendar based on their scheduled dates. A system view selector is available to filter the shown records in this calendar type, which can display multiple types of entities.
- Form Level Calendar: Form–level calendars show up when you look at a particular record, such as an event. The form view incorporates them. These might show up as a section on a tab alongside other settings sections that are also accessible, or they could have their own tab on the form. This kind of calendar lacks a system-view selection and can only create and display records of a single kind of entity. They are frequently set up to display data relevant to the particular record in which they occur.
Here are the steps to add a Marketing calendar to an entity:
- Log in to a Marketing environment.
- Go to Advance setting -> Customization -> Customize the system
- Select the entity to which you want to add a calendar.
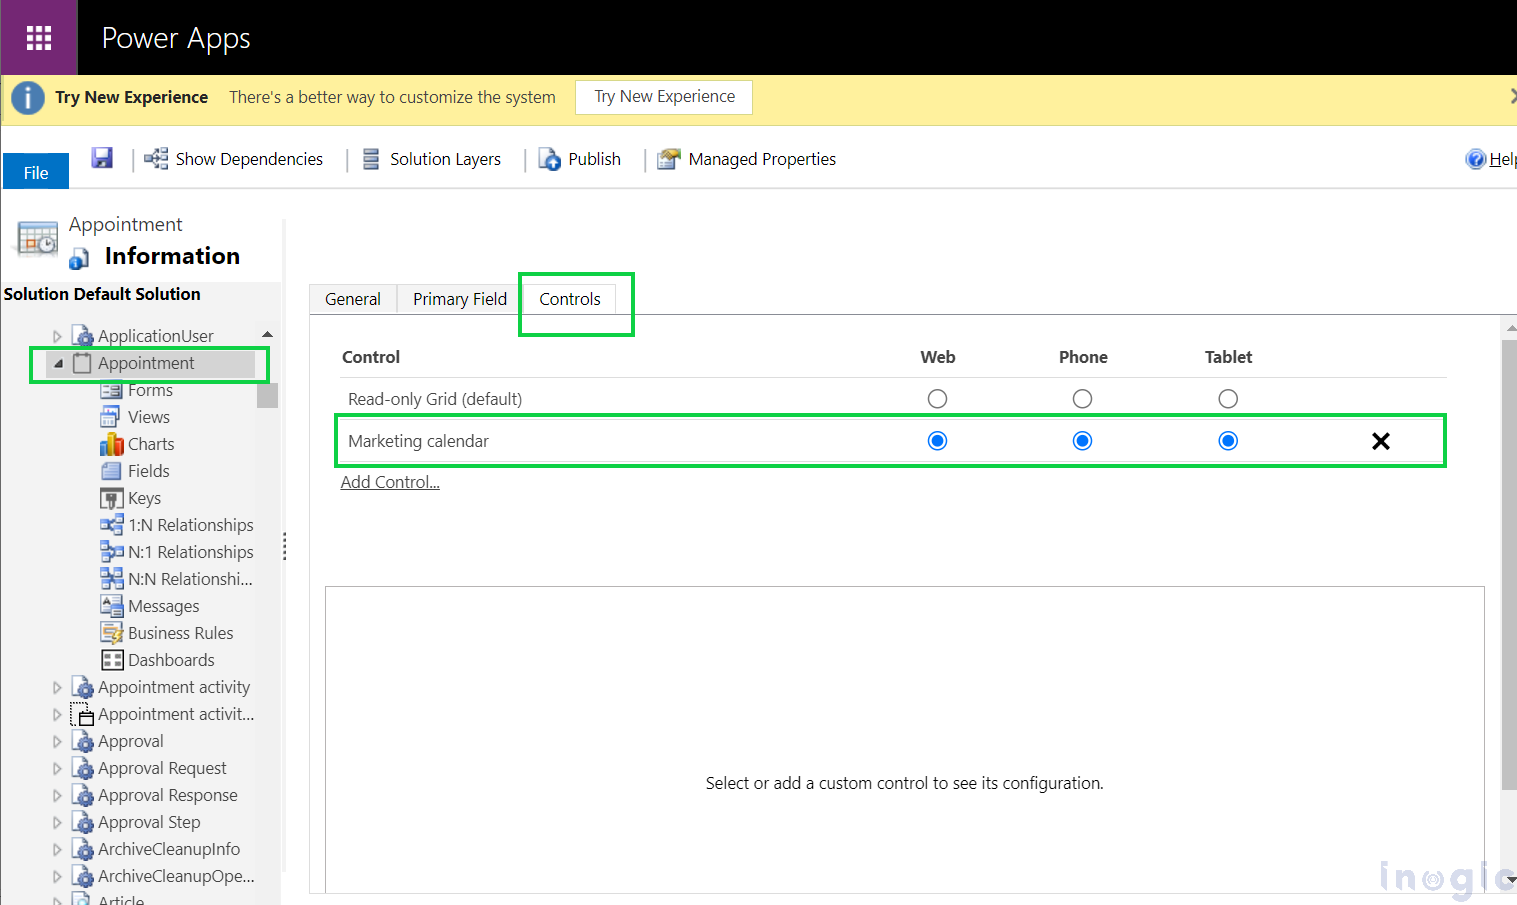
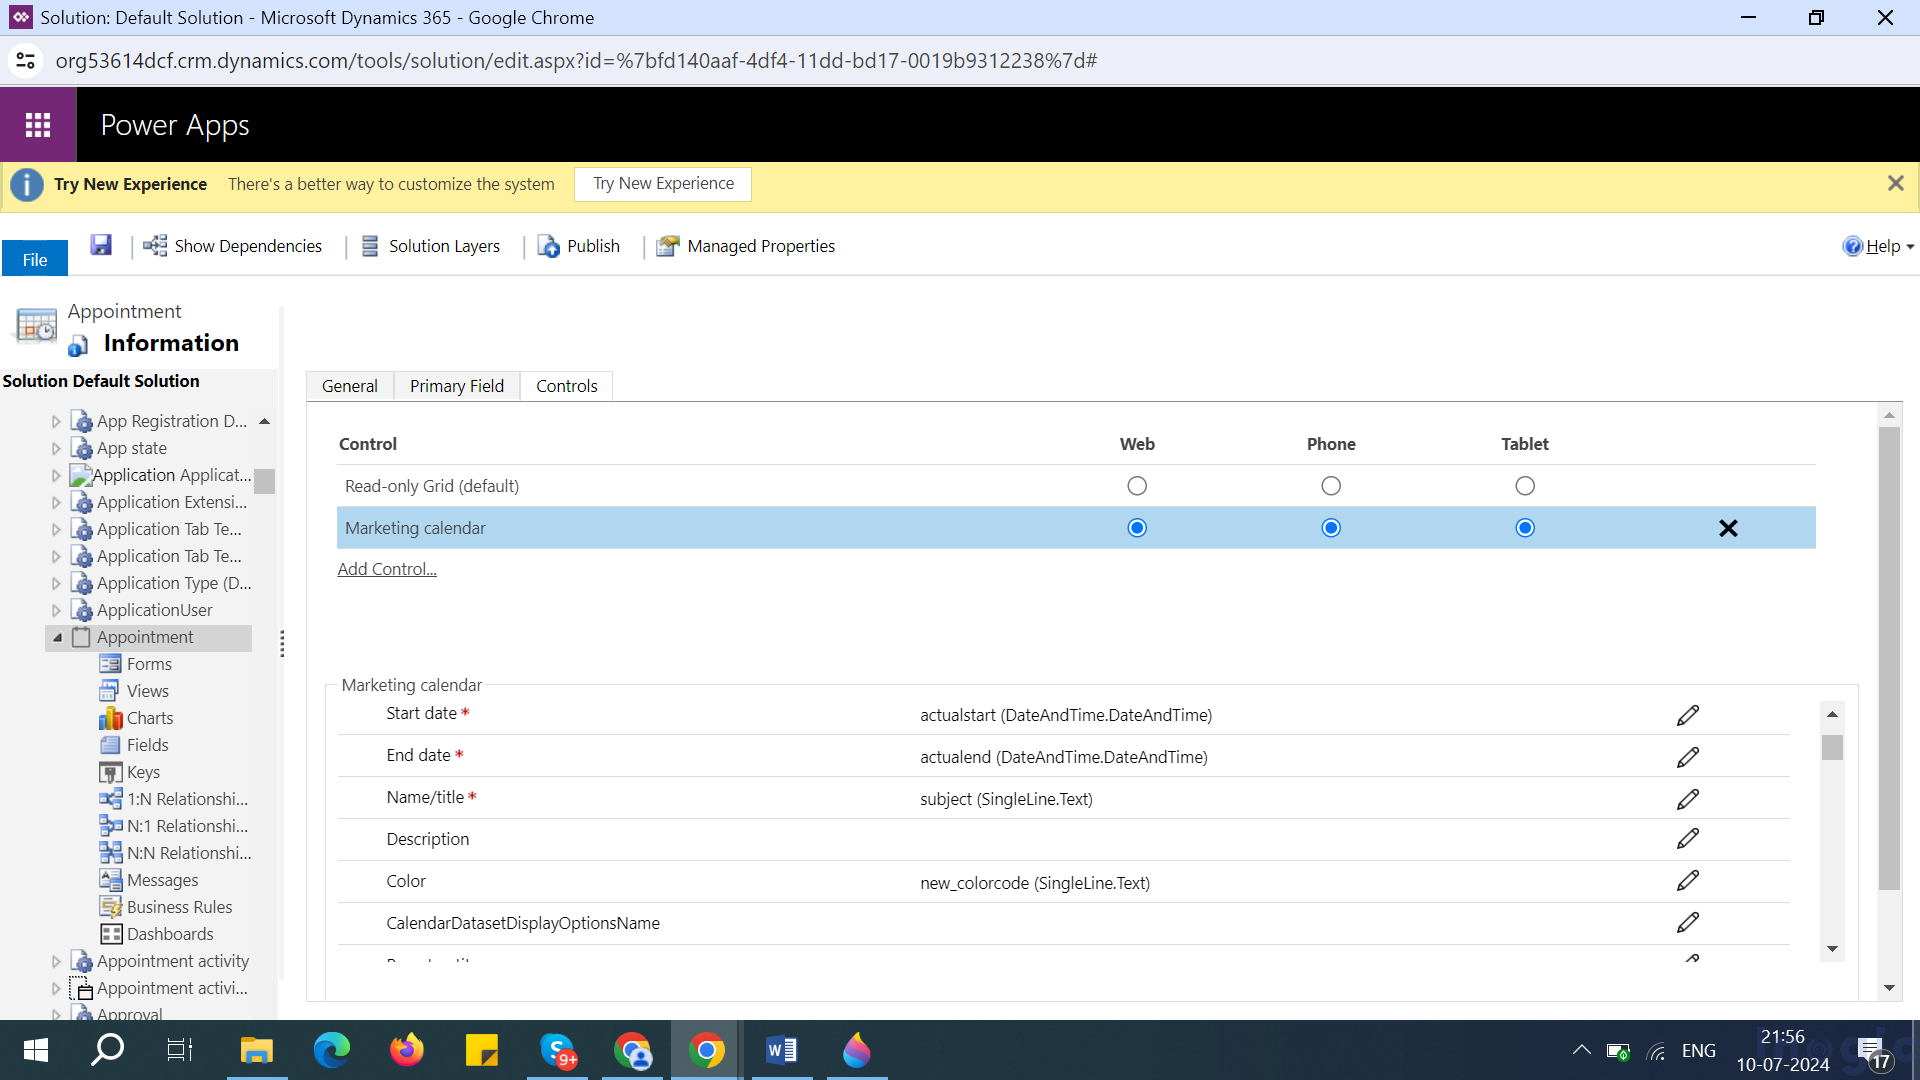
- Go to the Control tab and choose Add Control.
- Now select Marketing Calendar.
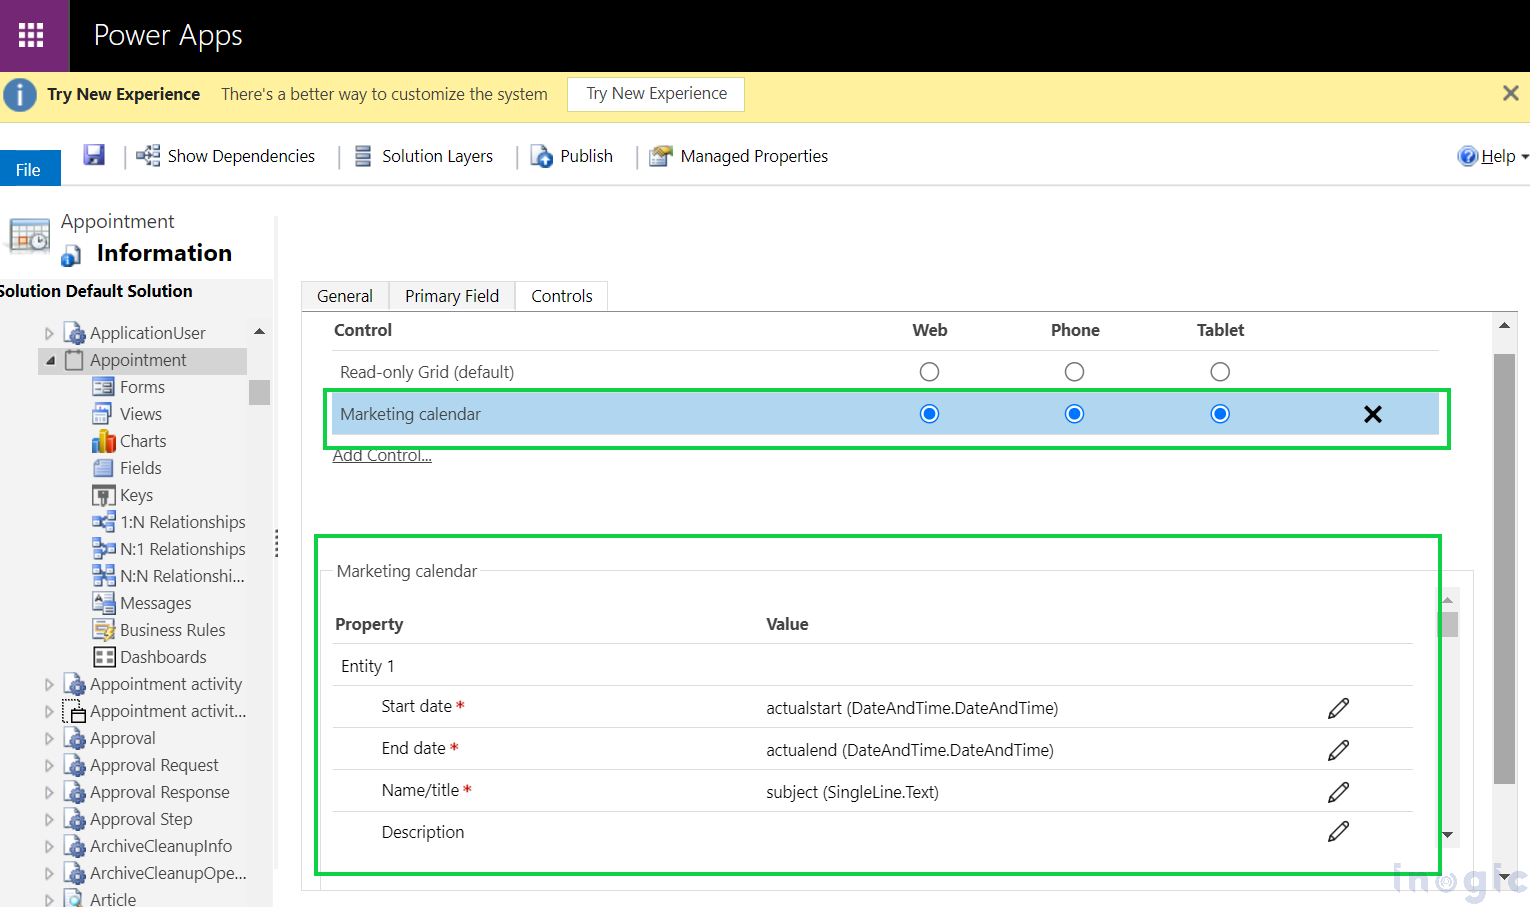
- Click on Marketing Calendar, configure the mapping, quickly create form ID, and another configuration setting. Same for other entities that you would like to include in the calendar.
- Save and Publish your customizations.
Note: You can add entity-level calendars to entities that have start and end dates.
Following are the steps to add a Marketing calendar to a form:
A marketing calendar can be added to any form. You can add it as a new section to an already-existing form tab or make a tab just for the purpose of displaying the calendar on its own. Calendars added at the form level are limited to displaying a single kind of entity (events, appointments, or sessions).
- Log in to a Marketing environment.
- Go to Advance setting -> Customization -> Customize the system
- Select the entity to which you want to add a calendar and expand it.
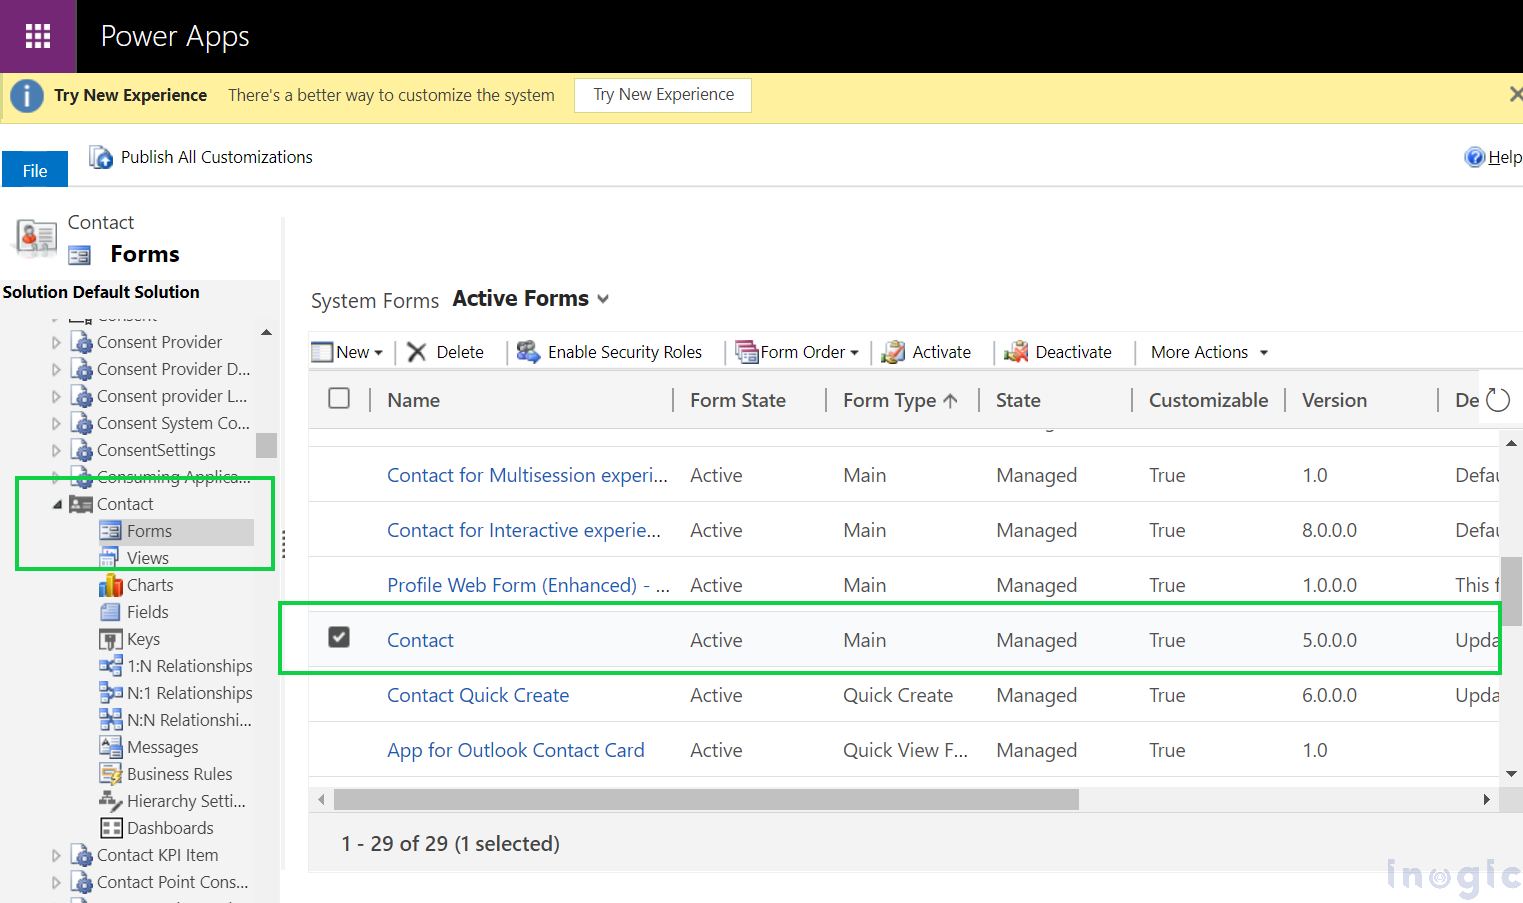
- Select the form on which you want to add a calendar.
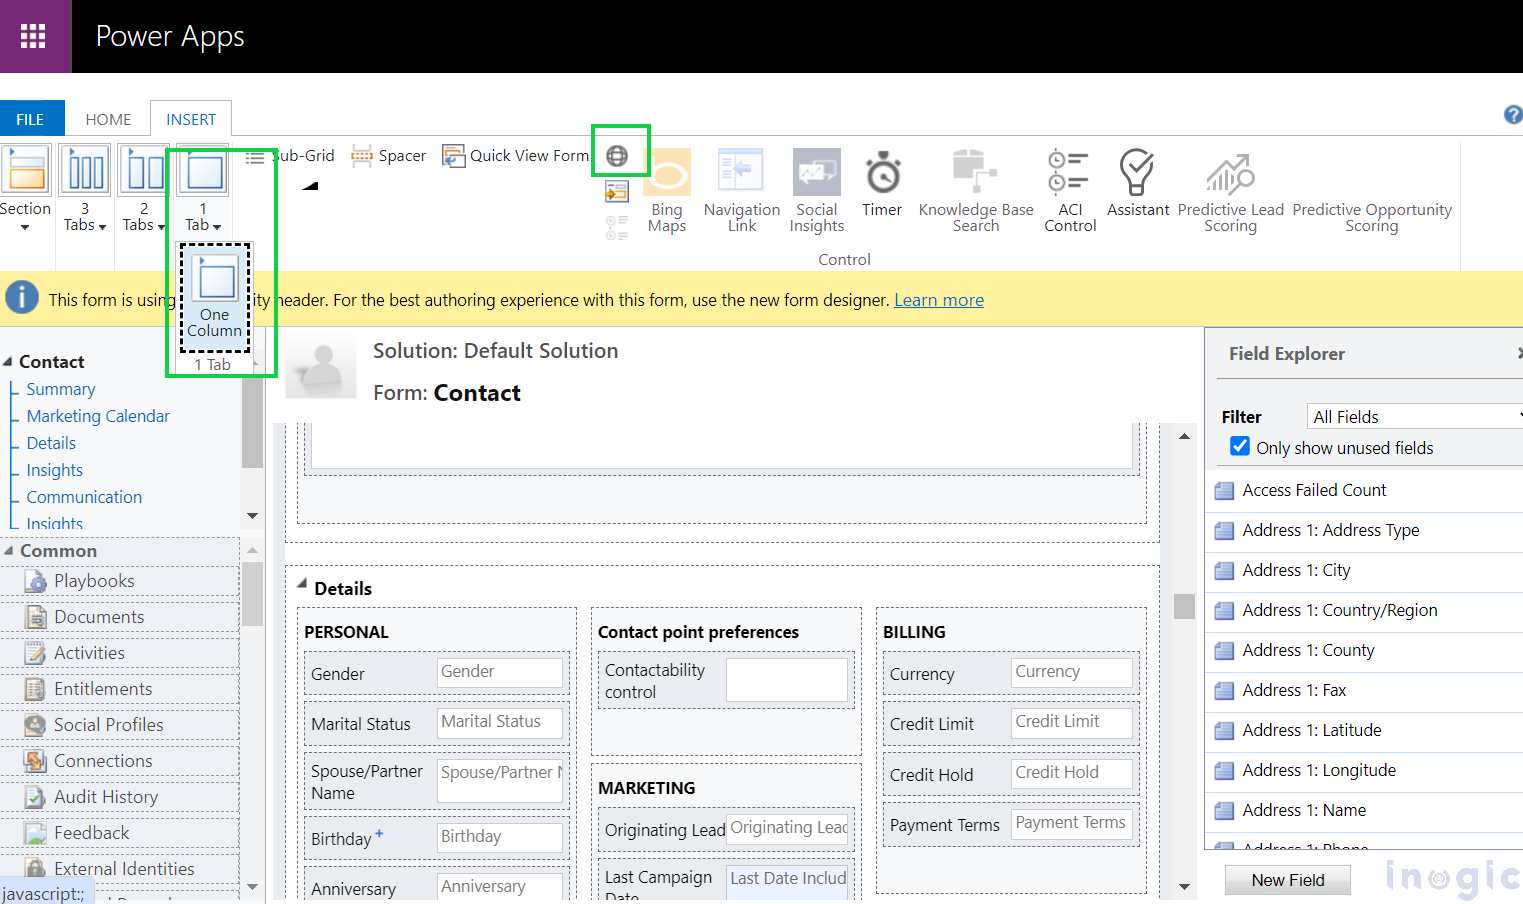
- In the form editor click on the Insert tab and add a section or tab.
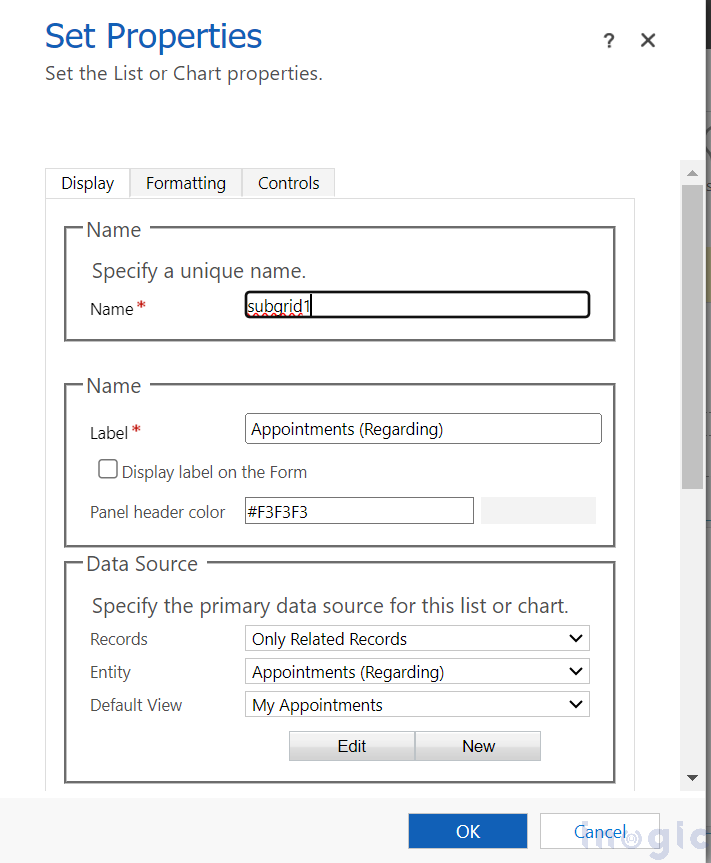
- In the newly added section or tab add a subgrid.
- Enter the Name and Label in the popup window, then, in the Data Source section, select “All Record Types” and choose the entity for which you want to see records in the calendar. Top of FormBottom of Form
Note: The entity you select in the Datasource section must have a start and end date and also a quick create form.
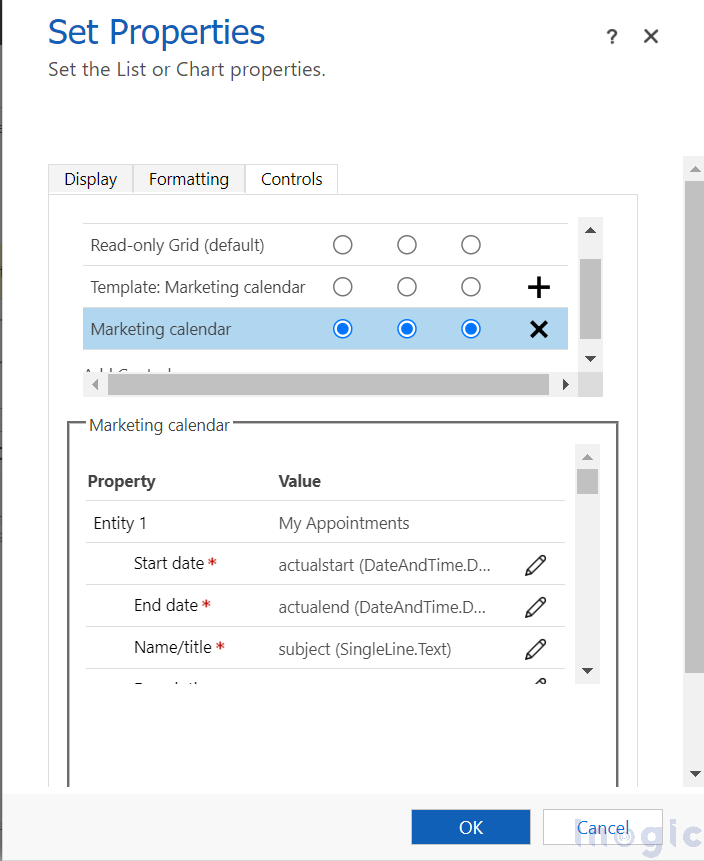
- Click on the control tab and again click on add control.
- Click on Marketing Calendar, configure the mapping, quickly create form ID, and another configuration setting. Same for other entities that you would like to include in the calendar.
- Save and Publish your customizations.
Set up the entities that are accessible for a calendar
- Open the Entity or Form on which you have configured the Marketing Calendar.
- Click on the Marketing calendar to open its configuration setting.
Note: For entity level calendar you can add up to 5 entities and for Form level calendar you can add only 1 entity.
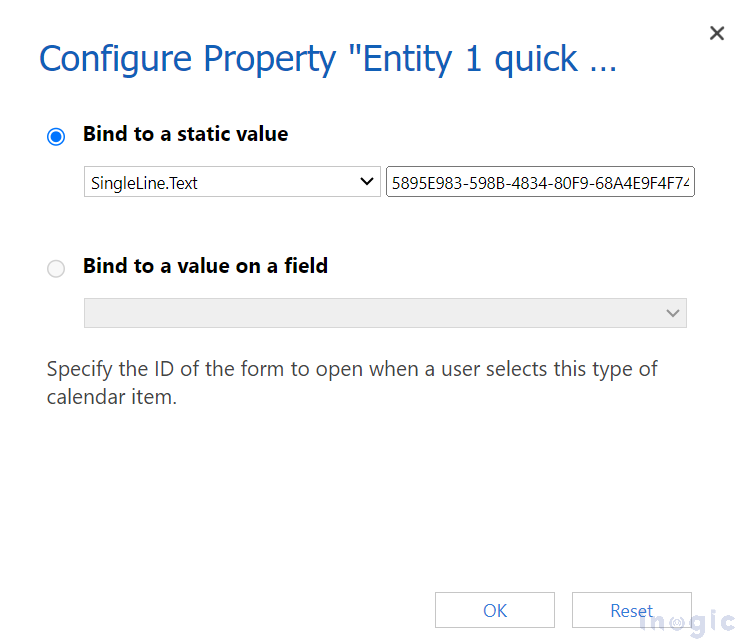
- Now select the Start date, End date, Name, and Quick view form ID of the Target entity.
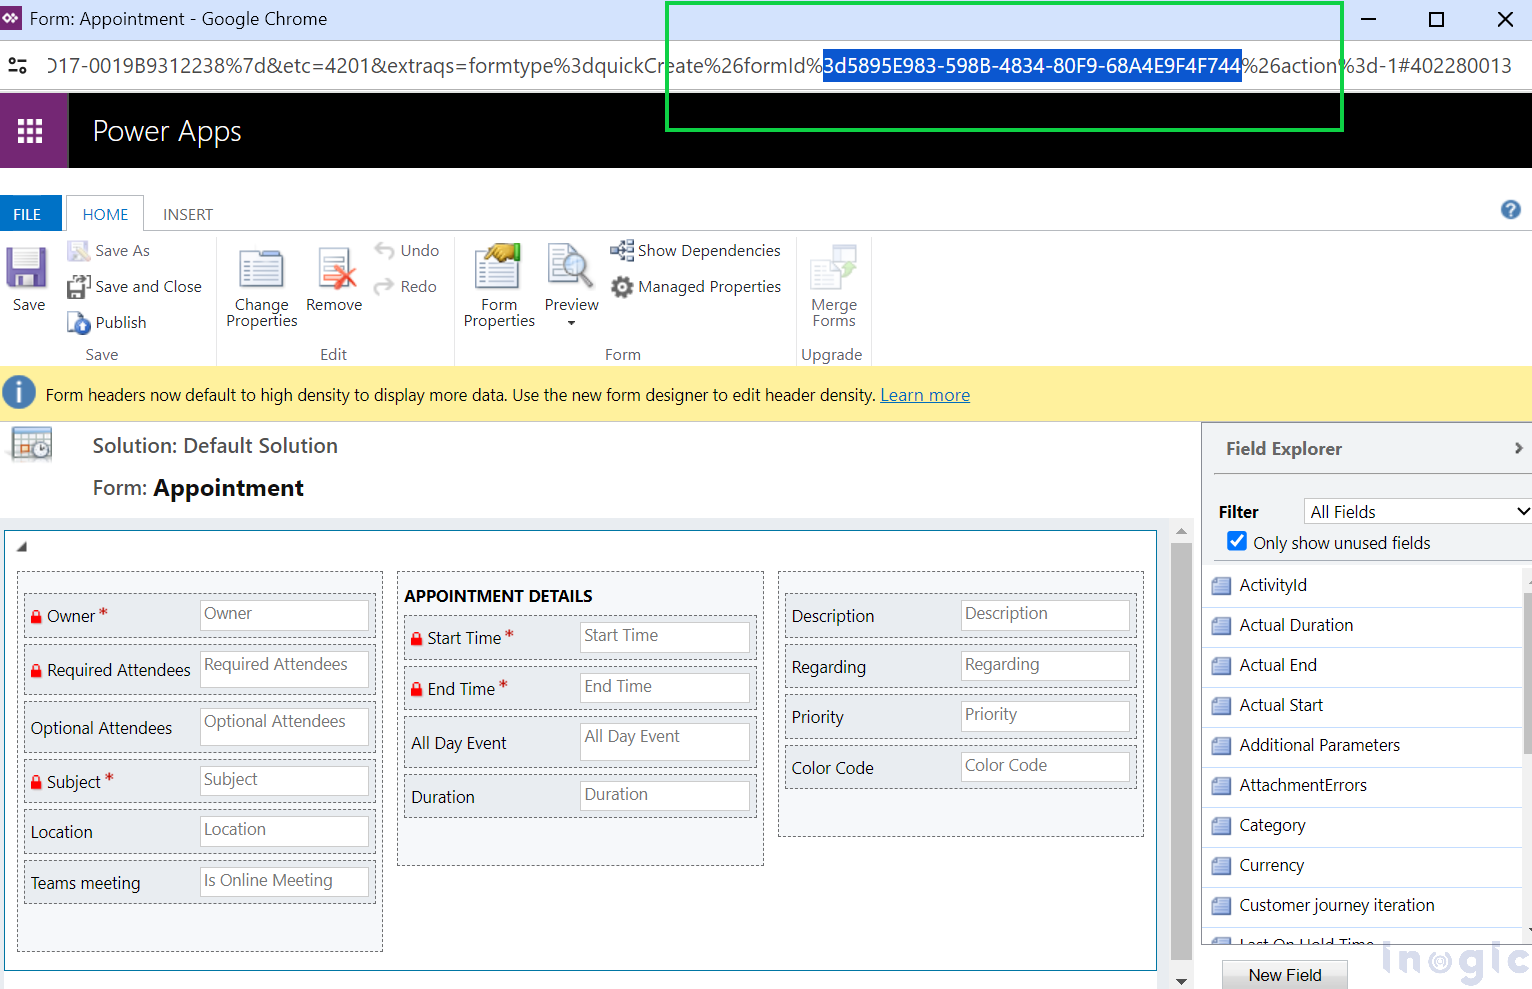
To find the Quick view form ID: Open the Quick Create form of a targeted entity from customization, inspect the URL, and select the content that looks something like the following.
5895E983-598B-4834-80F9-68A4E9F4F744
- Save and Publish your changes.
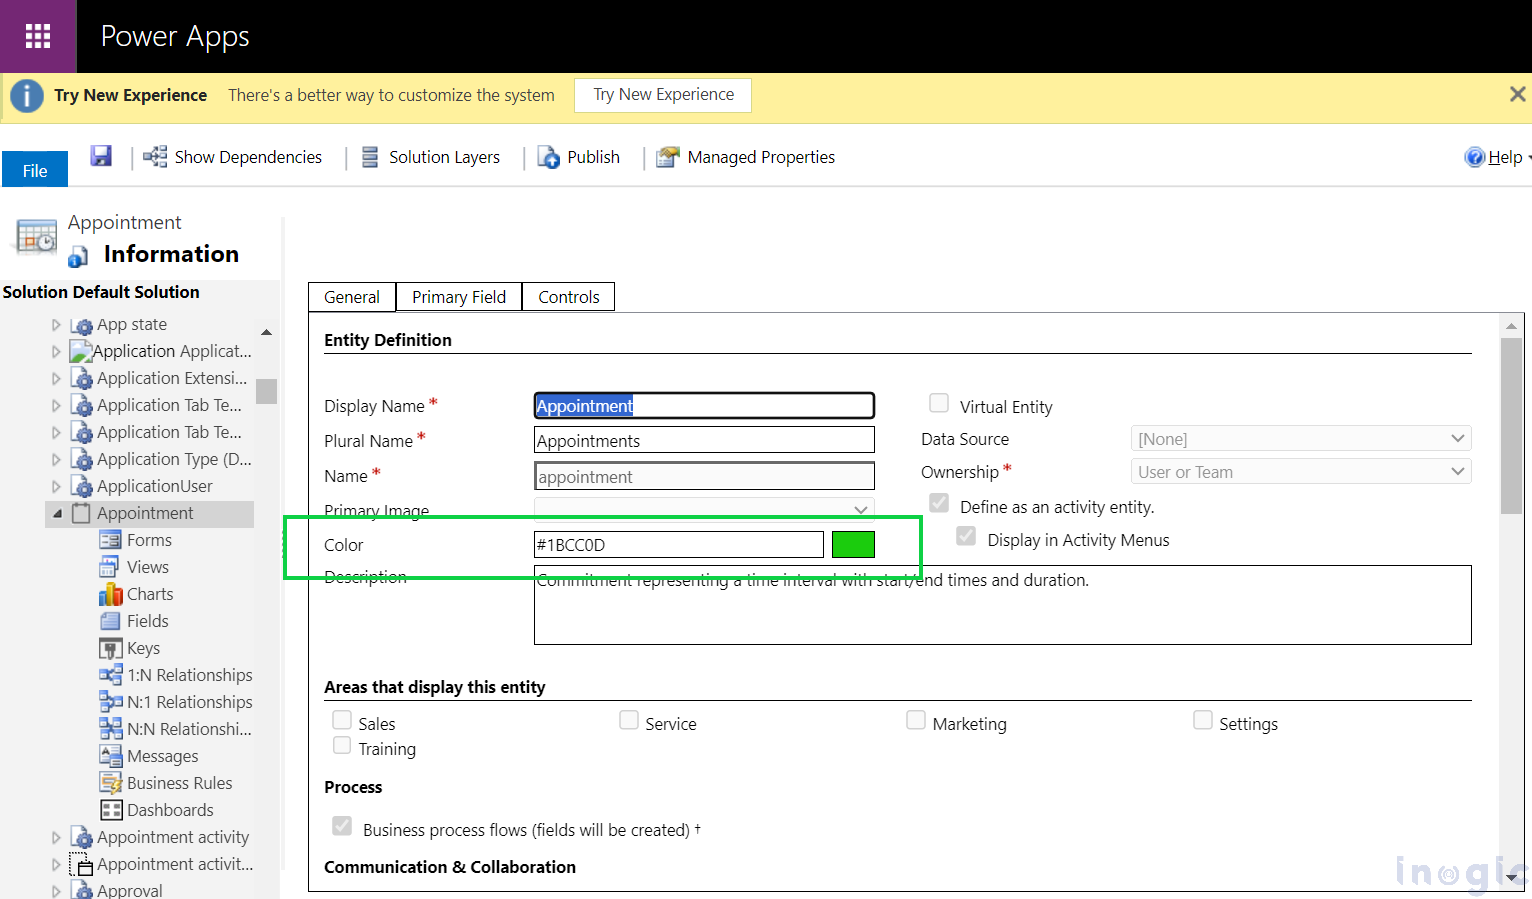
Configure the default colour for every kind of entity that appears in the calendar
A background colour designates the type of item for each item seen on the calendar. Sessions are blue, appointments are red, and events are green by default. Grey is displayed for entities that have no colour settings.
- Log in to a Marketing environment.
- Go to Advance setting -> Customization -> Customize the system
- Select the entity on which you have added a calendar.
- You can see the colour field on the General tab.
- Save and Publish your Customization.
Configure the custom colour at a record level
You can personalize a calendar to allow users to choose a unique colour for each record they add, in addition to the standard entity colour. The entity’s default colour will be used for new records if no custom colour is chosen.
- Create a custom field of datatype a Single line of text.
- Add this field to the form which you have configured in the calendar.
- Now add this field in Calendar Configuration.
- Save and Publish your customization.
Conclusion:
You can easily stay on top of things and meet deadlines and goals by using a marketing calendar to track multiple checkpoints.