
This blog will thoroughly explore the seamless integration of Power Apps with Microsoft Planner to effectively create and assign tasks to users within your organization using Microsoft Teams. The vast majority of employees rely on Microsoft Teams to work, communicate, and collaborate. In Microsoft Teams, apps are seamlessly integrated with other capabilities. For example, you can efficiently assign tasks using Planner in your Teams channel. Apps requiring follow-up, such as addressing reported issues, can effectively utilize Planner in the Teams channel to create tasks.
Step by Step Guide to Integrate Power Apps with Microsoft Planner using Teams:
Step 1: Log in to Microsoft Teams
Open the Microsoft Teams Desktop app or go to the Teams Web app and enter your Microsoft account credentials to log in.
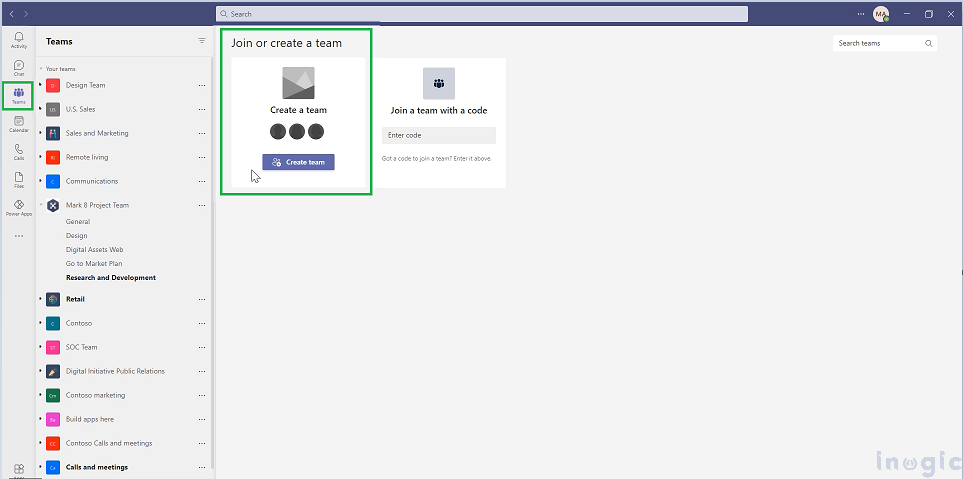
Step 2: Create a New Team (if necessary)
You can skip this step if you want to use the existing team. Also, you can create a new team, as shown in the screenshot below:
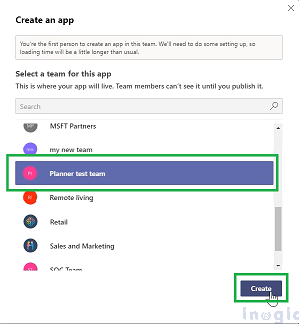
Step 3: Create an App Within the Team
We will create an app with some of the fields capturing details that will be used to create a task in Planner.
- Open Teams > Select the Power Apps from the left pane > Select + New app under the Recent apps.

- Select the team created earlier or select the existing team > Click on Create to open Power Apps Studio.
- Give the app a suitable name, like “Planner app,” and select
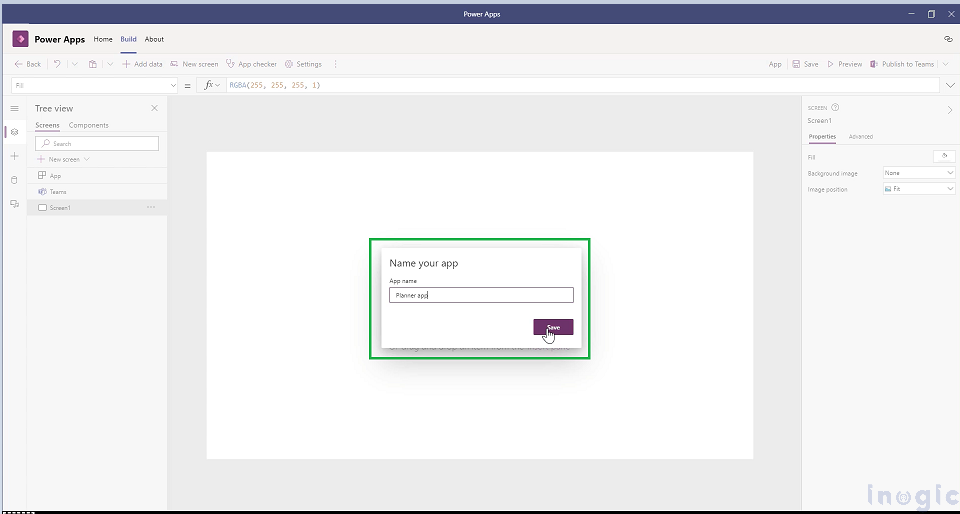
Step 4: Build the Power App in Power Apps Studio
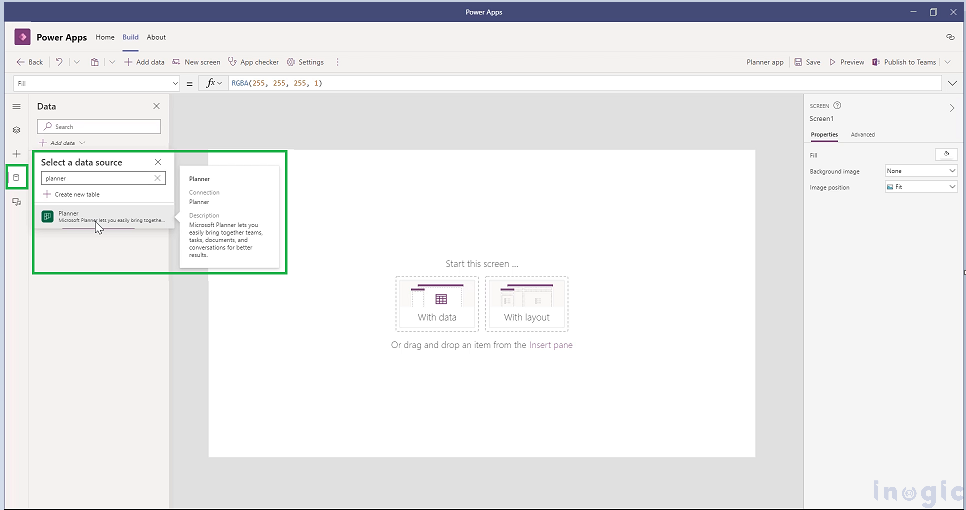
- Connect to Microsoft Planner:
-
- In the app designer, go to the Data tab on the left > Click Add data > Search for Planner, and select it > Authorize the connection by signing in with your Microsoft account.
Note: You must have the ability to create apps within Teams, available as part of select Microsoft 365 subscriptions, and the ability to connect to Planner to complete this task.
- Design your app:
-
- Select to open the tree view > Select + New Screen > Blank layout > Add the Title (text input), From Date (date picker), Due Date (date picker), Assigned To (combo box), and Planner ID (combo box) controls on the layout as shown in the screenshot below:
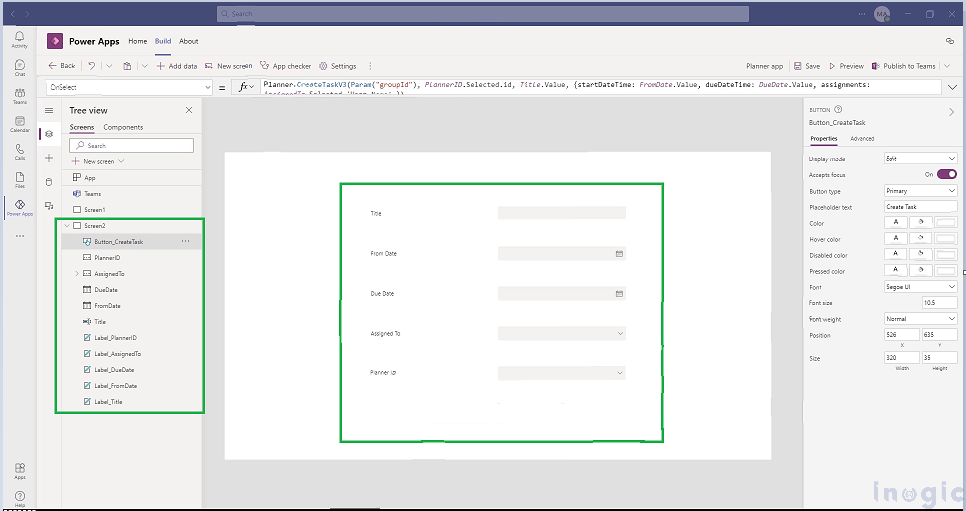
- Configure your App to interact with Planner:
- Add a button to create the task.
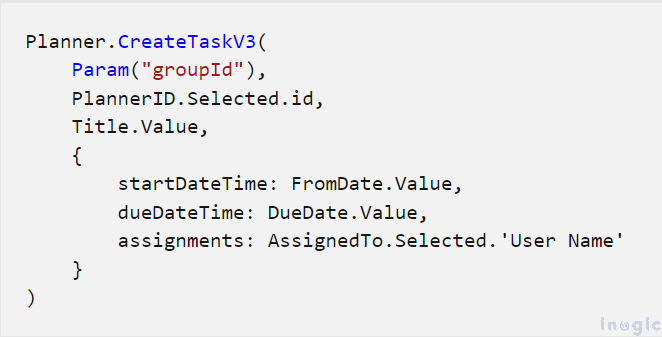
- To create the task, simply use the following formula in the OnSelect property of the Create
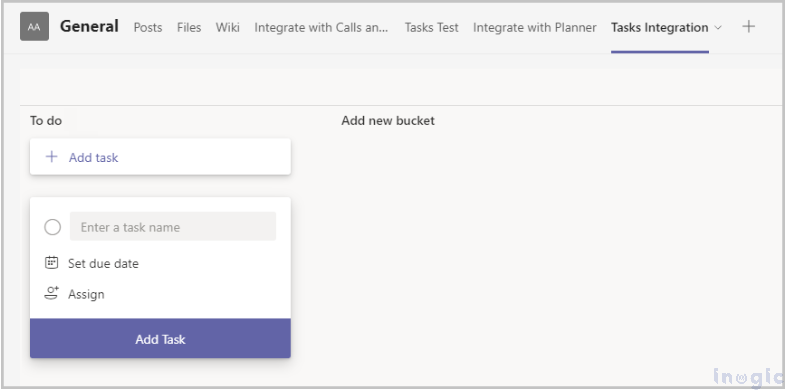
Step 5: Use the Apps in Teams
- Open the team under which the app was created > Click the “+” icon > under “Create a new plan,” enter the tab name, such as “Task Integration Planner,” and click
- Select “Create Task” after running the app and populating the column with the appropriate values.
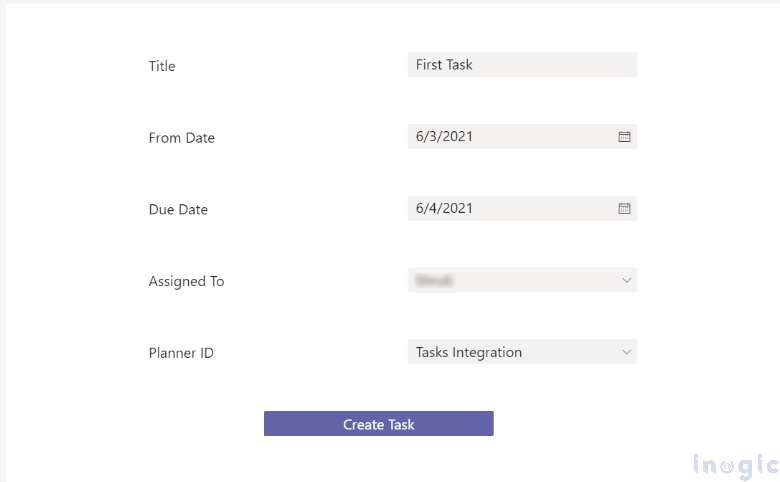
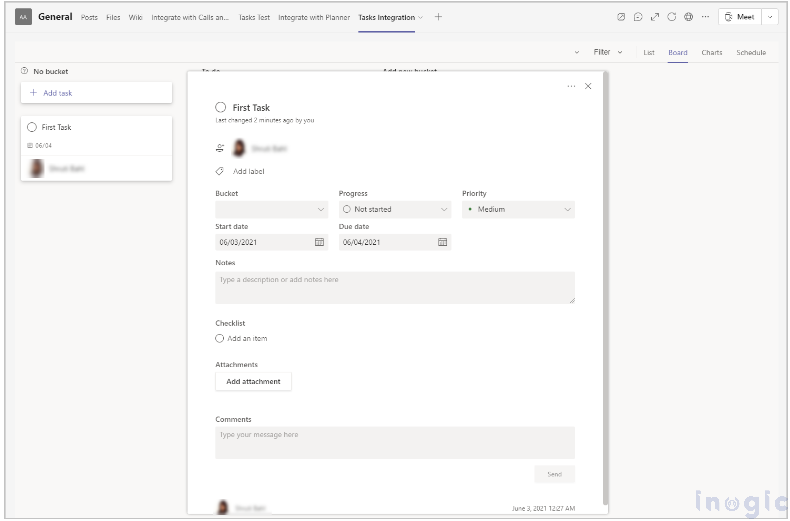
- Now check the new tab that you’ve added, “Task Integration Planner.” A new task with the details will be added to the list.
Conclusion:
Integrating Power Apps with Microsoft Planner using Microsoft Teams provides a powerful solution for managing tasks efficiently within a collaborative environment. By following these steps, you can leverage the combined strengths of Power Apps, Microsoft Planner, and Microsoft Teams to create a seamless, integrated task management solution that enhances team collaboration and productivity.

About Sam Kumar
Sam Kumar is the Vice President of Marketing at Inogic, a Microsoft Gold ISV Partner renowned for its innovative apps for Dynamics 365 CRM and Power Apps. With a rich history in Dynamics 365 and Power Platform development, Sam leads a team of certified CRM developers dedicated to pioneering cutting-edge technologies with Copilot and Azure AI the latest additions. Passionate about transforming the CRM industry, Sam’s insights and leadership drive Inogic’s mission to change the “Dynamics” of CRM.
More about Sam Kumar