
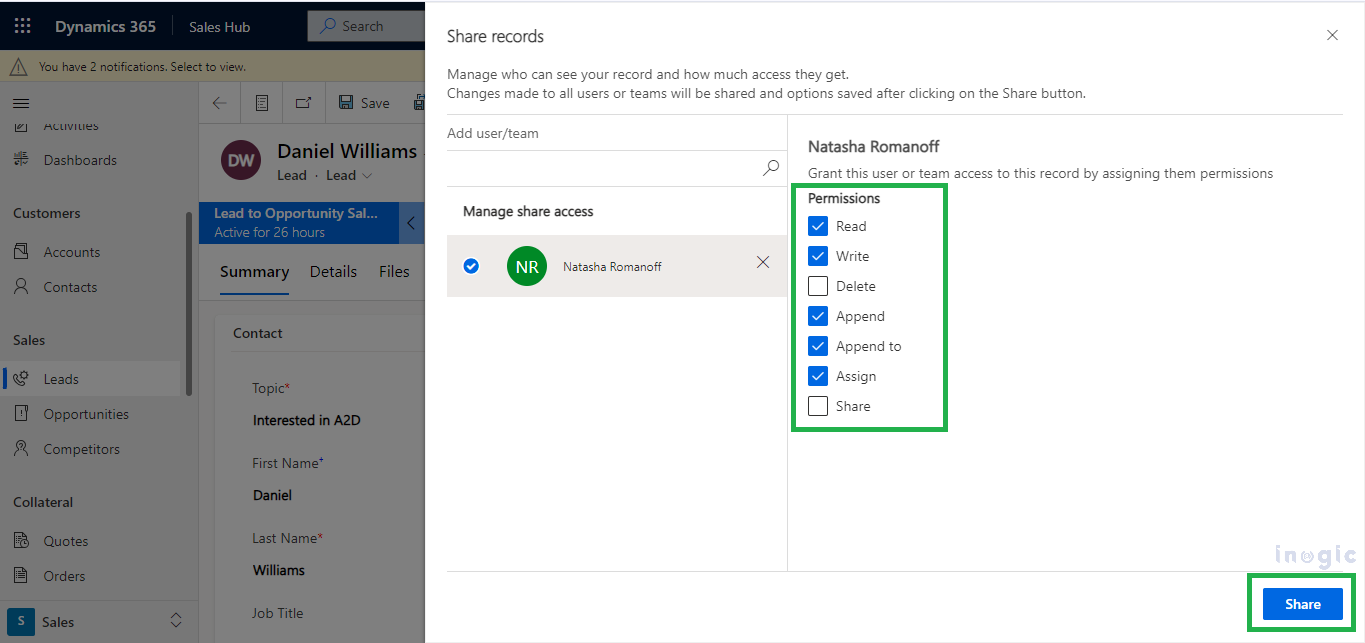
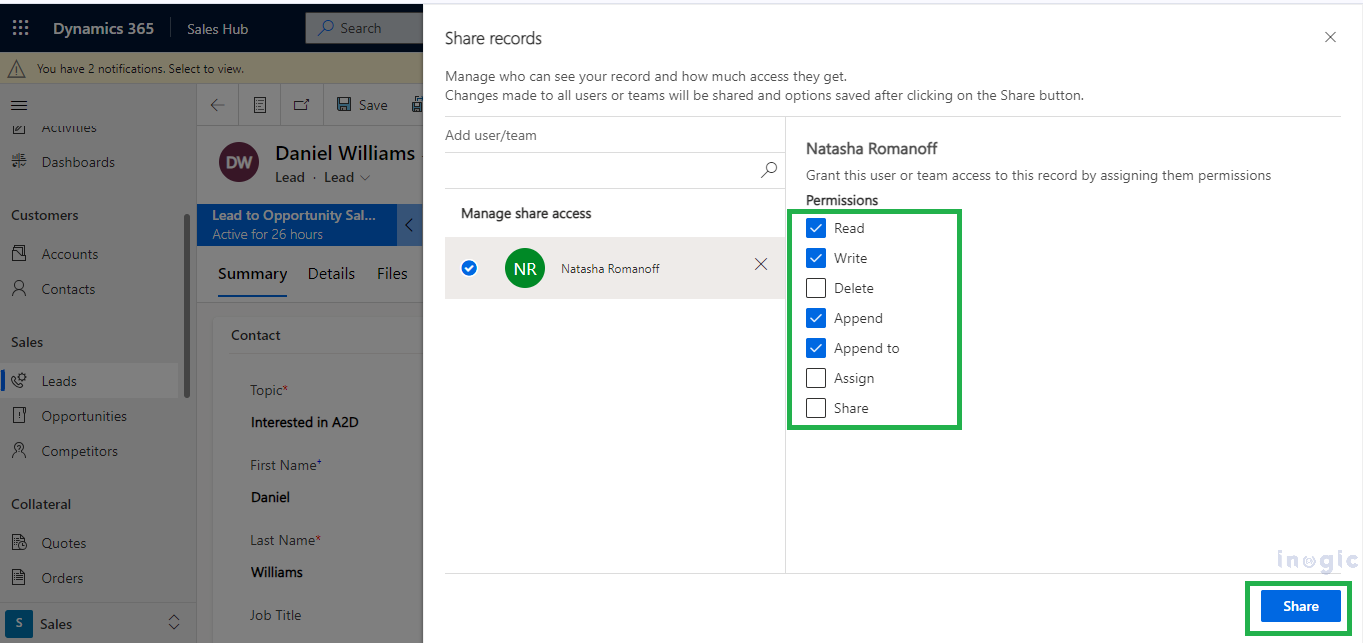
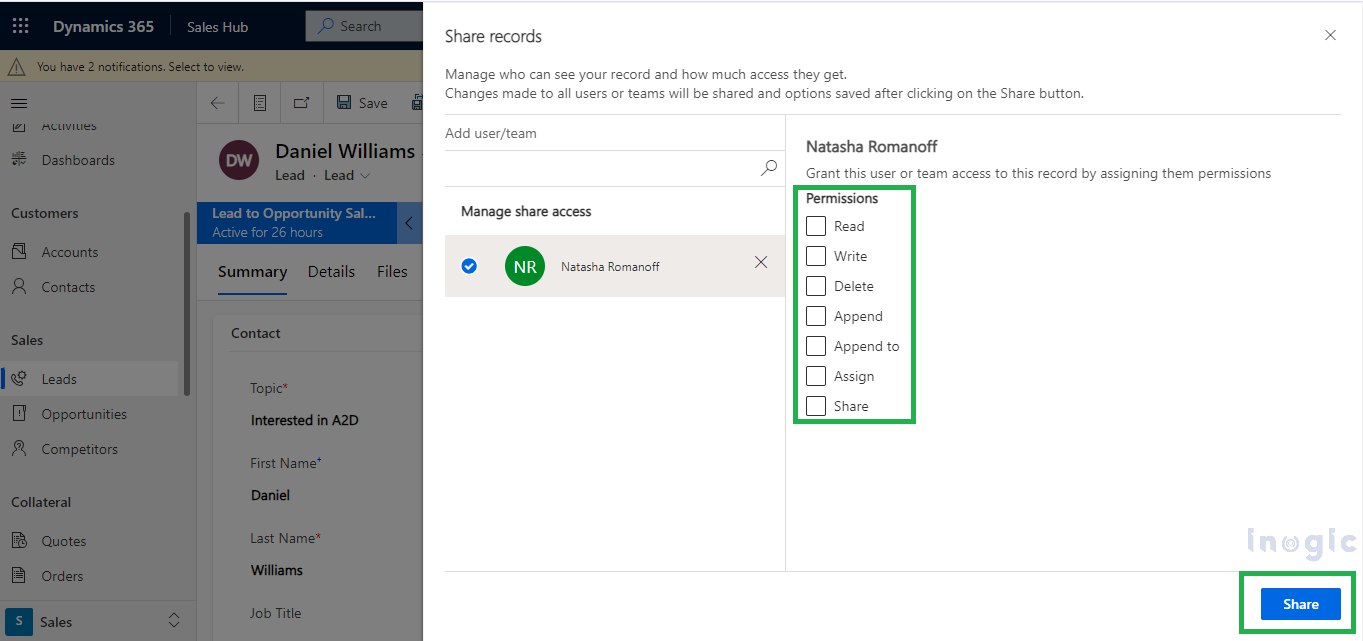
In Dynamics, managing access to sensitive data is handled through security measures such as role-based permissions. Security roles and access management play a significant role in ensuring that the right individuals have access to the appropriate information. To grant access to particular records, users with Share permissions typically navigate to the respective record and click on the “Share” button as shown below.
A common scenario arises when a sales manager needs to grant specific record access to a salesperson who doesn’t have the necessary permissions. The changes made by the sales manager may leave the salesperson unaware of their newly granted access, potentially leading to a loss in productivity. To resolve this issue, we can use access triggers introduced in Power Automate. These triggers activate whenever there is a change in user access for a particular record.
To improve this process, we can automate it by sending access notifications through email messages. By setting up a Power Automate flow, we can establish a notification system that triggers whenever access is granted, modified, or revoked for a particular user regarding specific records.
In this blog, we will utilize the example of a sales manager granting/modifying/revoking the permission of a salesperson in a lead record. To achieve this, we will need to create three different Power Automate flows, each of which is explained below.
1. Notify the user when Access is Granted for Lead records:
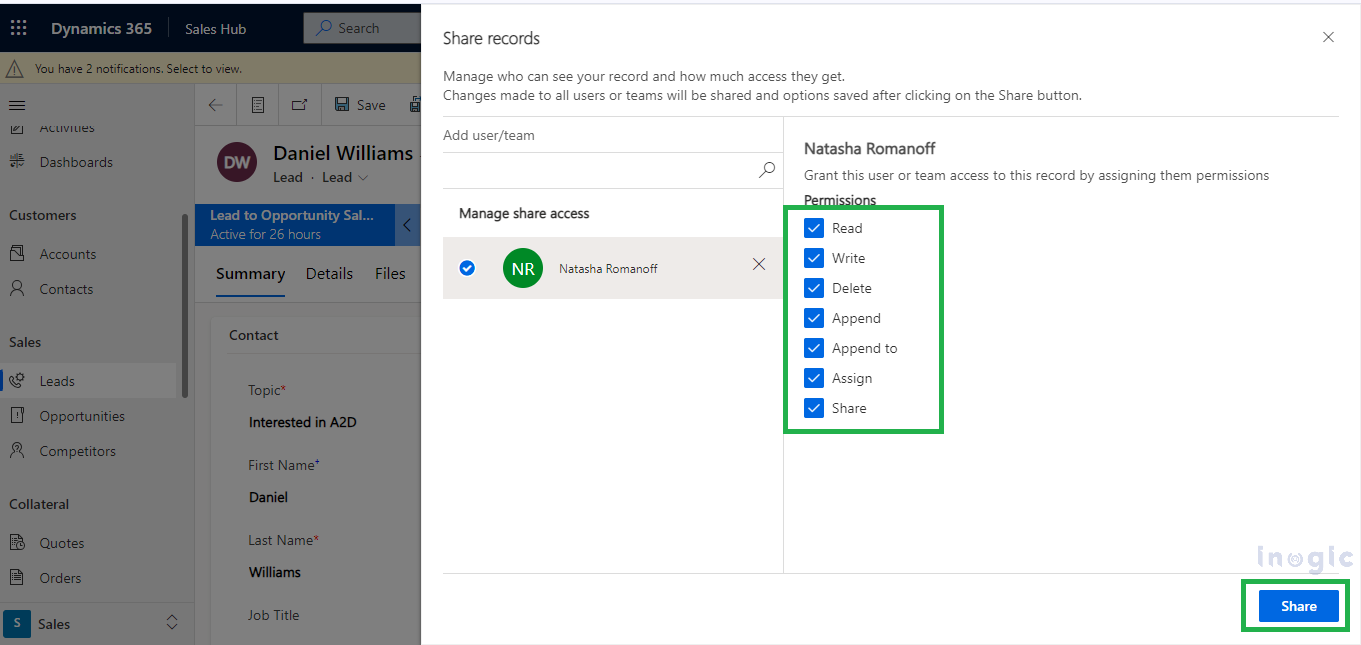
The GrantAccess action is triggered whenever full access, including Read, Write, Append, Append To, Delete, Share, and Assign permissions, is granted to the user for a specific record.
Let’s see how we can create a Power Automate flow for that:
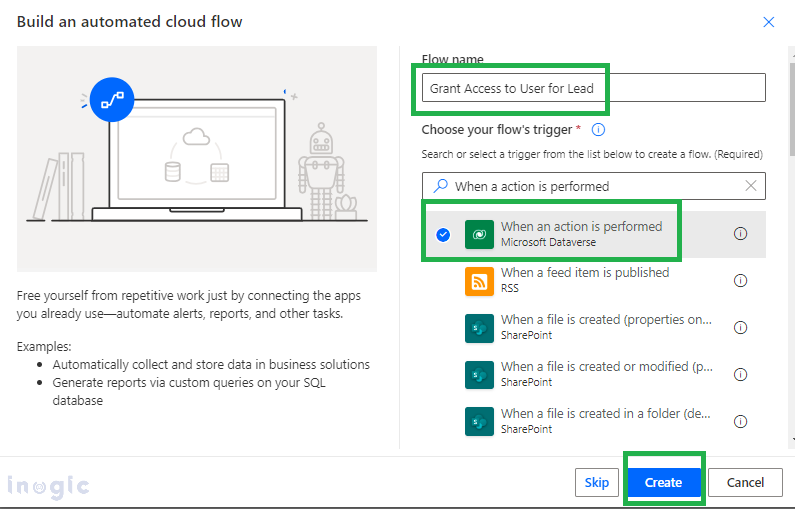
Step 1: Create a Power Automate flow and select the trigger point as “When an action is performed”. Select the Catalog and Category as All, and Table as Lead. Select the Action name as GrantAccess.
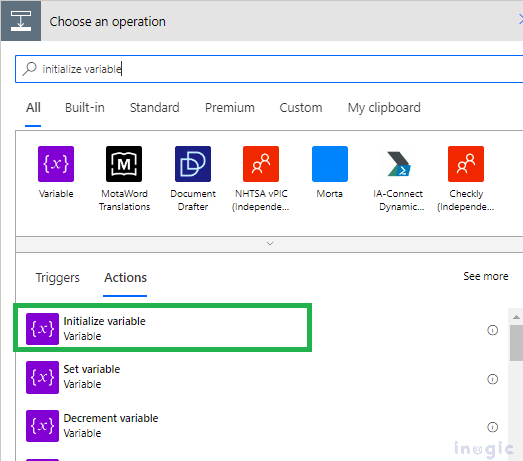
Initialize the AccessMask and leadID Variable by clicking on add action and searching for initialize variable. Set the value for each variable as shown below:
- AccessMask = triggerOutputs()?[‘body/InputParameters/PrincipalAccess/AccessMask’]
- LeadID = triggerOutputs()?[‘body/InputParameters/Target/Id’]

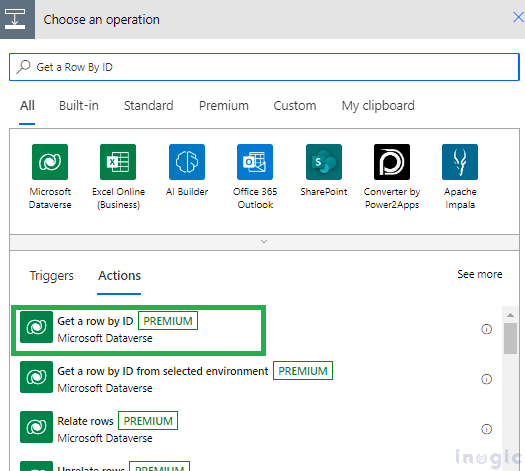
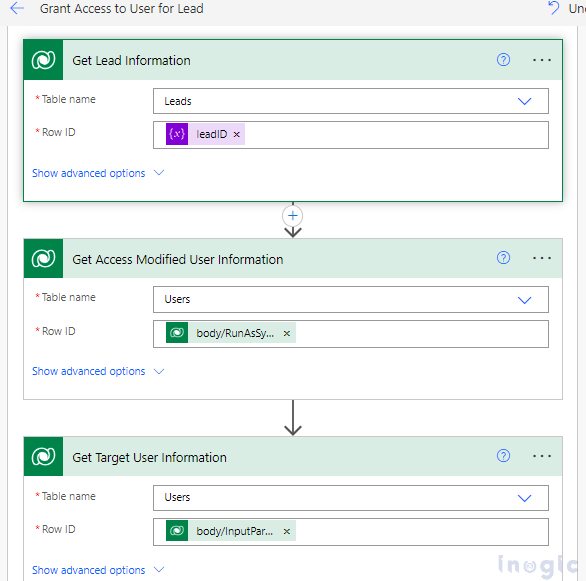
Step 2: Validate the above variable values and retrieve Lead, Access Modified User, and Target User Information by using the Get a Row By ID action in Microsoft Dataverse connector as shown below:
- Lead = variables(‘leadID’)
- Access Modified User = triggerOutputs()?[‘body/InputParameters/PrincipalAccess/Principal/Id’]
- Target User Information = triggerOutputs()?[‘body/RunAsSystemUserId’]
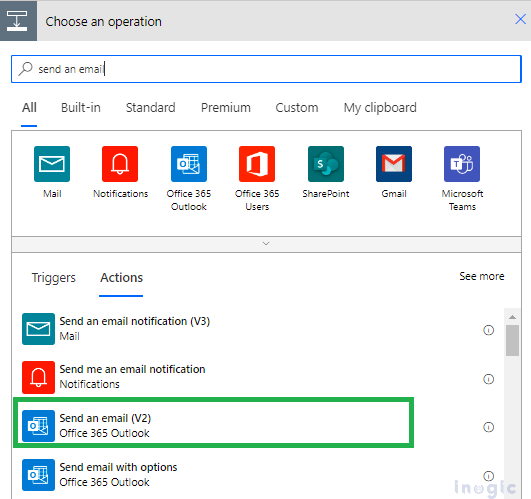
Step 3: As we have retrieved all the necessary details, we can now send an email to the user informing them that they have full access to the record, as shown below. To send the email, we are using the Outlook connector. Essentially press on “Include an activity” and look for “Send an e-mail,” as illustrated underneath.
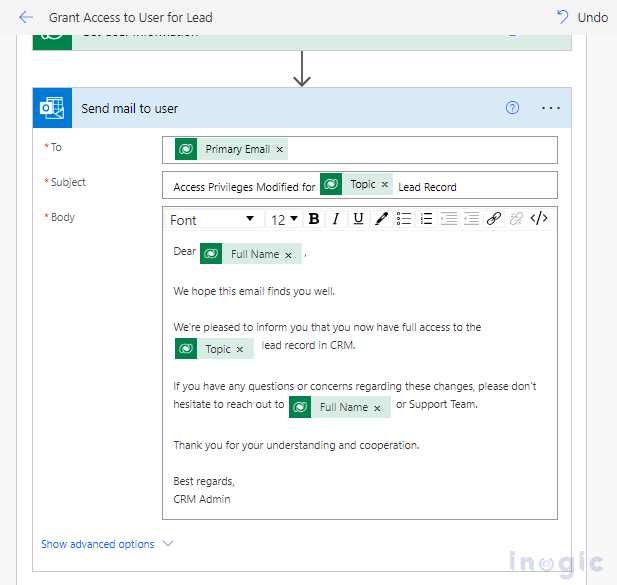
Now, enter the To as the primary email address of the target user and the Subject and Body as shown below.
2. Notify the user when Access is Modified for Lead records:
This flow triggers whenever specific access i.e. Read, Write, etc. is granted or revoked for a particular user under specific records.
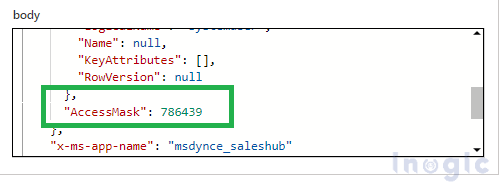
When we look at the JSON output of the trigger action from the power automate, we can see the AccessMask in JSON data, which is the addition of all access values which has been given to the user as shown below.
Following are the access values for all permissions:
- Read: 1
- Write: 2
- Append: 4
- Append To: 16
- Delete: 65536
- Share: 262144
- Assign: 524288
Let’s say if we give a user Read and Write access, the AccessMask value will be 3. To check if the user has any specific permissions, we can use a basic calculation. First, divide the AccessMask value by the permission value (either Read or Write shown above). At that point, apply the modulo operation by 2 (which is nothing but the leftover portion returned after isolating by 2). If the remainder is 1 or greater than 1, the permission is granted. If the remainder is 0, the permission is not granted.
Imagine you have a user with Read and Write access, you would get the Access Mask as 3. Here’s how you can identify if specific permissions (Read or Write) are granted to the user.
- Access Mask Value: 3 (this means both Read and Write permissions are granted)
- Permission Values:
- Read: 1
- Write: 2
To check if each permission is granted, follow these steps:
Step-by-Step Calculation
For Read Permission:
1. Divide the Access Mask Value by the Read Permission Value:
- 3÷1=3
2. Apply the Modulo Operation (remainder when divided by 2):
- 3 modulo 2=1
3. Interpret the Result:
- As the result is 1, the Read permission will be granted.
For Write Permission:
1. Divide the Access Mask Value by the Write Permission Value:
- 3÷2=1.5
2. Apply the Modulo Operation (remainder when divided by 2):
- 5 modulo 2=1.5
3. Interpret the Result:
- Since the result is greater than 1, the Write permission is granted.
So, in this case, both Read and Write permissions are granted to the user based on the calculated values. This process helps us determine whether specific access permissions are granted or not for a given Access Mask value. Let’s implement this in the Power Automate and see how we can check if the permission is granted or not.
Step 1: The triggered step and variable declaration will be the same as we have used in Step 1 of GrantAccess flow; the only change is that the action name will be ModifyAccess.
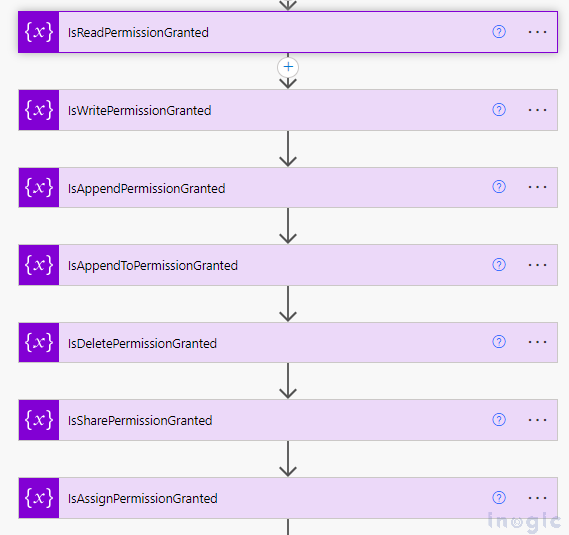
Step 2: Initialize boolean variables for all access permissions and set the respective expressions as shown below:
- Read Permission Check Equation:
IsReadPermissionGranted = if(equals(mod(div(variables(‘AccessMask’), 1), 2), 1), true, false)
- Write Permission Check Equation:
IsWritePermissionGranted = if(equals(mod(div(variables(‘AccessMask’), 2), 2), 1), true, false)
- Append Permission Check Equation:
IsAppendPermissionGranted = if(equals(mod(div(variables(‘AccessMask’), 4), 2), 1), true, false)
- Append To Permission Check Equation:
IsAppendToPermissionGranted = if(equals(mod(div(variables(‘AccessMask’), 16), 2), 1), true, false)
- Delete Permission Check Equation:
IsDeletePermissionGranted = if(equals(mod(div(variables(‘AccessMask’), 65536), 2), 1), true, false)
- Share Permission Check Equation:
IsSharePermissionGranted = if(equals(mod(div(variables(‘AccessMask’), 262144), 2), 1), true, false)
- Assign Permission Check Equation:
IsAssignPermissionGranted = if(equals(mod(div(variables(‘AccessMask’), 524288), 2), 1), true, false)
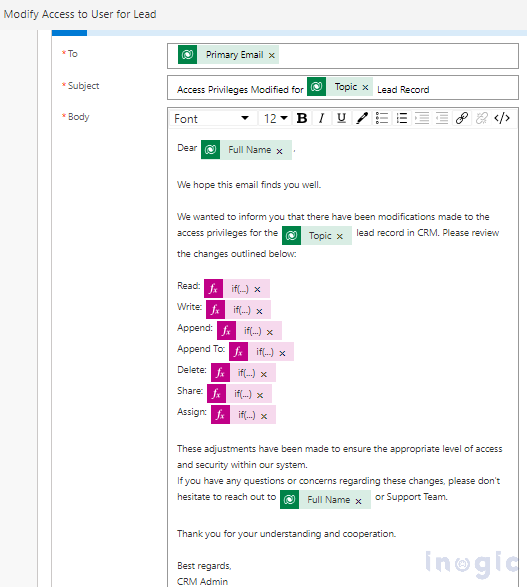
Step 3: Now we have all permission values as Boolean. We can check if the value is true, and then the access is granted; otherwise, the access is revoked as shown below:
- Read: @{if(variables(‘IsReadPermissionGranted’), ‘Granted’,’ Revoked’)}
- Write: @{if(variables(‘IsWritePermissionGranted’), ‘Granted’,’ Revoked’)}
- Append: @{if(variables(‘IsAppendPermissionGranted’), ‘Granted’,’ Revoked’)}
- Append To: @{if(variables(‘IsAppendToPermissionGranted’), ‘Granted’,’ Revoked’)}
- Delete: @{if(variables(‘IsDeletePermissionGranted’), ‘Granted’,’ Revoked’)}
- Share: @{if(variables(‘IsSharePermissionGranted’), ‘Granted’,’ Revoked’)}
- Assign: @{if(variables(‘IsAssignPermissionGranted’), ‘Granted’,’ Revoked’)}
3. Notify the user when Access is Revoked for Lead records:
This flow triggers whenever all access of the user has been removed from the specific record.
The flow is almost similar to the Grant Access flow, apart from some modifications mentioned below:
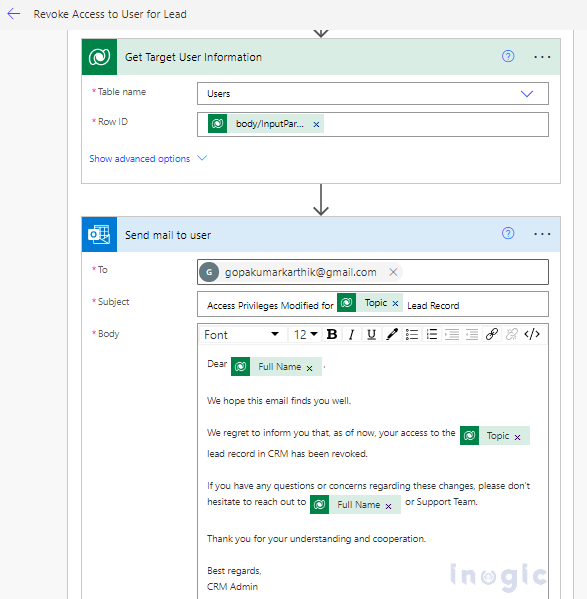
- The Action name would be RevokeAccess
- Retrieve the Target user record by providing the Table name as “User” and Row Id from Trigger Outputs i.e. “triggerOutputs()? [‘body/InputParameters/Revokee/Id’” as shown below
- The email needs to be modified as shown below
Conclusion:
By following the steps for creating Power Automate flows to notify users about access changes, organizations can not only improve productivity but also strengthen security measures by maintaining clear visibility and control over data access.
About Sam Kumar
Sam Kumar is the Vice President of Marketing at Inogic, a Microsoft Gold ISV Partner renowned for its innovative apps for Dynamics 365 CRM and Power Apps. With a rich history in Dynamics 365 and Power Platform development, Sam leads a team of certified CRM developers dedicated to pioneering cutting-edge technologies with Copilot and Azure AI the latest additions. Passionate about transforming the CRM industry, Sam’s insights and leadership drive Inogic’s mission to change the “Dynamics” of CRM.
More about Sam Kumar