Introduction
A custom action in desktop flow is a feature designed to automate repetitive tasks seamlessly.
This blog provides a comprehensive guide on designing and leveraging custom actions in the desktop version of Power Automate flows. The journey starts with a step-by-step procedure to create these custom actions, offering a detailed walkthrough of the process to upload them within the desktop Power Automate flows environment.
Certainly! In this scenario, a custom action in the desktop flow is employed to automatically download files linked to various activities. Whether these files are attachments or stored in notes, the custom action streamlines the process, offering users the flexibility to choose a personalized destination path for efficient file organization. This automation enhances efficiency, saves time, and empowers users with control over their file management preferences.
Pre-requisite: To create custom action in Power Automate for desktop flows you need the following things:
1. NET Framework 4.7.2 SDK or above.
2. Visual Studio 2022 or above
3. Power Automate desktop v2.32 or above.
4. The Action SDK
Step 1: Create a custom action
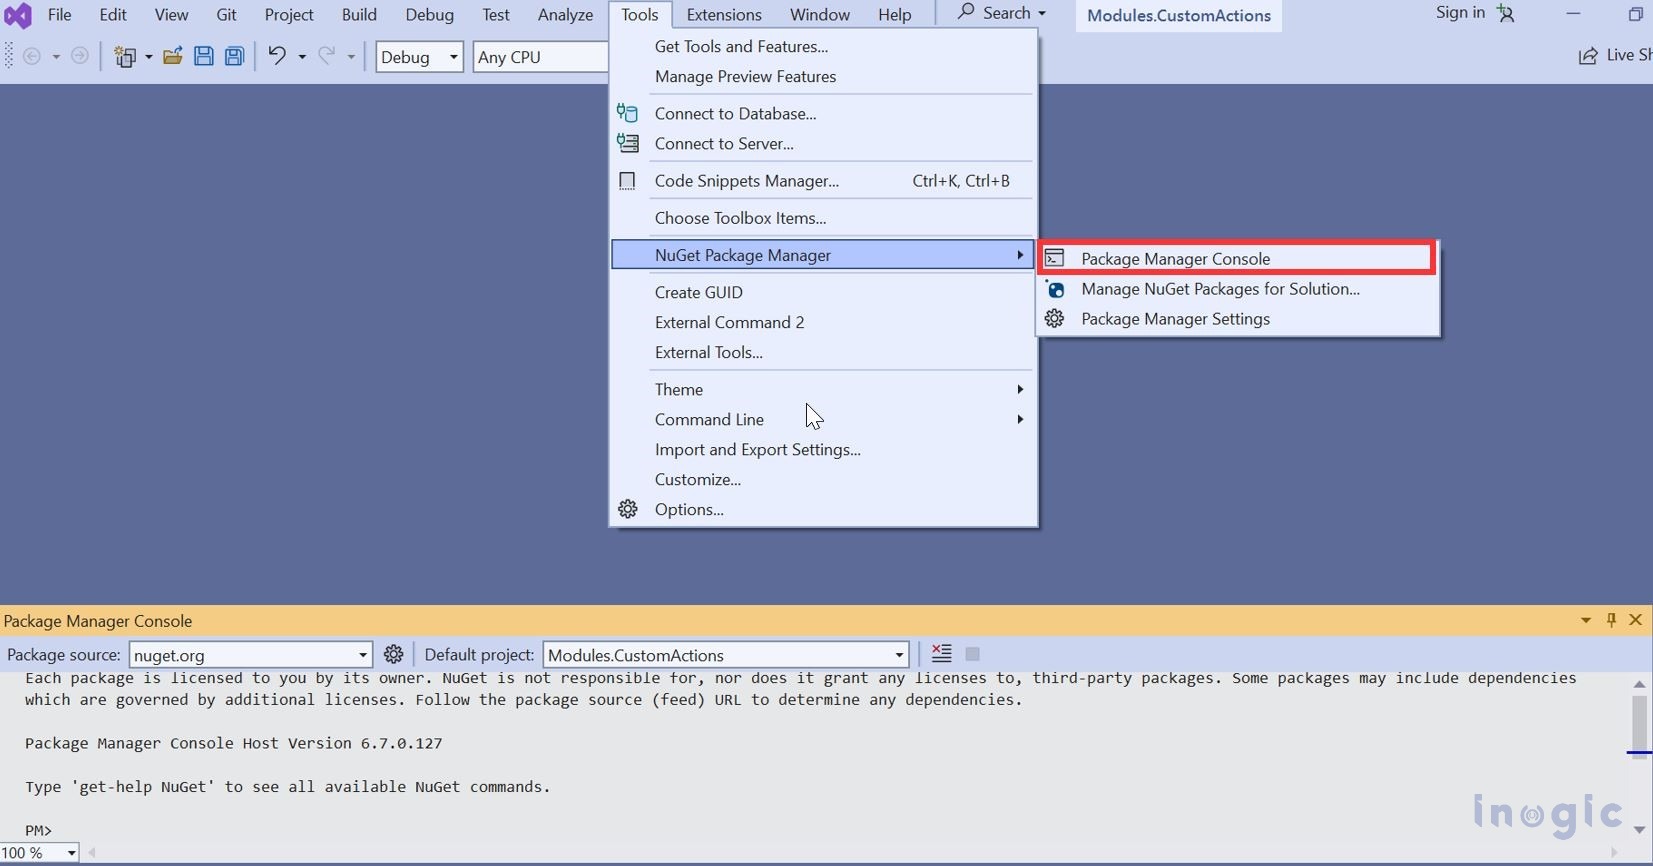
Open Visual Studio 2022 -> Create sample project -> Go to Tools -> Nugget Package Manager -> Package Manager Console.
Run the below commands inside the NuGet Package Console.
Action SDK:
NuGet\Install-Package Microsoft.PowerPlatform.PowerAutomate.Desktop.Actions.SDK -Version 1.4.232.23122-rc
Power Automate desktop – Visual Studio templates:
dotnet new install Microsoft.PowerPlatform.PowerAutomate.Desktop.Actions.Templates::1.0.0-rci
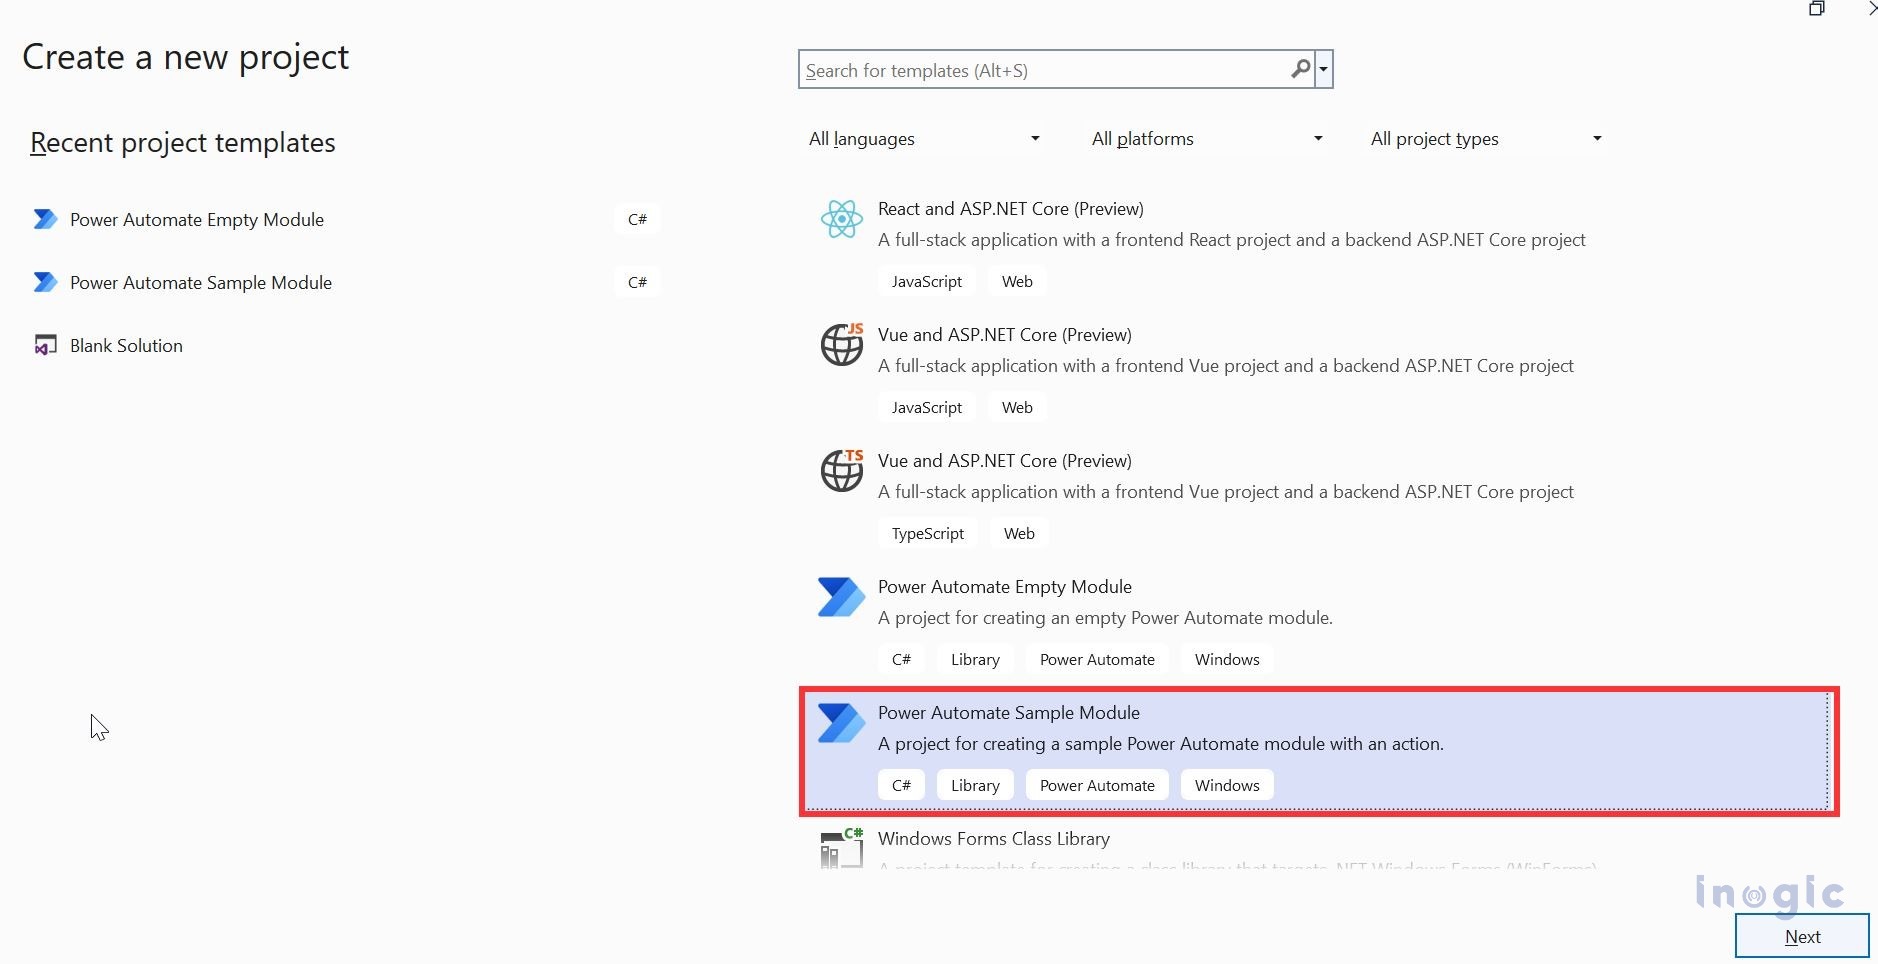
Create a new power automate project as mentioned below.
Once a project is created successfully, you can proceed with the code. In this illustration we have written /used the below code however it may vary depending upon the use case or the actual scenario.
using System;

using System.IO;

using Microsoft.PowerPlatform.PowerAutomate.Desktop.Actions.SDK;

using Microsoft.PowerPlatform.PowerAutomate.Desktop.Actions.SDK.Attributes;

namespace Modules.CustomActions

{

    [Action(Id = "Action1", Order = 1, FriendlyName = "Custom Action", Description = "The action is used to download notes/attachments")]

    [Throws("ActionError")] // TODO: change error name (or delete if not needed)

    public class Action1 : ActionBase

    {

        #region Properties

        // File path where the downloaded file will be stored

        [InputArgument(FriendlyName = "File Path", Description = "File Path")]

        public string filepath { get; set; }


        // File path where the downloaded file will be stored

        [InputArgument(FriendlyName = "Document Body", Description = "document Body")]

        public string documentBody { get; set; }

        // The name of the file to be created

        [InputArgument(FriendlyName = "File Name", Description = "File Name")]

        public string fileName { get; set; }

        #endregion

        #region Methods Overrides

        // Override of the Execute method in the base class

        public override void Execute(ActionContext context)

        {

            try

            {

                // Concatenate the file path and file name

                filepath = filepath + "\\" +fileName;

                // Create a file stream to write the file data

                using (FileStream data = File.Create(filepath))

                {

                    // Convert Base64 document body to byte array

                    byte[] fileBytes = Convert.FromBase64String(documentBody);

                    // Write the byte array to the file stream

                    data.Write(fileBytes, 0, fileBytes.Length);

                }

            }

            catch (Exception e)

            {

                // Handle exceptions and throw an ActionException

                if (e is ActionException) throw;

                throw new ActionException("ActionError", e.Message, e.InnerException);

            }

        }

        #endregion

    }

}
Build the project.
Step 2: Creating and importing a self-signed certificate
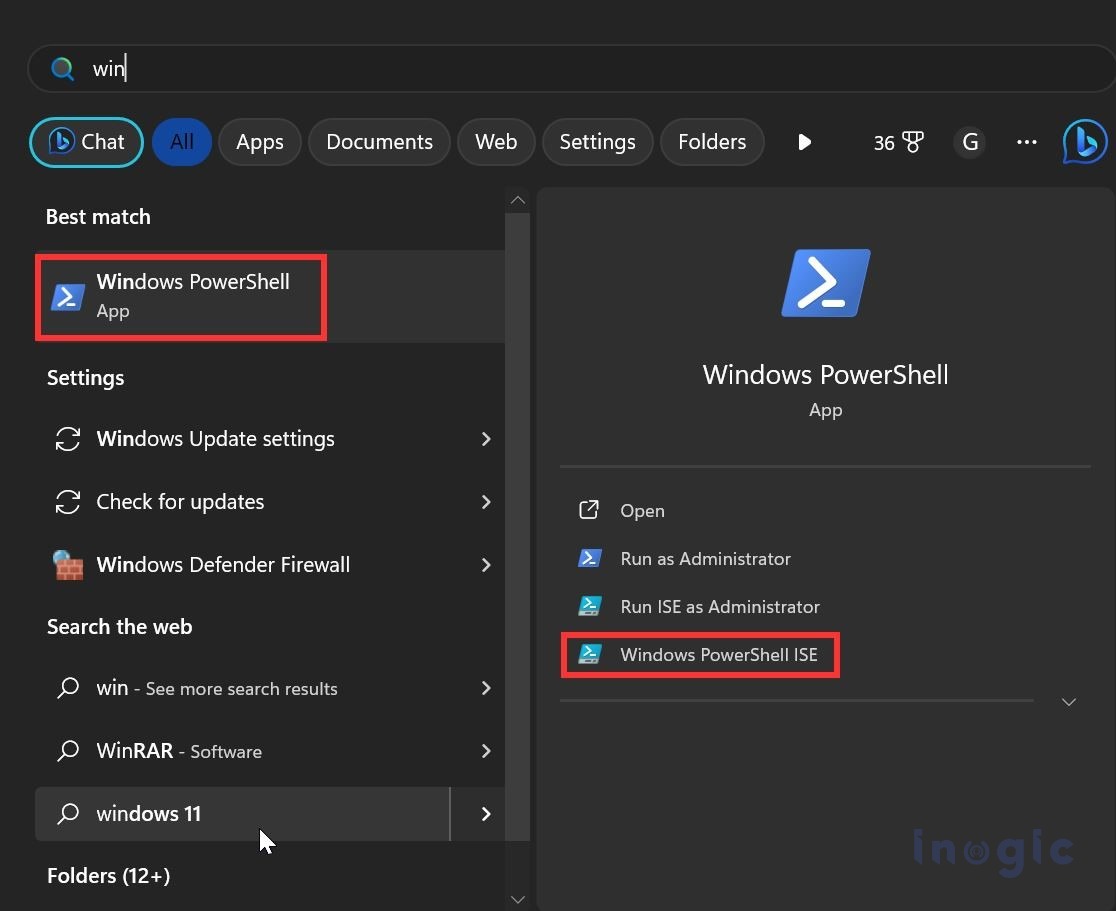
Open Windows PowerShell.
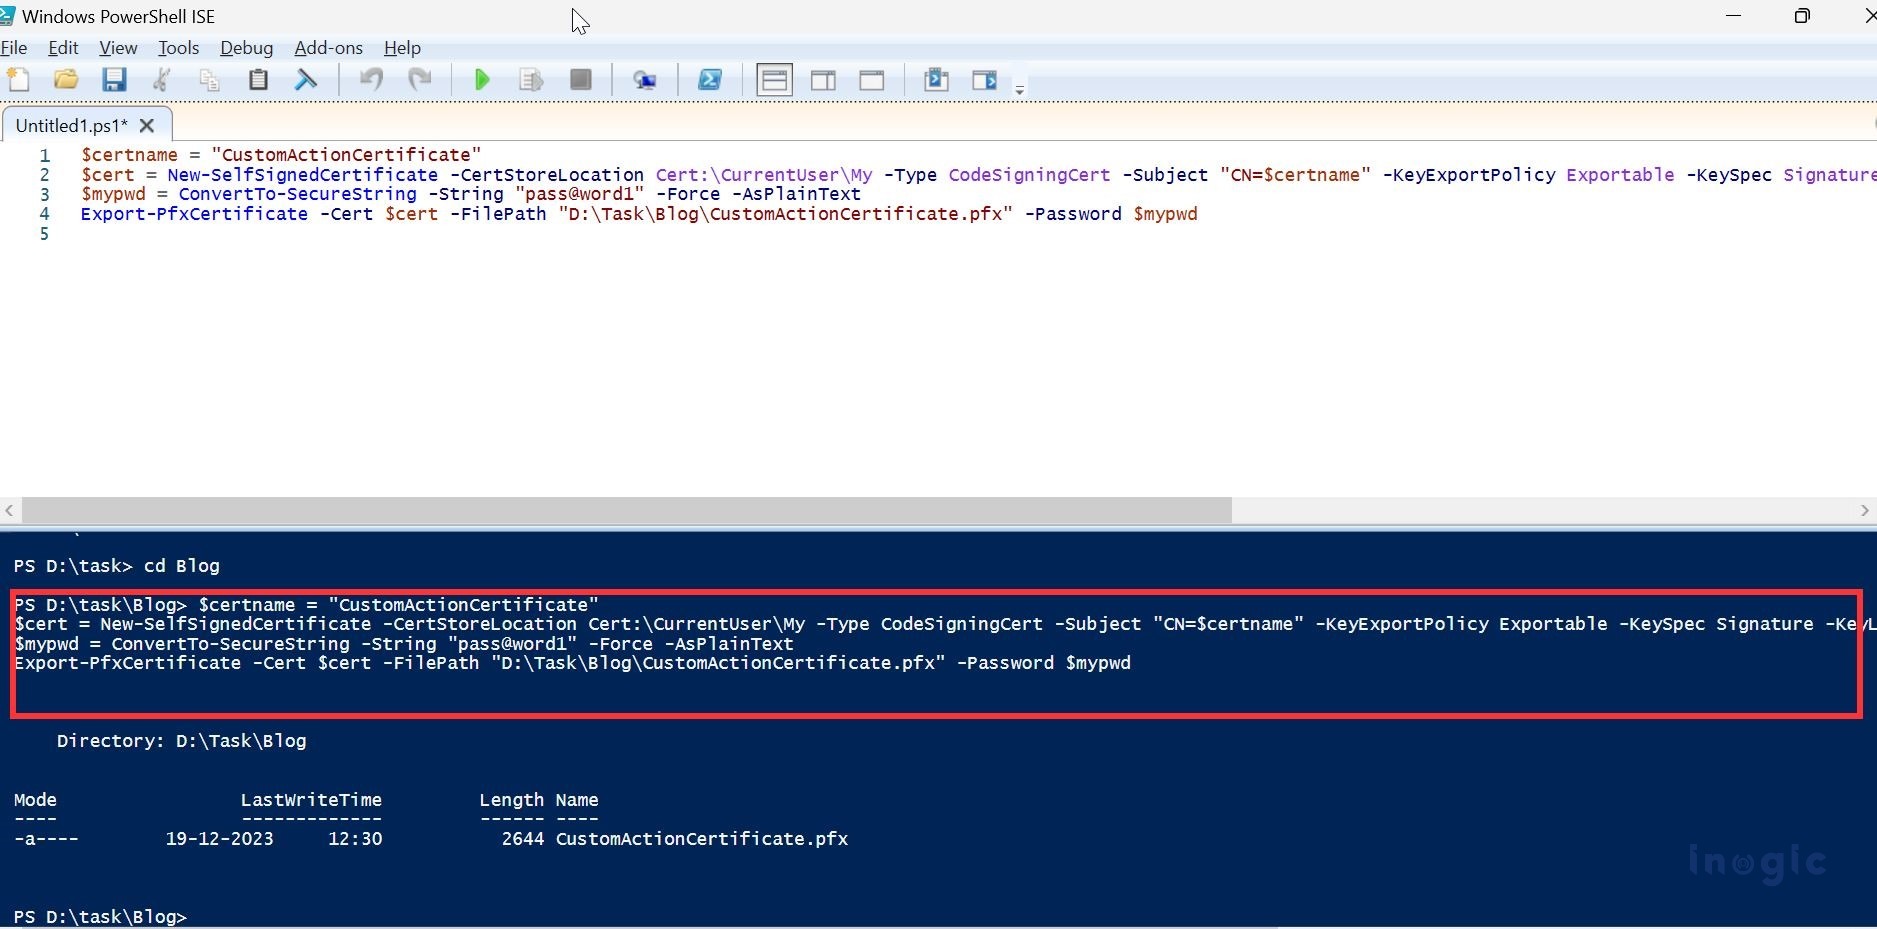
Copy and paste the following commands, replacing the underlined names as appropriate.
$certname = "CustomActionCertificate"
$cert = New-SelfSignedCertificate -CertStoreLocation Cert:\CurrentUser\My -Type CodeSigningCert -Subject "CN=$certname" -KeyExportPolicy Exportable -KeySpec Signature -KeyLength 2048 -KeyAlgorithm RSA -HashAlgorithm SHA256

$mypwd = ConvertTo-SecureString -String "pass@word1" -Force -AsPlainText

Export-PfxCertificate -Cert $cert -FilePath "D:\Task\Blog\CustomActionCertificate.pfx" -Password $mypwd
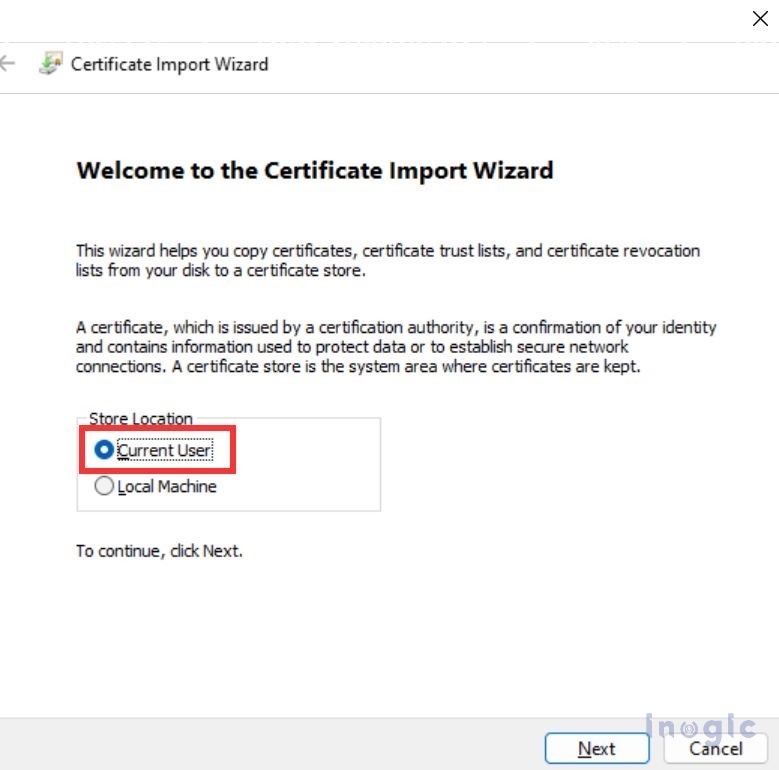
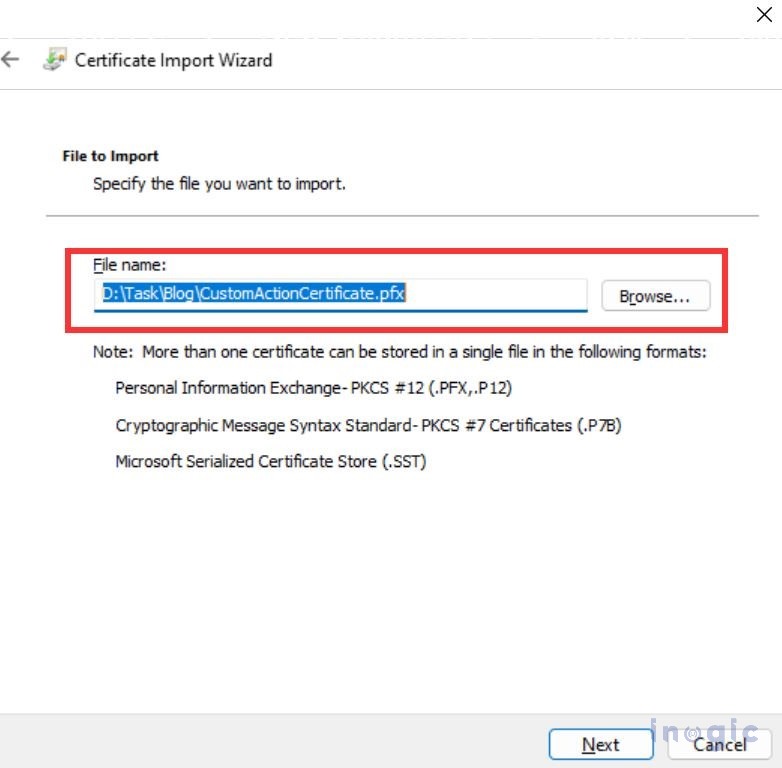
After generating and exporting the certificate, incorporate it into your trust root. Then, double-click on the exported certificate. Kindly complete all the steps in import vizard.
Click Next
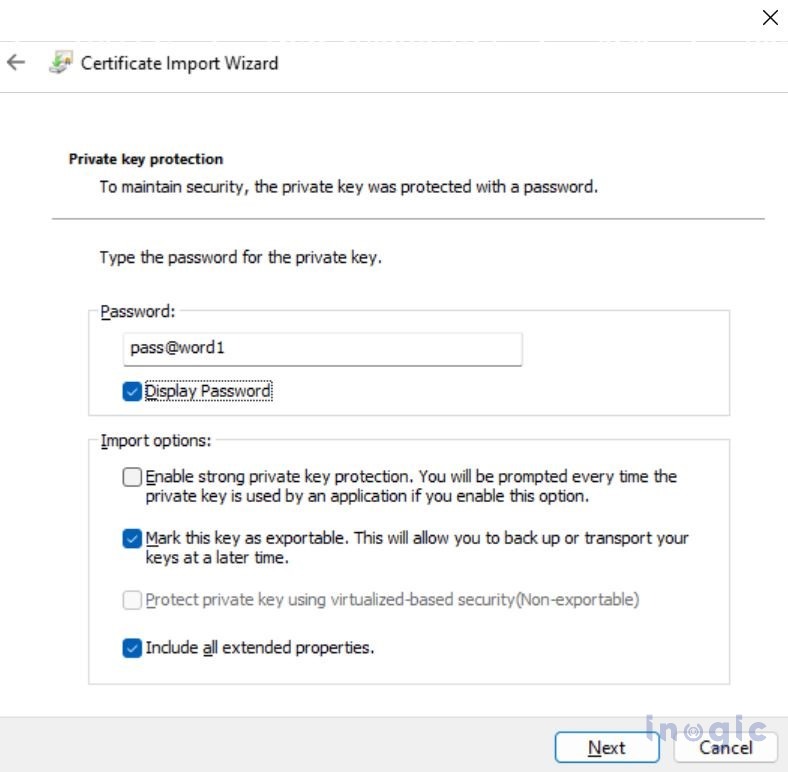
Write down the password that was used in the certificate creation command.
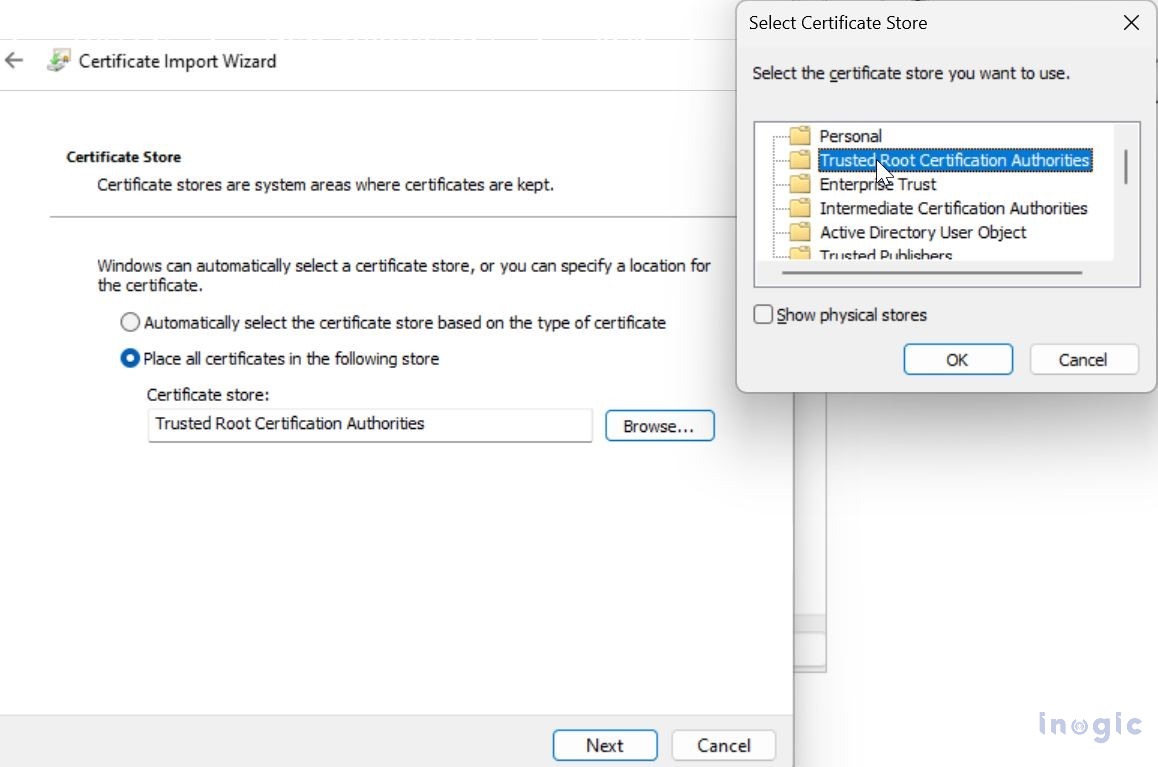
In the certificate store, select ‘Trusted Root Certification Authorities.’ Then click on ‘Next,’ and after that, simply click on ‘Finish.’ You will receive a message indicating that the import was successful.
Step 3: – Sign the .dll file using a trusted certificate by running the following command in a Developer Command Prompt for Visual Studio, replacing names as appropriate.
Signtool sign /f “D:\Task\Blog\CustomActionCertificate.pfx” /p pass@word1 /fd SHA256 “D:\Task\Blog\Modules.CustomActions\Modules.CustomActions\bin\Debug\net472\Modules.CustomActions.dll”
Step 4: – Packaging everything in a cabinet file
The .dll containing the custom actions and all its dependencies (.dll files) must be packaged in a cabinet file (.cab).
Create a Windows PowerShell Script (.ps1) containing the following lines & save it as Script[makeCabFile.ps1].
param(

[ValidateScript({Test-Path $_ -PathType Container})]

[string]

$sourceDir,

[ValidateScript({Test-Path $_ -PathType Container})]

[string]

$cabOutputDir,

[string]

$cabFilename

)

$ddf = ".OPTION EXPLICIT

.Set CabinetName1=$cabFilename

.Set DiskDirectory1=$cabOutputDir

.Set CompressionType=LZX

.Set Cabinet=on

.Set Compress=on

.Set CabinetFileCountThreshold=0

.Set FolderFileCountThreshold=0

.Set FolderSizeThreshold=0

.Set MaxCabinetSize=0

.Set MaxDiskFileCount=0

.Set MaxDiskSize=0

"

$ddfpath = ($env:TEMP + "\customModule.ddf")

$sourceDirLength = $sourceDir.Length;

$ddf += (Get-ChildItem $sourceDir -Filter "*.dll" | Where-Object { (!$_.PSIsContainer) -and ($_.Name -ne "Microsoft.PowerPlatform.PowerAutomate.Desktop.Actions.SDK.dll") } | Select-Object -ExpandProperty FullName | ForEach-Object { '"' + $_ + '" "' + ($_.Substring($sourceDirLength)) + '"' }) -join "`r`n"

$ddf | Out-File -Encoding UTF8 $ddfpath

makecab.exe /F $ddfpath

Remove-Item $ddfpath
Step 5: – Use the following command to create a .cab file in PowerShell.
.\makeCabFile.ps1 “D:\Task\Blog\Modules.CustomActions\Modules.CustomActions\bin\Debug\net472” “D:\Task\Blog” CustomActions.cab
Step 6: – The .cab file must also be signed. Use the following command to sign the .cab file in a Developer Command Prompt for Visual Studio, replacing names as appropriate.
Signtool sign /f “D:\Task\Blog\CustomActionCertificate.pfx” /p pass@word1 /fd SHA256 “D:\Task\Blog\CustomActions.cab”
Step 7: Upload custom actions
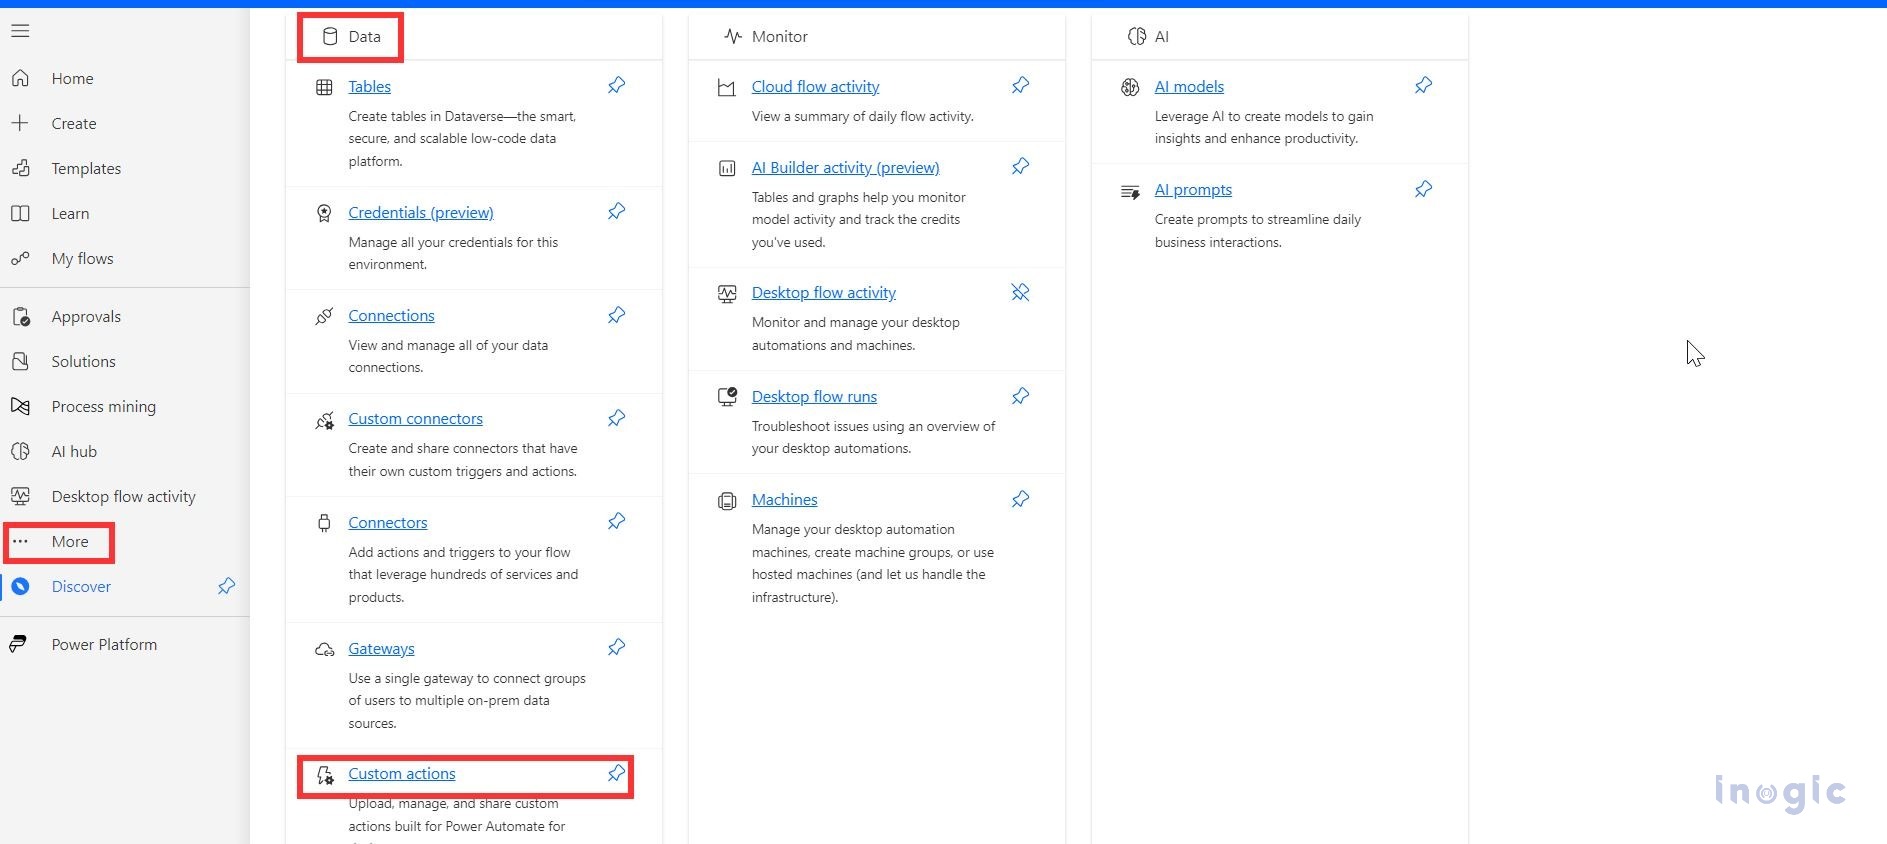
Go to Power Automate -> More -> Discover all -> Data -> Custom Action.
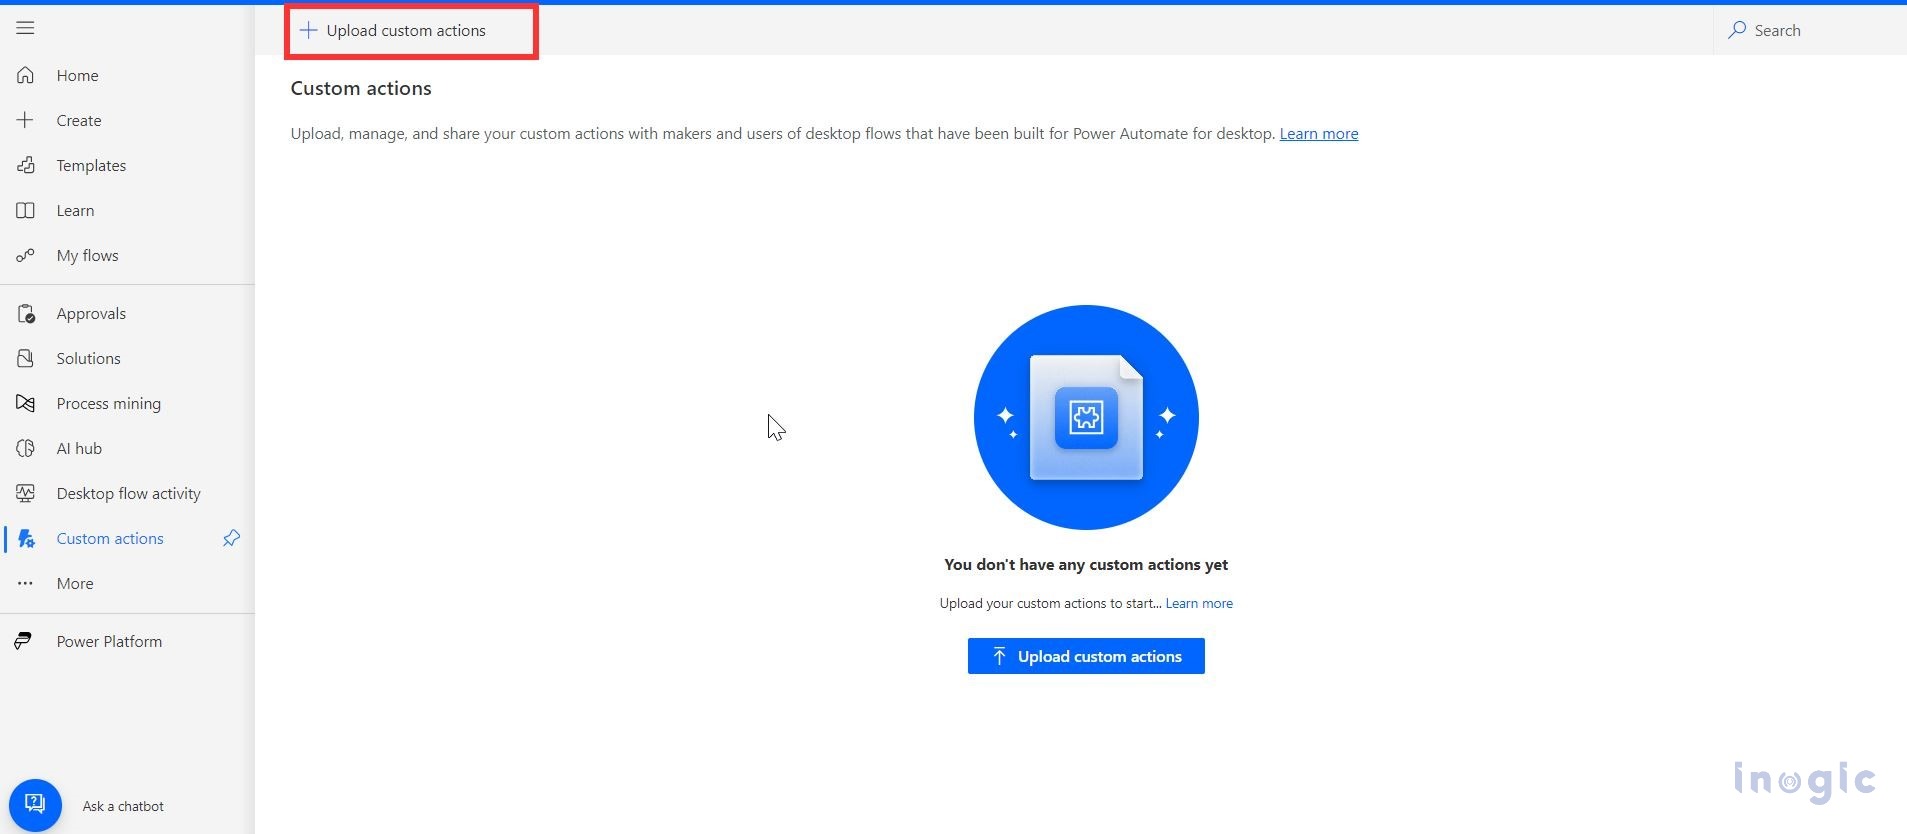
Select ‘Upload custom action’ and upload the .cab file. However, note that we can upload .cab files up to 30MB.
Step 8: Use custom actions
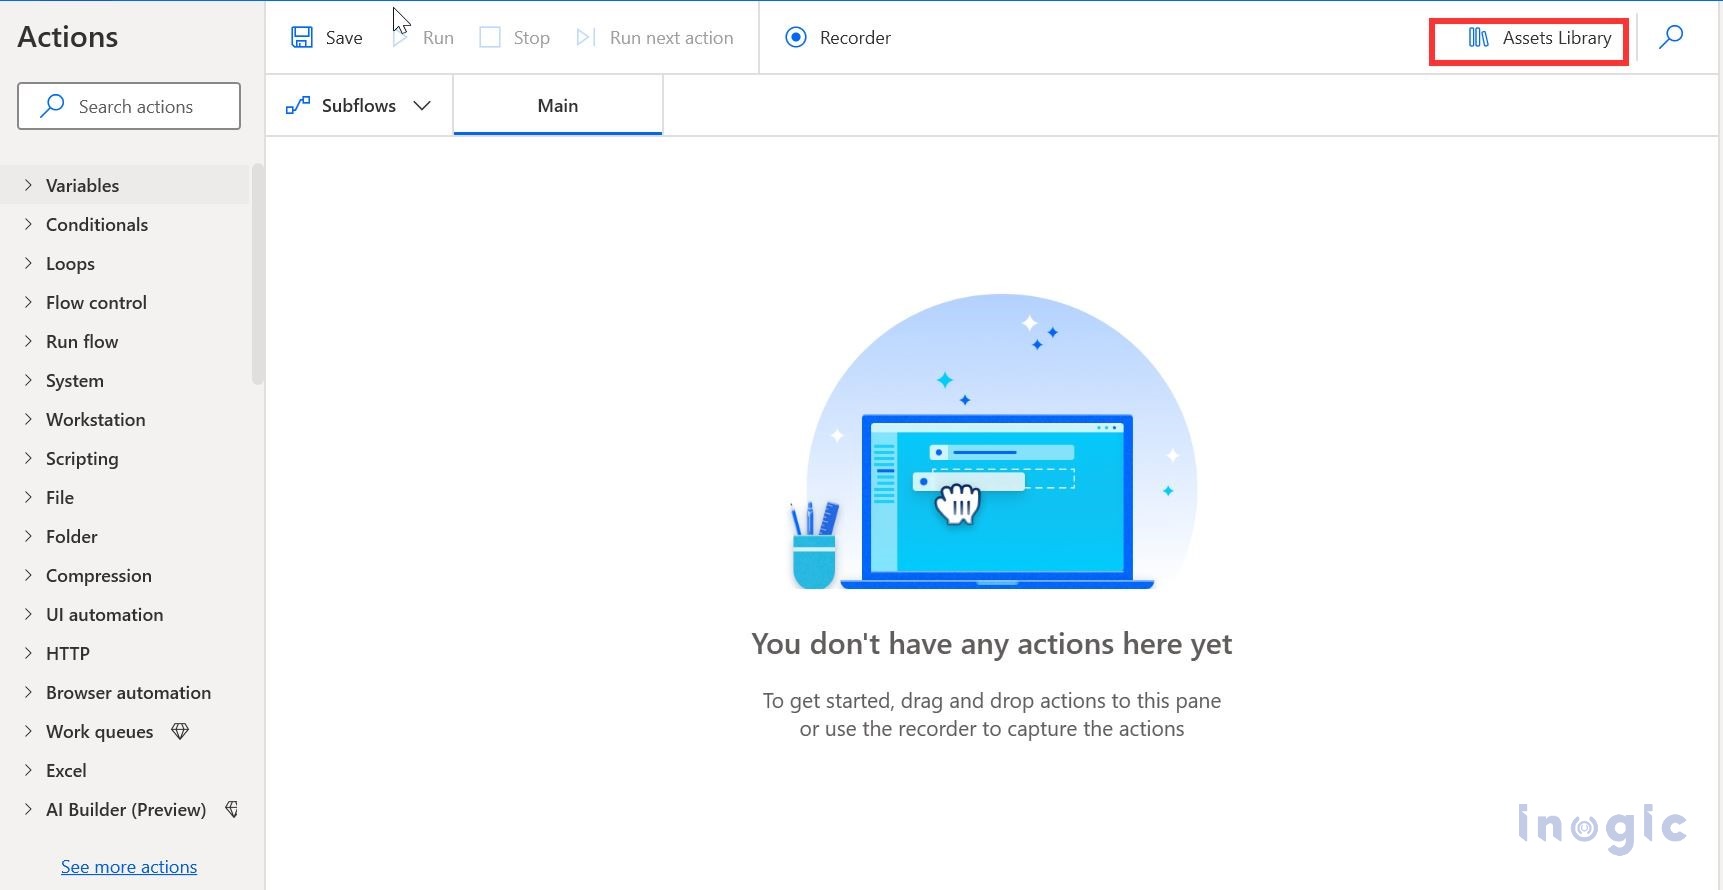
You can include custom actions in the desktop flow through the ‘Assets library’ using Power Automate Desktop Designer.
To use the ‘Assets library,’ select it in the designer. Alternatively, use the Tools bar.
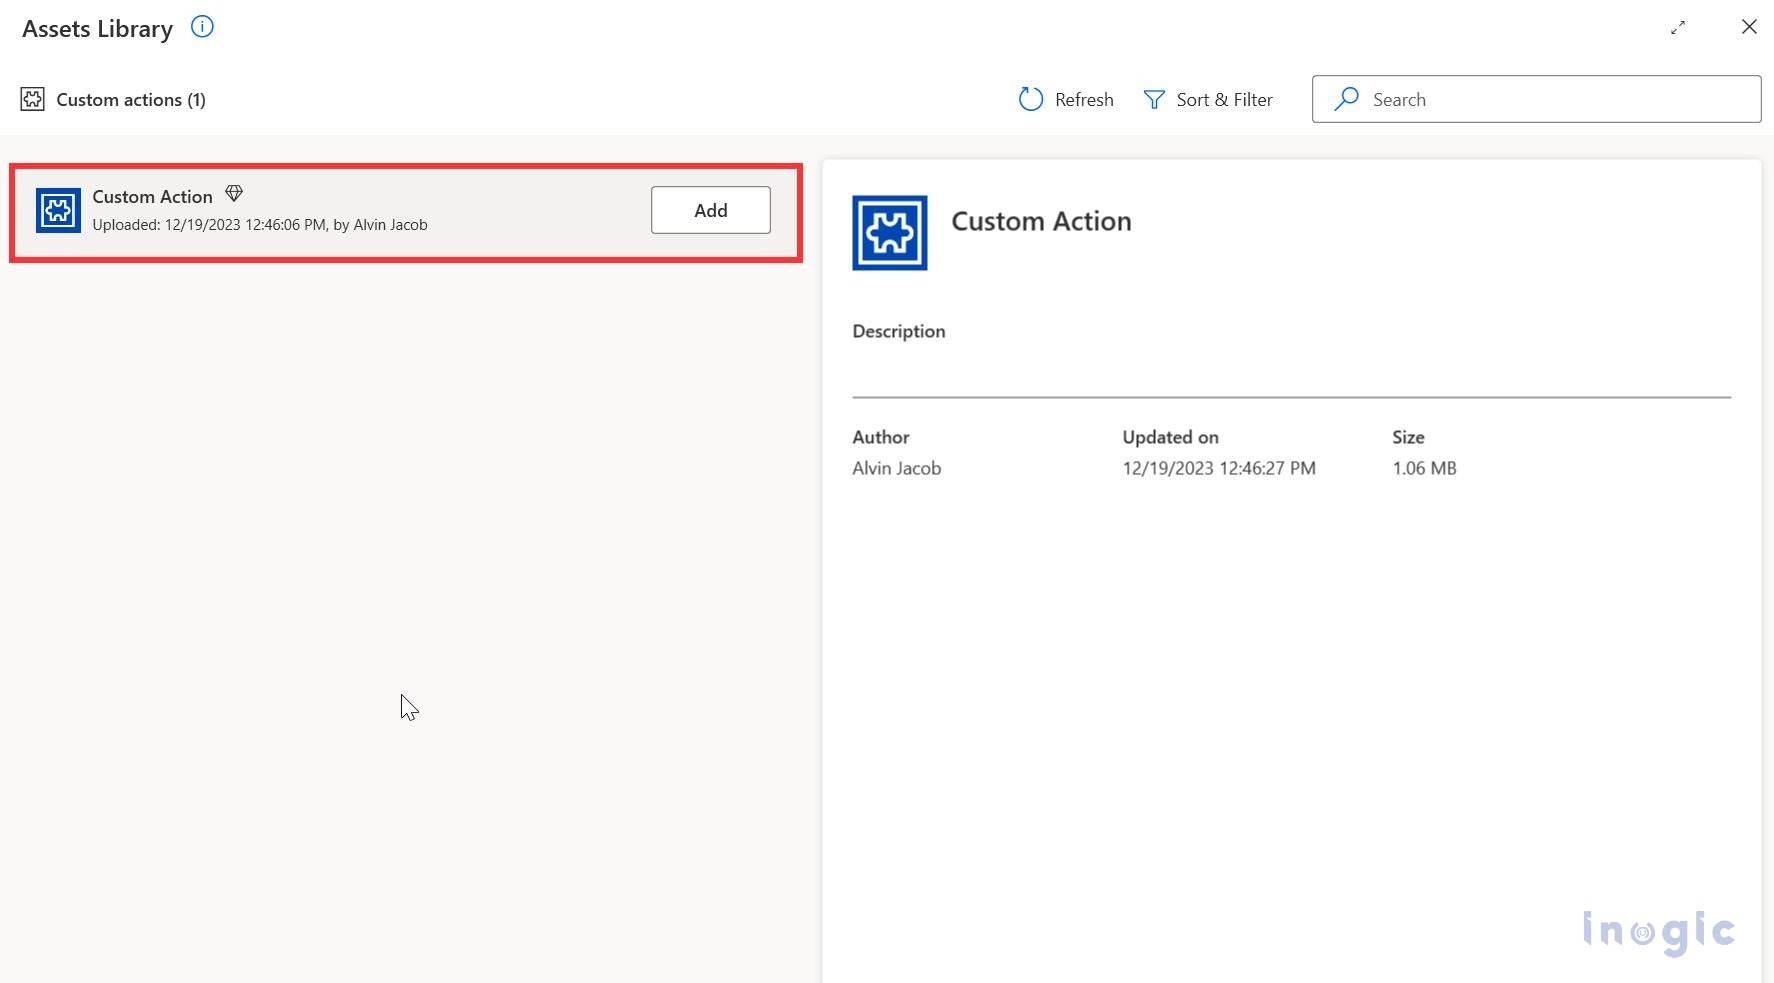
In the Assets library, we can see all the custom actions we have uploaded. We can add a custom action, and we can also remove previously added custom actions.
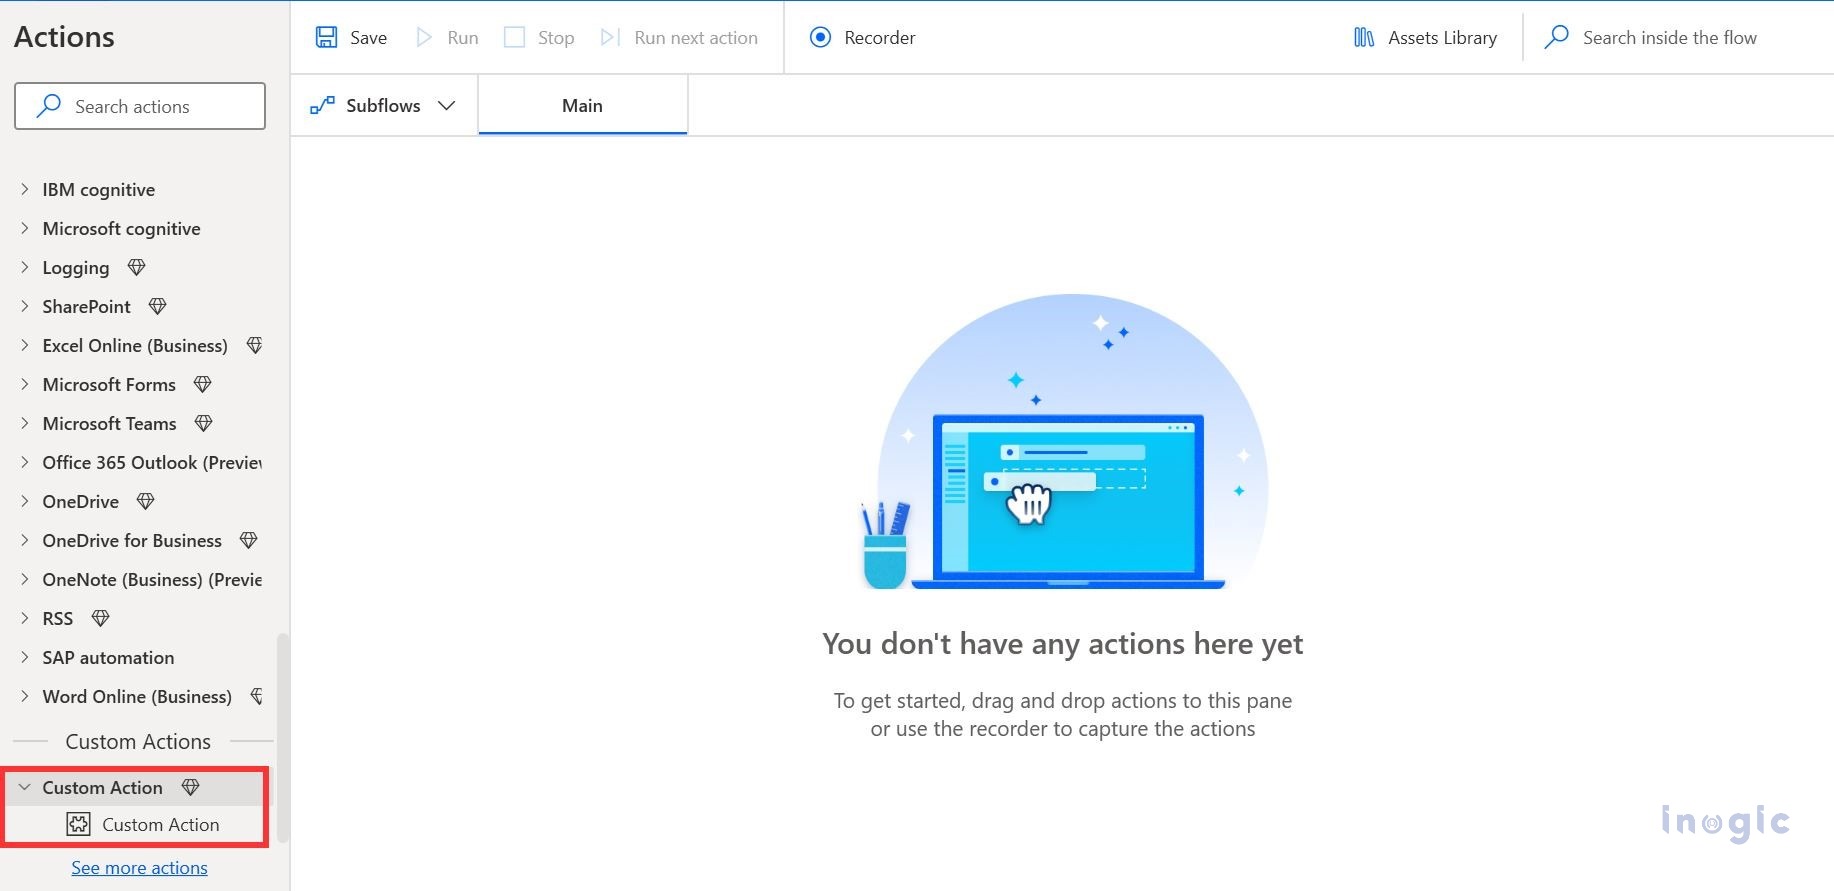
Now, we can use our custom action.
Double-click on the custom action to add it.
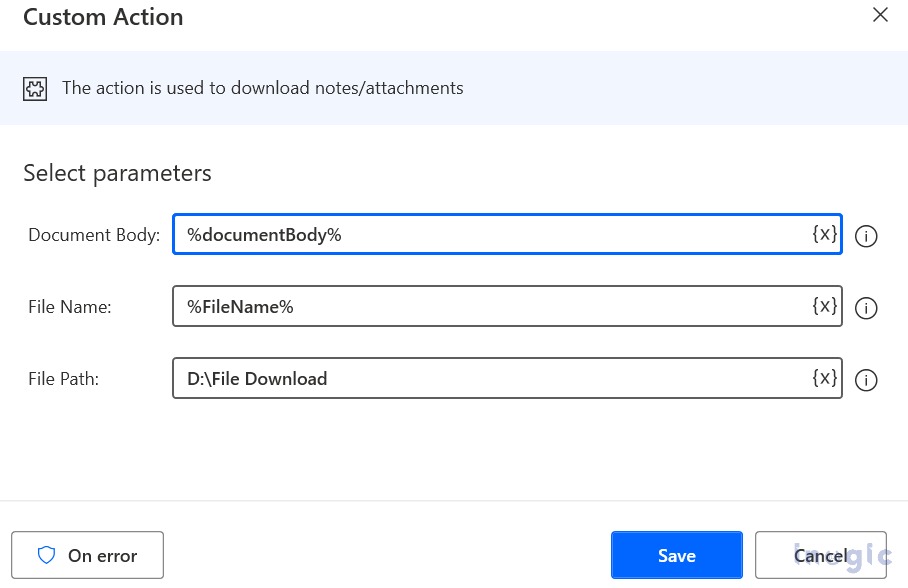
Here, documentBody and FileName are variables taking input from the cloud flow. Choose the file path where you want to store the downloaded attachment or notes.
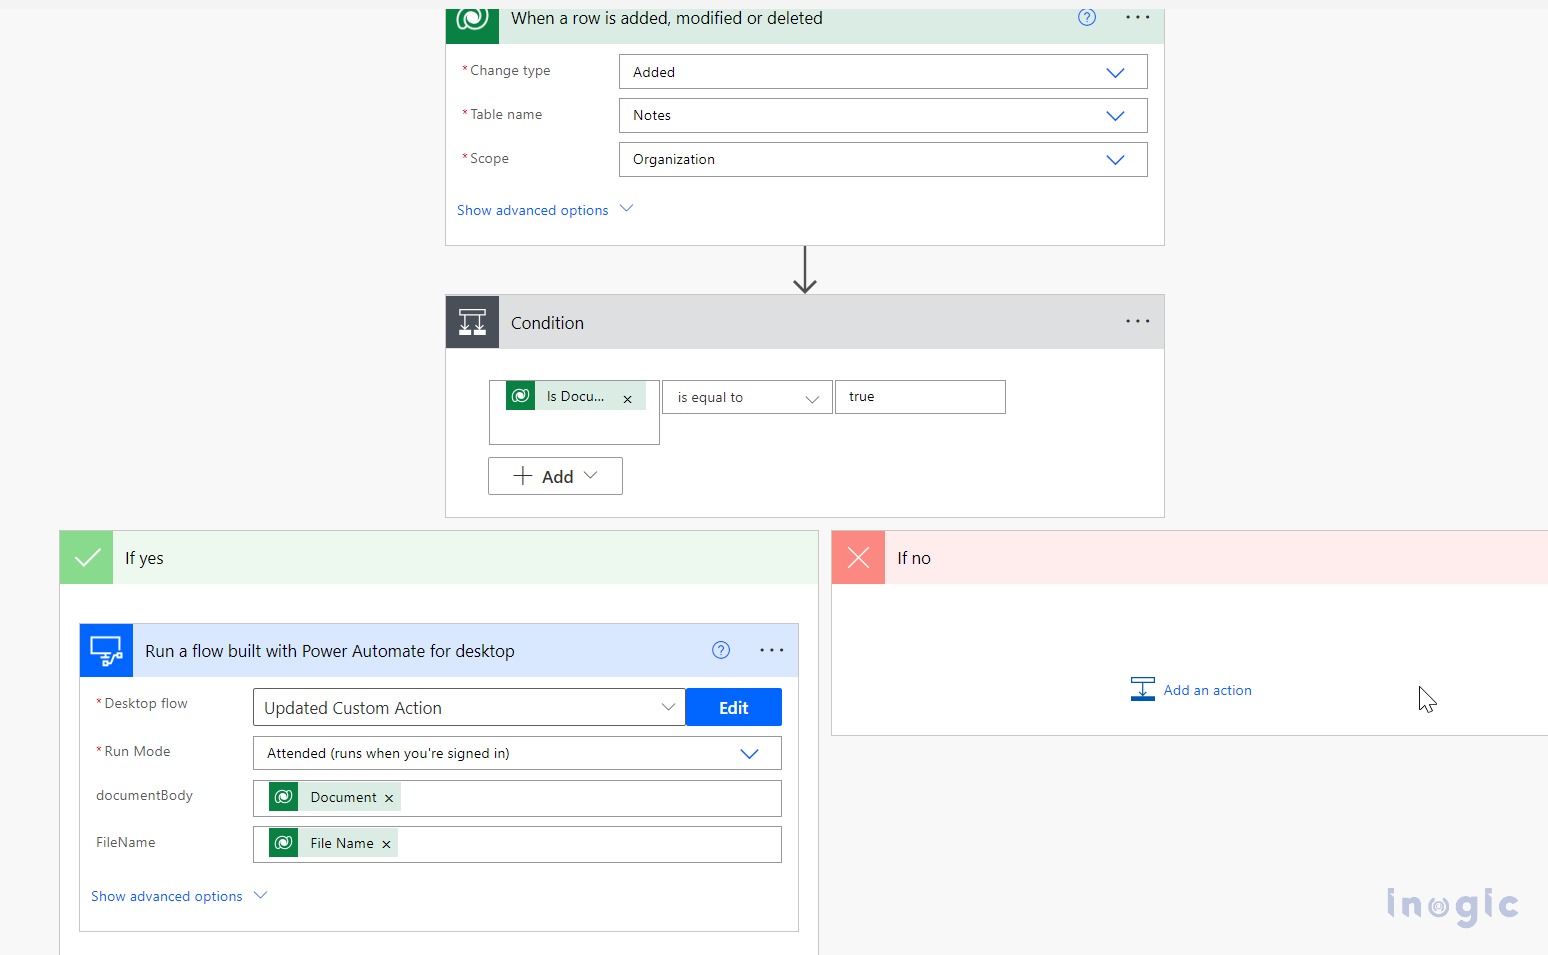
We created an automated cloud flow that triggers when a file is added to notes. Then, we check if the document is present or not in a condition. If the document is present, we call a desktop flow, select the run mode, and pass documentBody and fileName.
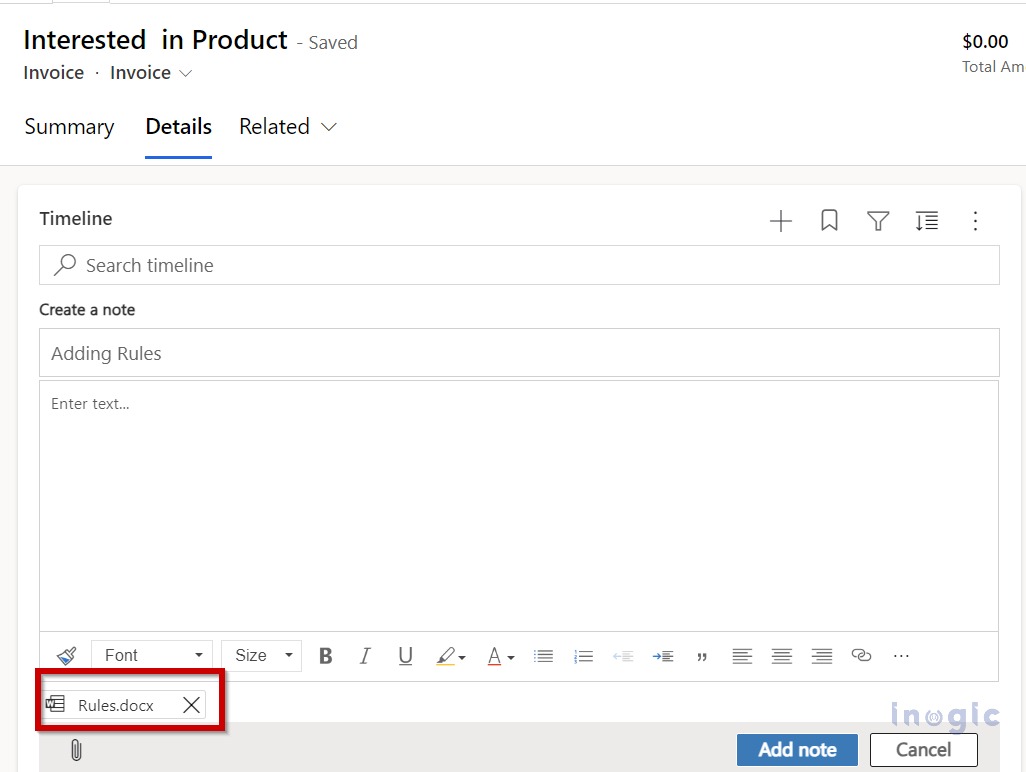
Here, I am adding a docx file to the note.
Finally, the file is downloaded or stored in my selected path automatically
Conclusion
Thus, we learned how to utilize the custom actions with the Power Automate Desktop Flows
