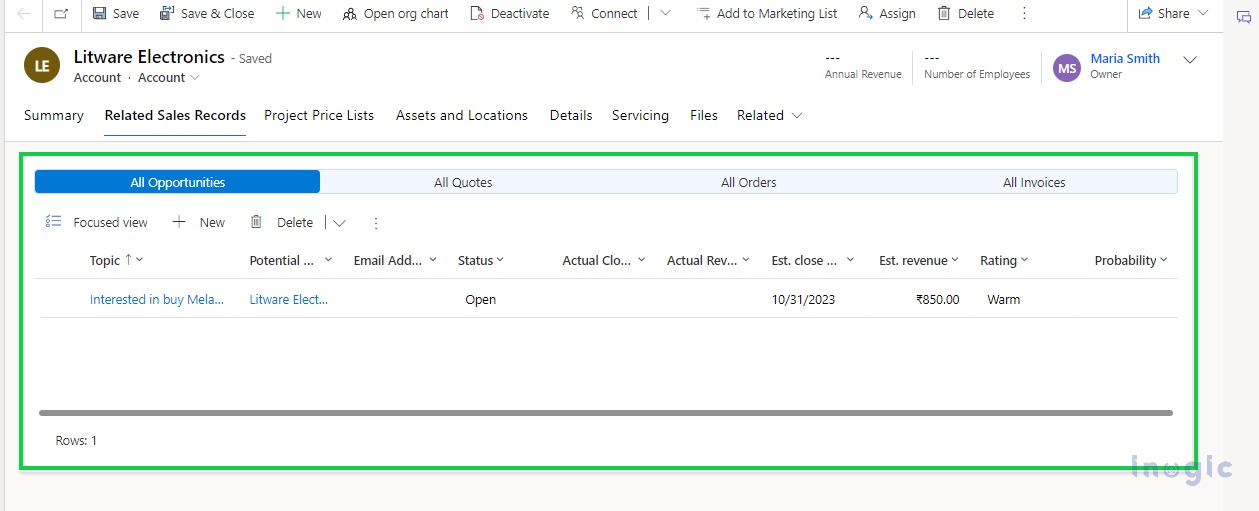
The newly introduced Associated Grid Control allows us to enhance the form’s simplicity and readability by showcasing related record details up to four subgrids. This Associated Grid Control is available for all tables.
Steps to configure the Associated Grid Control,
1. Navigate to https://make.powerapps.com
2. Select the environment that contains your solution and select Table > Forms > open the form on which you want to add the Associated Grid Control.
3. In the form designer, select Associated Grid Control in the More Components list from the left navigation as shown below,
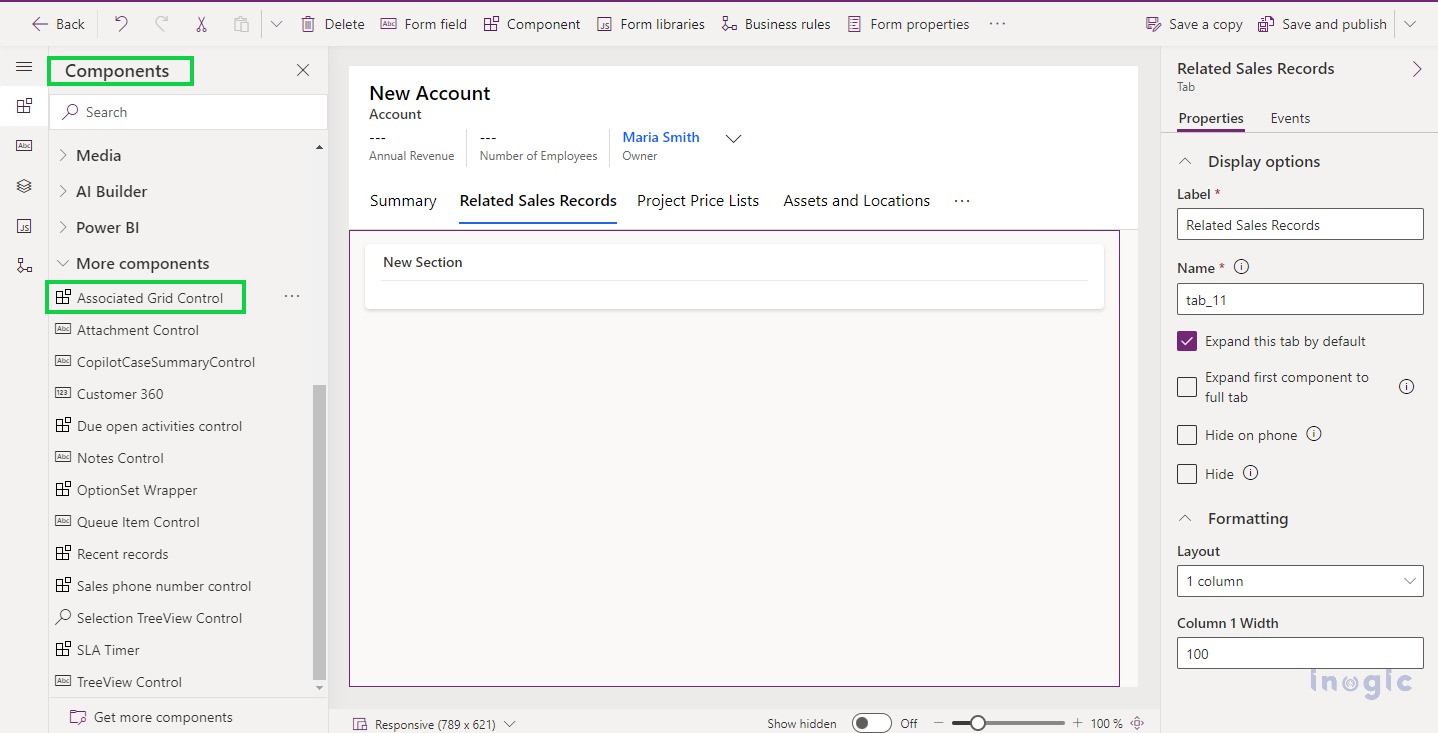
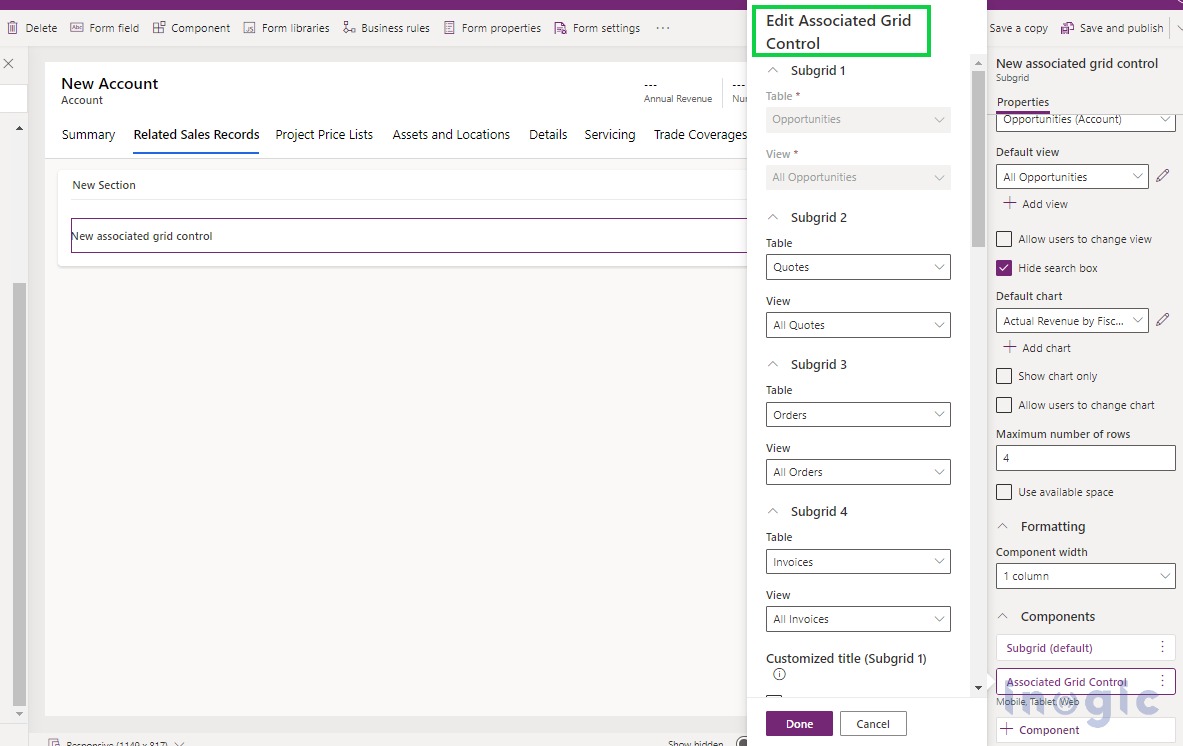
4. On dragging it to form, you will see the properties panel where you can specify the Tables along with the Default View that needs to be displayed for the respective table in the subgrids.
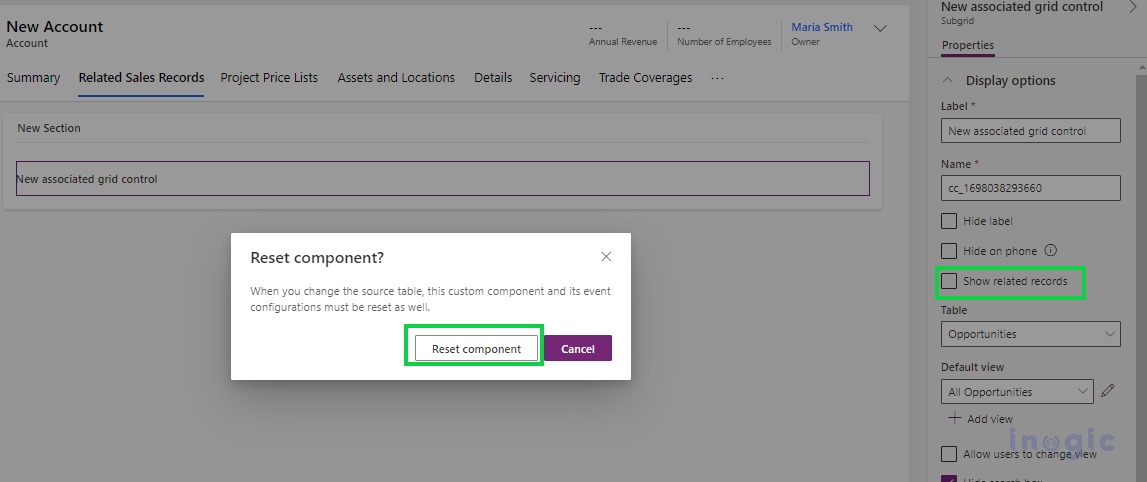
5. Make sure, you select the “Show related records” property to display only records that are related to the current record on the form and not all the available records and this property applies to only Subgrid 1.
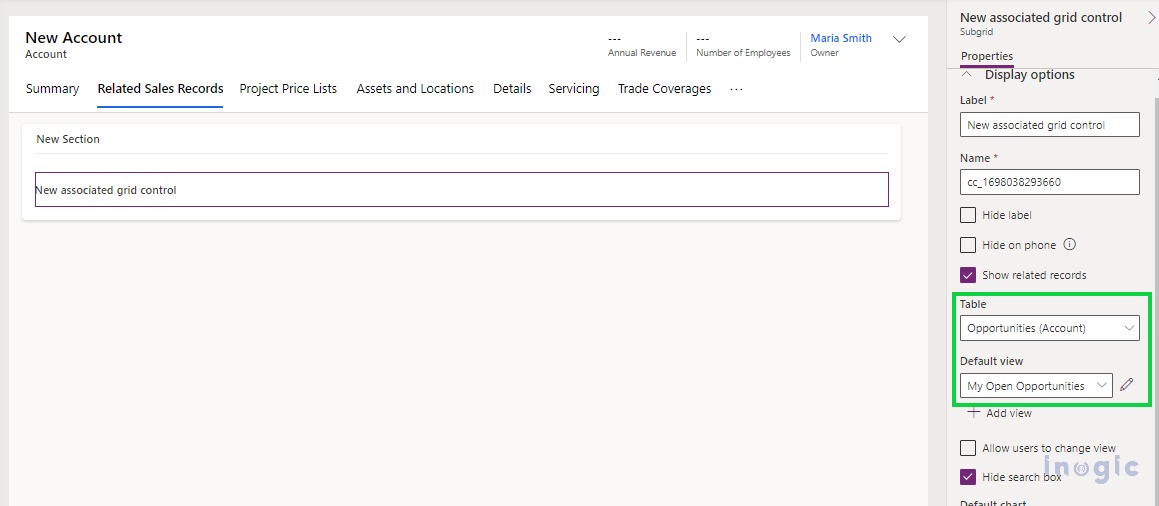
While setting the same, the below popup message will be displayed to reset the component of the Associated Grid control and on clicking Reset Component, you have again set the Subgrid 1 properties as this setting applies to only Subgrid 1 as shown below,
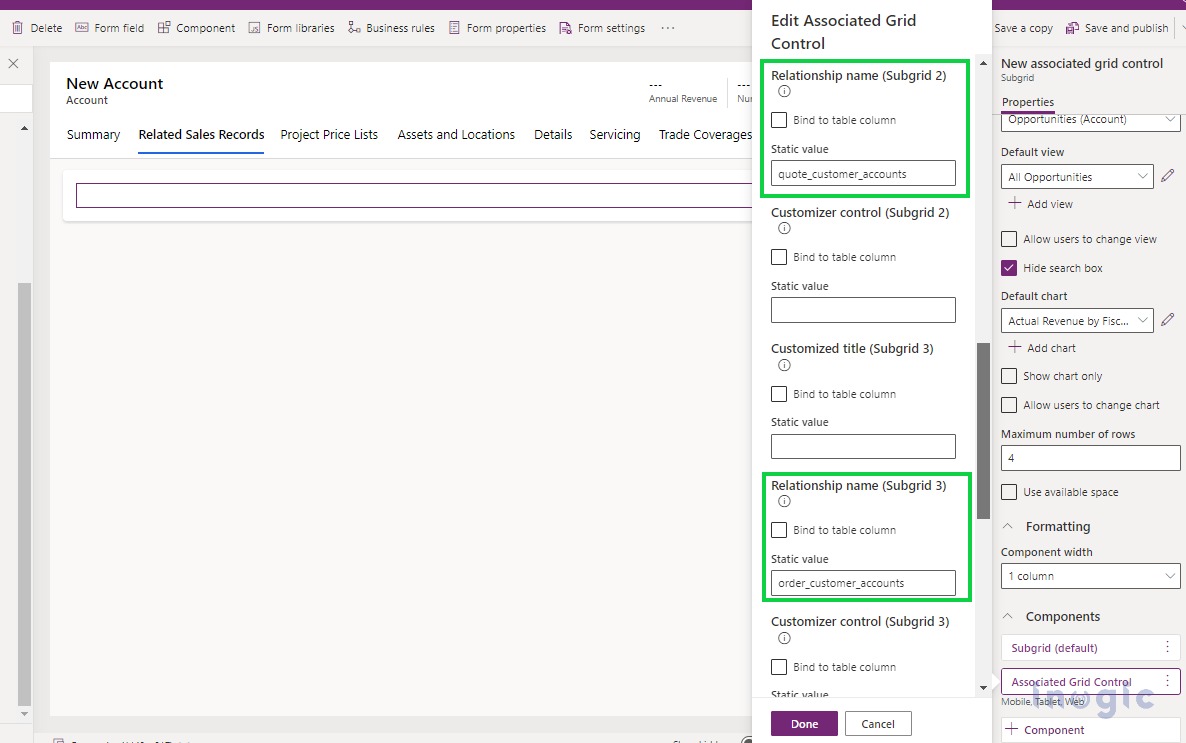
For other subgrids to display only related records, you can specify the Relationship name of the related table with the current table in the control properties as shown below,
6. Once you are done with the configuration, you can Save and publish the form and see how it looks,
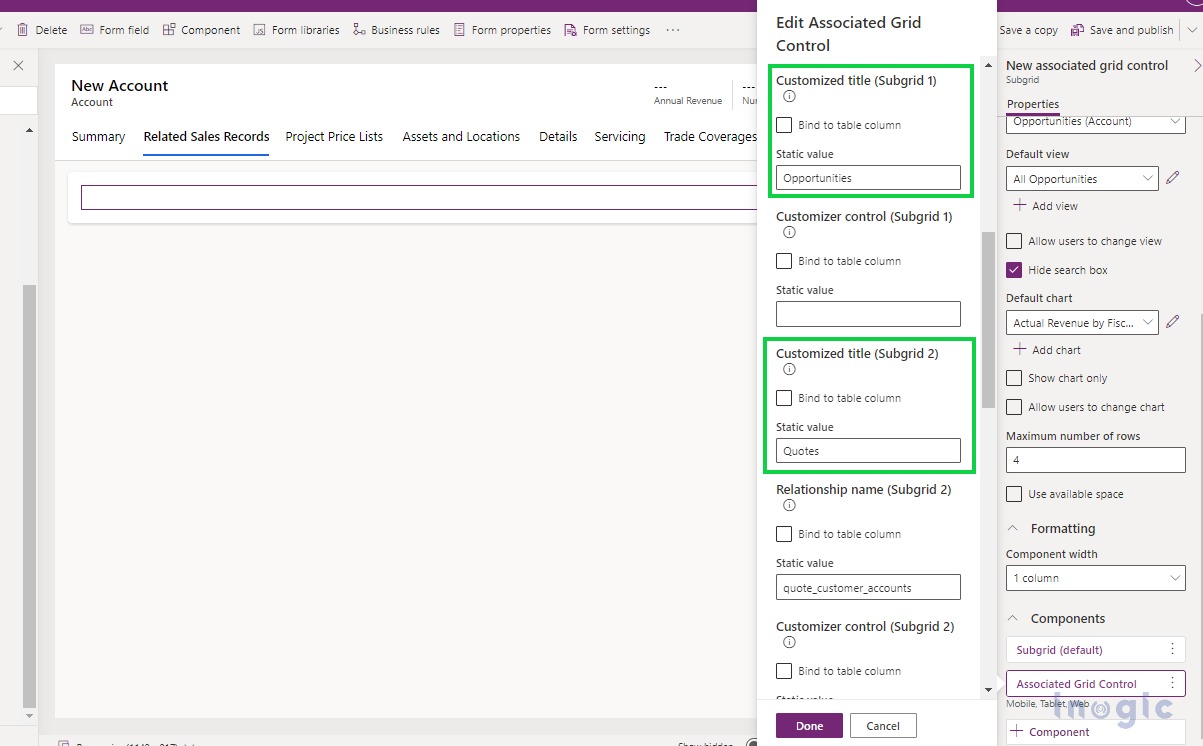
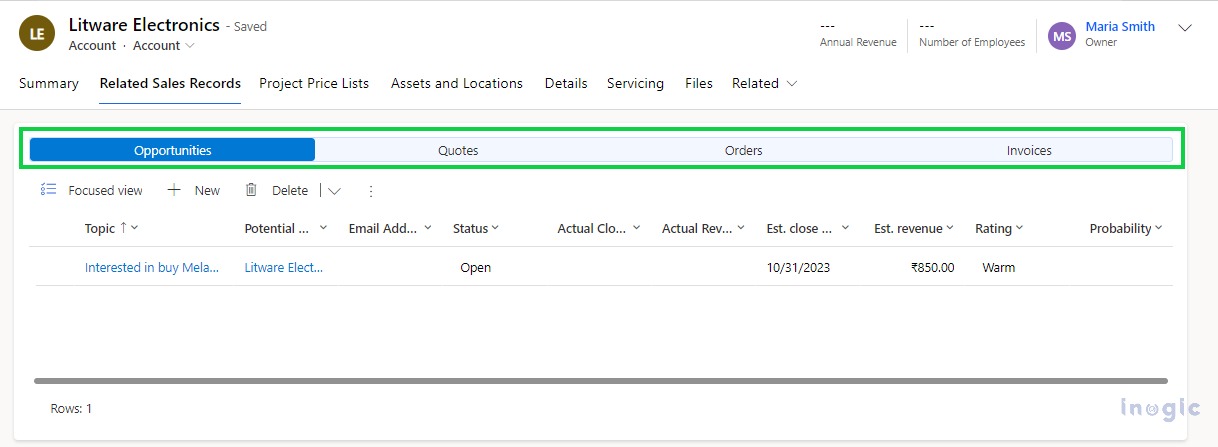
7. If you want to see any other title for those subgrids i.e. instead of All Opportunities just display Opportunities, you can set it in the control properties.
By default, the Default View Name selected for the respective subgrids will be displayed as Title.
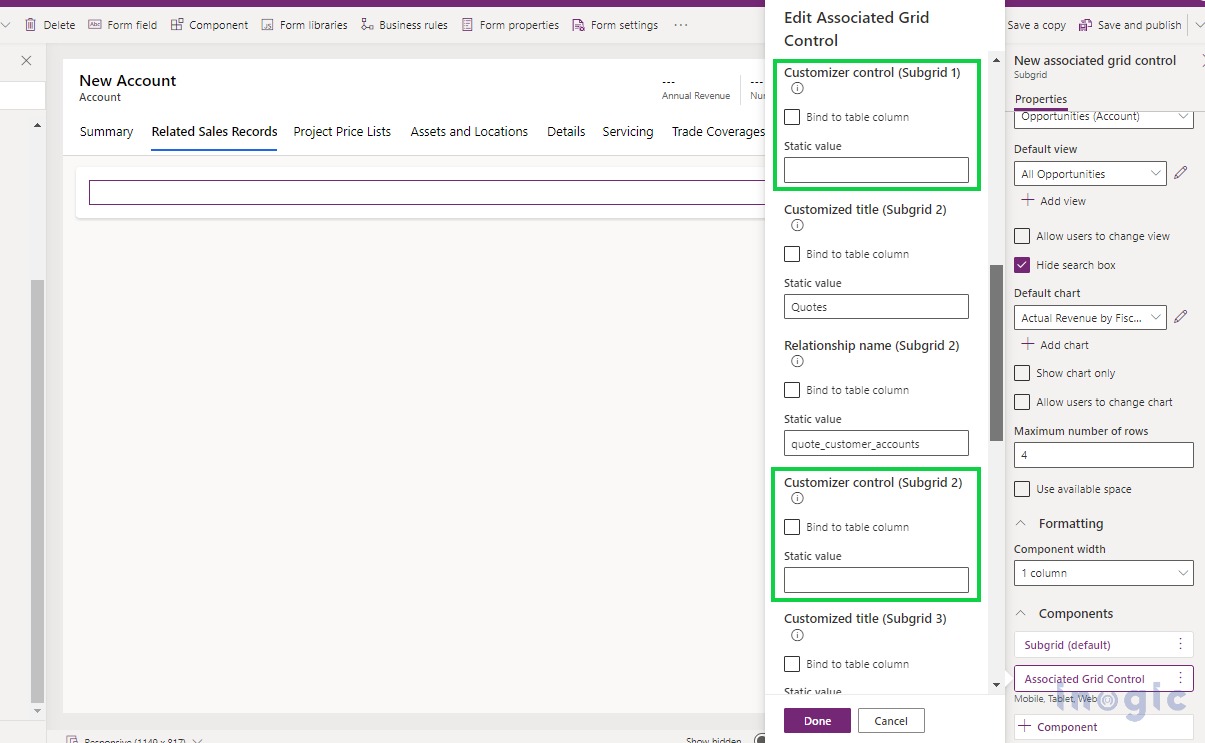
8. Also, you can configure control on each subgrid in the properties as shown below,
Conclusion
This newly introduced Associated Grid Control will surely make the user experience easy while working with forms/subgrids and turn complex forms into simpler versions.
