In today’s fast-paced digital landscape, there is an excess demand for streamlined solutions. And we, as makers, constantly seek ways to optimize workflows, enhance productivity, and deliver exceptional user experiences.
This can be achieved by harnessing the potential of Excel spreadsheets, transforming them into entities, and ultimately evolving them into dynamic applications that resonate with a broader audience.
Also, enabling Copilot helps with table creation by providing the best-fitting table names, descriptions, column names, and data types based on the uploaded Excel data.
In this article, we will explore the process of transforming employee data from an Excel sheet into an entity. We will determine how this entity can be integrated into a Canvas App.
To import data from Excel, follow these steps:
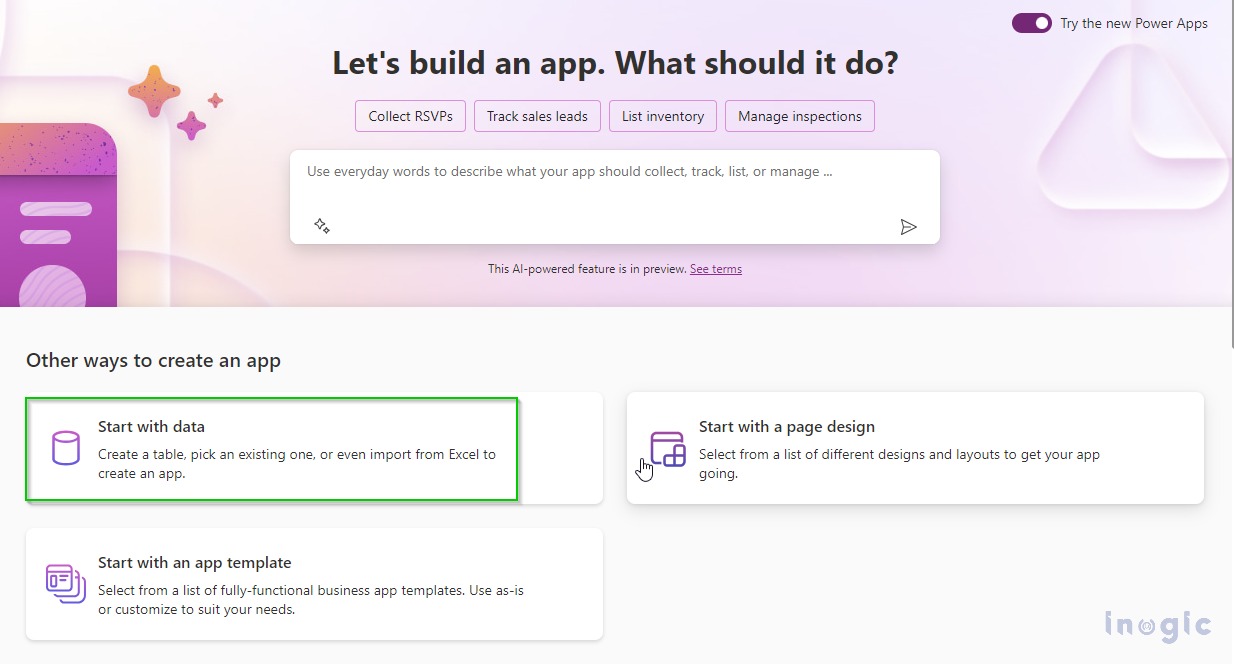
1. Open https://make.powerapps.com/ and access the home page.
2. Click on “Start with Data” to initiate the data import process.
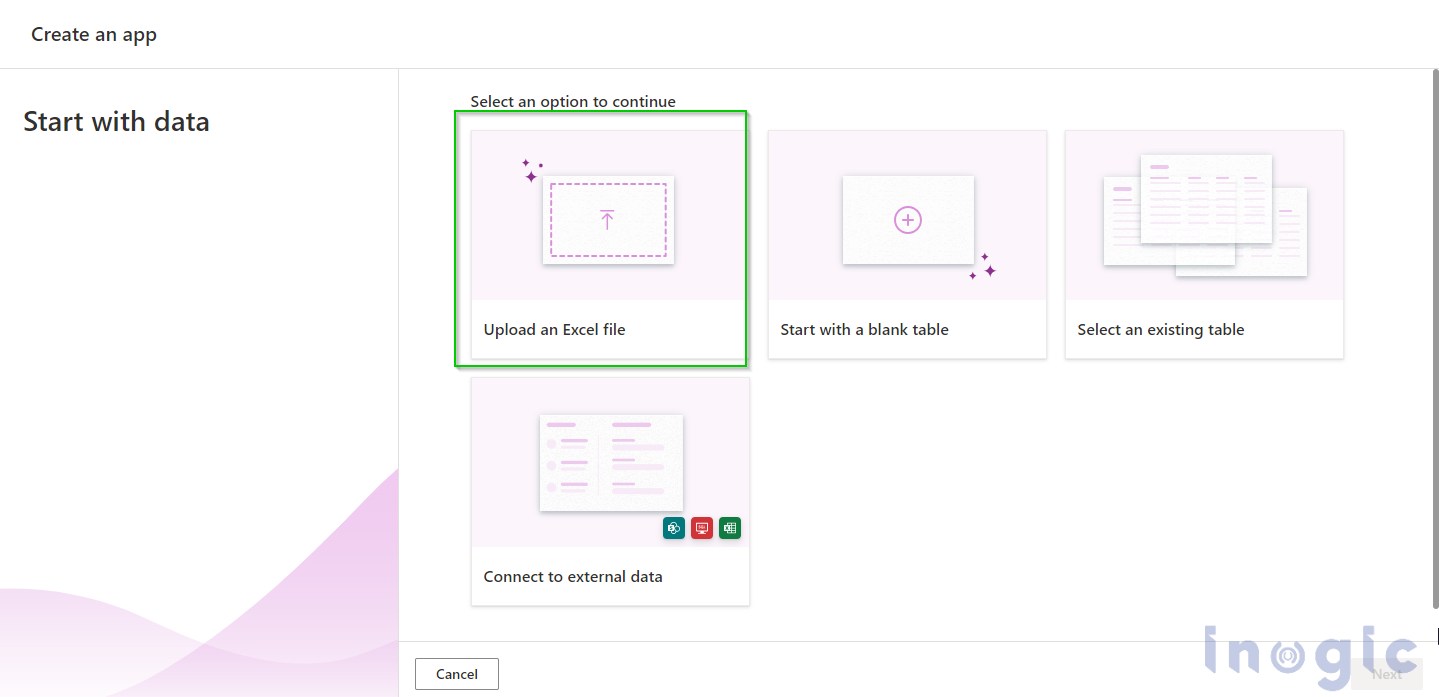
3. Select “Upload an Excel file” from the available options.
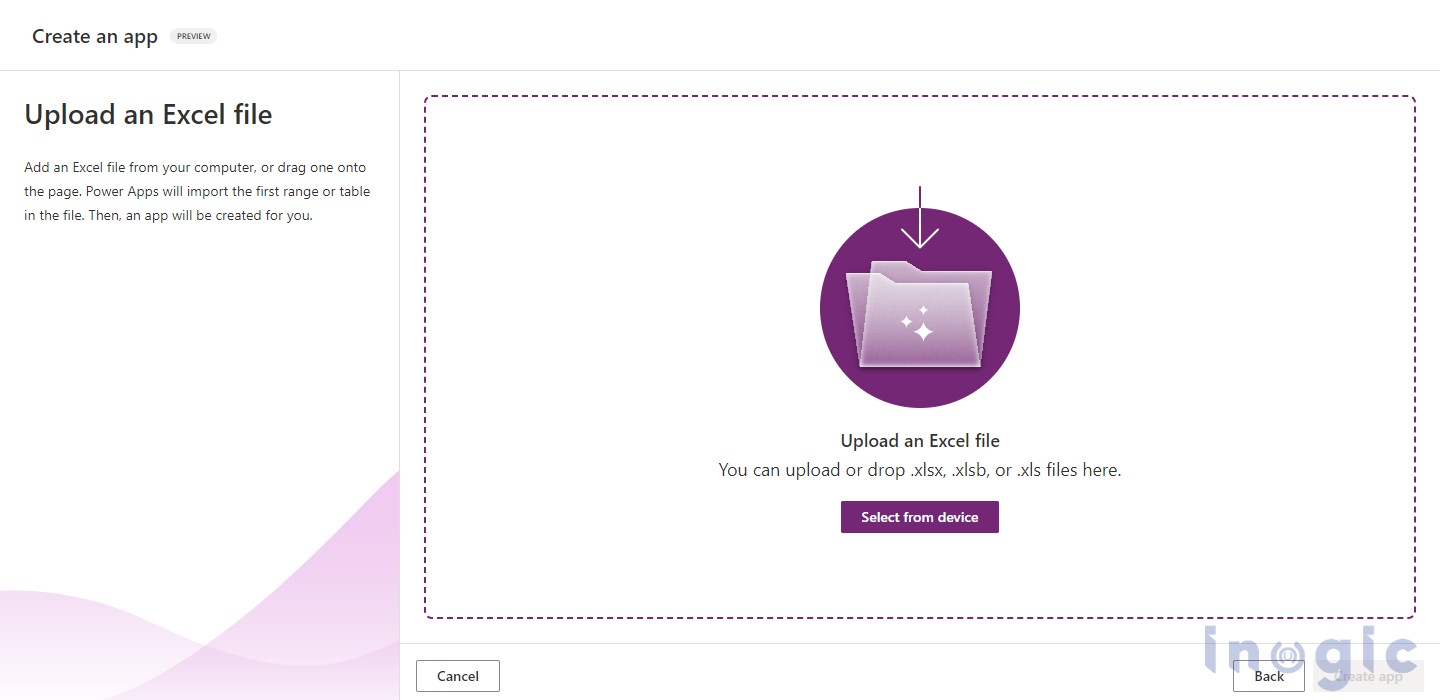
4. A new page will appear, allowing you to upload the Excel file. Either choose “Select from device” to browse and select the file manually or drag and drop the Excel file.
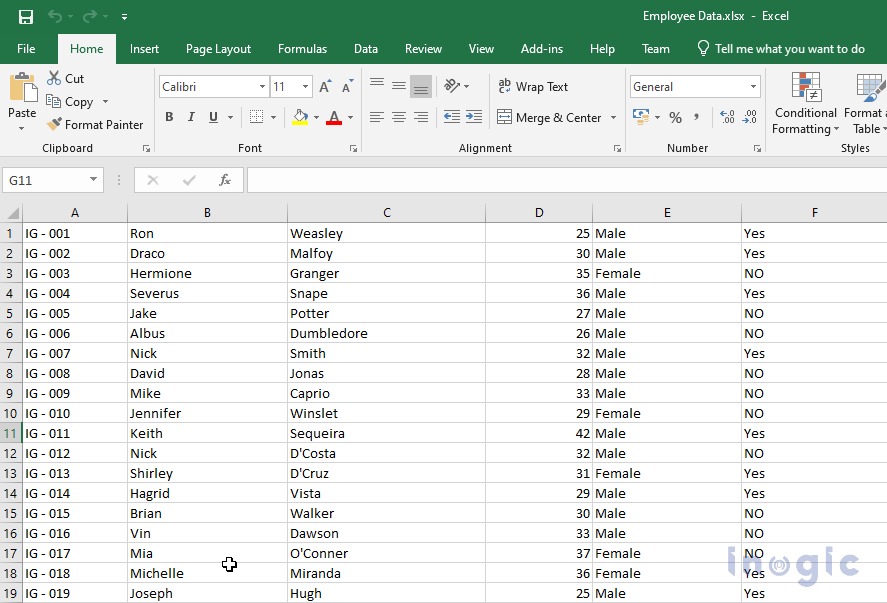
5. Now, upload the Excel file without specifying any column names.
This will demonstrate how Copilot, an advanced AI tool, can assist in identifying the most suitable table names, column names, and data types based on the content of the uploaded Excel data.
To make use of Copilot in your CRM environment, you must first enable it along with AI Builder and Copilot Preview.
It’s important to note that users with the role of System Administrator or Global Administrator are granted the necessary permissions to perform these actions.
To enable Copilot follow the below steps:
1. Sign in to Power Platform Admin Center.
2. Click on the Environmentsoption in the left panel.
3. Select specific environment> Click on settings > then click on Product > Click on Features > Turn on Copilot and under AI Builder, enable AI Builder preview models.
By default, these features are enabled.
Copilot is enabled, so you can upload the Excel sheet without mentioning column names.
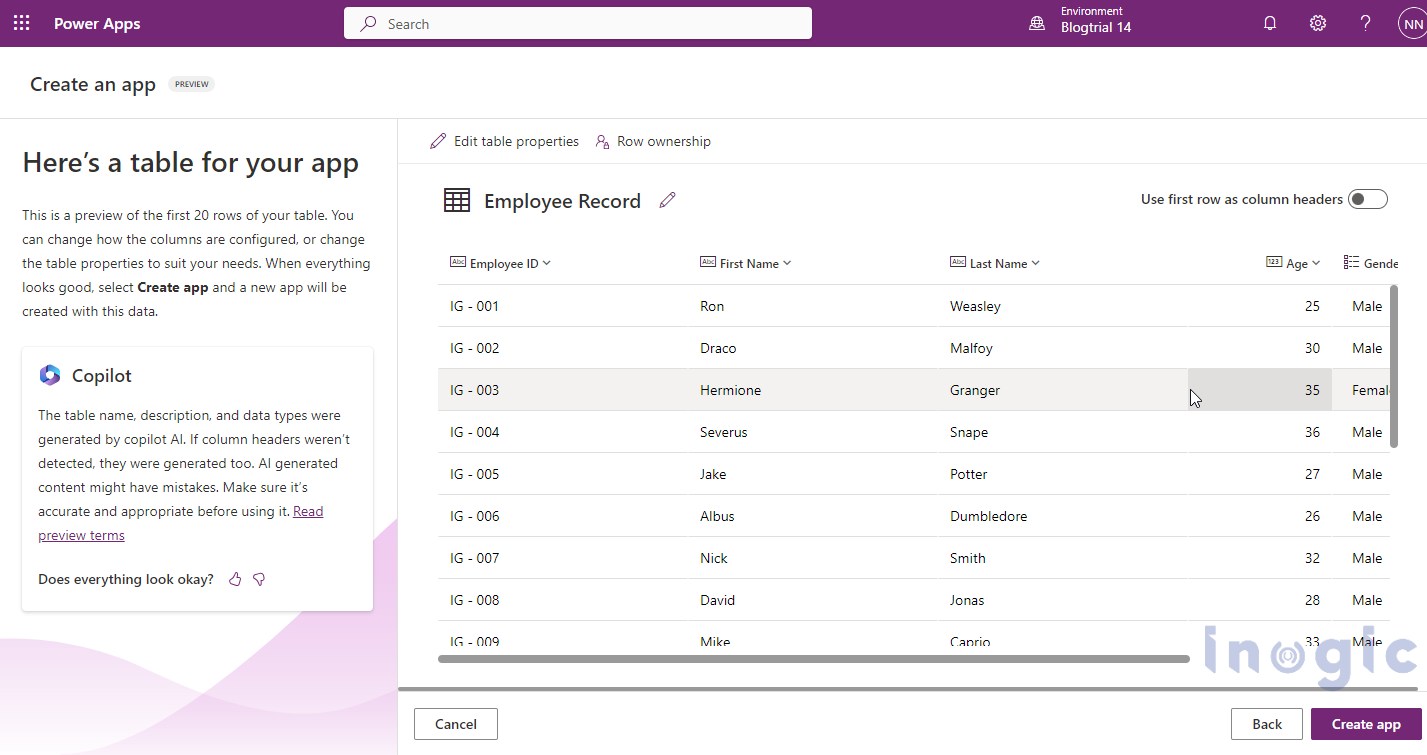
Once the file is uploaded, it will be displayed as shown in the below screenshot.
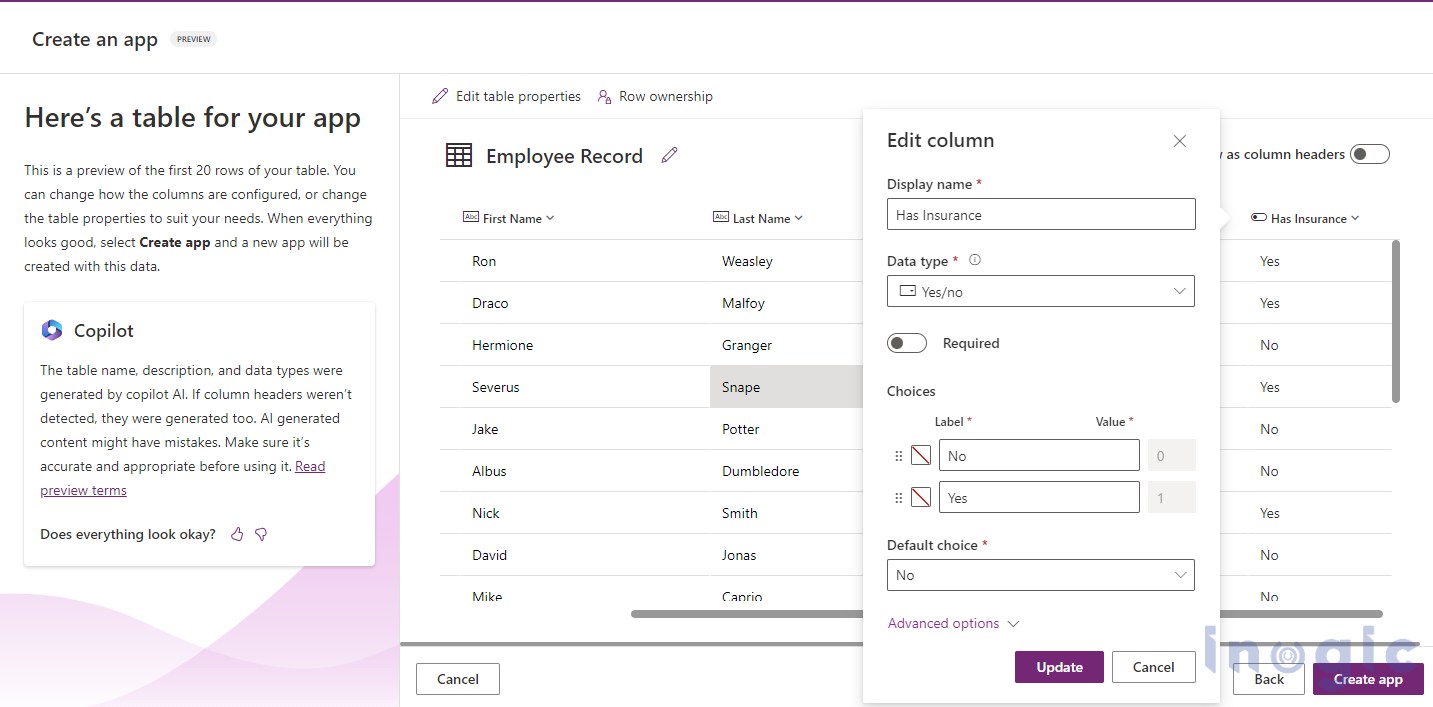
When utilizing Copilot to generate a table, an indicator (in the form of a card) will appear on the left-hand side of the screen. This card informs users that AI has played a role in assisting with the creation of the table.
The above screenshot clearly illustrates how Copilot has carefully analyzed the data and significantly contributed in creating column names and data types.
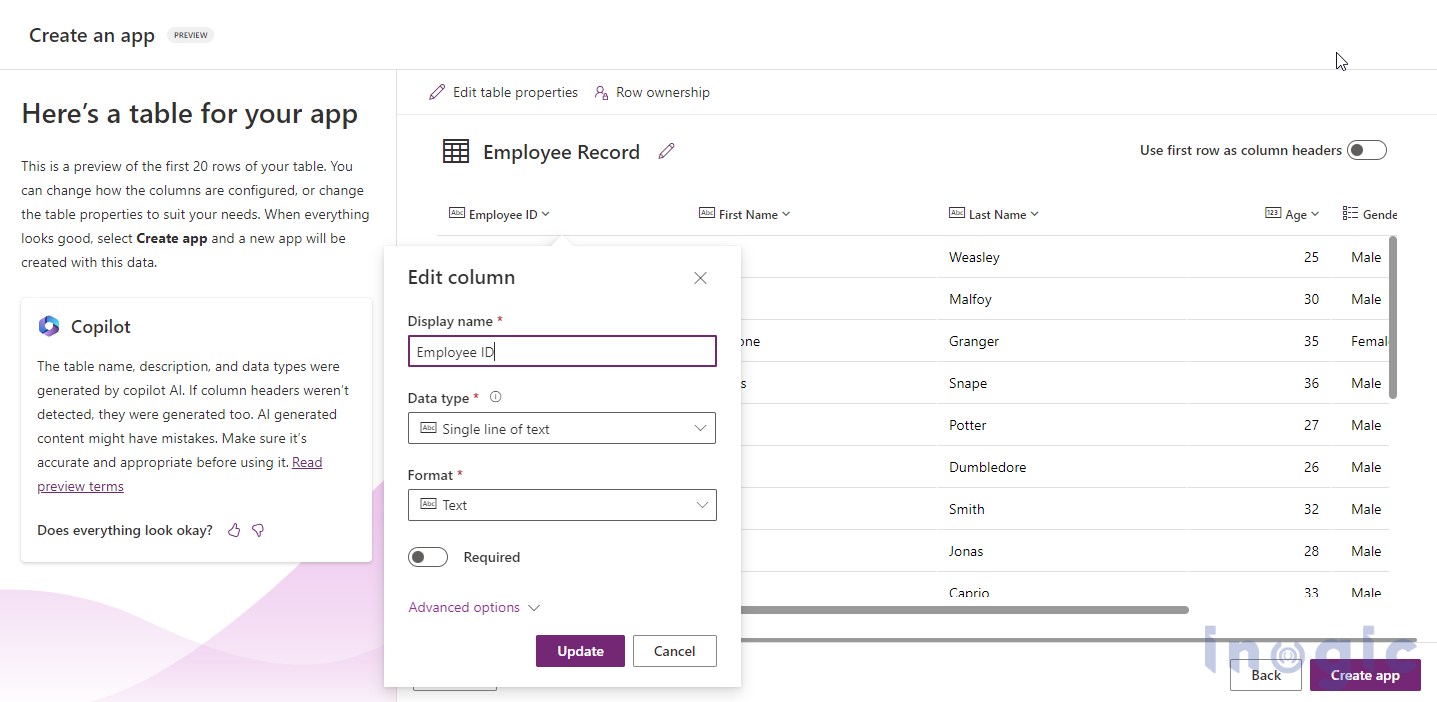
Let’s look at the first column, i.e. Employee ID; as per the data provided, it has set the field’s data type in a ‘Single line of text’ as seen below.
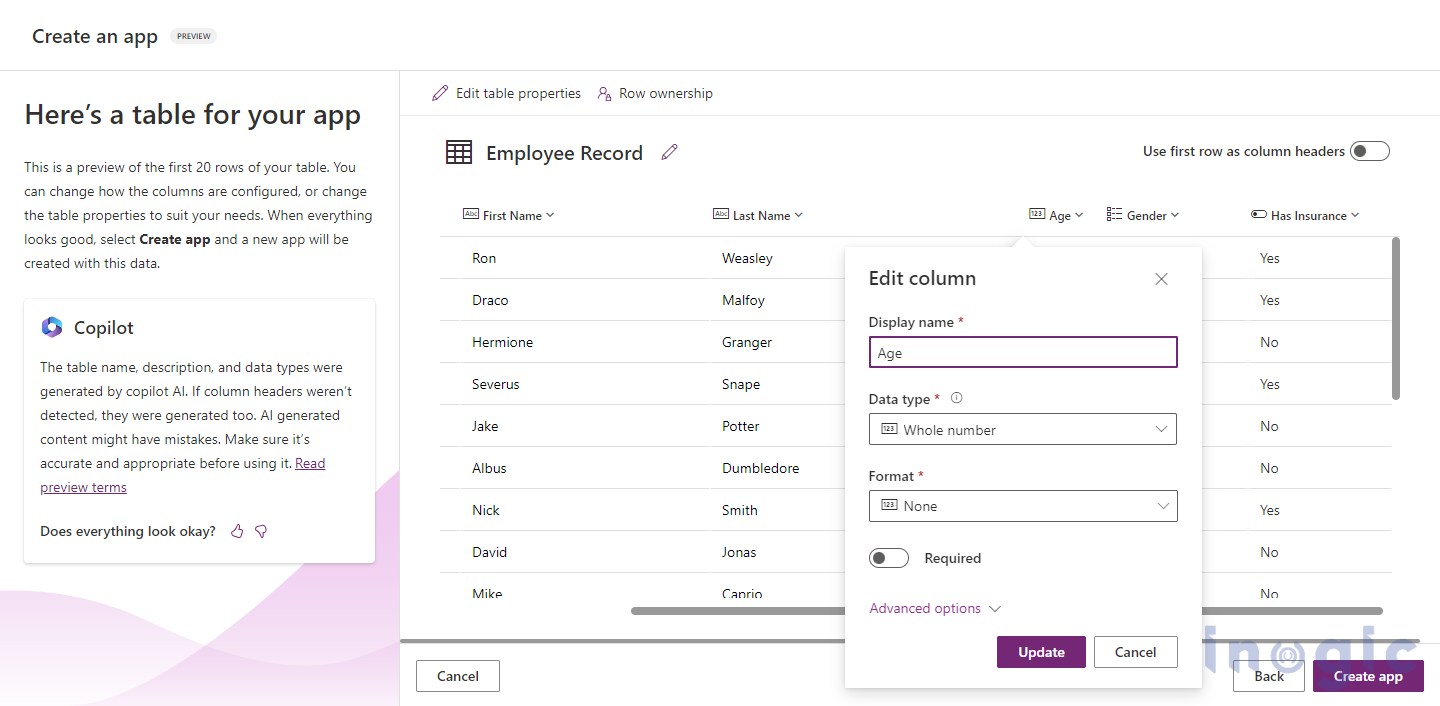
Similarly, the Age column has set the data type as Whole Number.
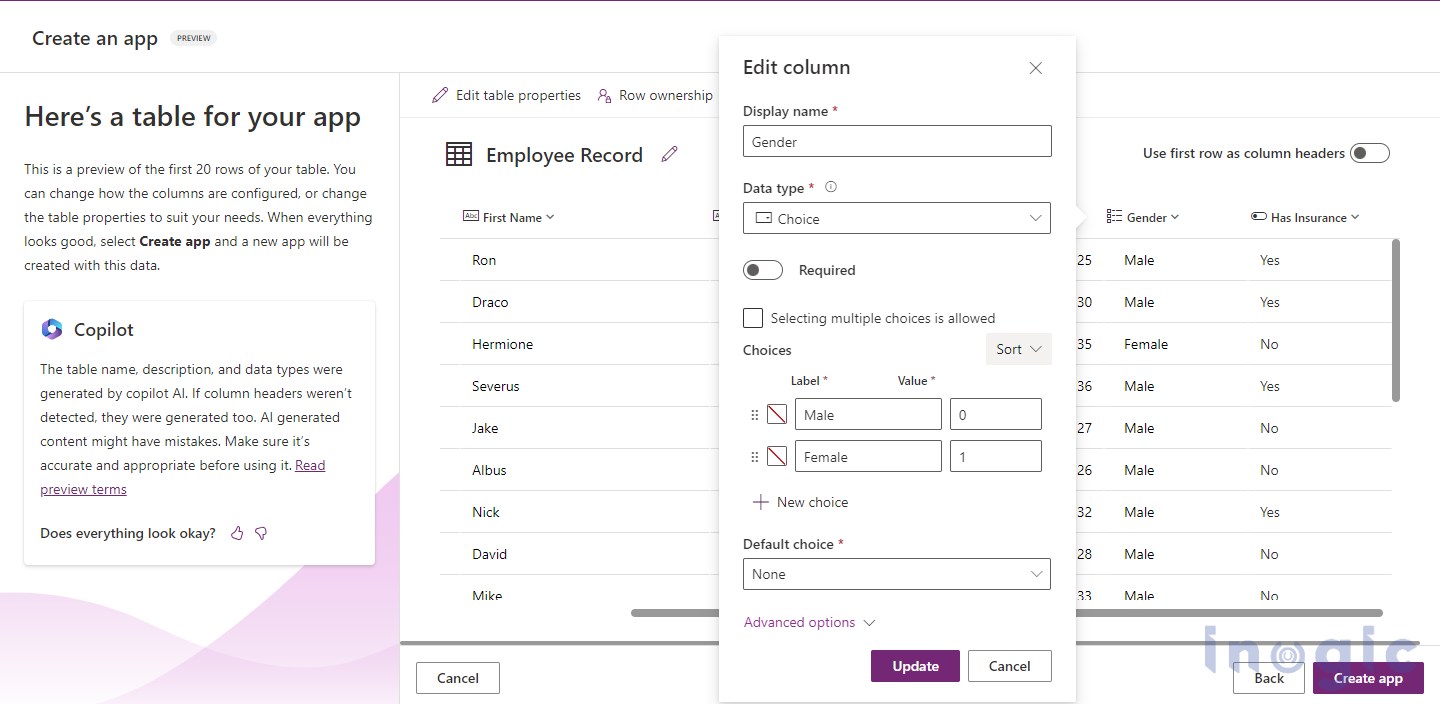
For the Gender column, the data type is set to Choice.
For the Has Insurance column, it has set the data type to Yes/No.
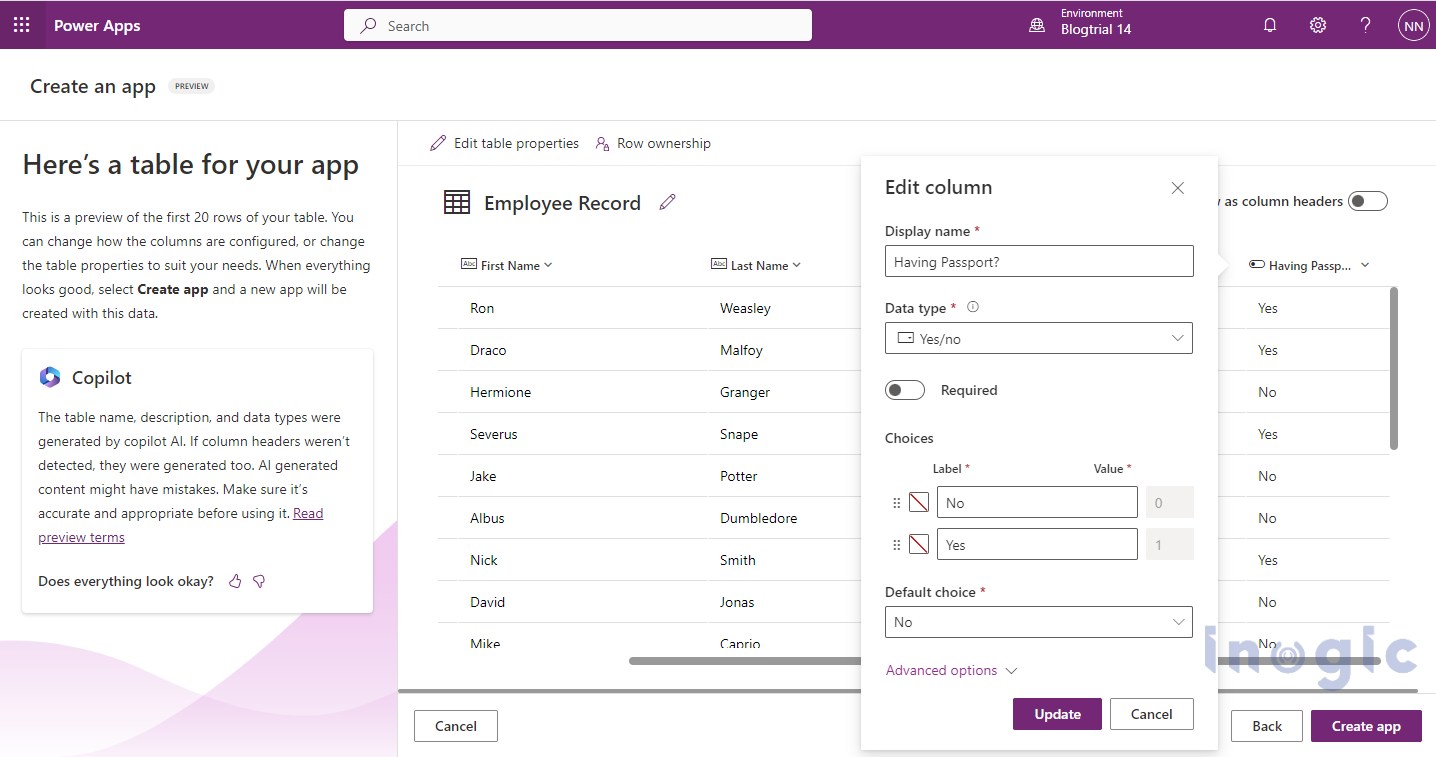
If you want to change the column name from Has Insurance to Having Passport, you can simply edit the display name and click on the update button.
In addition to Copilot’s valuable contributions in generating column names and data types, users have the flexibility to further customize and refine the fields within the table.
During the table creation process, users can amend the fields by specifying whether a particular field is required or could be optional. This offers better data validation and ensures that essential information is captured accurately.
Moreover, users can set default choices for certain fields, streamlining data entry and reducing the need for repetitive inputs. This feature enhances efficiency and consistency when populating the table with data.
By clicking on “Advanced options,” users can gain access to additional details, including the schema name of each field. The schema name is essential for system integration and customization, enabling developers and administrators to interact with the data more effectively through various applications and interfaces. Once the table is modified, you can click on Create app button.
On clicking of Create app button, the below page will be displayed.
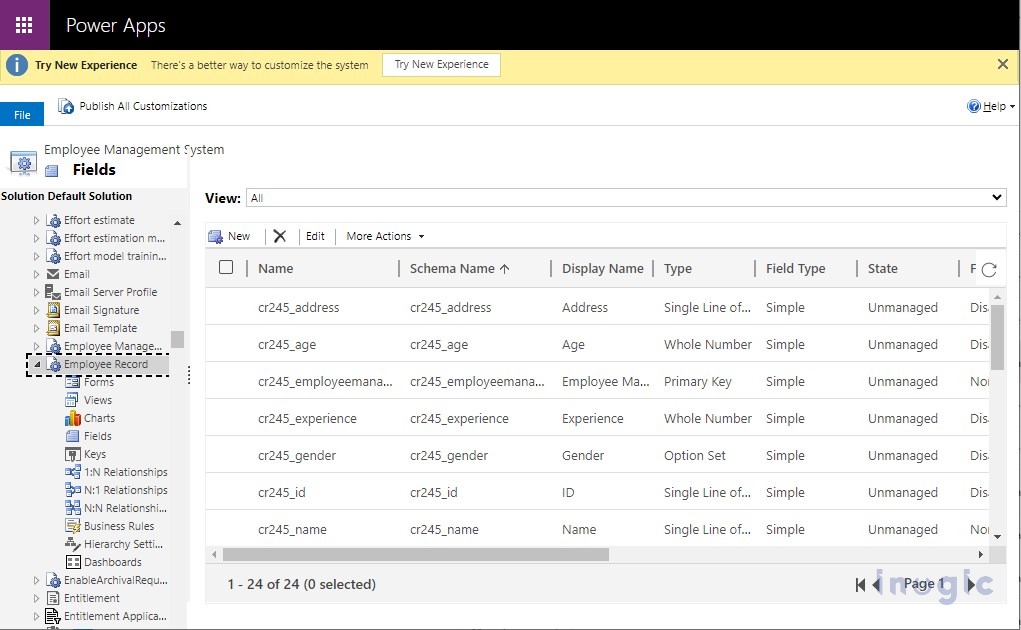
Upon the successful development of the application, it will seamlessly initiate the automatic creation of corresponding entities and columns within the CRM system, streamlining the setup process behind the scenes.
After successfully creating the App using Power Apps, the next step involves designing the App to align with the specific business needs and branding.
This is achieved through the following steps:
Adding Images: To enhance the App’s visual appeal and brand identity, you can incorporate relevant images, logos, or icons. These visuals can be strategically placed in the App’s interface to create a more engaging and user-friendly experience.
Defining Properties: Customize the properties of various elements within the App, such as buttons, text boxes, and data fields. This includes setting fonts, colours, sizes, and alignment, ensuring a cohesive and professional appearance throughout the App.
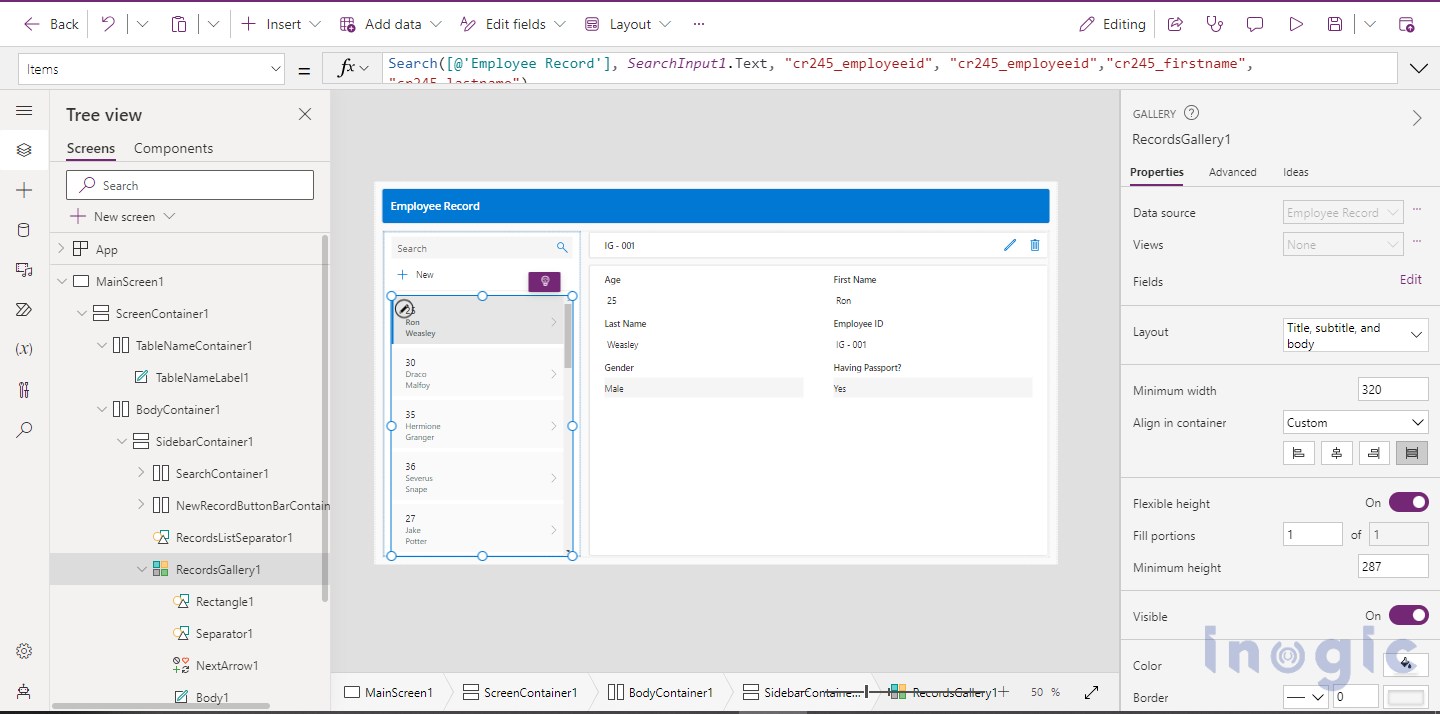
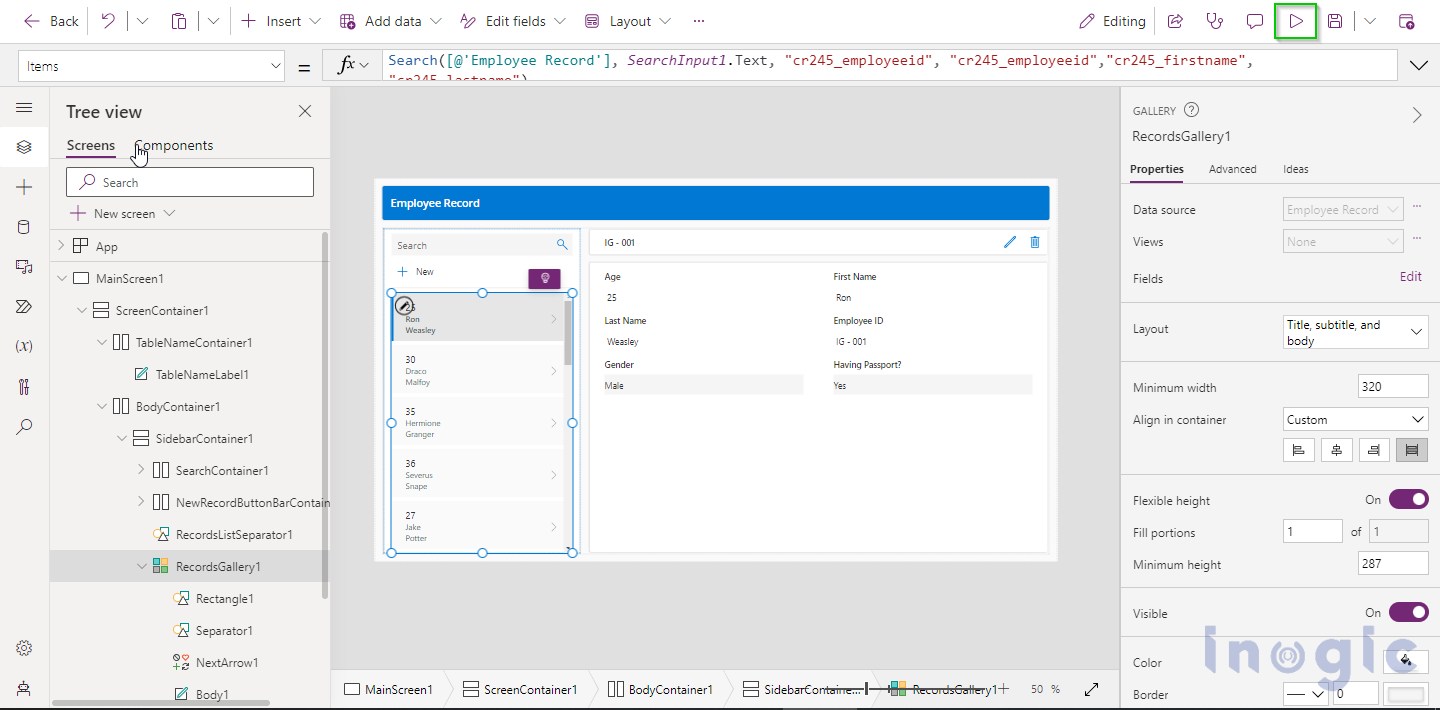
Before deploying the App for end-users, it’s essential to preview the App by clicking on the preview button to check its functionality and design.
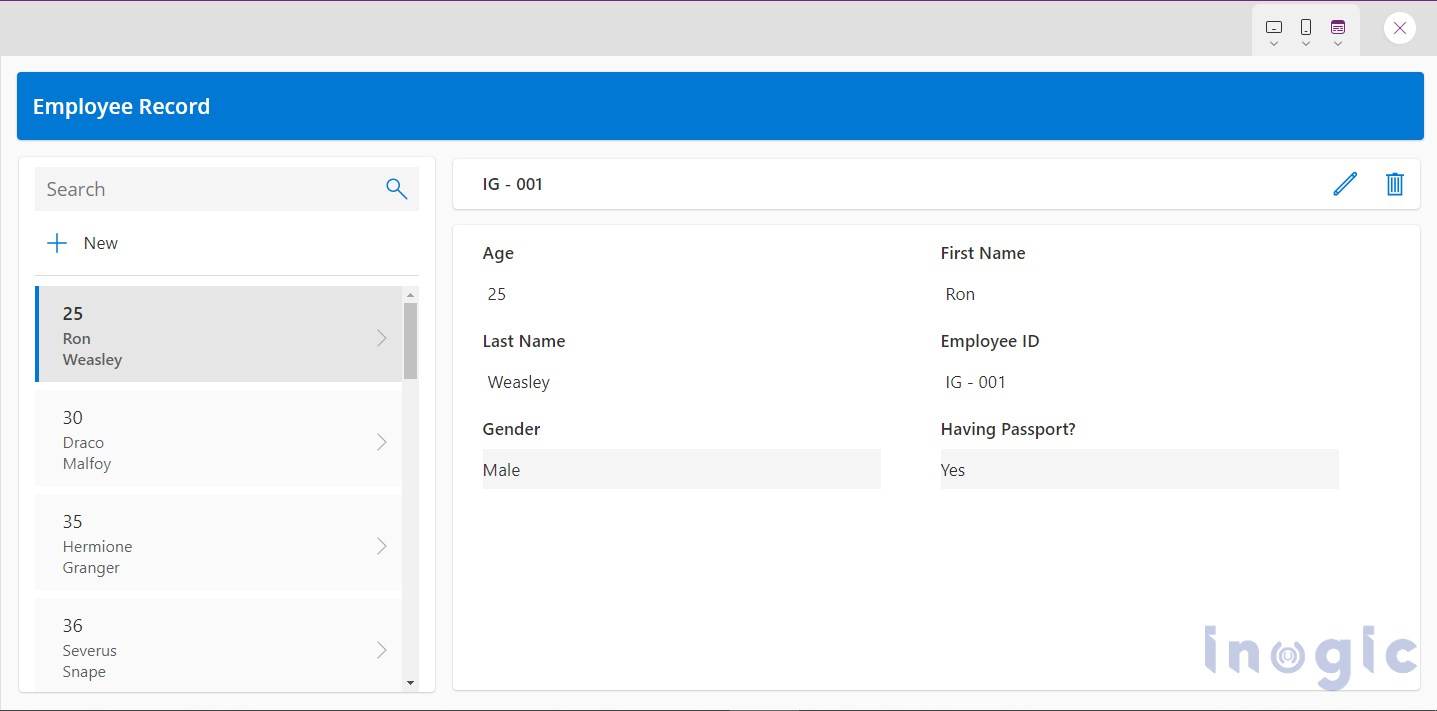
Below is the preview of the App.
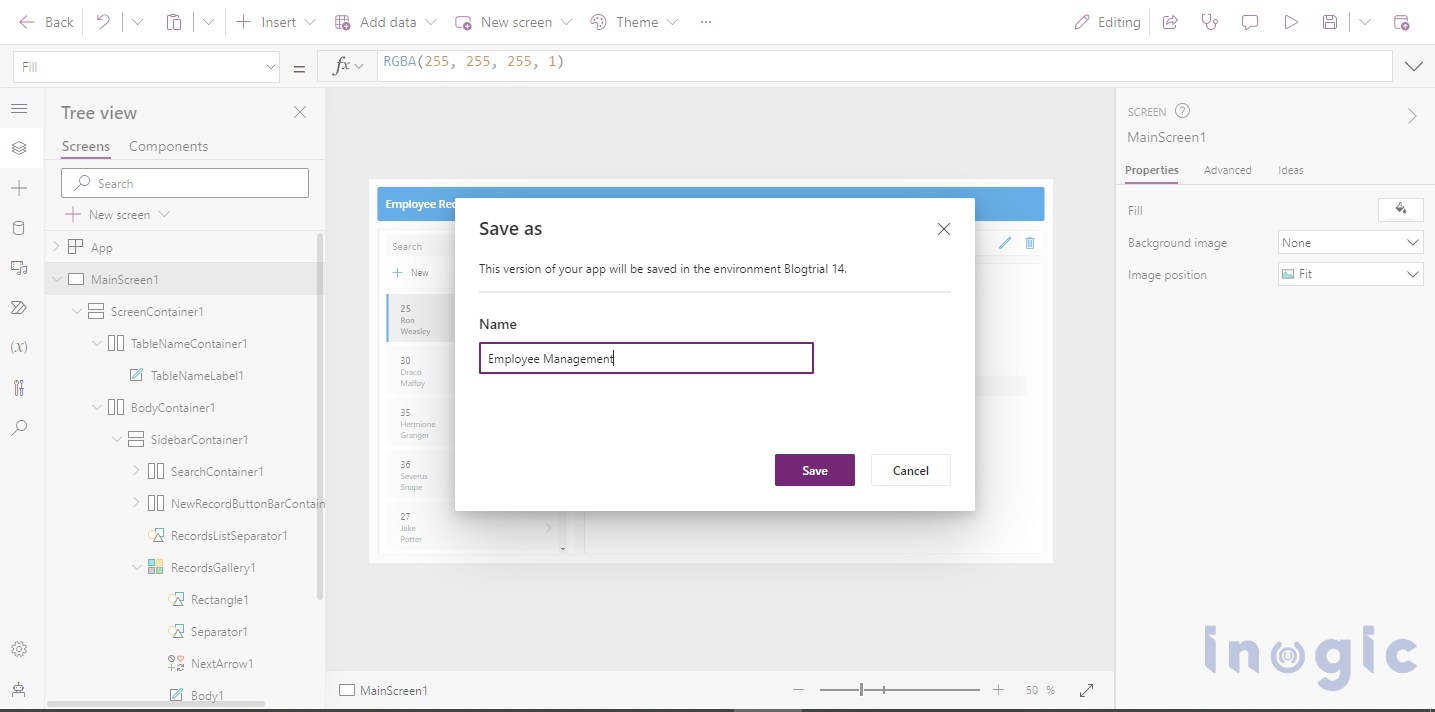
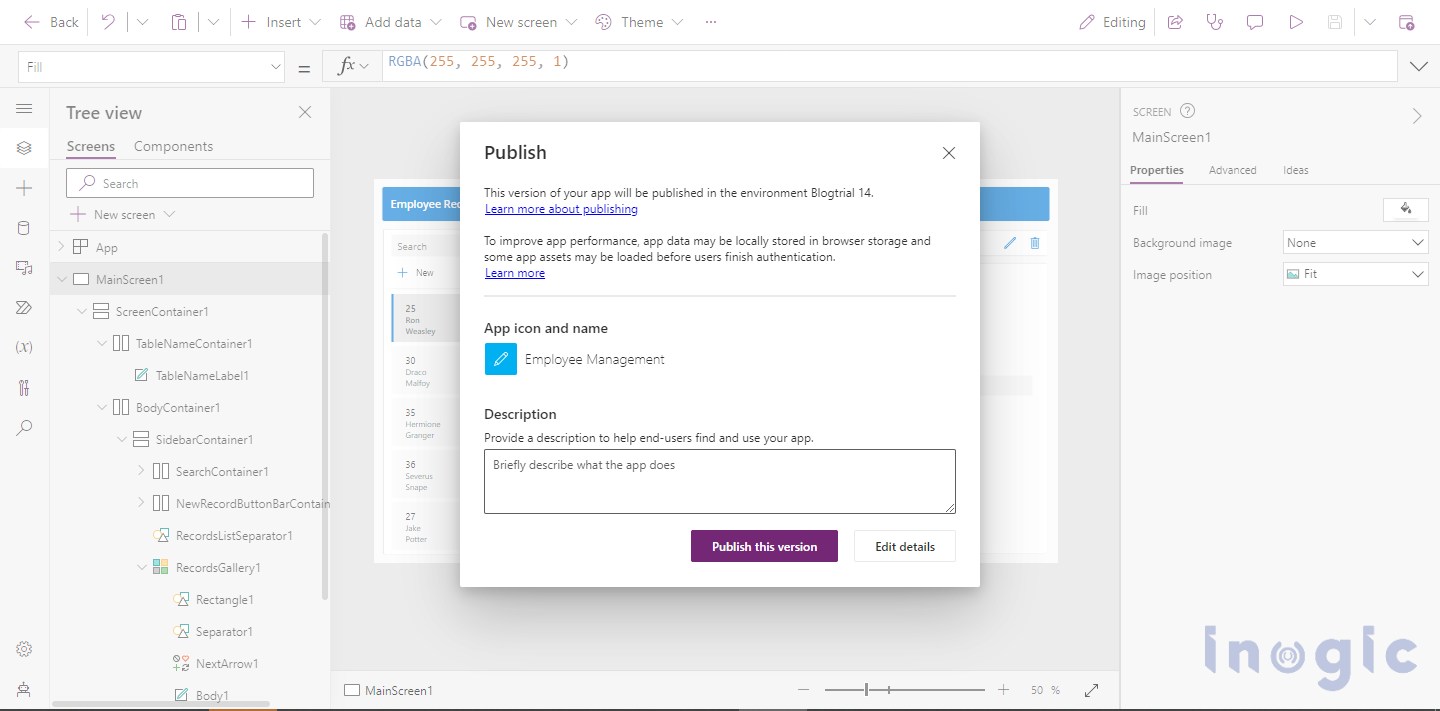
Once previewed, you can click on the save button! While saving, remember to give an appropriate name to the App and then publish it.
After being published, it deploys the App to the target environment, making it accessible through the Power Apps platform.
By leveraging Copilot’s capabilities, users can streamline the process of creating tables and defining columns in their database, saving time and effort while ensuring data integrity and accuracy.
This seamless integration of AI-driven assistance simplifies the initial setups and enhances the overall efficiency of data management within the Power Apps environment.
