Introduction
Recently, we were working on a customer requirement that required us to handle two specific scenarios: creating a phone call activity when an email is sent and creating an appointment upon receiving an email.
We tried two approaches to meet this requirement. The first approach was to create a single workflow called “SendReceivedEmail” that would trigger when the email status changed. This workflow would create a phone call activity when the status reason was set to “sent” and an appointment activity when the status reason was set to “Received.” However, we found that this approach would trigger the workflow three times for each email sent.
The second approach was to develop two separate custom workflows: one for creating a phone call activity when an email is sent and one for creating an appointment activity when an email is received. These workflows would both trigger when the email was created, but they would wait until the status reason changed to “Sent” or “Received” before taking any action. This approach worked as expected, but it had a downside of keeping workflows in a waiting state if the email status never changed.
After more digging, we found a better solution. This approach ensured that the workflow would only trigger once for each email sent, and it also avoided the issue of keeping workflows in a waiting state.
Solution:
To resolve the mentioned issue, we need to modify the trigger condition for both the “Send Email” and “Received Email” workflows.
Send email workflow
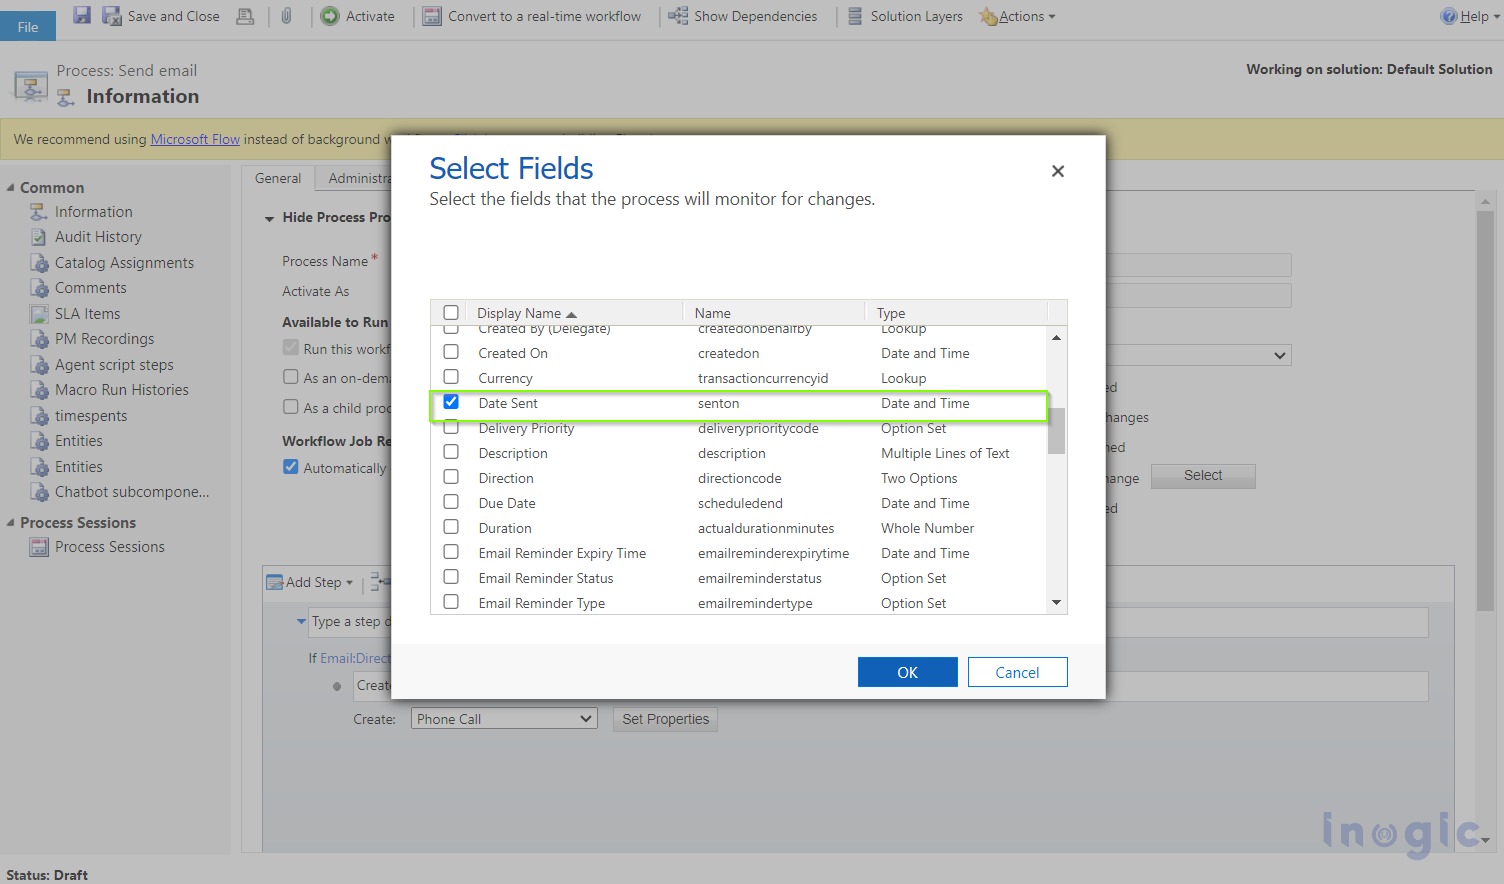
“Send Email” workflow -> check Record fields change -> select Date Sent.
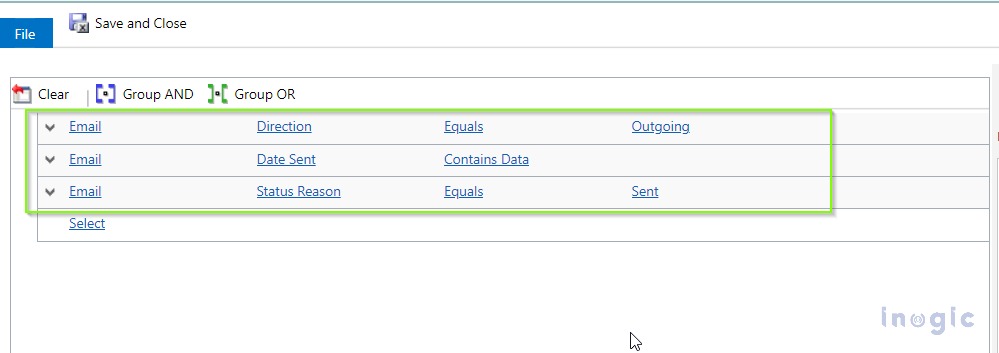
Once the trigger condition is selected, we have to Click on Add Step -> select Check Condition. Refer to the below image to add conditions.
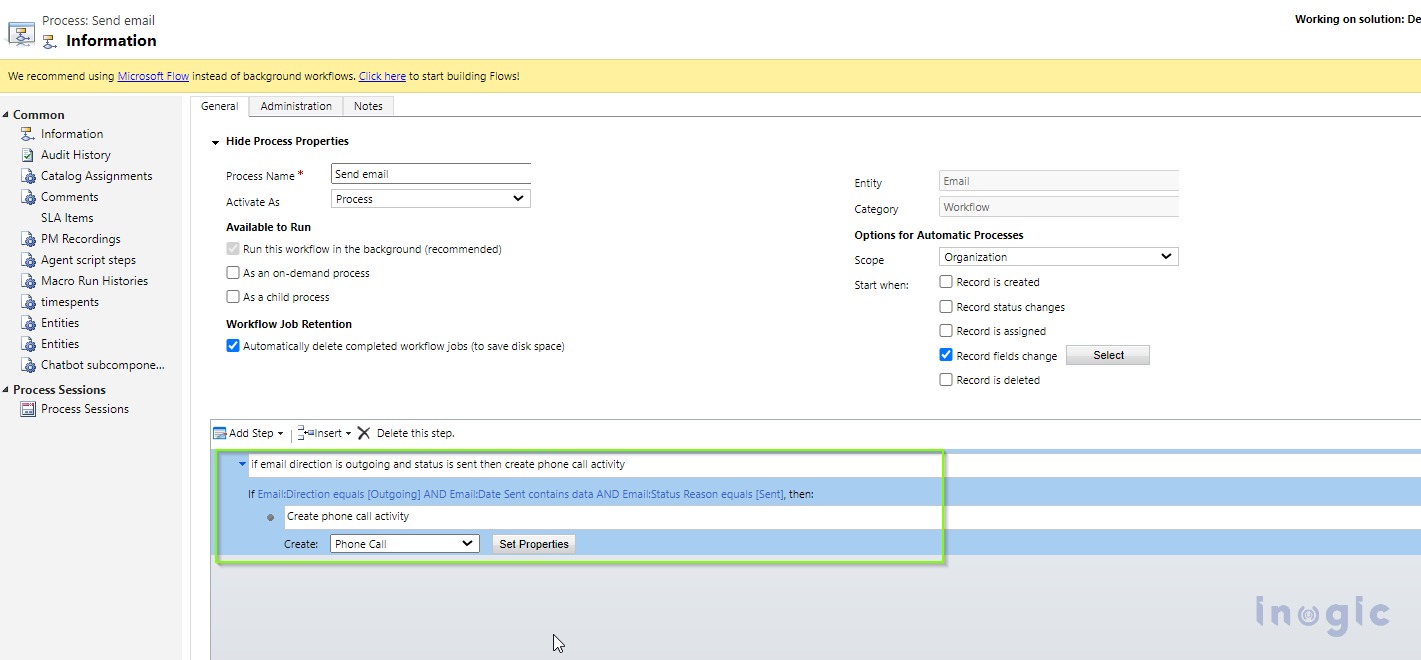
When sending emails, we must now include the Outgoing Direction, Date Sent, and Status Reason conditions. These conditions ensure proper email handling and tracking.
Once we have added the check condition, we need to select the specific conditions we have added. Afterward, we click on “Add Step” and choose “Create Record” from there. We can select the phone call activity and configure its properties accordingly.
Received email workflow
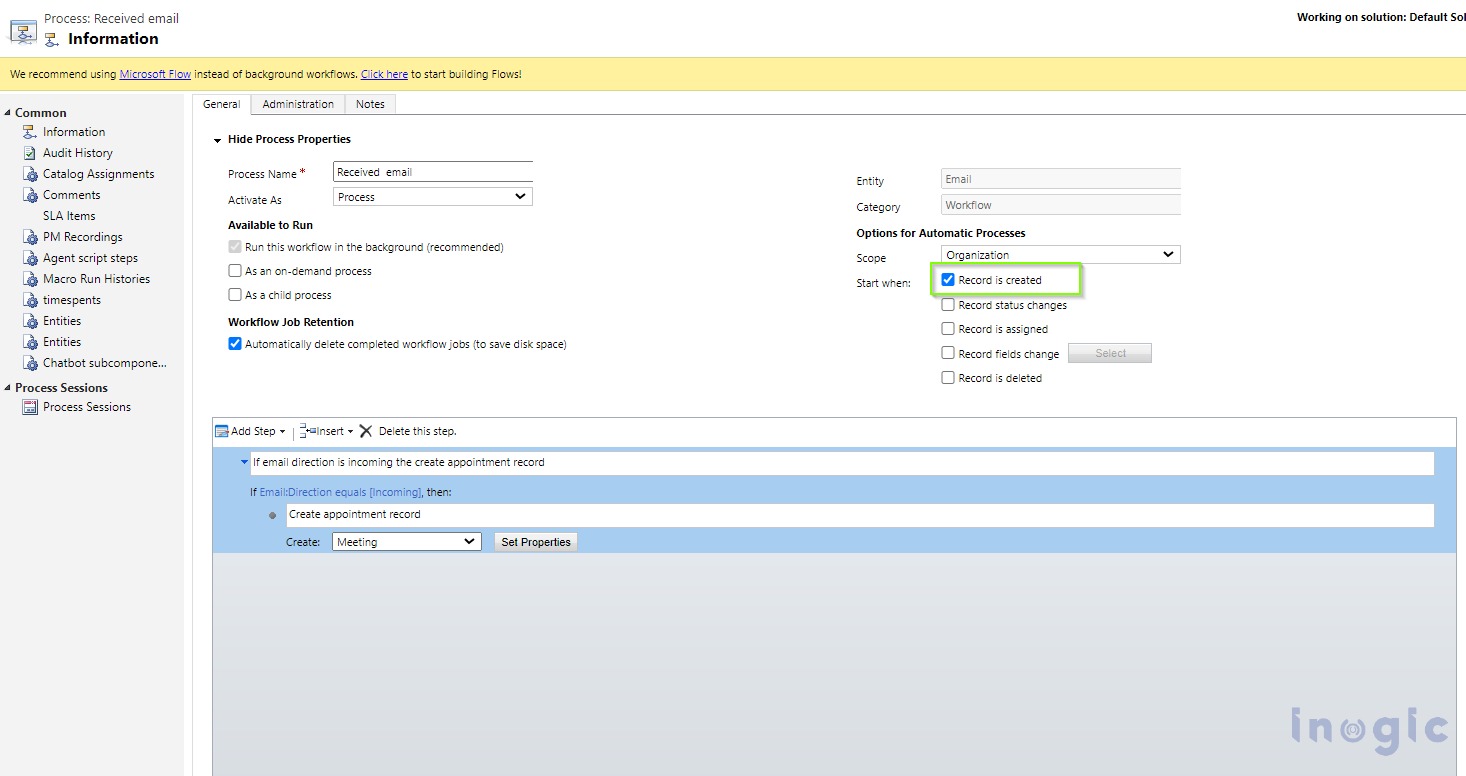
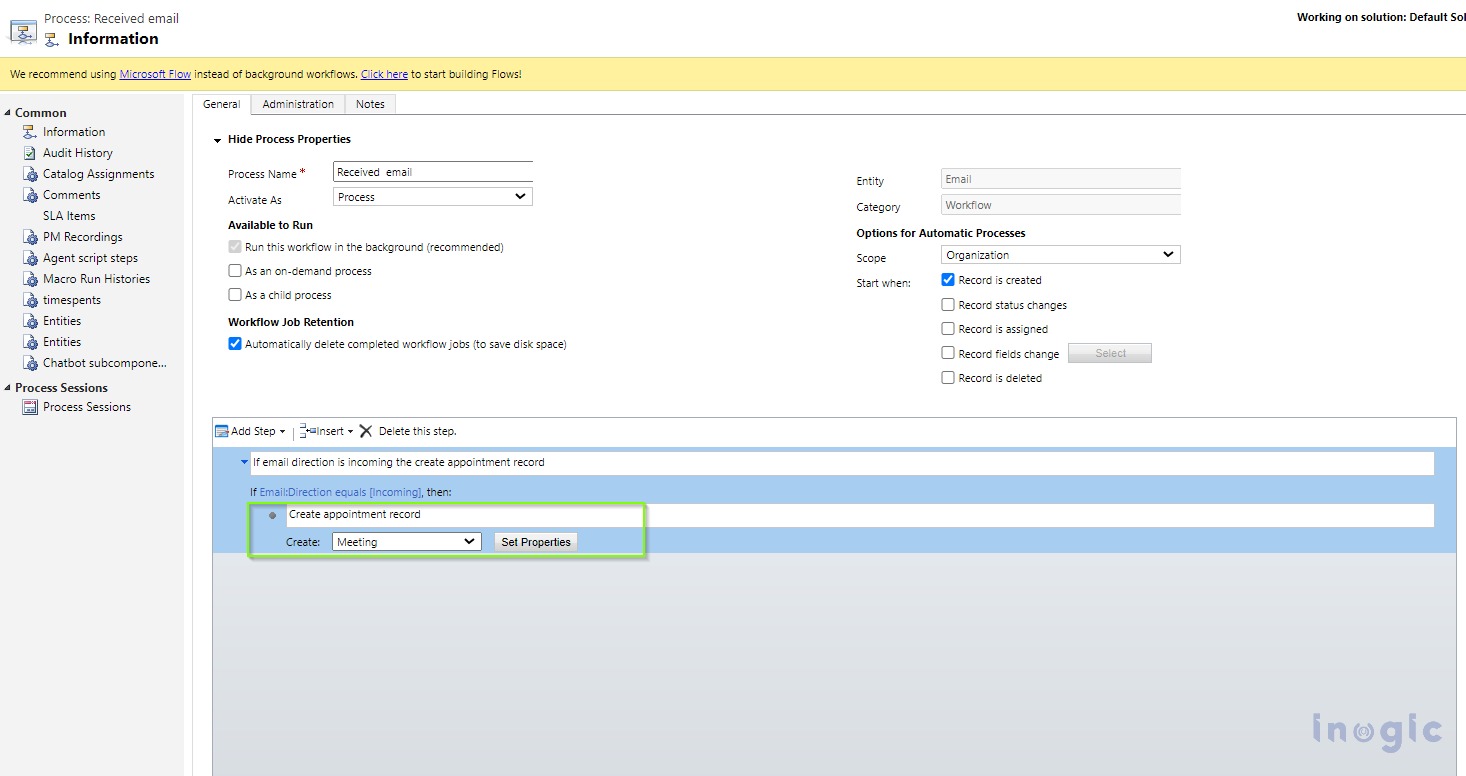
“Received email” workflow -> check Record is created.
Once the trigger condition is selected, we have to Click on Add Step -> select Check Condition. Refer to the below image to add conditions.
We must now include the incoming direction conditions when receiving emails.
Once we have added the check condition, we need to select the specific conditions we have added. Afterward, we click on “Add Step” and choose “Create Record.” From there, we can select the Meeting entity and configure its properties accordingly.
Conclusion
By leveraging the capabilities of Dynamics 365 CRM, we can successfully automate actions based on emails sent and received events.
