Introduction
Currently everyone want mobile app for doing any work. To build a mobile app in Dynamics 365 CRM the Canvas App is the better option. Canvas App is a no-code/low code business app where you can design the app by dragging and dropping elements onto a canvas. To automate any process Power Automate is used. So to combine capabilities of Canvas app and Power Auotmate big is a advantage as it enables to build any app with rich functionalities.
Recently in Canvas app, the feature to show Power Automate pane so that we can easily access and use Power Automate in Canvas app was introduced. In order to show Power Automate we need to first enable it from settings.
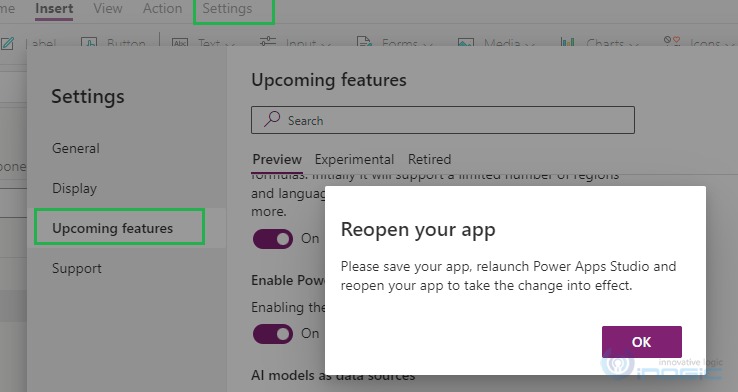
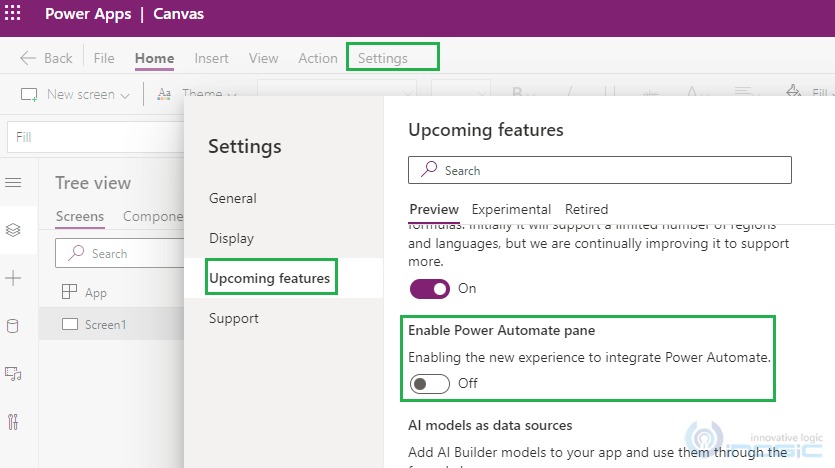
To enable Power Automate pane click on Settings from top menu. A window will open, in that select “Upcoming features” option from left navigation and then go to “Enable Power Automate pane” as shown below:
 Once it is enabled the following message is displayed.
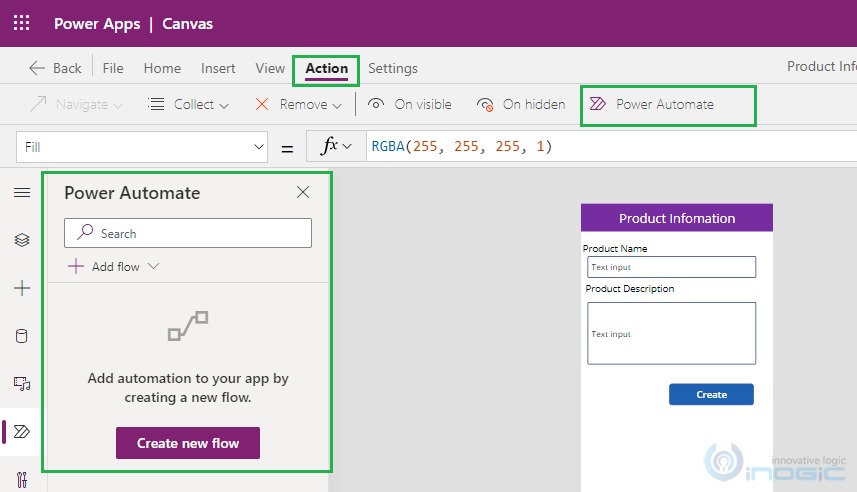
After the app is reopened, go to Action tab and then click on Power Automate. It will now open the Power Automate pane as shown below:
Using this new Power Automate pane we can easily create new flow and add existing flow to Canvas app and get overview of Power Automate.
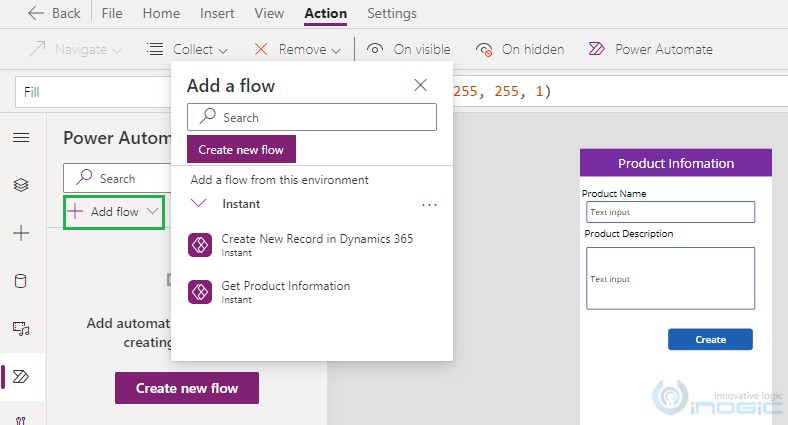
To add Power Automate into Canvas app Click on “Add Flow”. Once we click on it then it will open the below window with list of Power Automate flows. Here, select the Power Automate flow that is to be added in Canvas app. If we wanted to create new flow then click on “Create new flow” button.
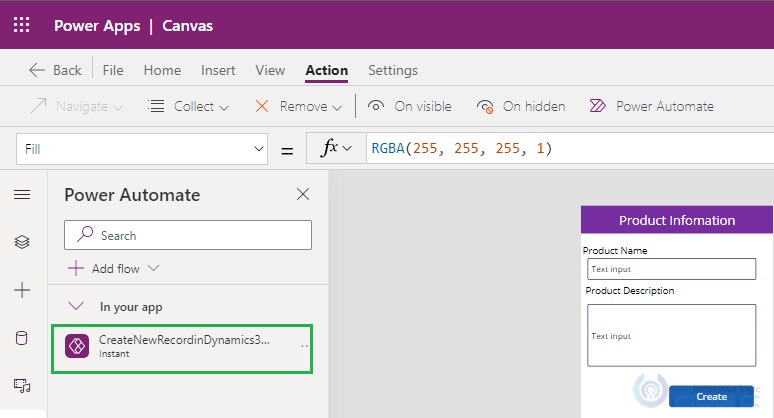
Also it will give overview of all Power Automate flows that was added to Canvas app. From here, we can easily navigate to the respective flows and edit it.
Conclusion
In this way, by using Power Automate pane we can easily and quickly perform action related to Power Automate.
