Introduction
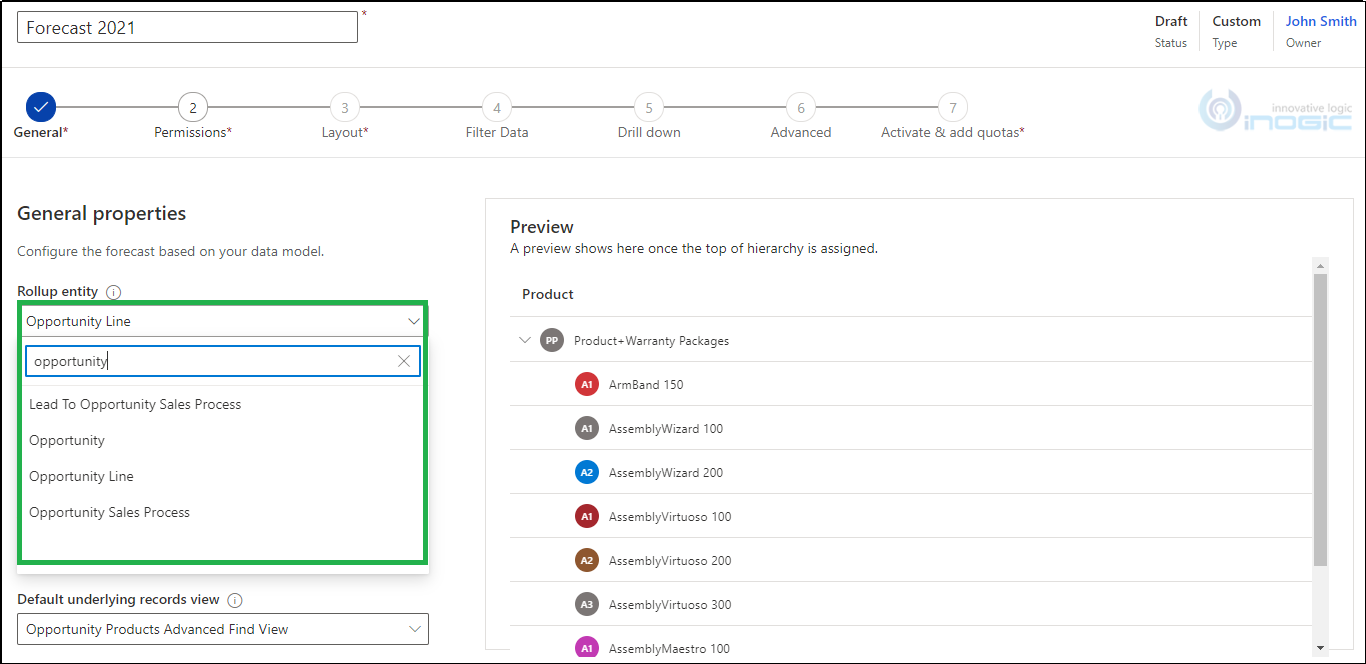
Recently when I was exploring the sales forecasting feature of Dynamics 365 sales, I came across many enhancements in Forecast configuration. Previously if you were trying to create any type of forecast (Org, Territory, and Custom) then it was restricted to Opportunity entity only. Now you can observe that there is a flexibility to select Rollup entity for other than Opportunity as well.
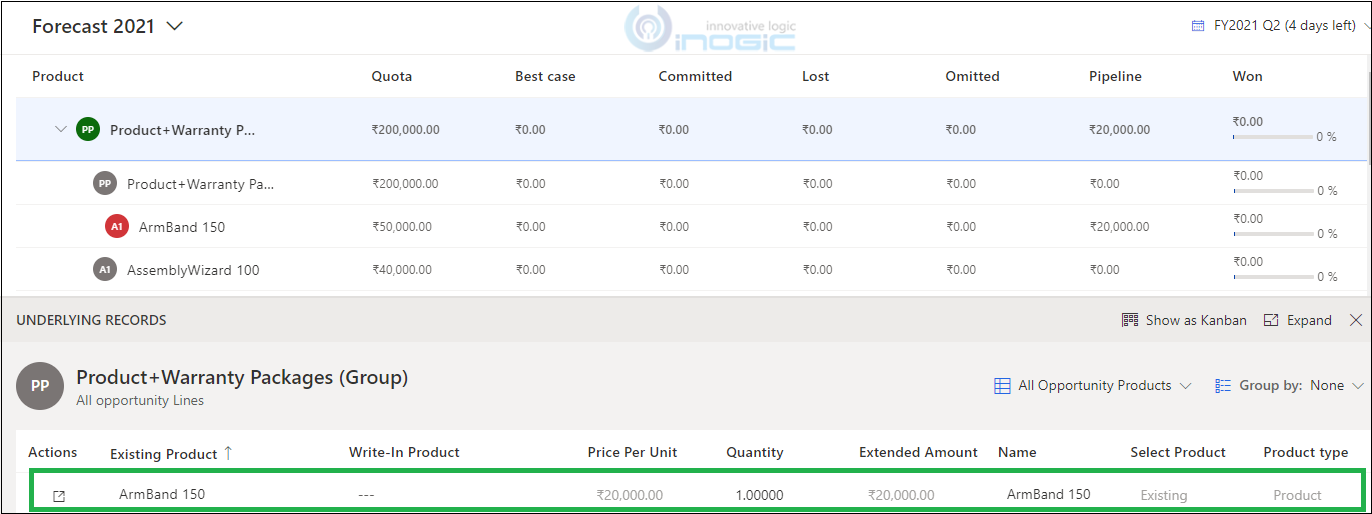
In my scenario, I have used Opportunity line entity as rollup entity as shown in the below screenshot:
In the previous blog, we have seen sales forecast experience through “Create from scratch”. In this blog; let us have a walkthrough of the additional configuration steps available.
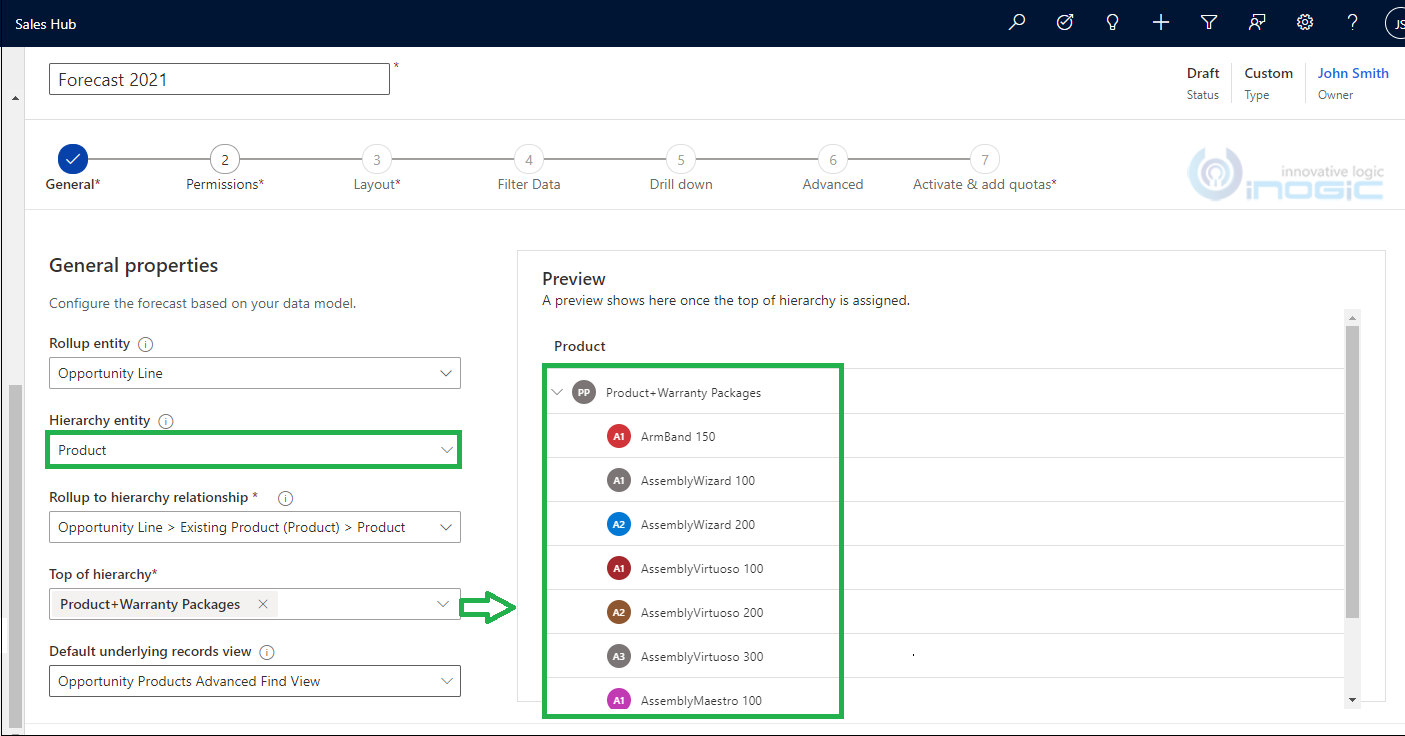
Let us consider one scenario that I have implemented. If my organization would like to forecast or track the opportunity lines based on the product selected then I can implement it by selecting “Hierarchy Entity” as Product.
Using the Parent lookup on the product entity, the entire hierarchy of products is auto-selected as shown above.
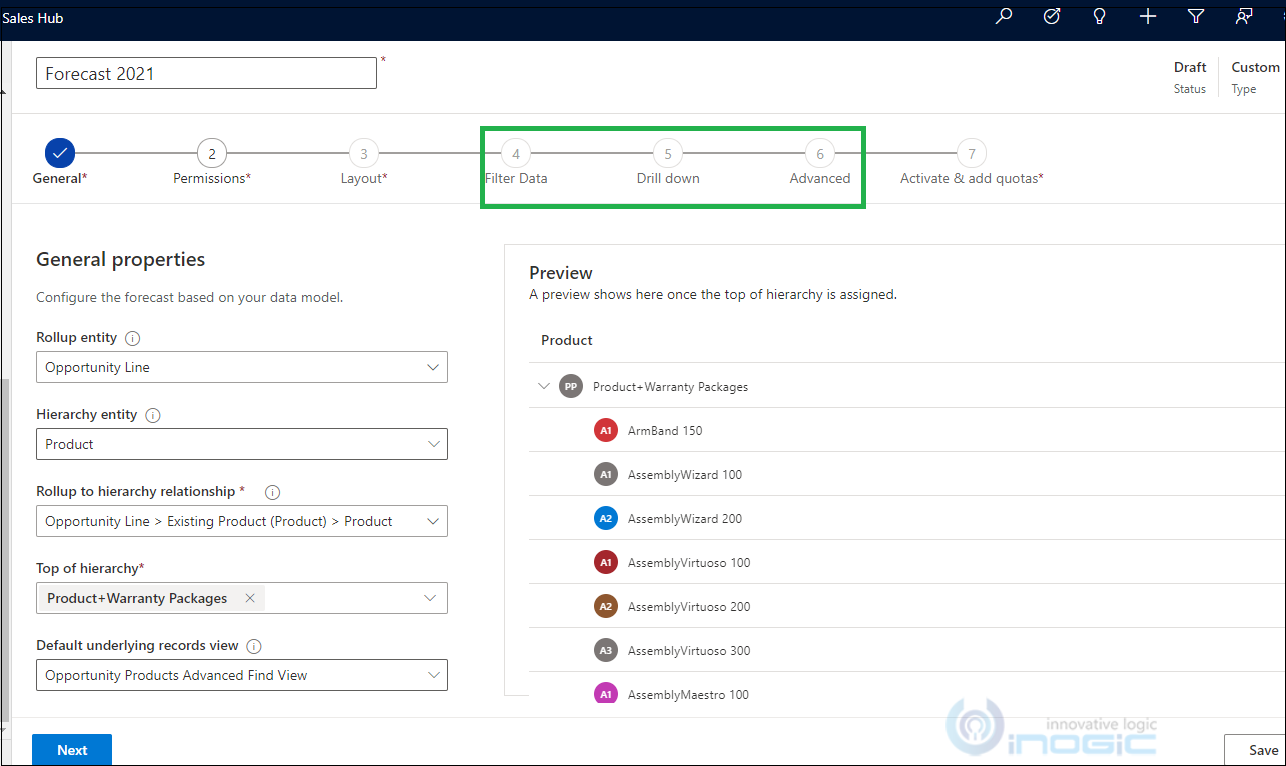
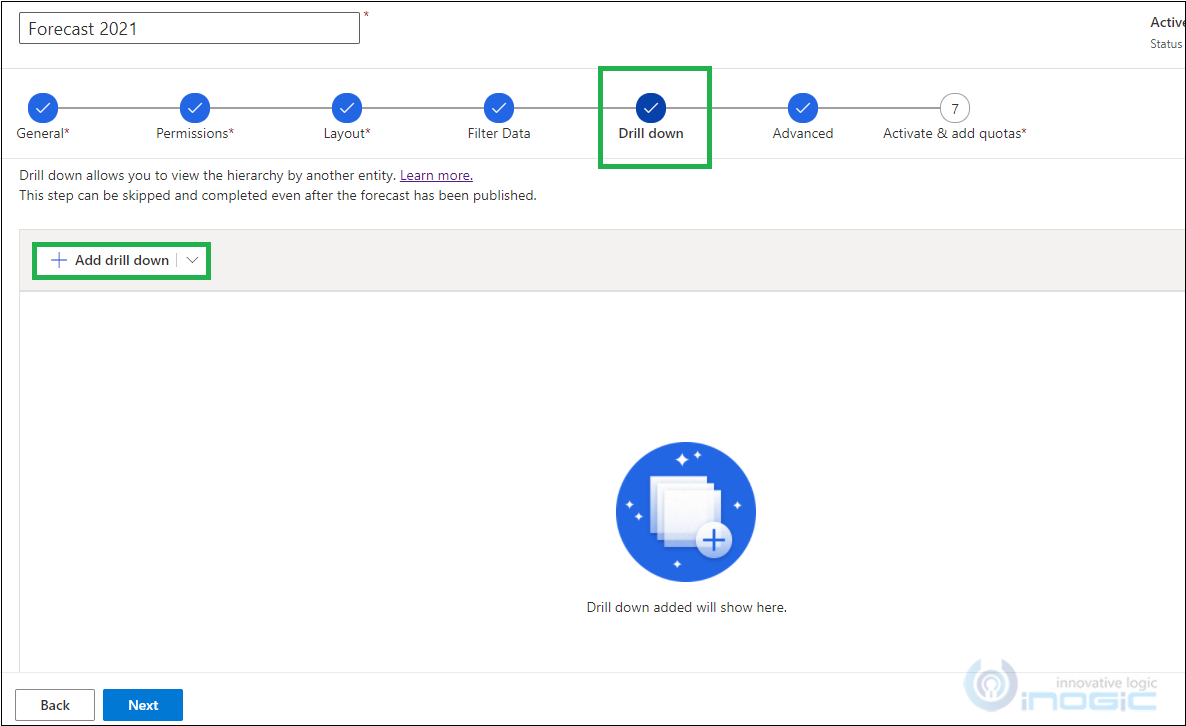
Here, I have observed there are few newly introduced configuration steps, namely, “Filter Data”, “Drill Down” and “Advanced” as highlighted below:
Note: “Filter Data”, ‘Drill Down” and “Advanced” these configuration steps are introduced in all types of forecasts (Org, Territory, Product, Custom).
Let us quickly jump into these configuration steps as rest of the steps have already been explained in the previous blog.
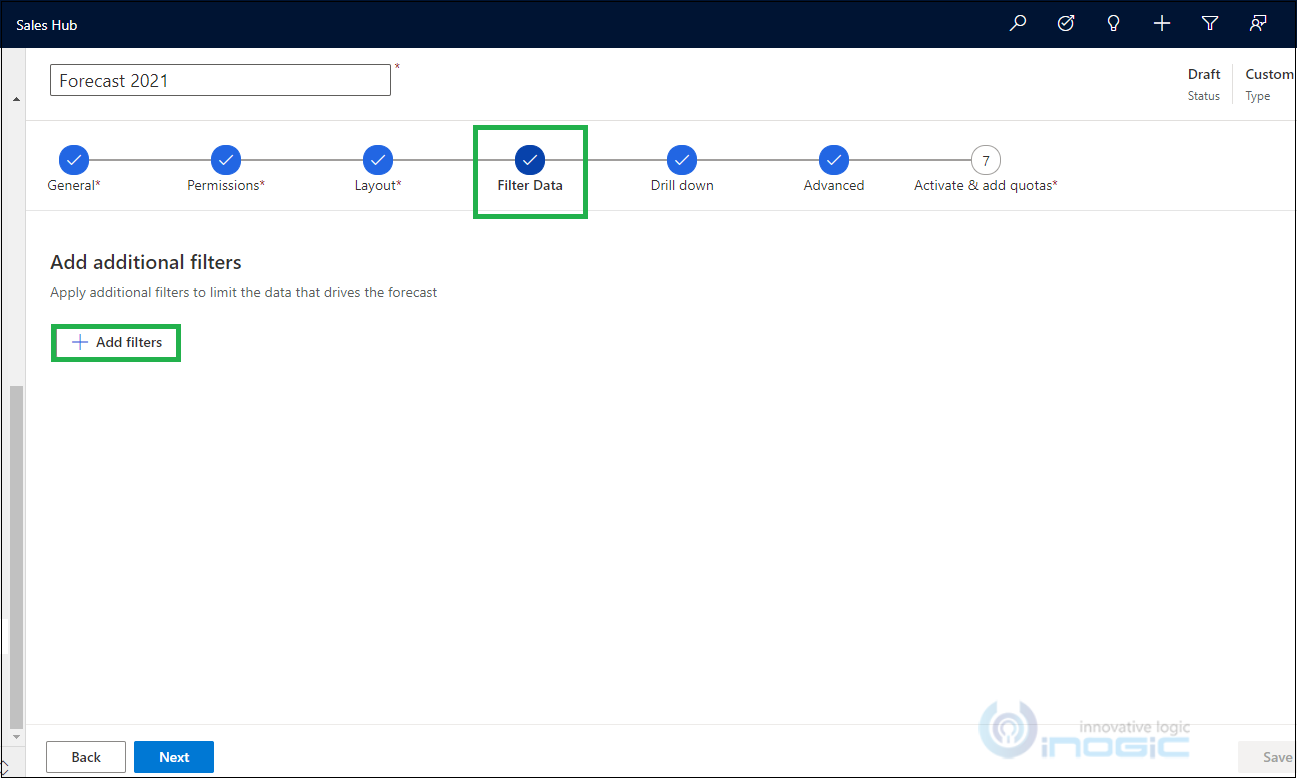
Filter Data: This configuration is useful if you want to filter the forecast data based on any entity attribute.
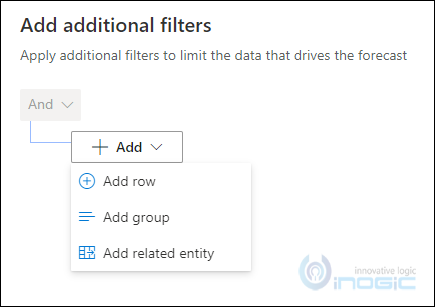
If you click on “Add filters” above, you will get the following options – “Add row”, “Add Group”, “Add related entity”.
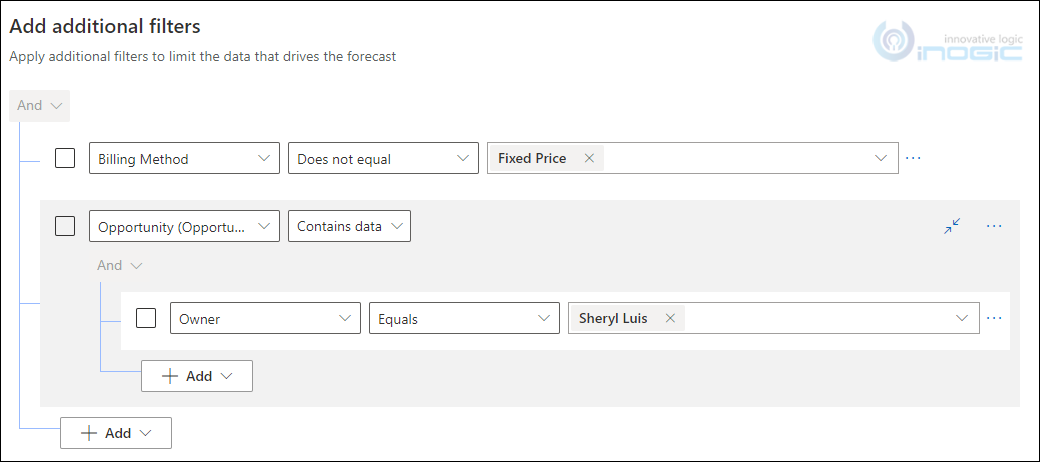
In the below scenario, I have demonstrated “Add row” and “Add related entity” filtering:
With this condition, the opportunity lines are filtered as below:
- Opportunity lines having Billing Method as the fixed price removed from the forecast.
AND
Opportunity lines having opportunities whose owner is set as “Sheryl Luis” shown in the forecast.
Note: Once the forecast is activated, you cannot further edit the criteria for filtering.
Drill down: This configuration is useful if you want to break down the forecast data based on any other entity. It has two types – “Drill down by entity” and “Drill down by option set”.
Drill down by entity:
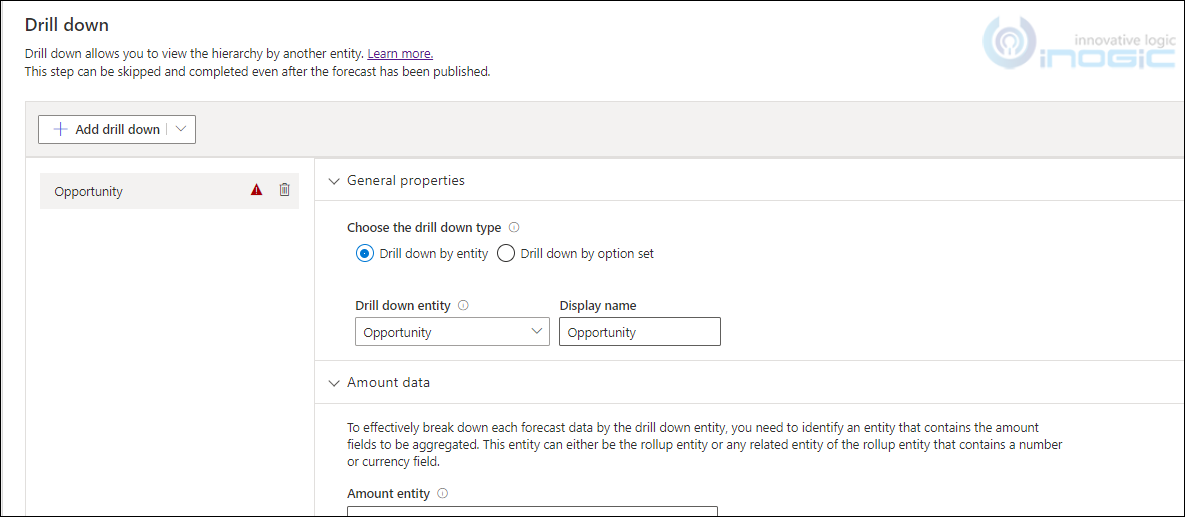
- Let say in my scenario I want to drill down the forecast with underlying opportunities, then I will configure it by selecting “Drill down by entity” and providing the Display name as shown below:
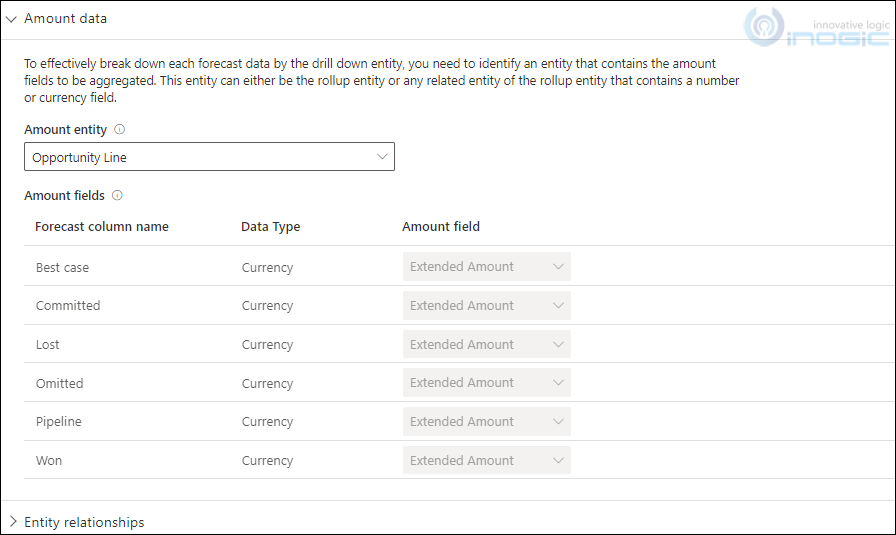
- After this, select the “Amount” entity as “Opportunity Line”, as we want to drill down amount fields that need to be aggregated in the forecast.
Once it is done select the relationship between the amount entity and drill down entity as shown below:
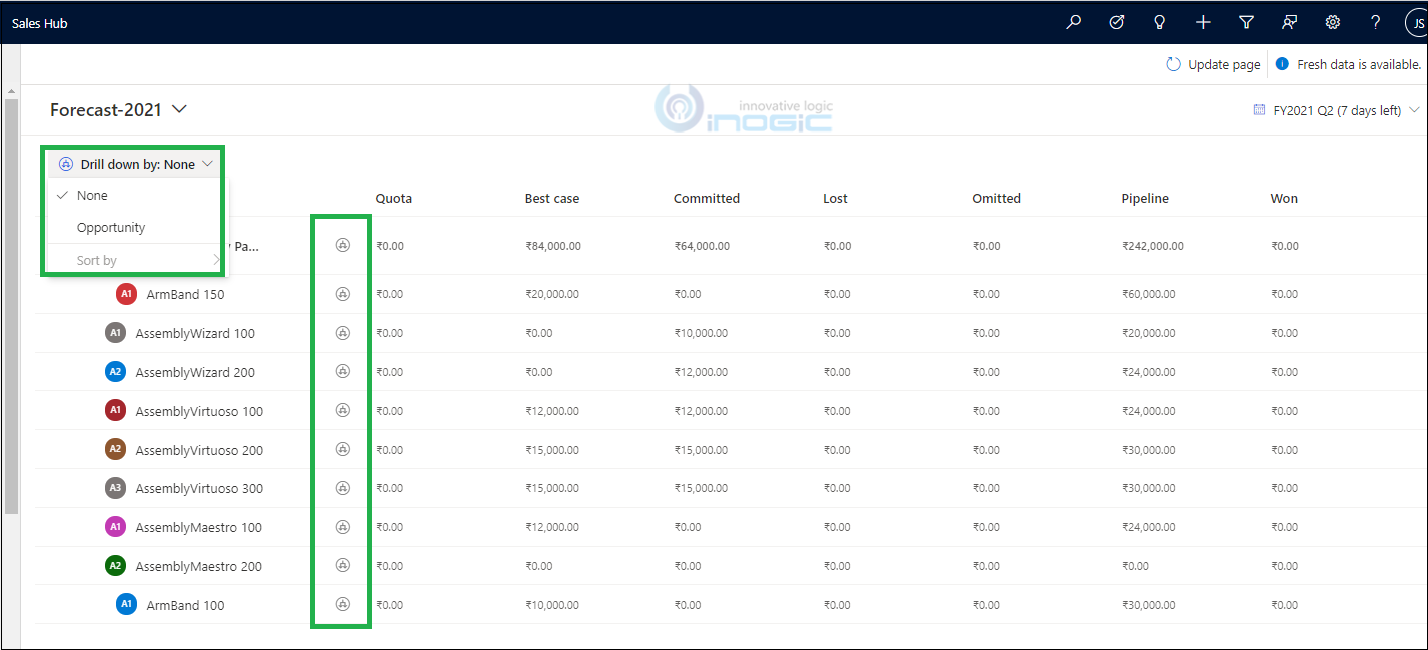
After configuring this drill-down feature, you will observe that drill down selection enabled on the forecast as shown in the below screenshot:
As you can see, by default it is selected as “Drill down by: None” and hence the “Drill down by” selection (Icon shown above) is disabled.
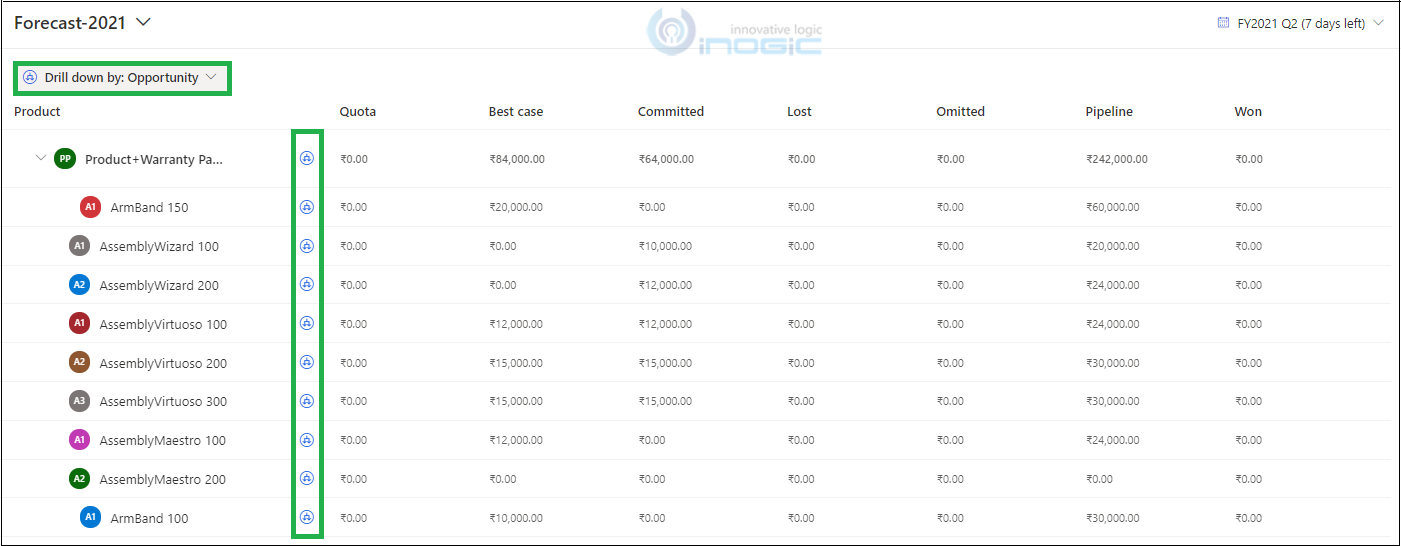
Once you select the “Drill down by: Opportunity” then “Drill down by” selection is enabled as shown below:
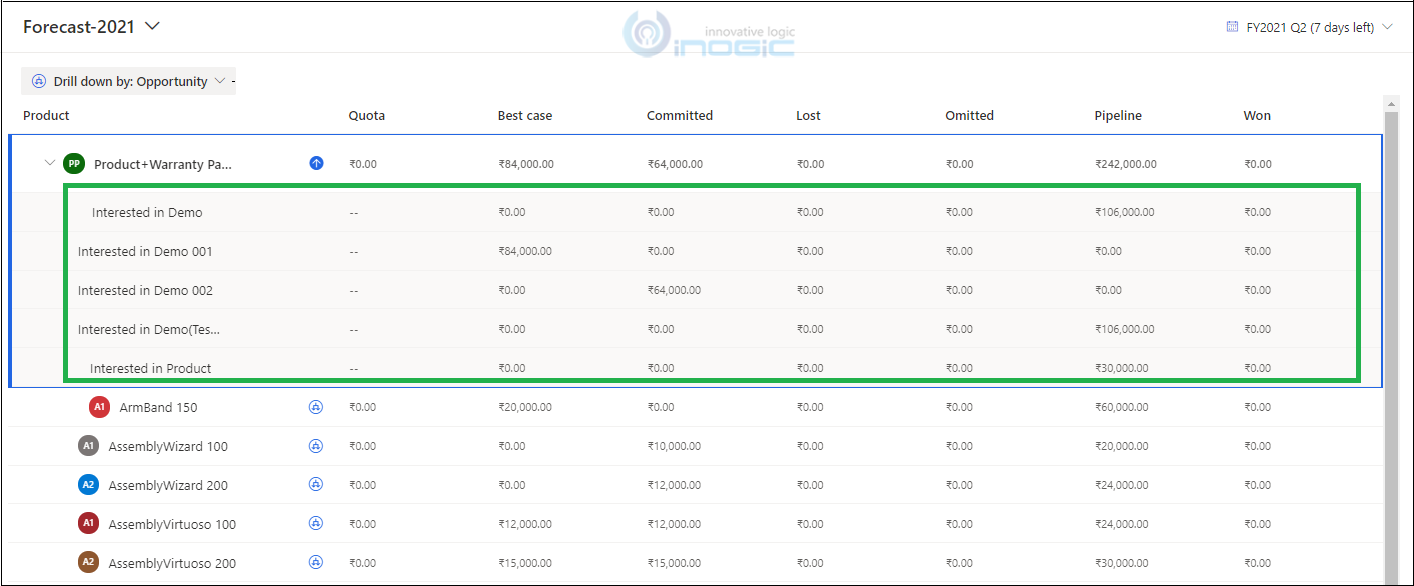
Once you click on the “Drill down by” icon the list of opportunity records are shown, as seen in the below screenshot:
Drill down by option set:
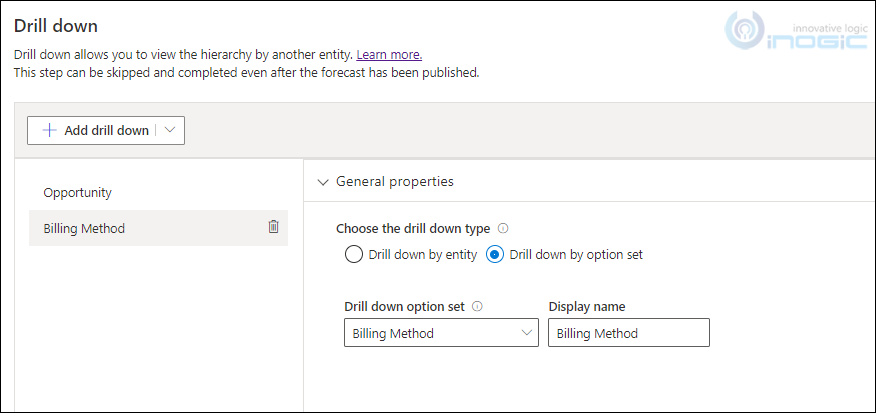
All the option sets available in the rollup entity are available here for selection. In my scenario, I have selected the “Billing Method” option set and provided the Display name.
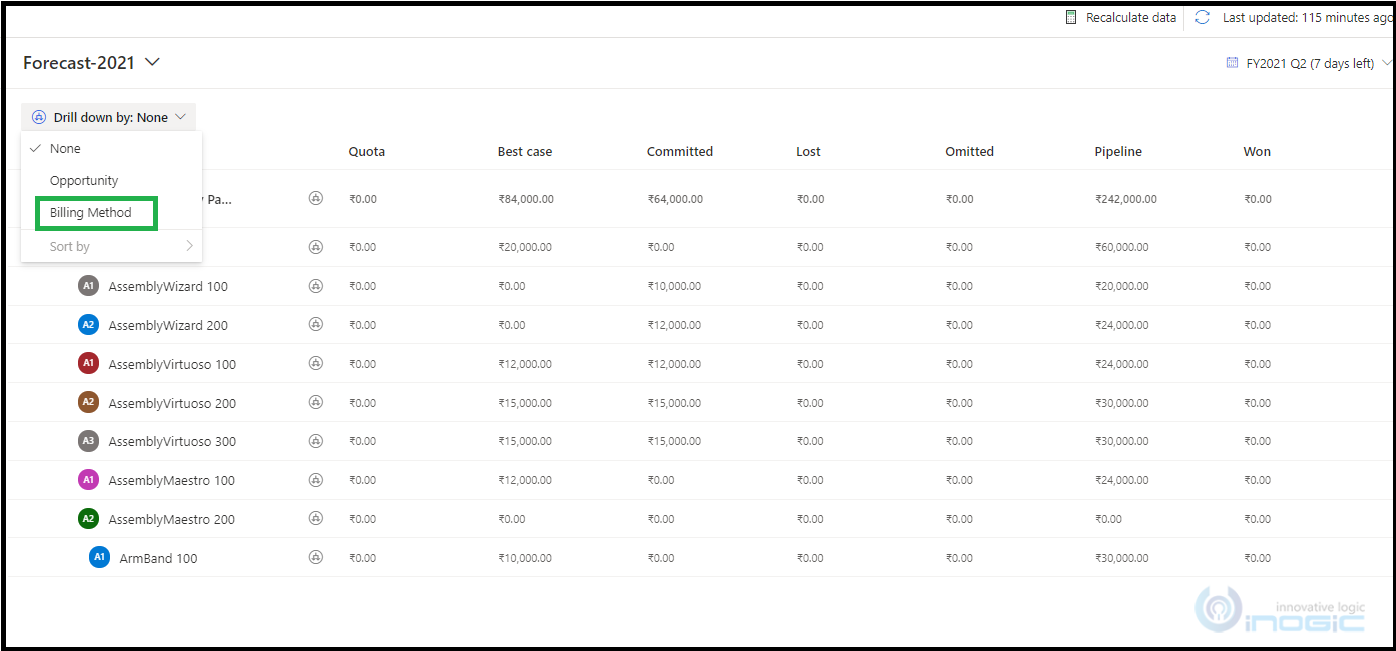
After configuring this drill-down feature, you will notice that the “Billing Method” option is available for selection, as shown in the below screenshot:
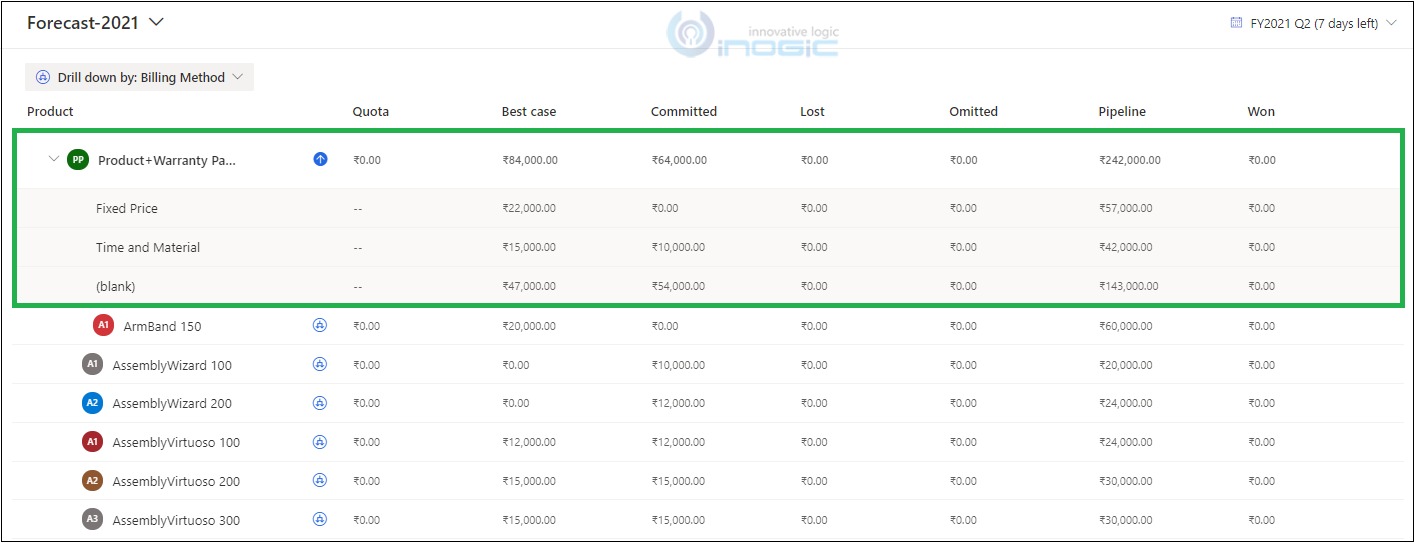
Once you select the “Drill down by: Billing Method” and you click on “Drill down by” icon, you will get the breakdown of opportunity line records as per “Billing Method” – Fixed Price, Time and Material and Blank (Billing Method not selected):
Note: You can edit the drill-down configuration at any time even if the forecast is activated.
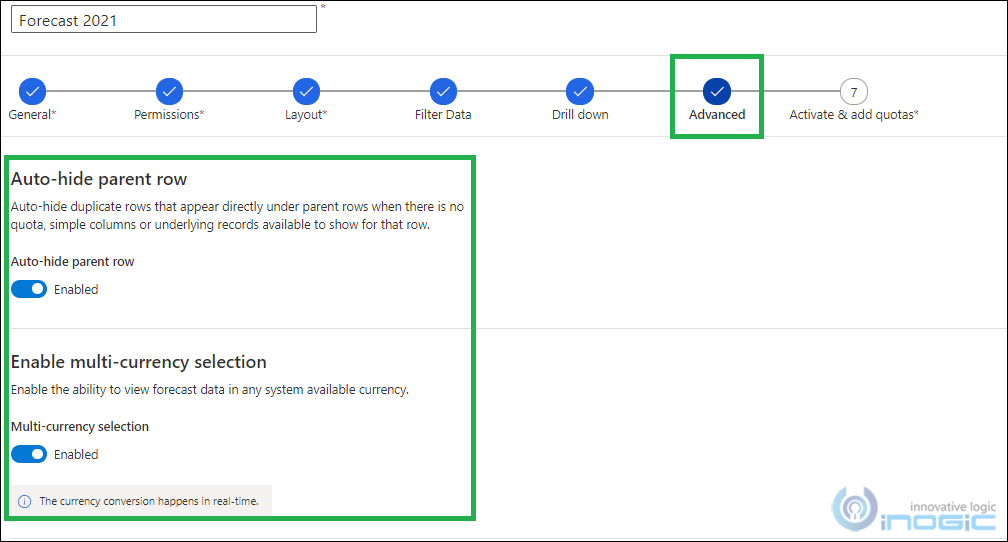
Advanced:
This configuration is useful –
- If you want to hide a dedicated contributor row under hierarchy – By using Auto-hide parent row option.
- If you want to show forecast across different geographies as per the currencies- By using multi-currency selection option.
Auto-hide parent row:
When you open a forecast, each parent node has a dedicated contributor row under the tree where individual revenues (like Quota, Best-case revenue, and so on…) are shown.
Sometimes there are no quotas, revenues under that row then you want to hide this row as you might not want this row to be displayed on the forecast.
Note: By default “Auto-hide parent row” option is enabled.
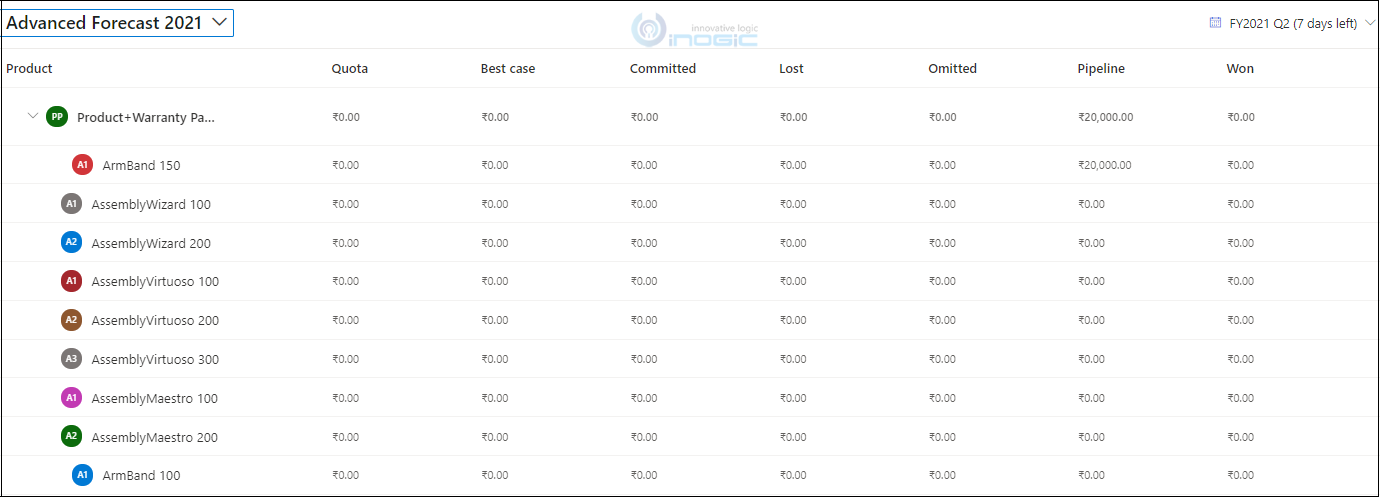
As you can see in the below screenshot, by default a dedicated contributor row under the tree is hidden. As there is no quota, no other revenues or underlining records available for the parent row it is kept hidden.
Once you disable the “Auto-hide parent row” option as shown below:
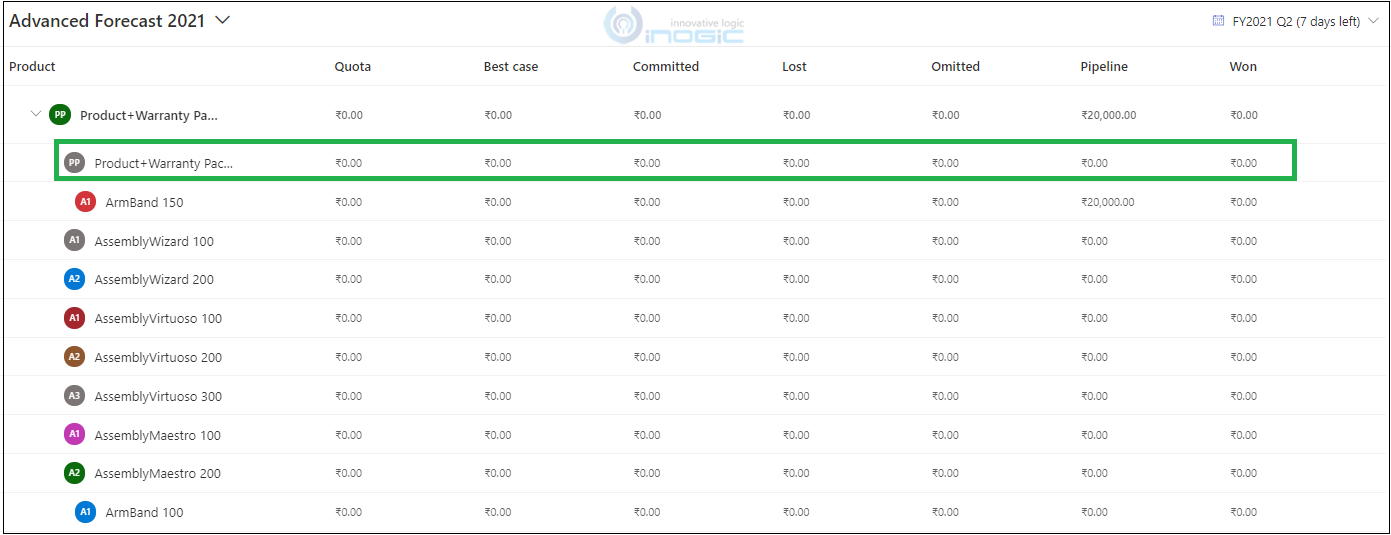
Then, you can see as shown in the below screenshot a dedicated contributor row under the tree is displayed:
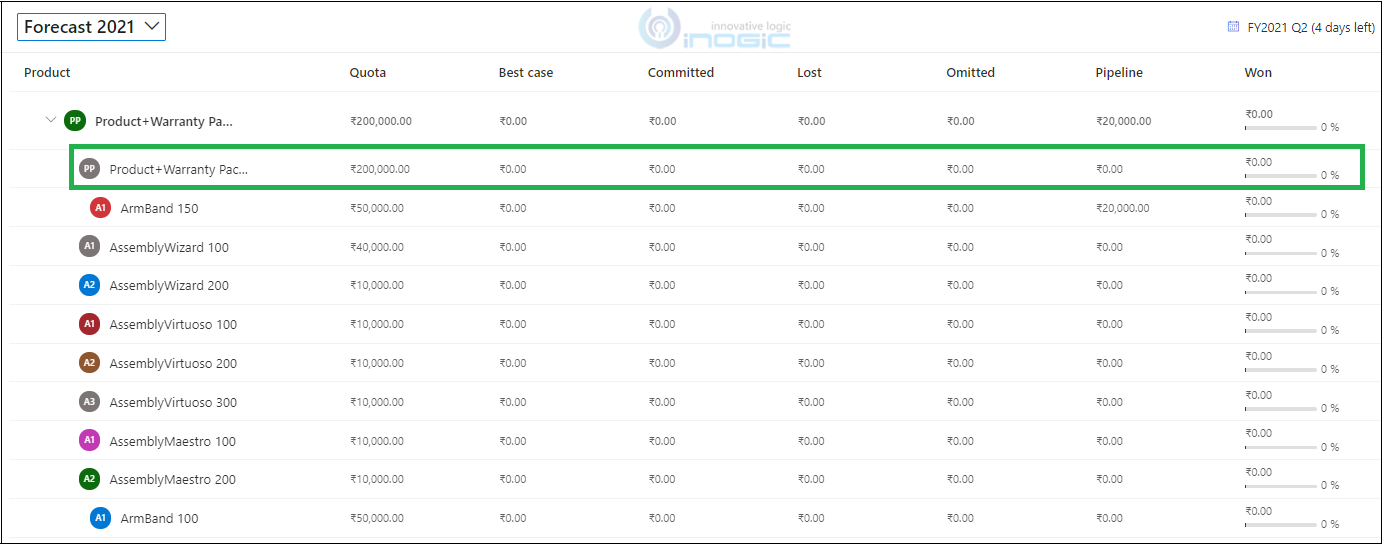
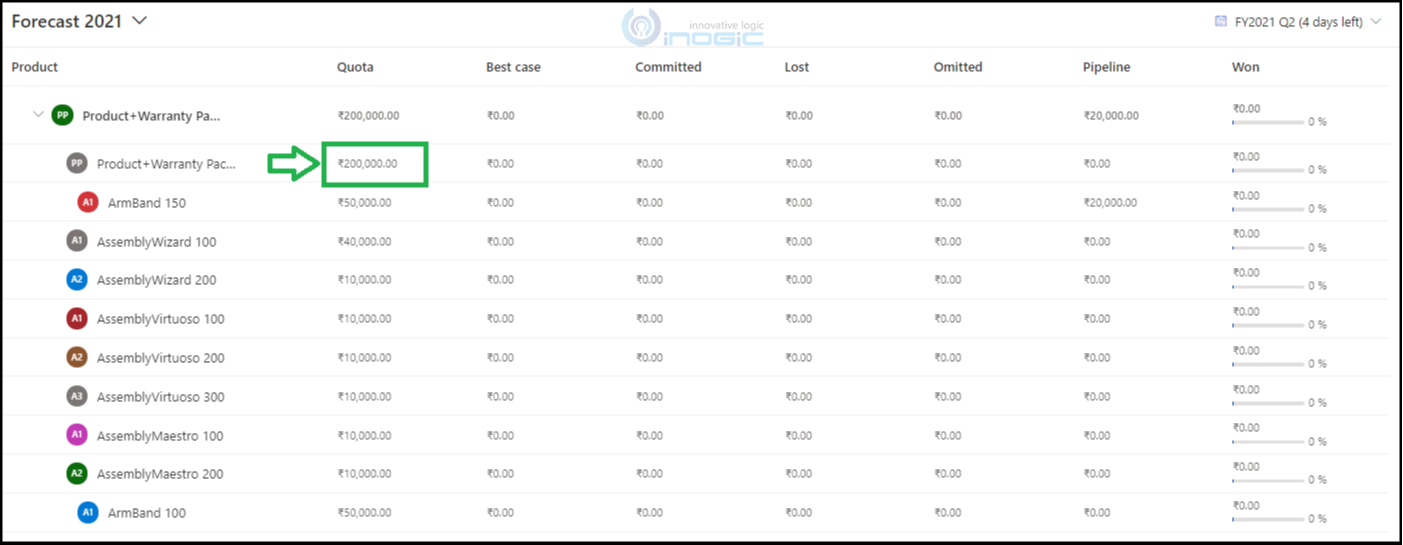
Note: If Quotas, other revenues, or underlining records are available for the parent row then even if the “Auto-hide parent row” option is enabled parent row under the tree will not be hidden. It will still be displayed as there are values to be shown.
As you can see in the below screenshot this parent row under tree always will be displayed irrespective of “Auto-hide parent row” toggling option.
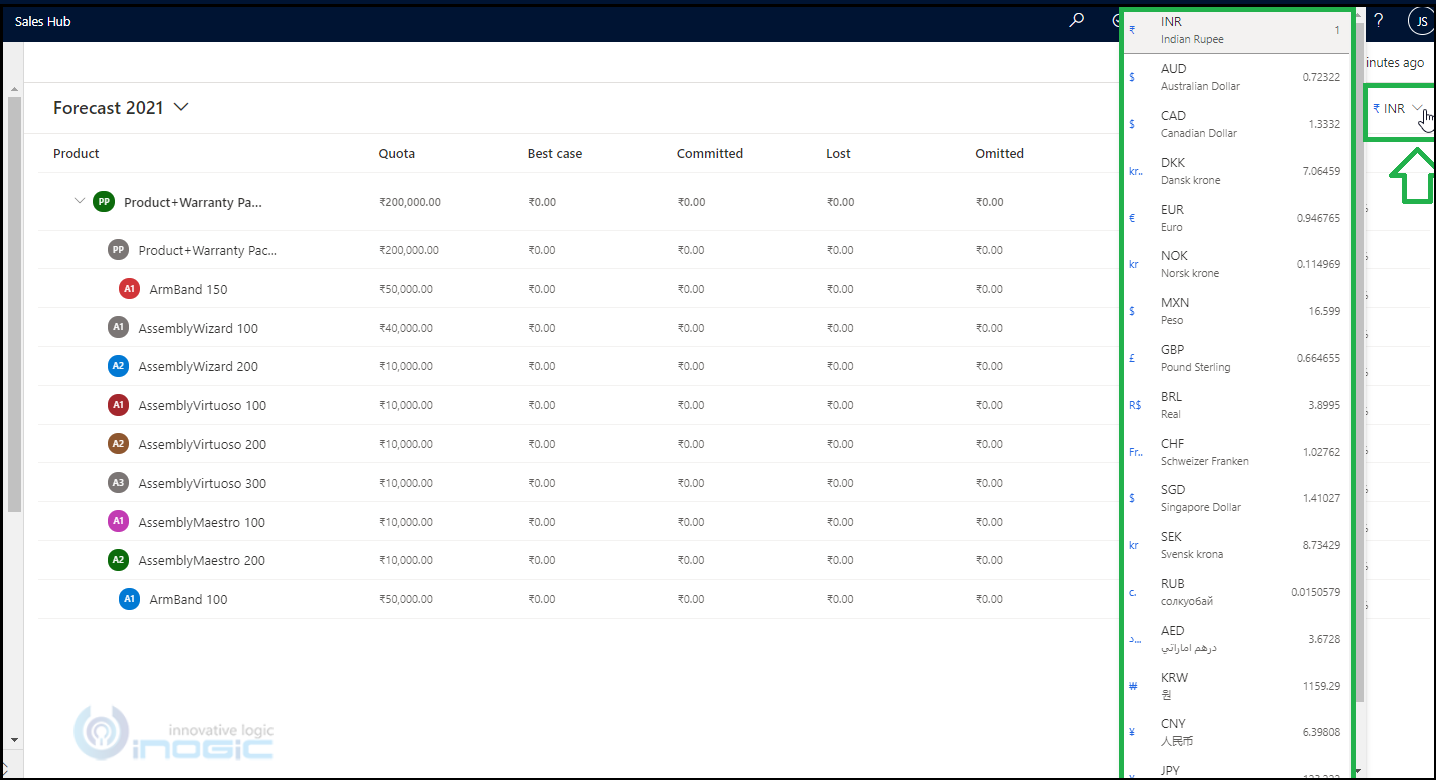
Multi-currency selection: By default, this toggle is disabled. When you enable the same, it converts the forecast revenue data to any currency that is available in the system in real-time, based on current conversion rates.
For example, once I enabled the multicurrency selection for forecast, a currency selector appeared on the forecast page. If you want to see the forecast data in any currency other than the base currency then simply select the appropriate currency by changing it. You will see all the forecast data converted into changed currency in real-time.
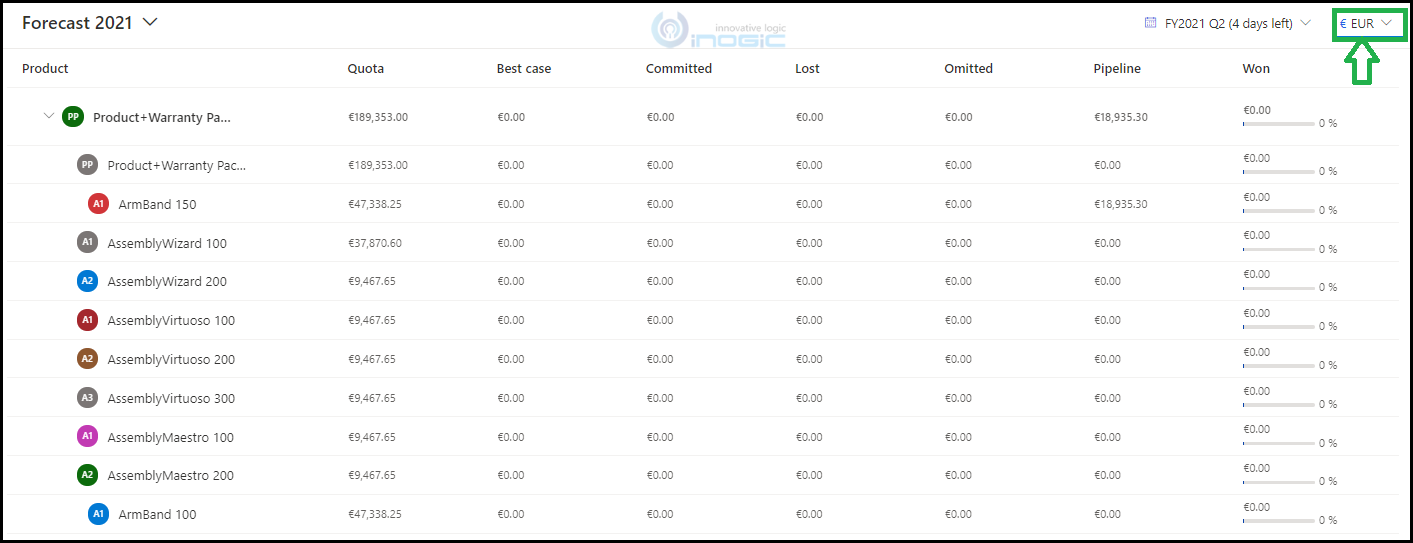
In my scenario, I changed it to Euro and corresponding forecast data conversion happened in real-time by using the current exchange rate.
In the below screenshot, you will see INR forecast data is converted into Euros:
Conclusion:
Sales Forecasting is a great prediction tool. These newly introduced configuration steps has enhanced the usability experience of filtering and drilling down the forecast data. Also enabling the multi-currency definitely helps the sales team to view the forecast data real-time in any of currency that is defined in the organization.
Reference Links:
https://docs.microsoft.com/en-us/dynamics365/sales-enterprise/add-additional-filters
https://docs.microsoft.com/en-us/dynamics365/sales-enterprise/configure-manage-drill-downs
https://docs.microsoft.com/en-us/dynamics365/sales-enterprise/forecast-configure-advanced-settings
A trusted solution to Accelerate Sales Performance!
Need any help with smoothening the process of lead generation in Microsoft Dynamics 365 Sales module?
Want to manage your sales process more effectively? Contact us at crm@inogic.com and our Inogic- Professional Services Division will help you modify, optimize, and automate your requirements within Microsoft Dynamics 365 Sales!



Nice article , as always by inogic team, i was also trying this feature , but couldn’t seem to find project entity in the “Rollup entity” list , do you know happen how “rollup entity” column filter which entities to show and which not to and is there any way to update an entity to show up in this list ?
Thank you for the feedback. To answer your question, only those entities that have Change Tracking enabled will be listed under “Rollup entity”.
If you want to have “Project” entity in “Rollup entity” list then simply select the “Enable change Tracking” option as shown below:
And you will observe that “project” entity will start appearing under “Rollup entity” as shown below:
Hope this helps!