In one of our earlier blog, we had looked at approvals connector that would allow us to send an approval message to select users and wait to receive their response before further action is initiated. The approvals are presented through a power automate mobile app or can be accessed from the flow portal.
Microsoft Teams is fast becoming the communication and collaboration app for businesses, and some would even agree that they literally live on teams. This, therefore, makes sense to have notifications and updates sent out on Teams to receive quicker responses and updates rather than using the traditional channels of emails or requiring another app to receive these notifications.
In this article, we will explore the capabilities of the Power Automate Microsoft Teams connector to send out actionable messages. Messages that not only display details with a couple of buttons to approve or cancel but also allow the users to add fill in additional fields and submit.
Actionable messages can be easily designed using Adaptive Cards. As the name suggests, these cards adapt themselves to the look and feel of the host app. Microsoft Teams is one of the apps that Adaptive Cards support. It JSON for the template formatting. While JSON may sound non-citizen friendly, adaptive cards can easily be designed using the WYSIWYG designer available. Once you are done with the design, copy the card payload and paste it in your flow step and that’s it!
Since the focus of this article is on Adaptive cards and Teams, we are using the manual trigger in this example to invoke the flow and post the messages. In this example, there is a need for revising a quote with the customer requesting a price discount. A message will be sent to the Manager with the details of the existing quote and ask them to enter the new price that could be presented to the customer.
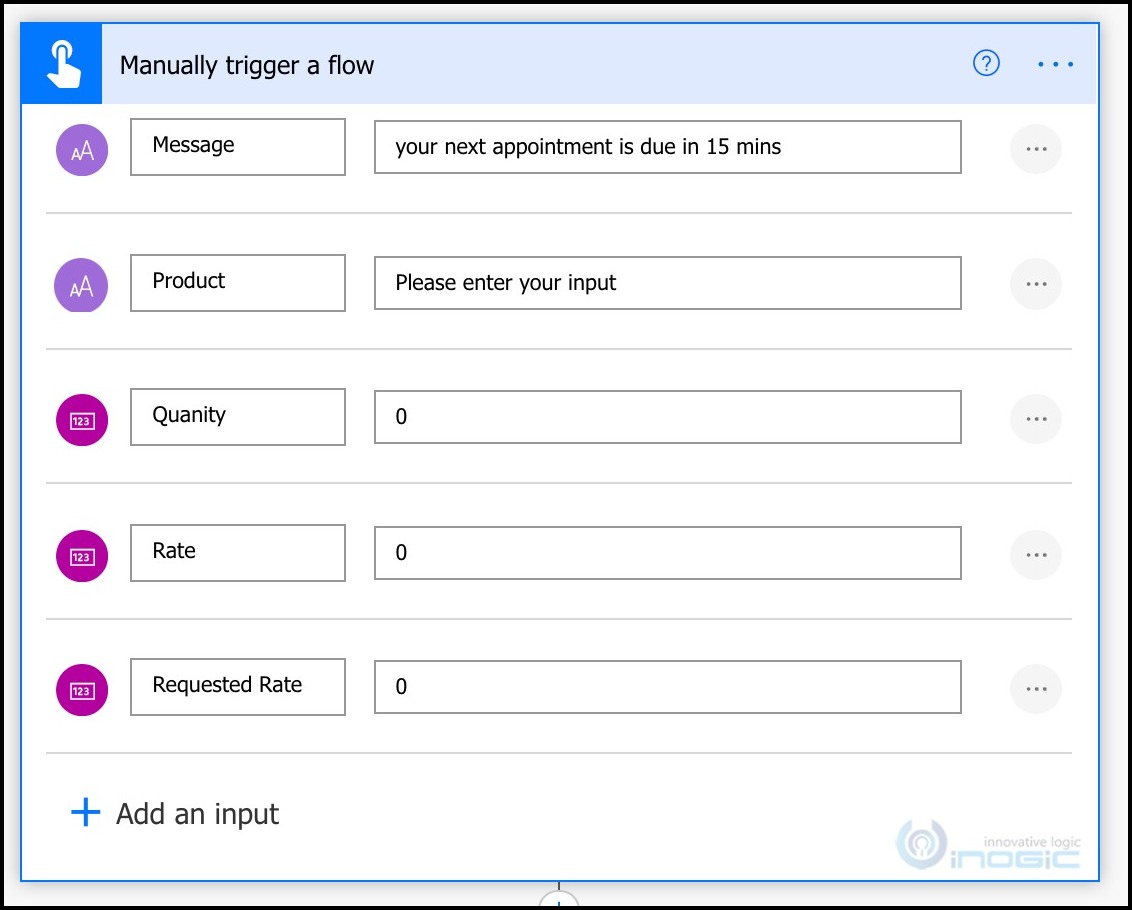
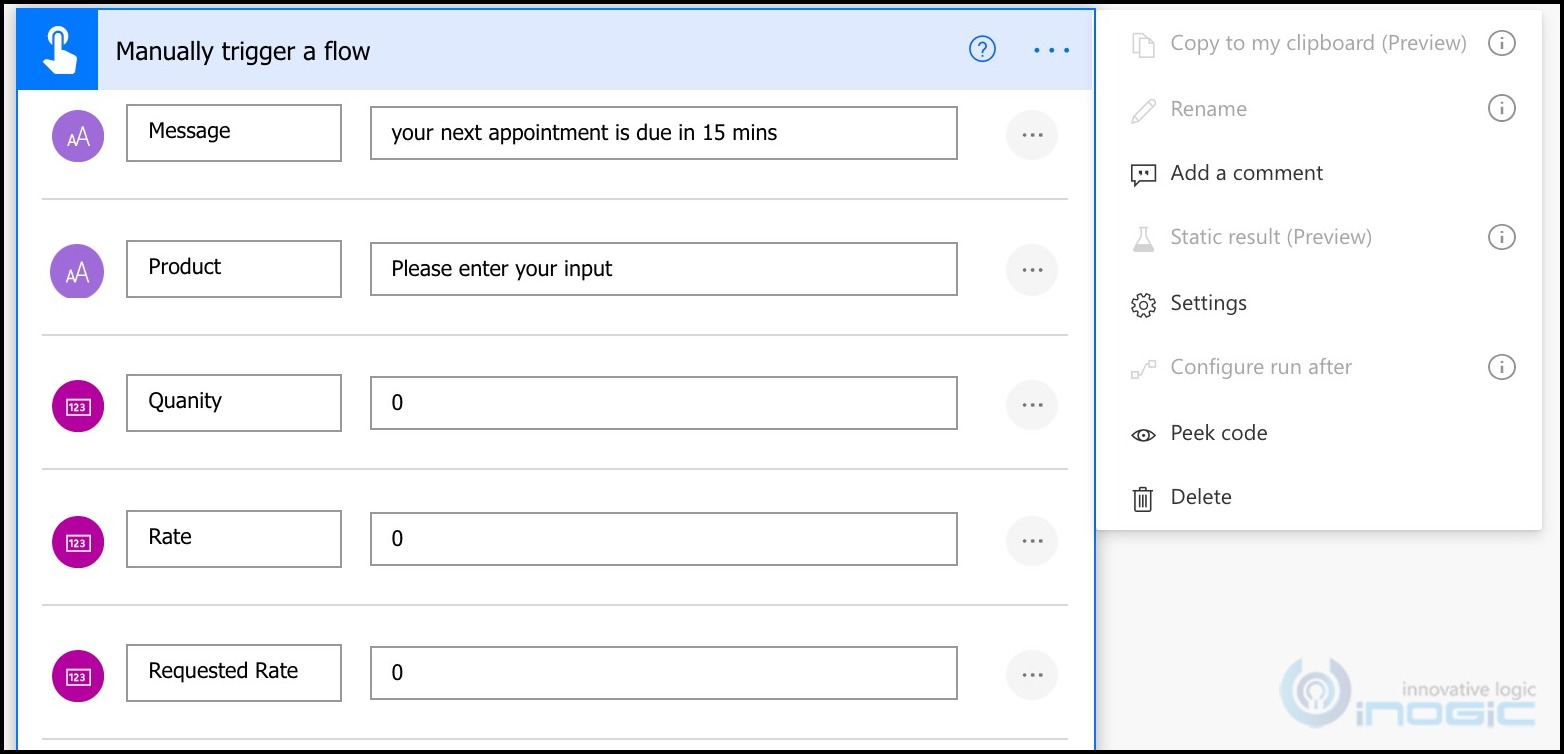
Since we are using a manual trigger, we will add the following inputs
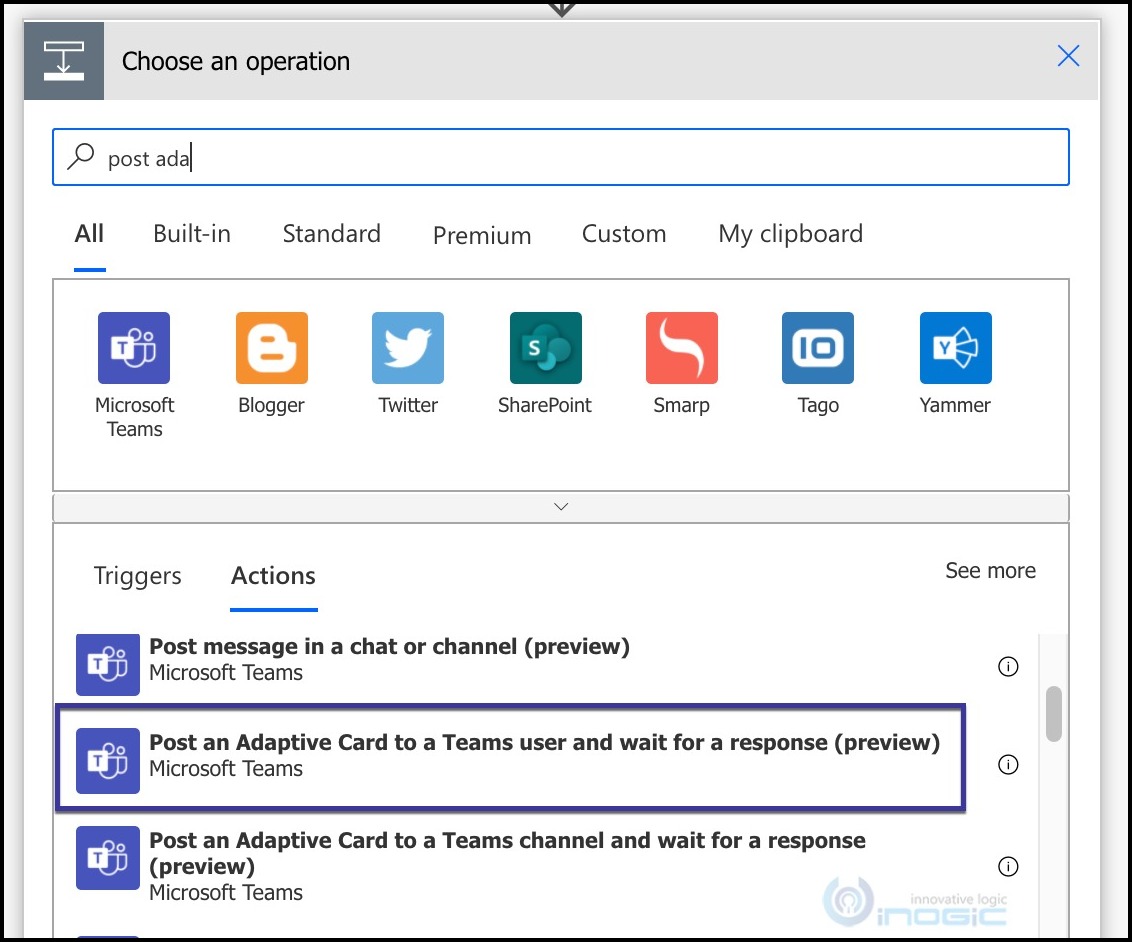
Next, we will add the “Post an Adaptive Card to a Teams user and wait for a response” action from the Microsoft Teams connector to send the message to the manager for approval.
This action will post the message to a user in the chat window. We can also post the adaptive card to a Teams channel using the other action displayed in the screenshot above. We will also use this one in our example.
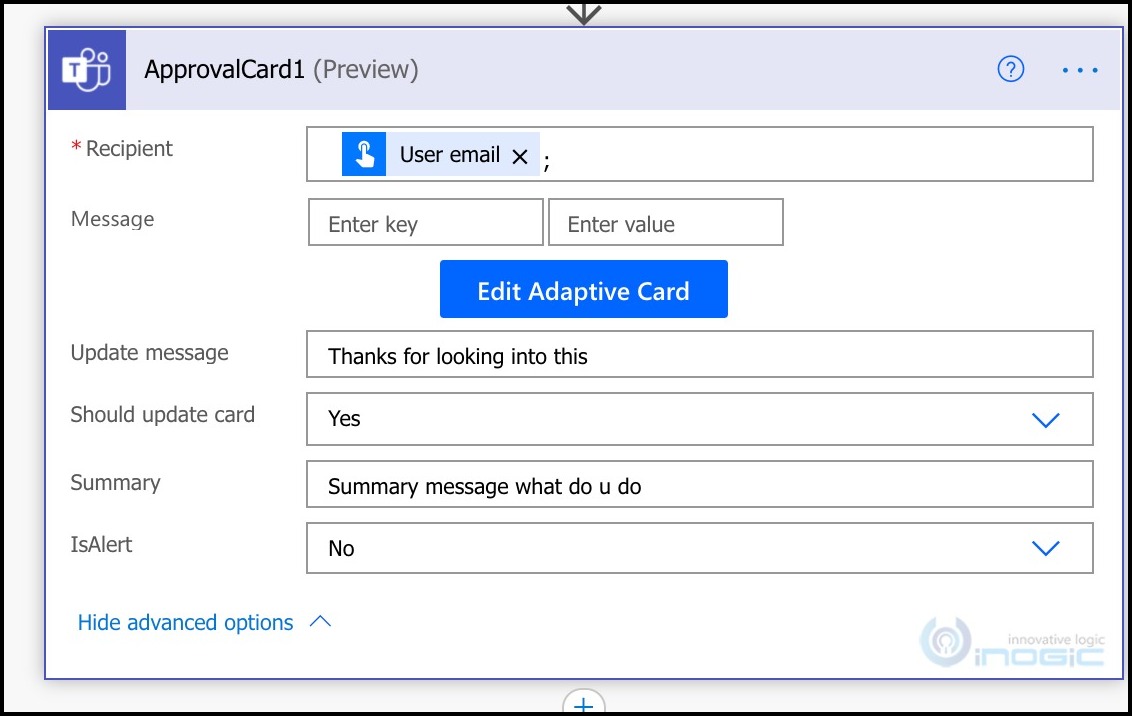
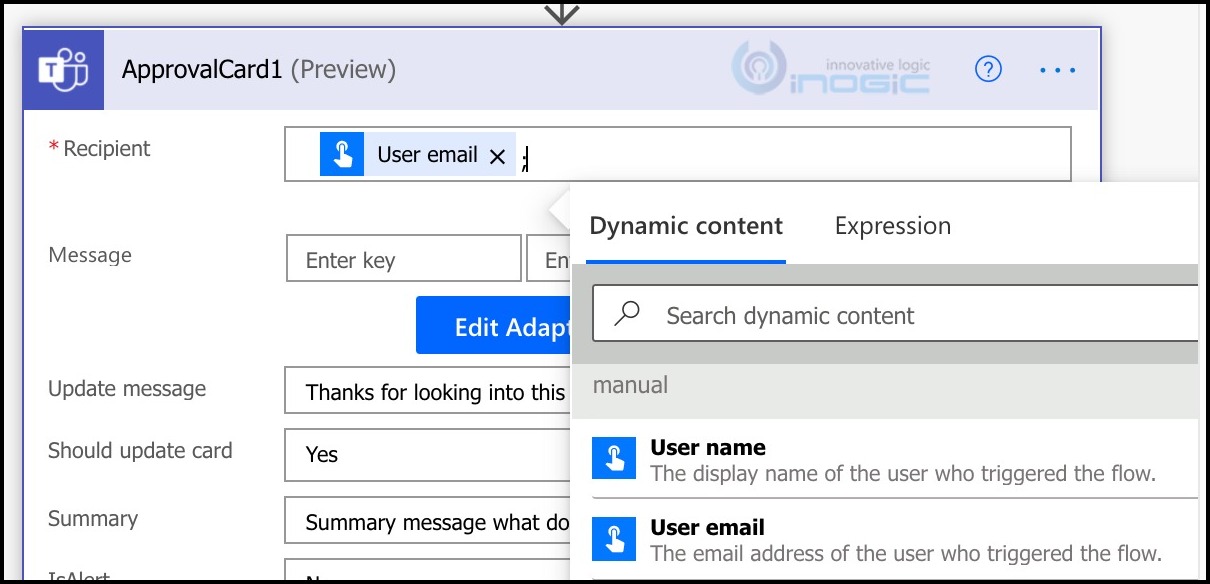
For this action, we need to primarily provide the user to whom the message needs to be sent and the card payload itself.
Before you begin editing the details of the action, make sure to rename the action to something simpler like “ApprovalCard1” in the screenshot above. To read the responses entered by the user we need to refer to this action in the later steps.
In this example, I have added the user email of the user who invoked the flow manually using the dynamic values
You can also provide direct email addresses as shown below
Moving to the Message section. Looking at the Key/Value pairs it is expecting, I thought we could define the key/value pairs here and then refer them in the Adaptive Card design to pass dynamic values to the card. But I did not succeed in identifying the syntax to be used to refer to these key/value pairs. Hence ignoring these for now.
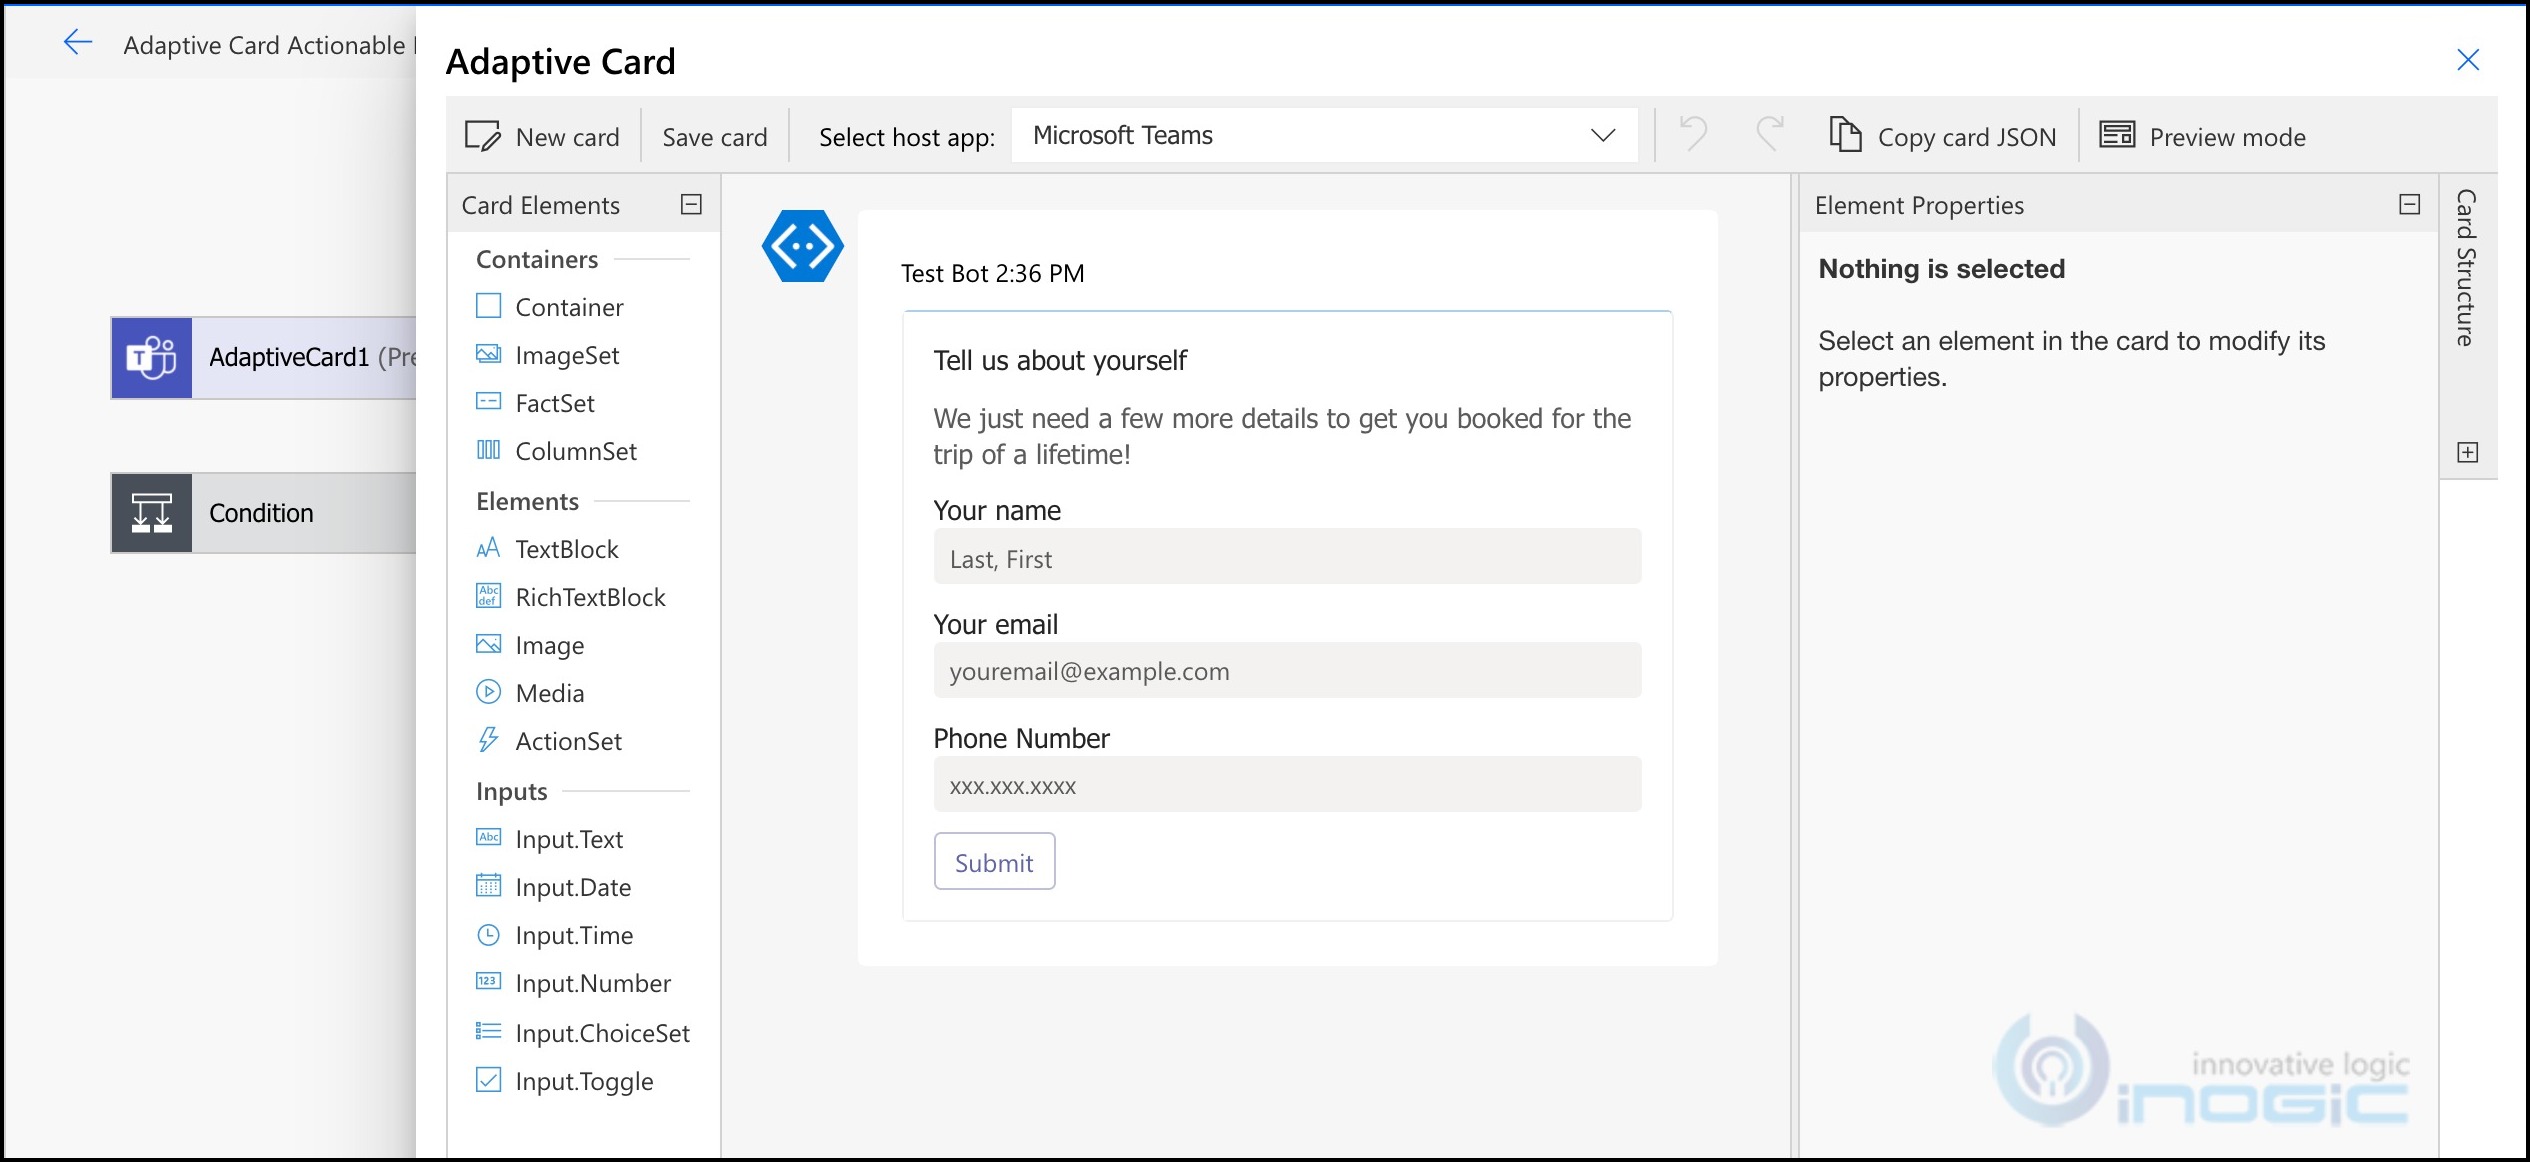
Now click on the Create Adaptive Card button available. After saving the card, you will be shown the Edit button to make further changes to the card design.
This will present you with the in-place Adaptive Card WYSIWYG designer to drag and drop controls on the canvas and get started right away.
As you hover over the canvas, you will find individual controls highlighted. Lets delete most of them. Edit the Tell us about… text block and call it Quote Details
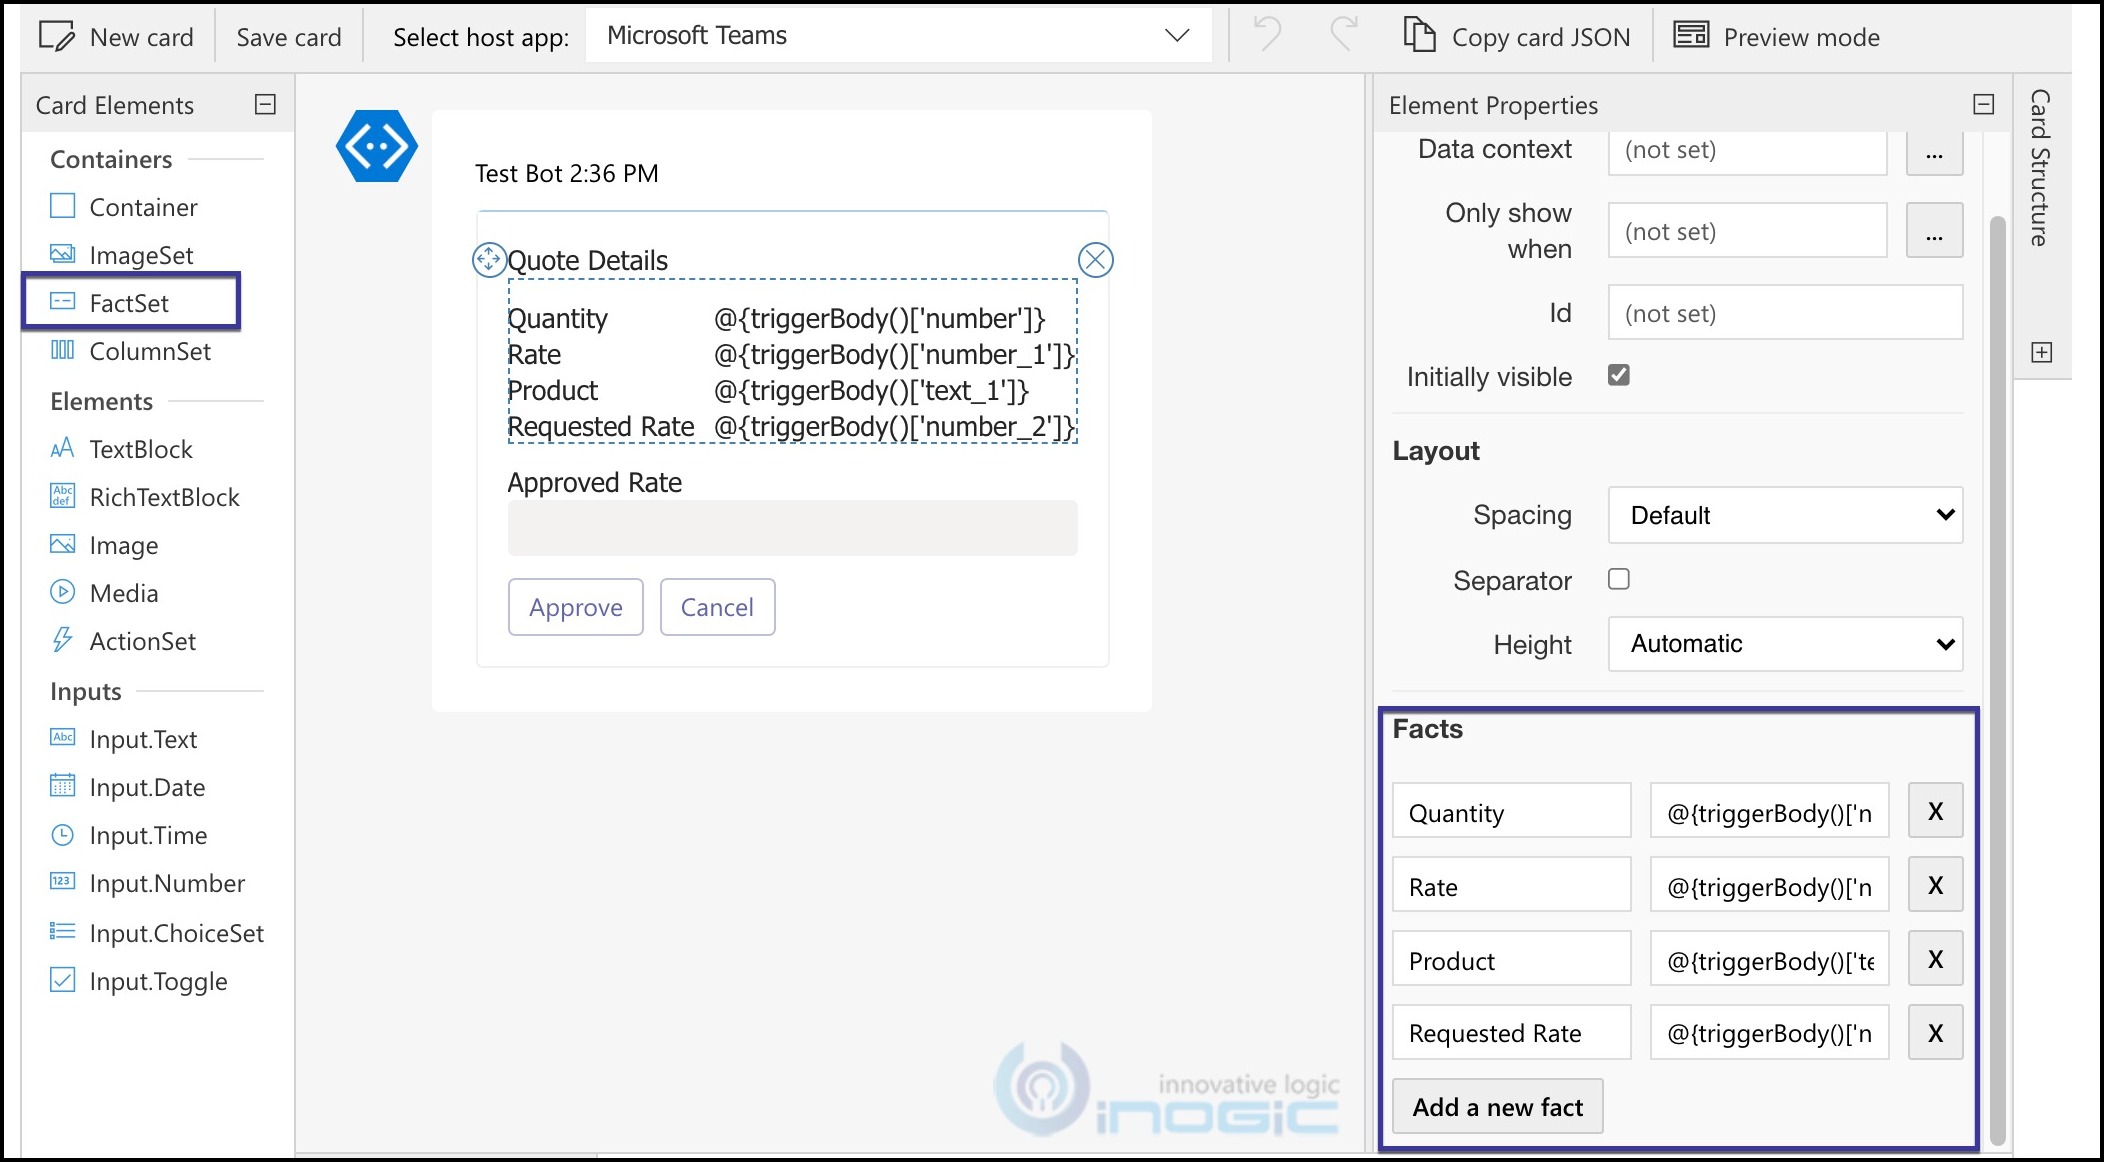
To add a table kind of layout I used the FactSet element from the designer and dropped it on the canvas.
In the properties bar to the right you again see a label/value pair that you can add for each of the details to be displayed in the table.
In our example we are displaying all the details that we requested as input in the flow.
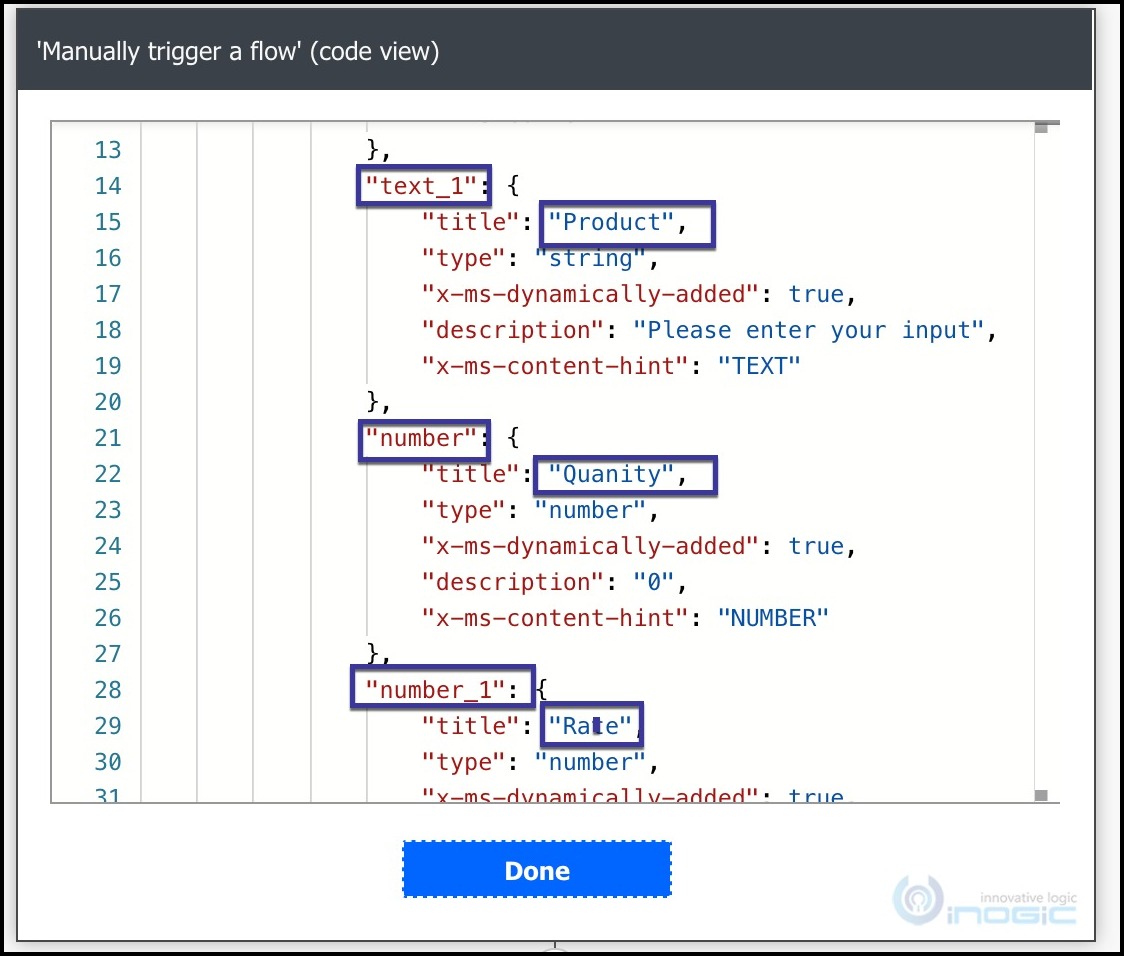
To understand the expression to be entered for the value so that it refers to the flow inputs, we will go back to the Manual trigger and click peek code
Peek code shows you the key values for these input controls. It may seem that the key values would be same as Product, Quantity, Rate, and so on but that is not the case
We will need to refer to text_1, number, number_1 to read the values that were entered by the user to display them in the card.
The value for each of these in the factset would be
Quantity – @{triggerBody()[‘number’]}
Rate – @{triggerBody()[‘number_1’]}
…
Next, we also want to allow the Manager to enter a custom rate if they would like to offer something other than the requested rate.
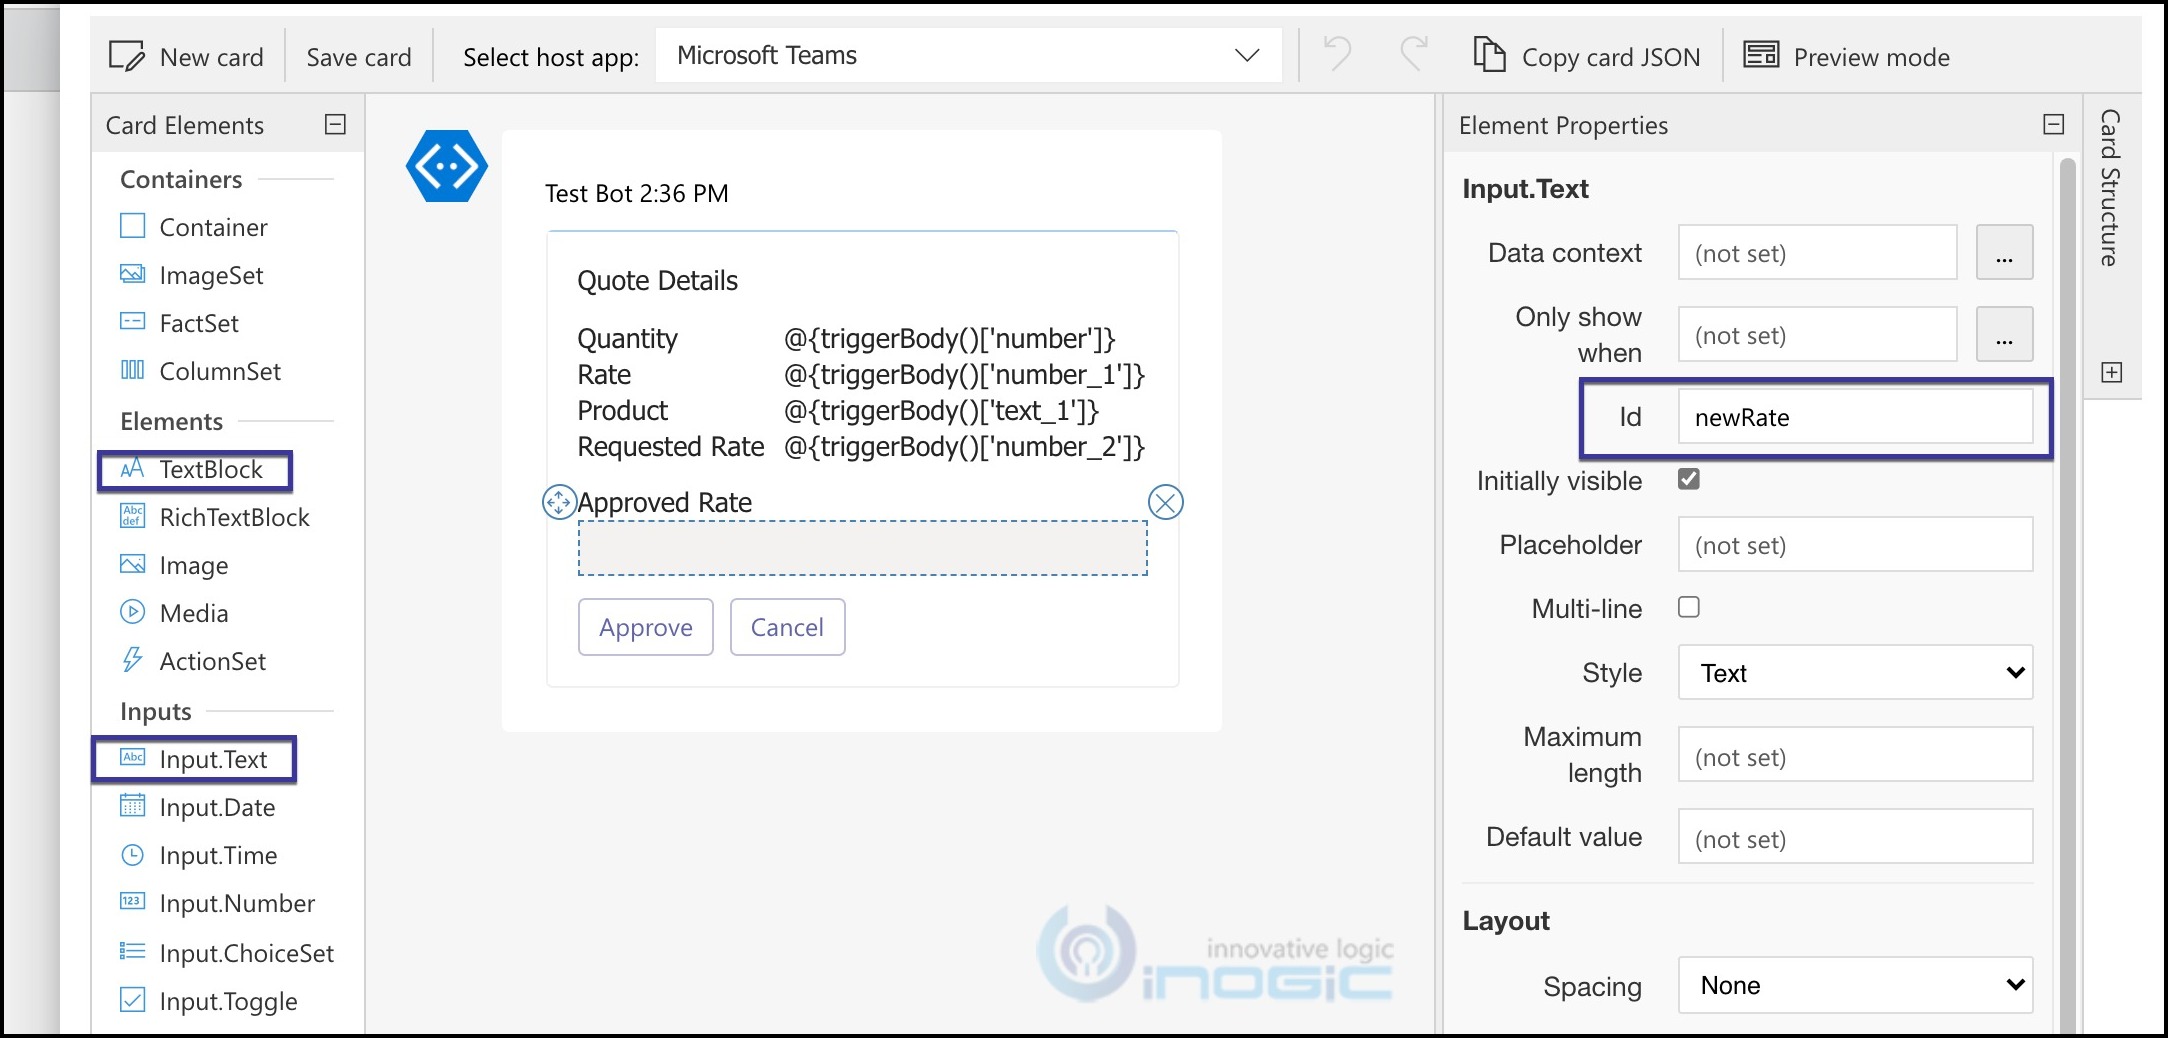
For this will add an input control Input.Text to the canvas and a TextBlock element for the label. Arrange it as shown in the screenshot below
Make sure to set the Id of the Input.Text control as we will need to use that Id to refer back to the value entered by the user in our flow.
Next we add the Approve and Cancel button. Make sure to set the Id for both the controls. This will help us identify the choice made by the user from the Adaptive card and process action accordingly.
We are now done with the design. Click Save card on the ribbon to return back to the flow designer.
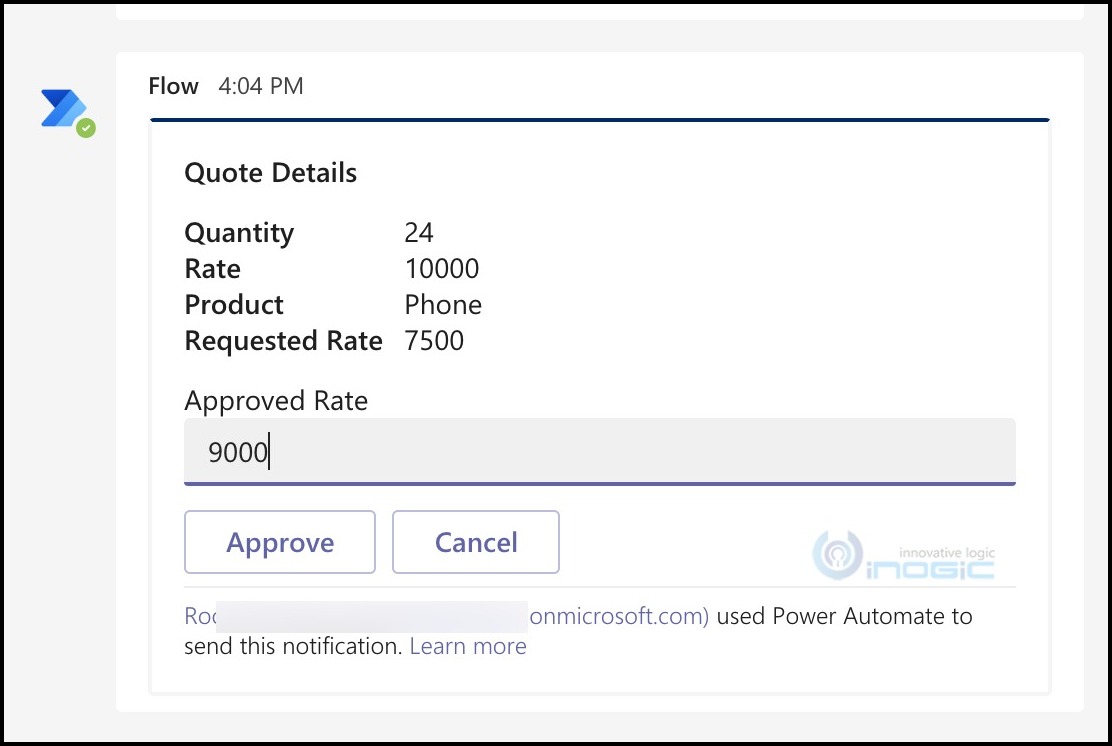
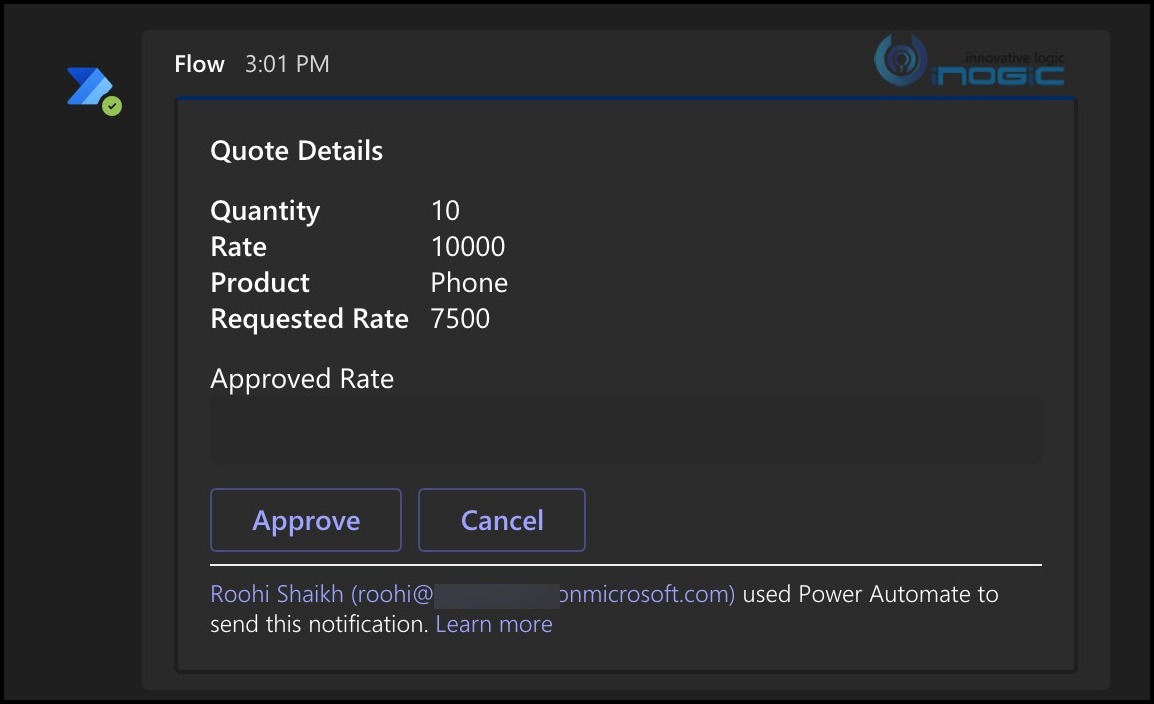
We are ready to test this out Enter the values for the input parameters and you will find the following message posted in the chat window of the selected user.
The manager can enter the approved rate and click approve or even click cancel to reject any price change request.
We will enter 9000 in the approved rate and click approve to complete the testing.
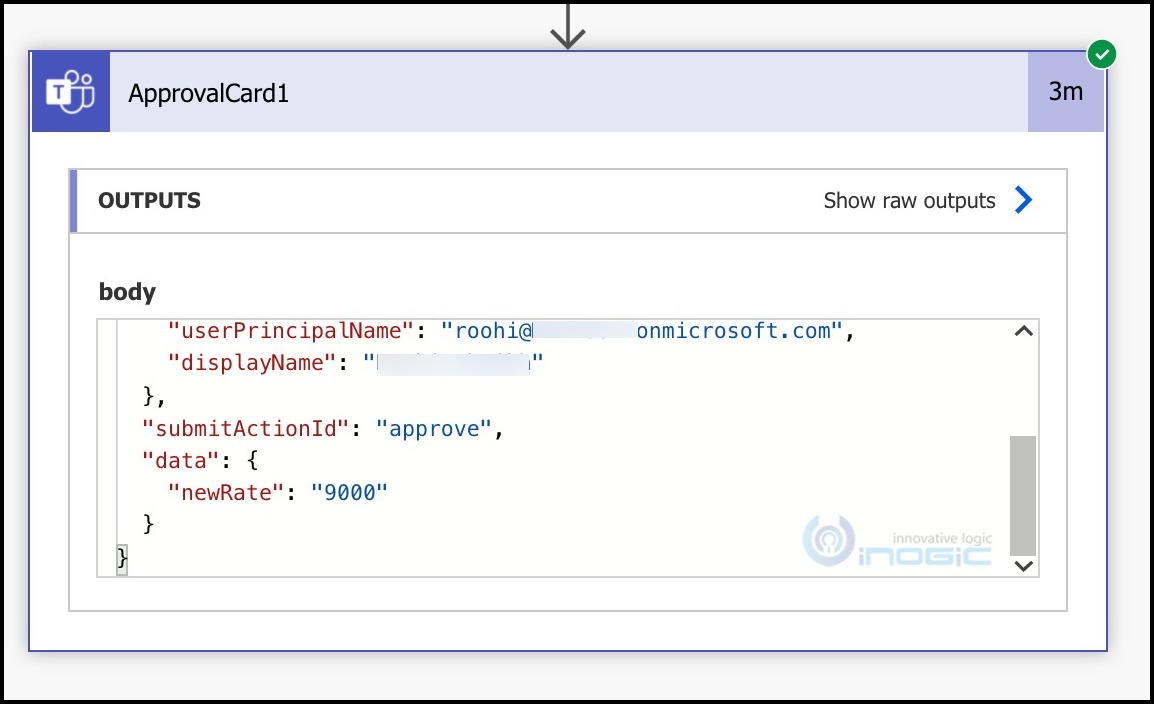
Go back to the flow execution of the test run and check the details received as outputs of the adaptive card action.
Within data, you will get all the input values accepted in the card as properties. The choice of button is available in the “submitActionId” property.
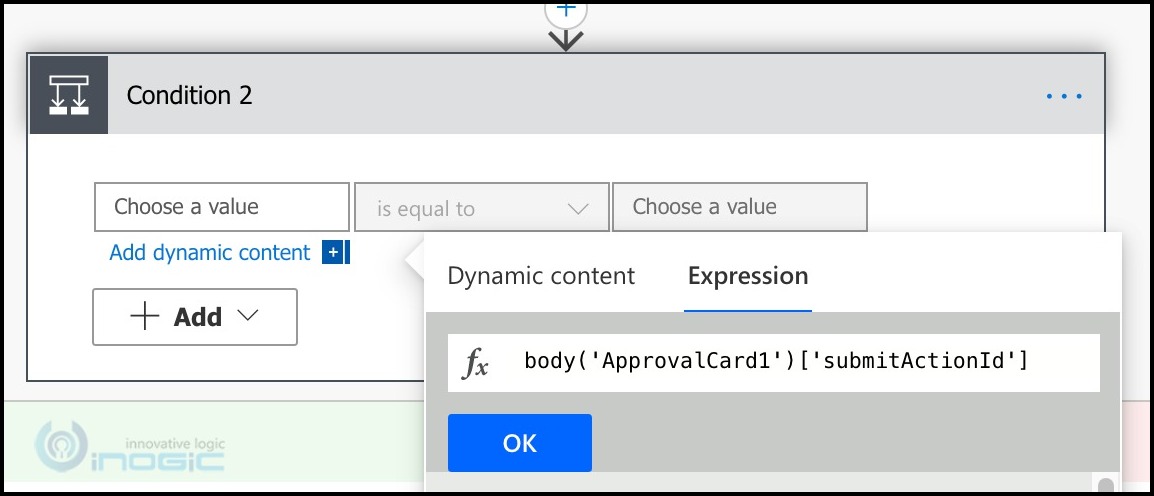
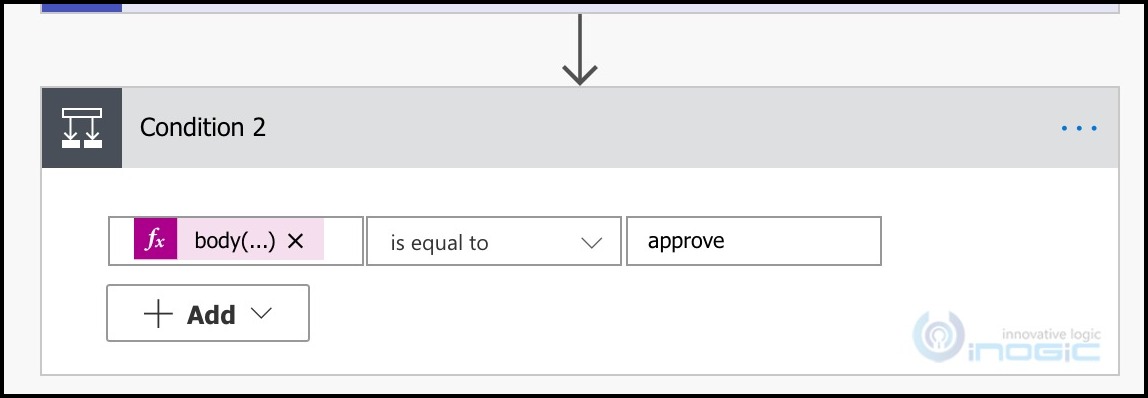
We will add a condition control to check the action selected. Note the results of the AdaptiveCard action is not available for direct selection through Dynamic content and will be referred through expressions as shown below
If it is approved,
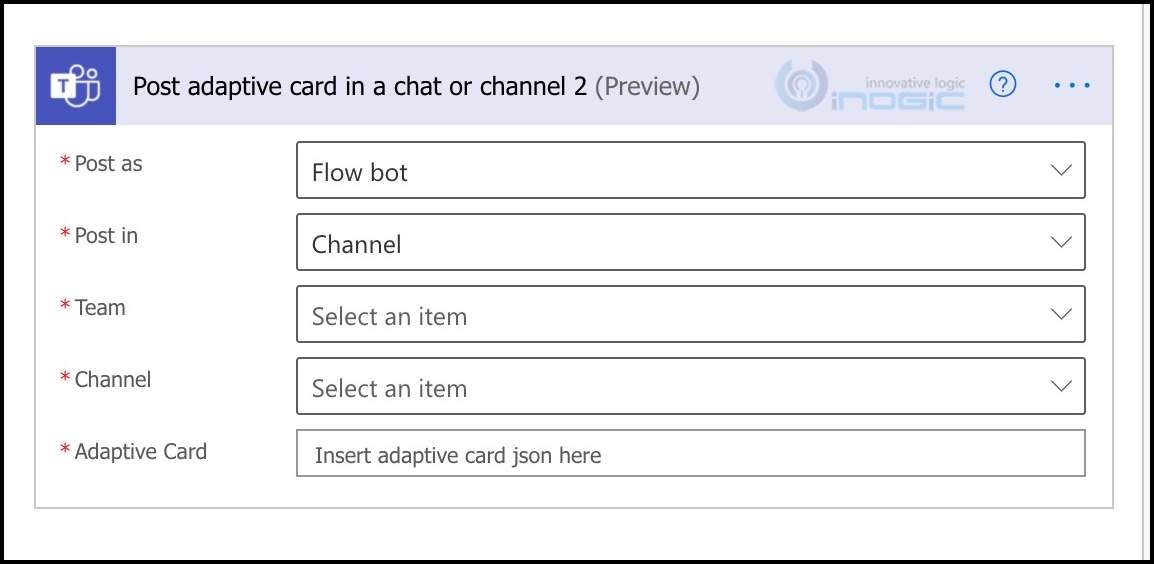
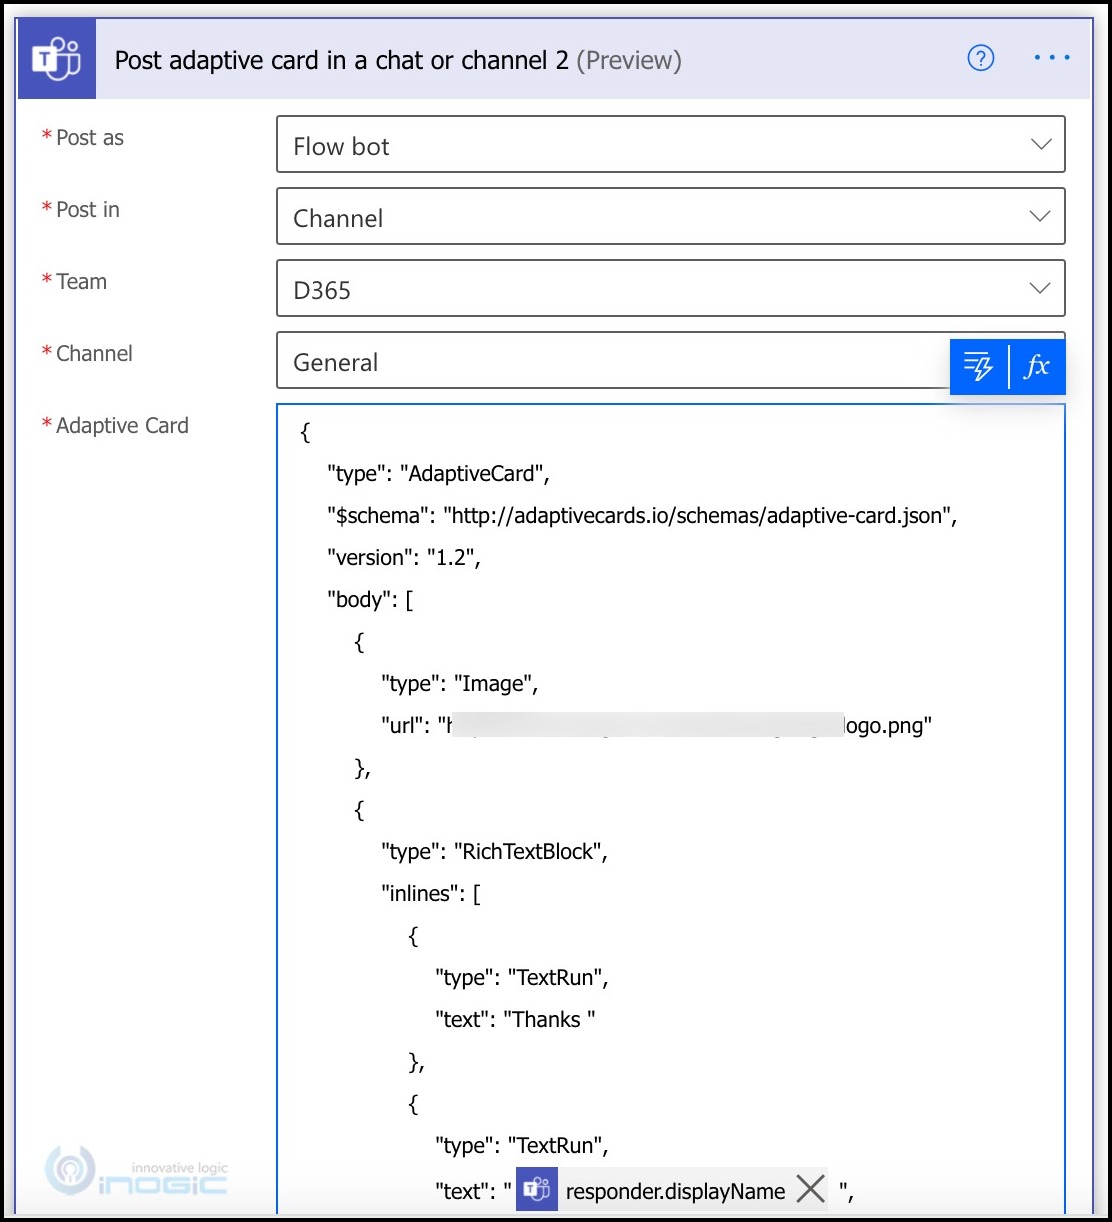
we will post a message on the Teams channel using the other action “Post Adaptive card in a chat or channel”
Choose Flow bot to have messages posted through the bot. You can also post as user, in that case, the user set in the connection is used to post the message.
In this action you will notice that the Adaptive Card does not have the designer that was available in the earlier action. In this case we need to design the adaptive card and copy and paste the card payload here.
Navigate to the designer.
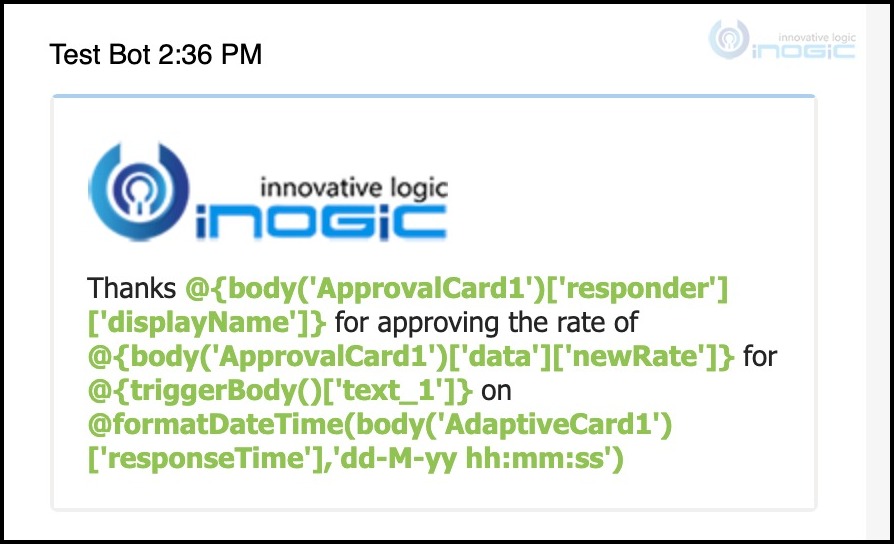
Place an image and set the url property to the location of the image on the web. Next, add a Rich TextBlock, this will allow us to format the words within the text block independent of the whole text.
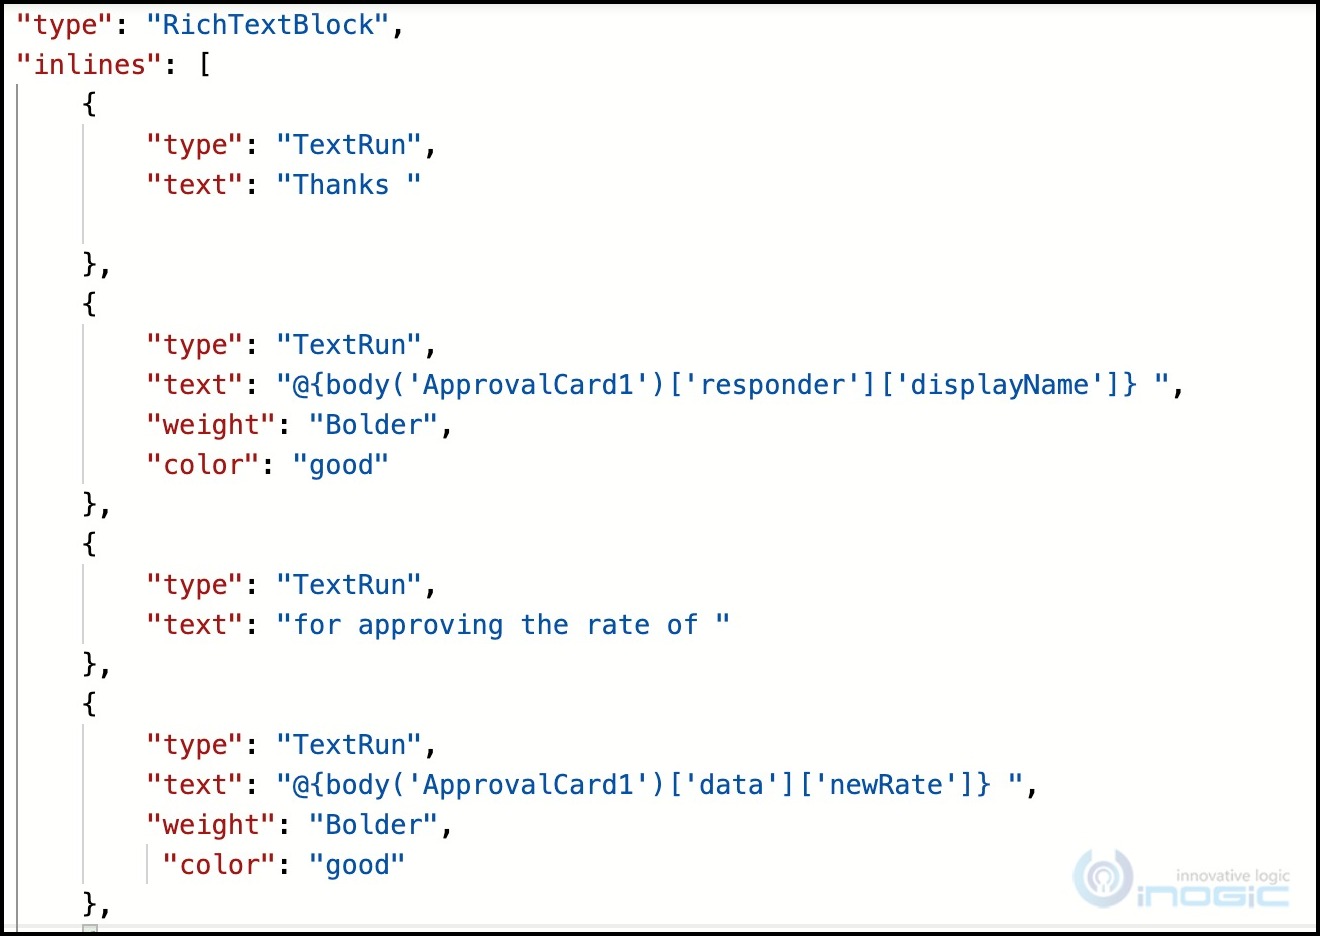
This is what the inlines block looks like
To refer to the flow values we have added the flow expressions as before.
Copy the card payload from the designer and paste in the Adaptive Card field of the action. Make sure all the expressions appear formatted correctly there.
Test the flow again. Now when you approve, a message will also be posted on the teams channel as shown below
Adaptive Cards are a great way to present actionable messages right within the app without having the users to navigate outside the app for user input or approvals.
Cut short 90% of your manual work and repetitive data entry!
Get 1 Click apps and say goodbye to all repetitive data entry in CRM –
Click2Clone – Clone/Copy Dynamics 365 CRM records in 1 Click
Click2Export – Export Dynamics 365 CRM Report/CRM Views/Word/Excel template in 1 Click
Click2Undo – Undo & Restore Dynamics 365 CRM data in 1 Click
