Introduction
In Dynamics 365 CRM 2021 release wave 1, you will notice there are many features available in Field Service app. One of these features includes a simplified setup of frontline workers, work orders, etc.
By using this setup of frontline workers and work orders in the field service app admin can streamline the field service process by using a single form to set up frontline workers and work orders. Frontline workers will now get quick access to the field service mobile app on email and can schedule themselves on work orders easily.
Let us explore this feature by logging into the Dynamics 365 CRM environment.
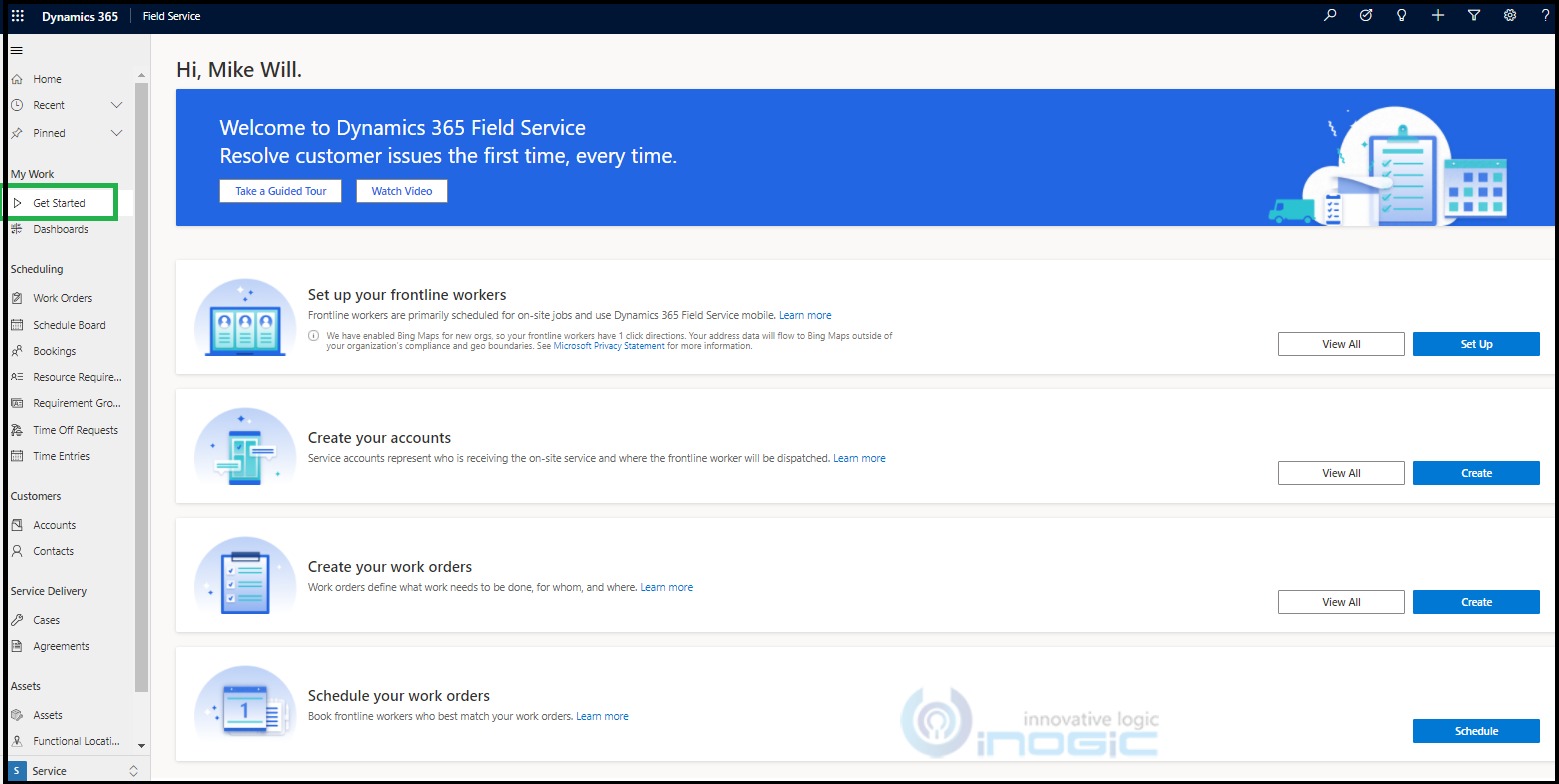
When you open the Field Service app, you will notice on the sitemap there is a ‘Get Started’ page available, from where you can start setting up the field service-related items.
On this page, you will find below options:
• Set up your frontline workers
• Create your accounts
• Create your work orders
• Schedule your work orders
Let us explore each option one by one:
Set up your frontline workers
There are two buttons available ‘View All’ and ‘Set Up’ under the ‘Set up your frontline workers’ option.
View All: By clicking on this button, you can simply view the entire frontline workers list.
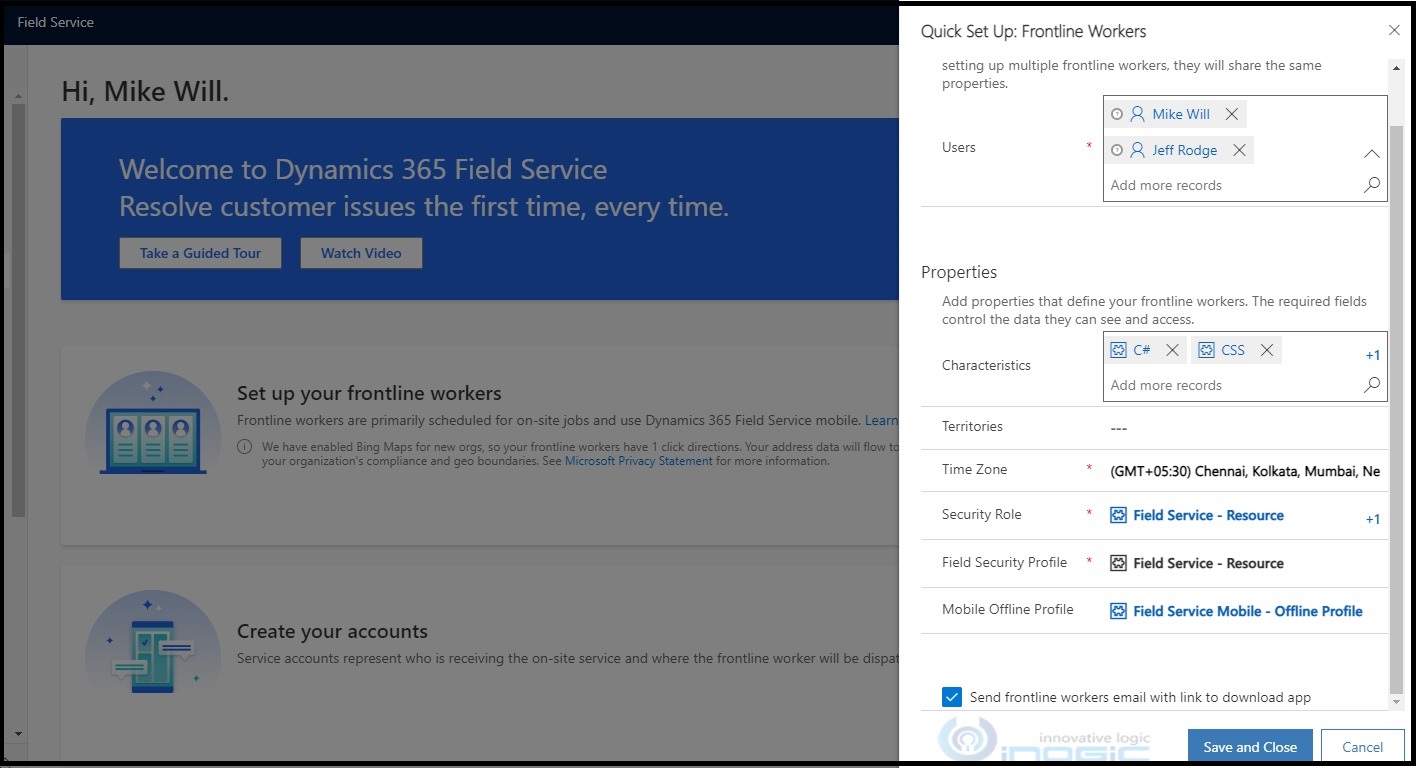
Set Up: This allows setting up frontline workers quickly at once. You can set up one or more frontline workers through a single quick set up form.
You can select multiple values in the lookup fields like ‘Users’, ‘Characteristics’, ‘Territories’, ‘Security role’, ’Field Security Profile’, and a single value in ‘Mobile Offline Profile’. You can also select the appropriate ‘Time Zone’ as per the resource.
On the bottom of the form, there is a checkbox option available which if checked, sends an email with a link to download the Dynamics 365 field service mobile app.
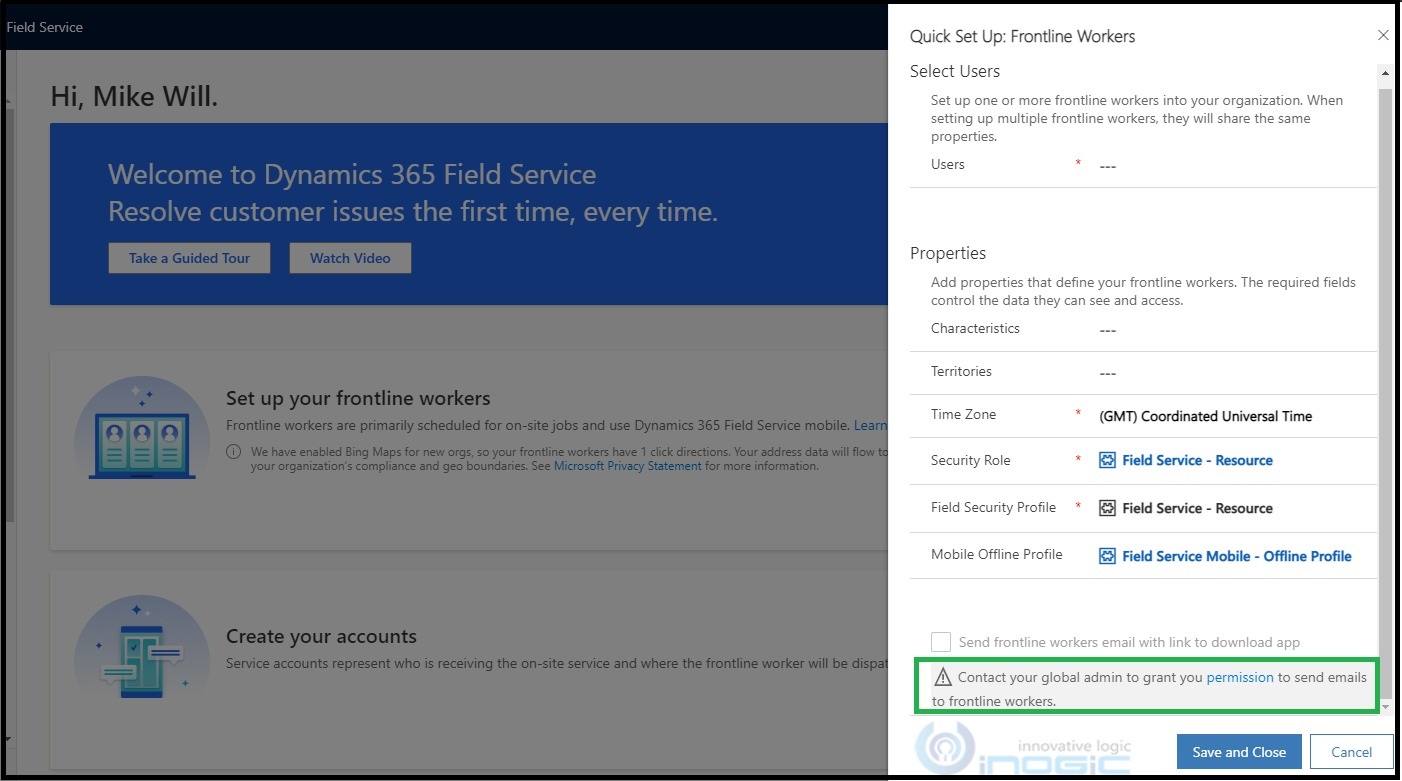
Admins cannot send an email to their frontline workers if they do not have their mailbox approved by the global admin. For more information you can refer to this documentation. Admin cannot check the checkbox as shown below:
Once the “Save and Close” button is clicked, the system will create frontline workers (Bookable Resources with type=User) in the background as shown below:
Note: Front line workers are bookable resources in the field service app that has resource type as ‘user’. You cannot set up other types of bookable resources through this setup.
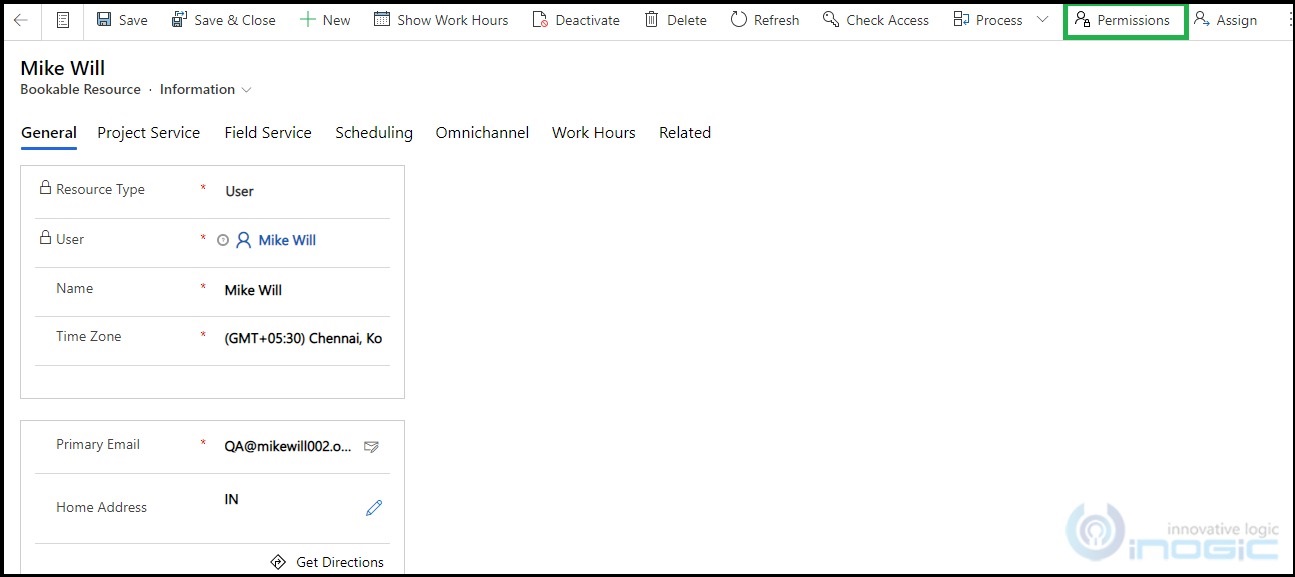
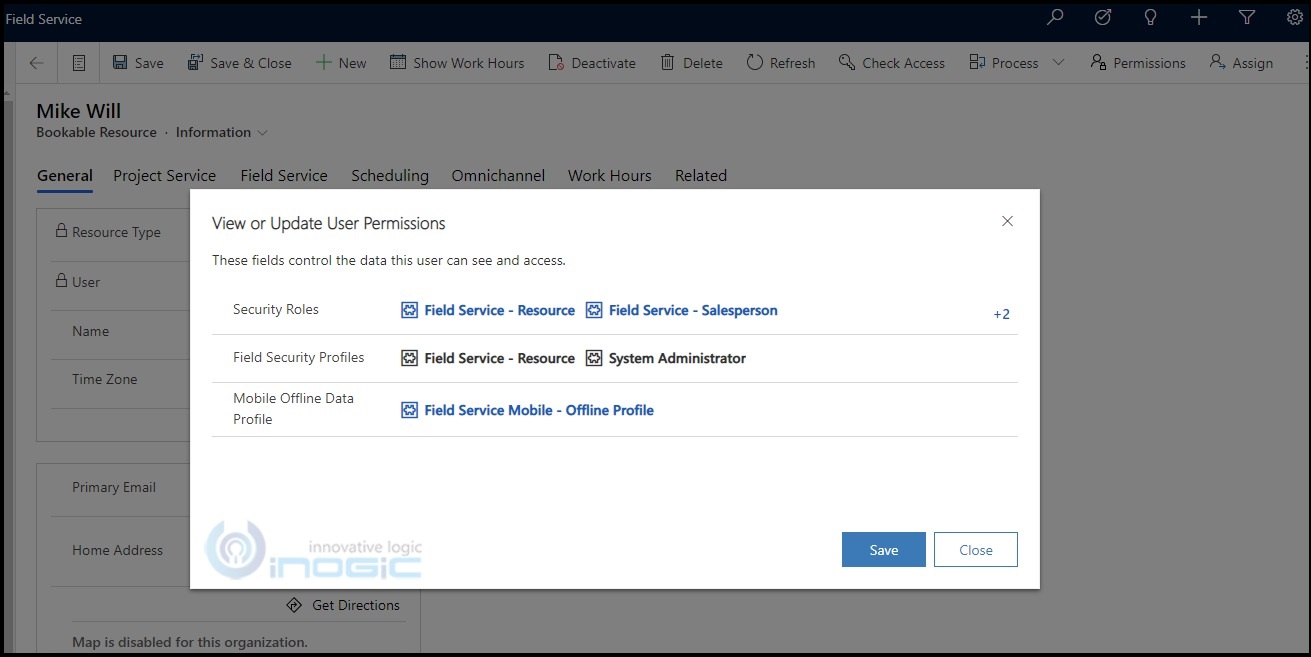
Open any of the frontline worker above and you can click on the Permissions option on the top of the bookable resource page as shown below:
You can view and update this worker’s permissions, such as security role, field security role, and mobile offline data profile as shown below:
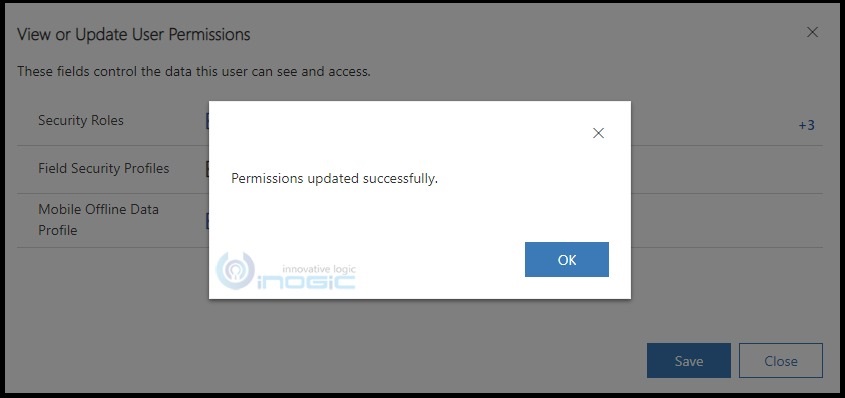
Once saved the permission for this worker get updated as shown below:
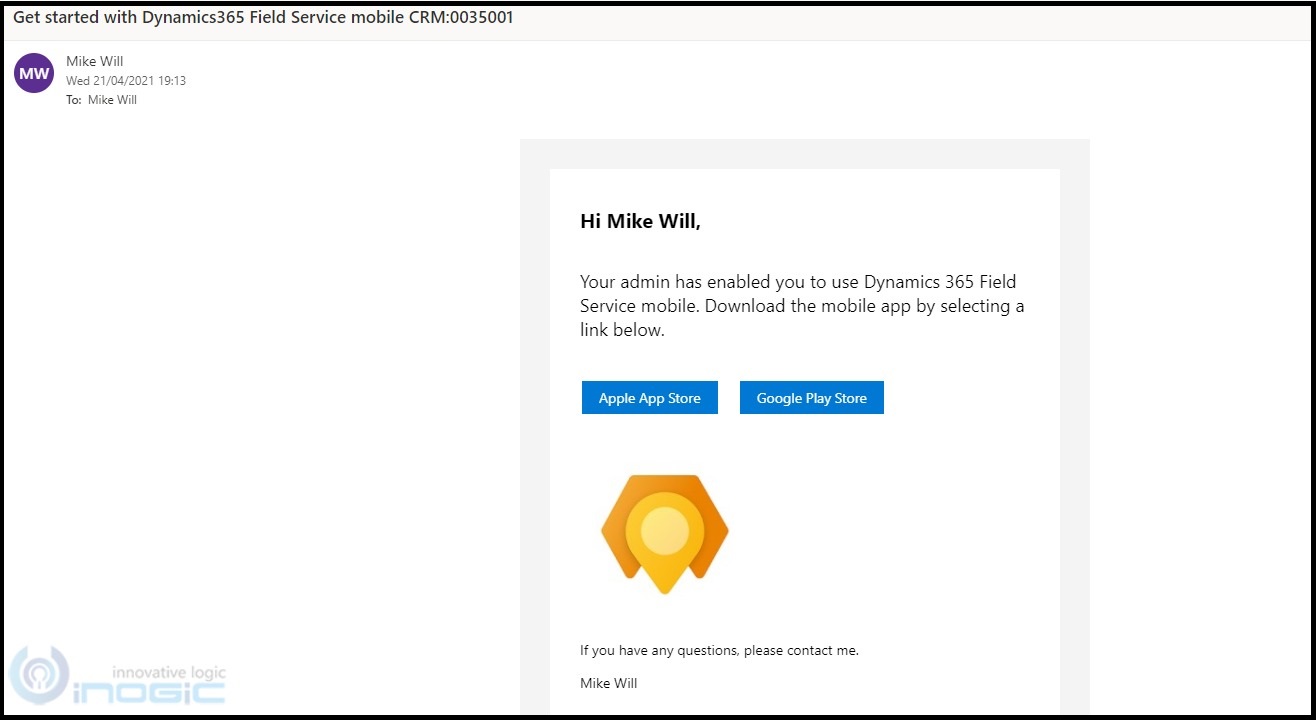
Make sure that the frontline workers receive email with a link to download the Dynamics 365 Field Service mobile app as we did enable the checkbox on the Quick Set Up: Frontline Workers form above.
Note: This email is not editable.
Create your accounts
There are two buttons available ‘View All’ and ‘Create’ under the ‘Create your accounts’ option.
View All: By clicking on this button, you can simply view the entire accounts list.
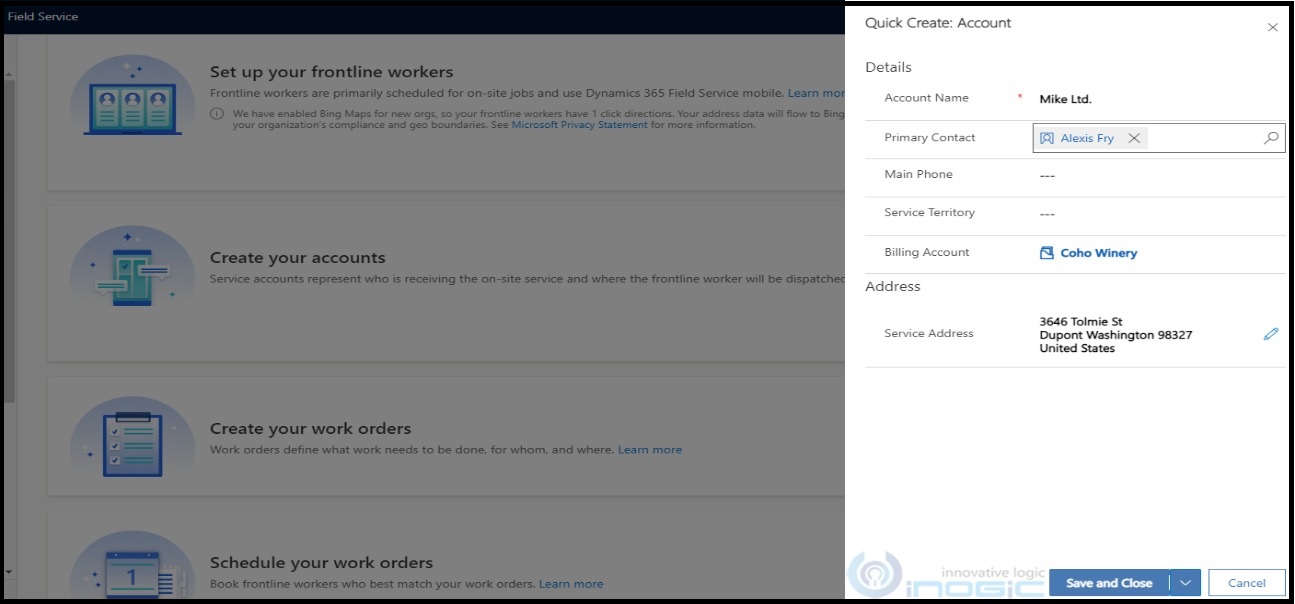
Create: When you click the ‘Create’ button it simply opens a quick create form for the account. The advantage is without navigating from this page; you can add the service account in the system where the frontline worker will be dispatched.
Create your work orders
There are two buttons available ‘View All’ and ‘Set Up’ under the ‘Create your work orders’ option.
View All: By clicking on this button, you can simply view the entire list of work orders.
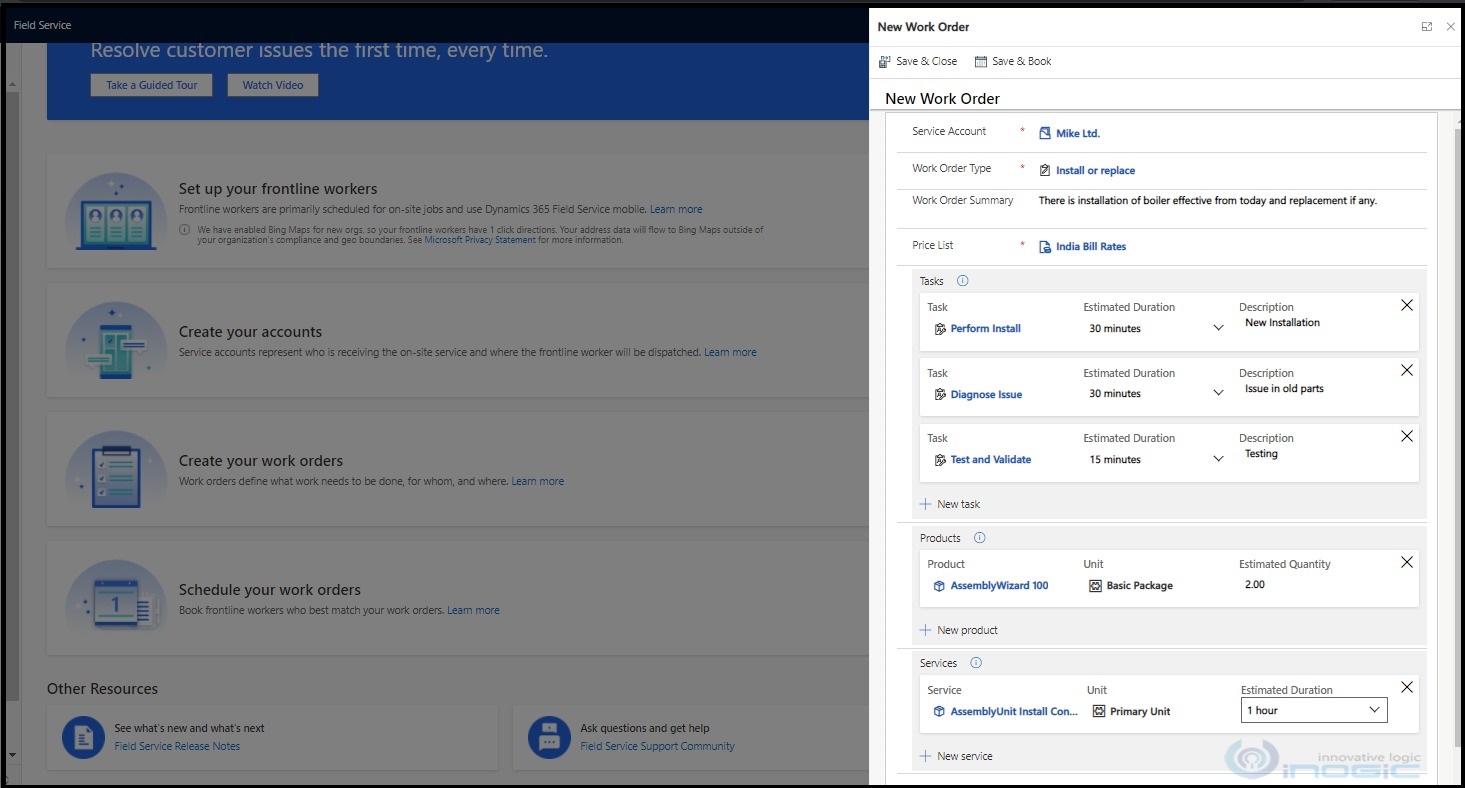
Set Up: This form allows you to select the Service Account, Work Order Type, and Pricelist while creating a work order.
Very exciting thing is that it allows you to add work order service tasks, work order products and work order services on the fly! No need to save the record first. You can directly go on adding those records on the work order as shown below:
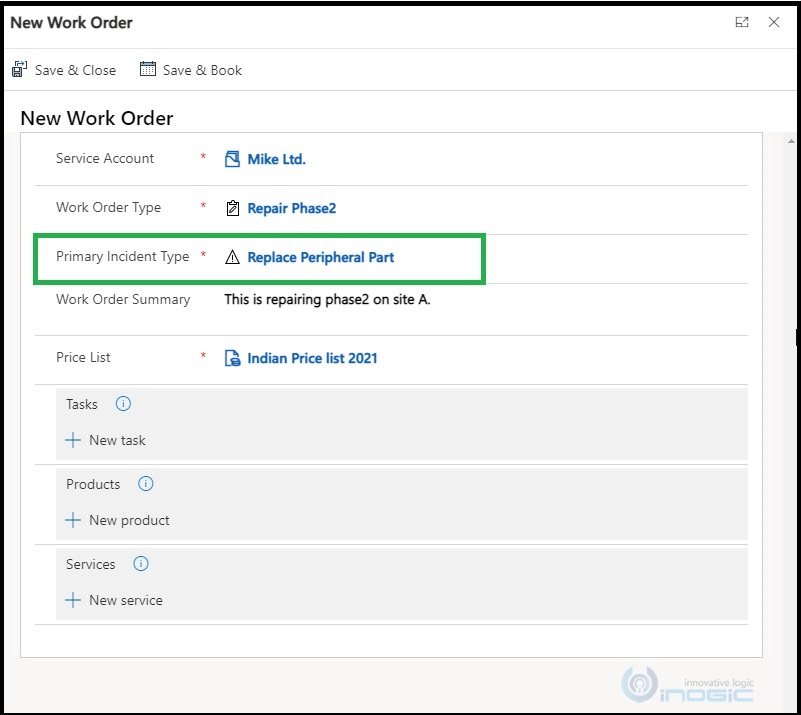
Note: There is a show and hide feature for “Primary Incident Type” field which depends upon the “Work order Type” selected on the form.
If you select “Work Order Type” lookup record having “Incident required”= Yes then “Primary Incident Type” lookup field will appear on the form as shown below:
Let choose “Work Order Type” which has “Incident required”= Yes, as shown below:
While setting up work order if you select it, “Primary Incident Type” field appear on form accordingly:
There are two buttons while saving:
Save & Close: When you click on this button, it simply saves the work order in the background.
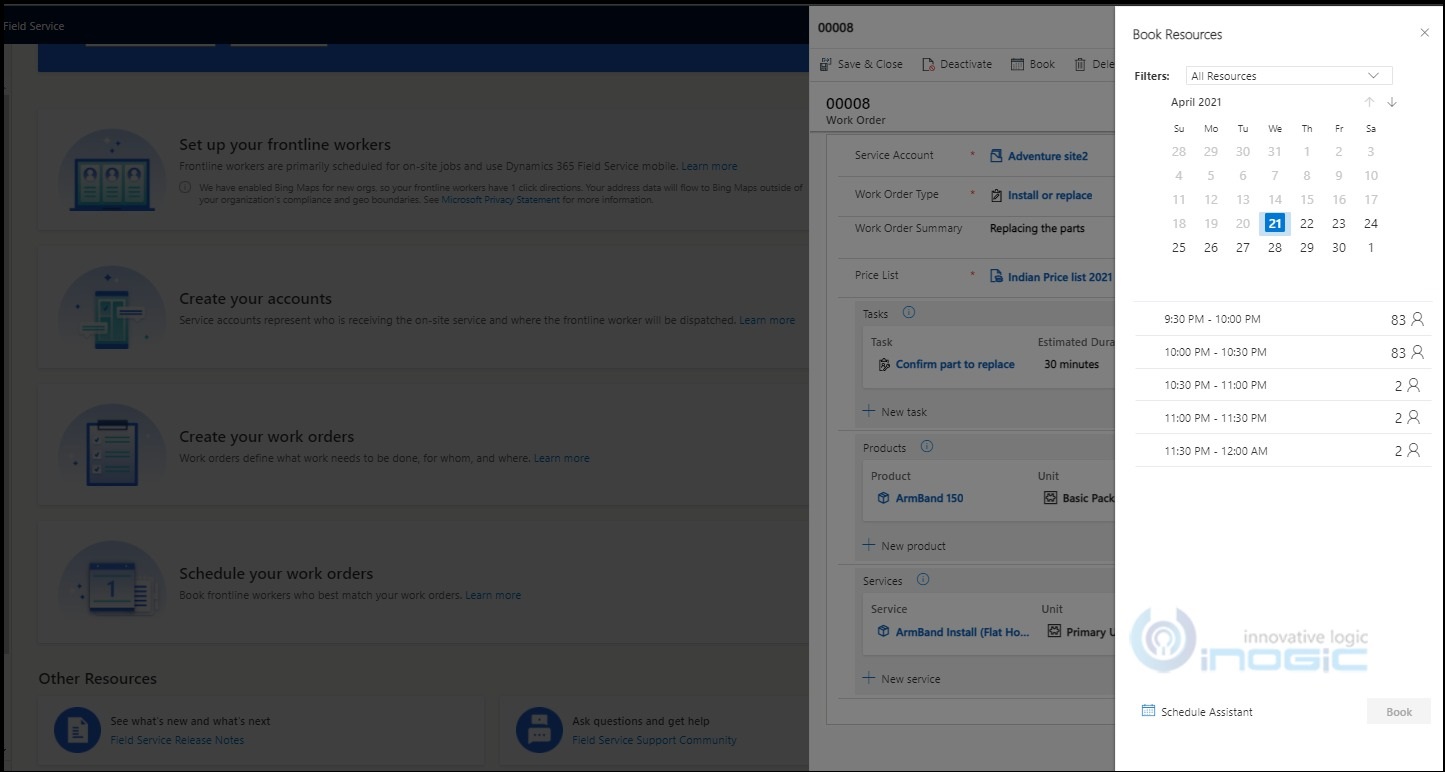
Save & Book: When you click this button, the ‘quick book’ form loads, allowing you to book the work order immediately.
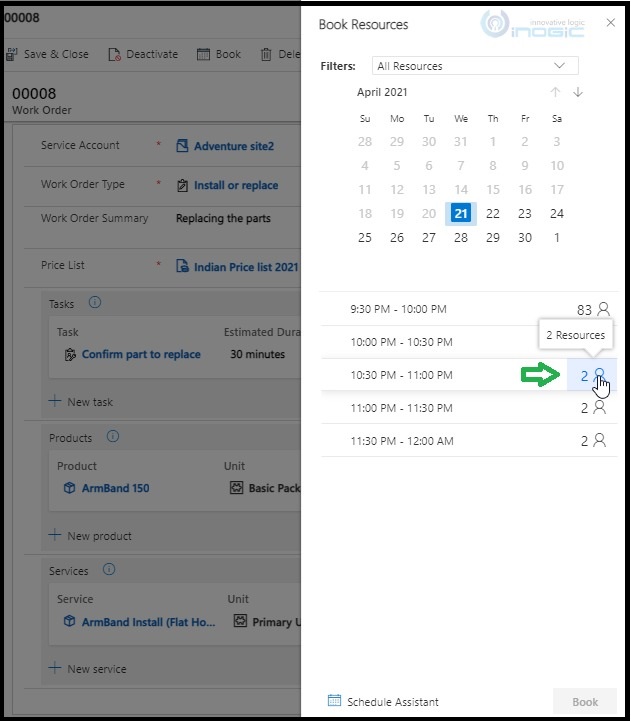
You can see the no. of available resources as per the time slot. Click on the resources corresponding to the time slot for which you want this work order to be booked, as shown below:
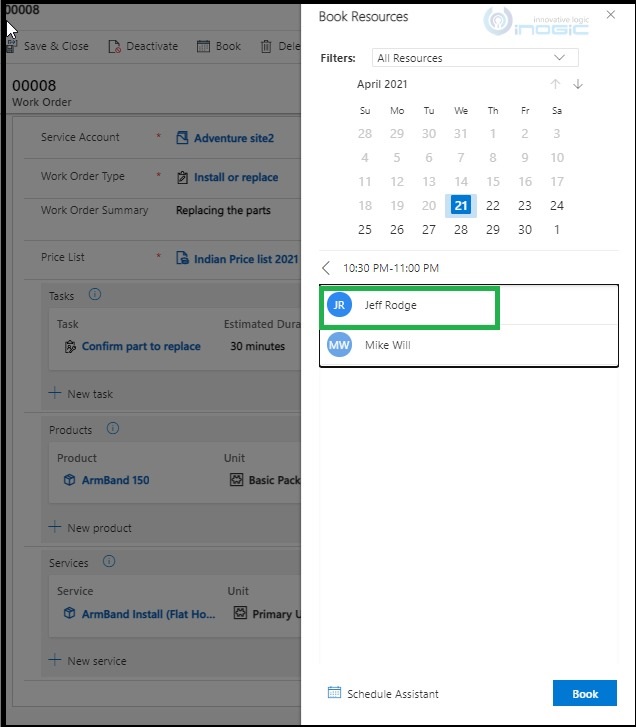
After clicking, available resources will appear, then pick the appropriate resource from the list as shown below:
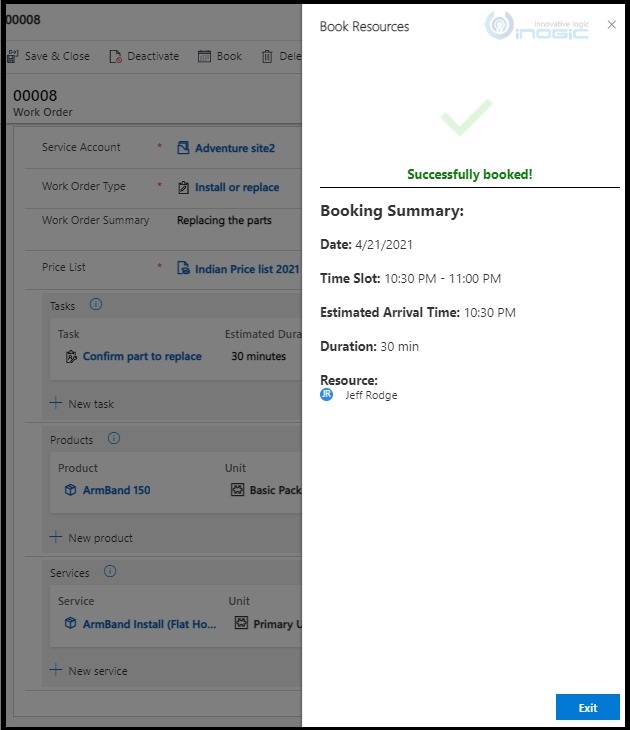
Once you click on the book button above, a success message will appear as shown below:
Schedule your work orders
Here, only one button available ‘Schedule’.
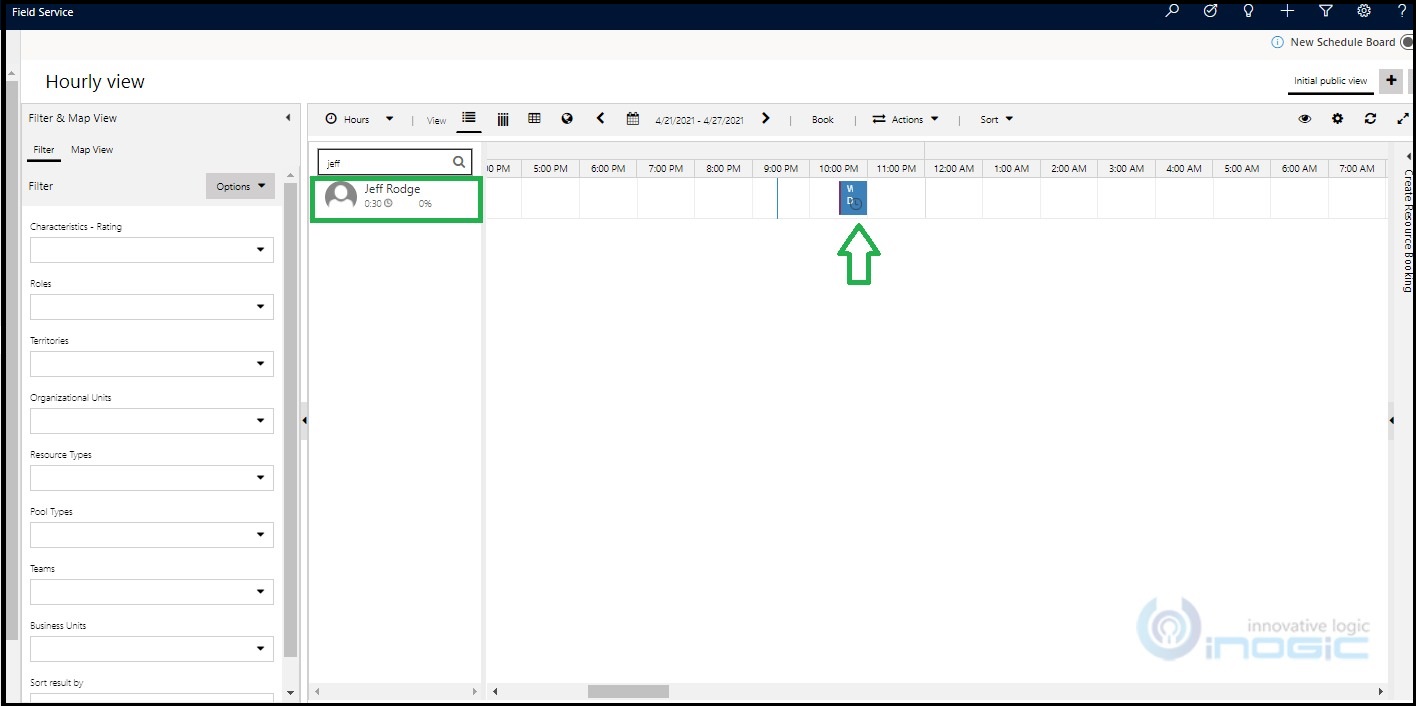
Schedule: When you click on the schedule button, the system will navigate you to the schedule board, from where you can see the work order that you just booked previously.
Conclusion
This feature is very useful for managing some of the field service setups in the system upfront from one place, which will surely save your valuable time.
Need any help with Microsoft Dynamics 365 Field Service module / Microsoft CRM / Power Platform development?
Want to manage your field services portal more effectively? Contact us at crm@inogic.com and our Inogic- Professional Services Division will help you modify, optimize, and automate all our requirements within Microsoft Dynamics 365 Field Service!
Happy Servicing!
