This blog is a continuation to part 1 of the 2-part blog series which will help you understand how to operate the AI model in automated flow and use the data parsed through AI builder.
Part 1 – Route an email to external services and create an invoice approval request in Microsoft Teams
Part 2 – Operate the AI model in automated flow along with enabling the actions (approve and reject) for invoice request and create the invoice in CRM once the request is approved in Microsoft Teams
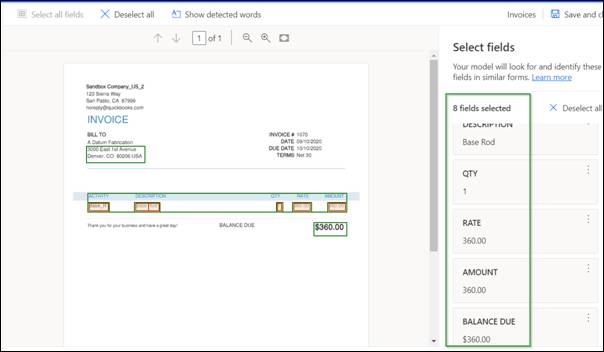
First and foremost, we need to create an AI Model and extract the field values from the Invoices using Form Processing. Detailed steps on how to use Form Processing can be seen here.
In our case, from the Invoices using Form Processing we are extracting the below fields.
After swaddling some of the data of invoice into AI model, now it is time to use it in our automation for extracting those values from invoice. Let’s continue further from where we left off in the flow that we designed earlier in the blog.
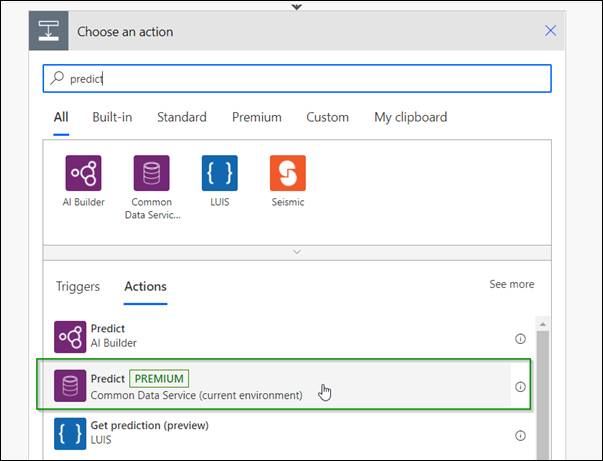
Let’s start by adding another action and call the AI builder.
Add a “Predict” action
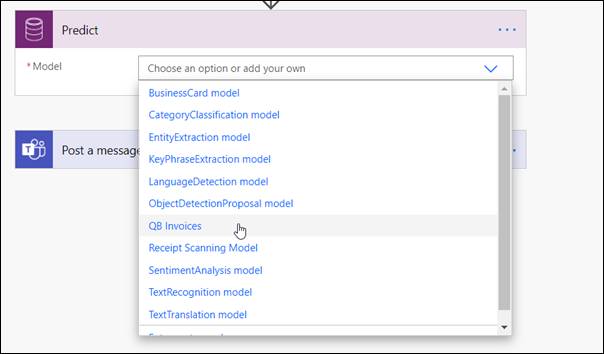
Select the model that we created earlier
Note: We have created an AI model named QB Invoices
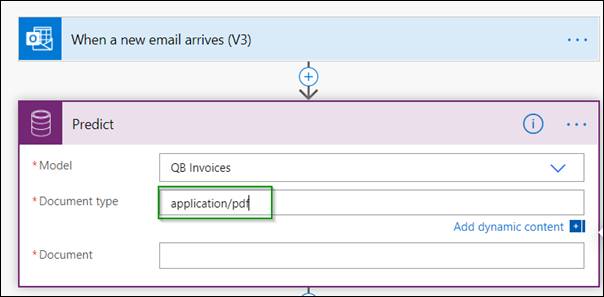
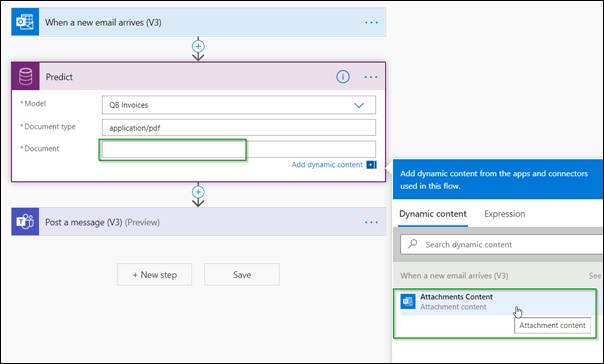
Specify the type of data that we will be sending to “Predict”. AI builder supports both pdf and image. In this illustration, we are going to send invoice as a pdf so let’s fill the field as shown below
For “Document”, we will select Dynamic content as shown below.
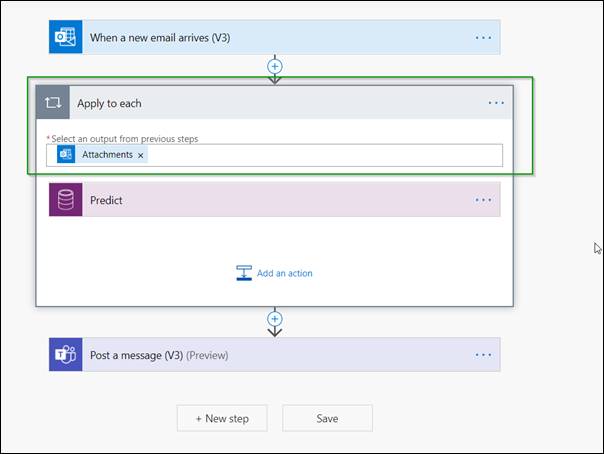
As soon as we add this field, the flow designer recognizes on its own that there can possibly be multiple attachments available in the email. So it automatically packs up in the loop that will iterate over each attachment in the email.
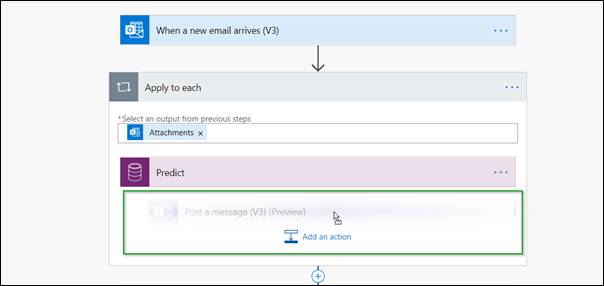
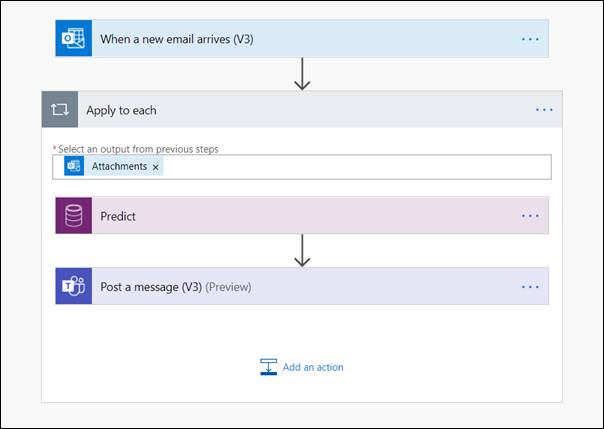
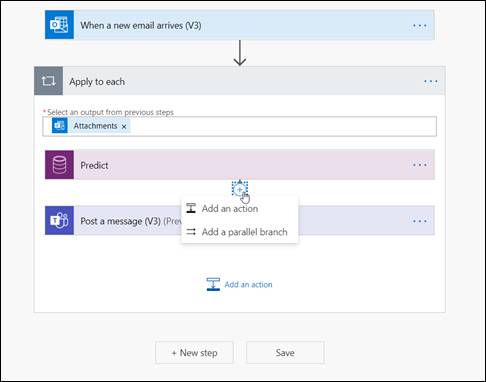
Let’s quickly move the “Teams” action to be within this loop.
Next, we want to route this for approval using the fields that AI builder extracts from each invoice, so we will add an action that will route the message to an approver in Teams. For this, let us add an action.
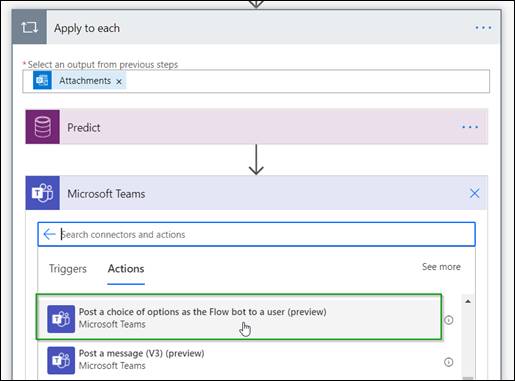
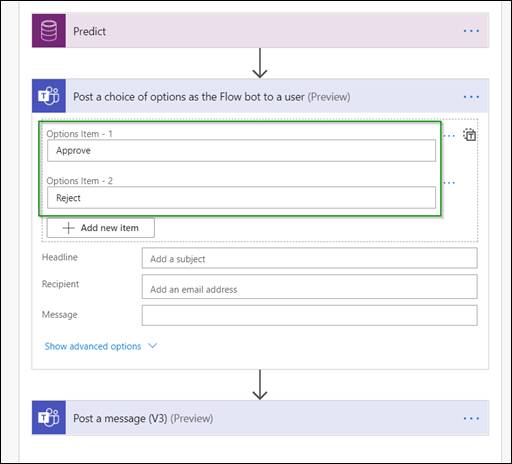
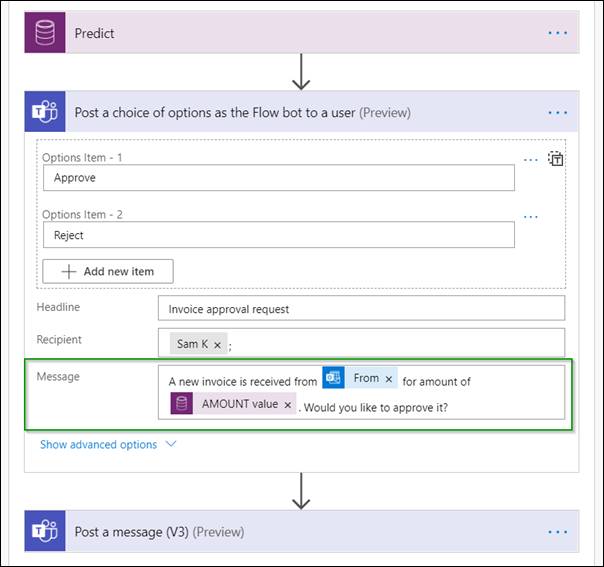
We will again choose a “Teams” connector and “Post a choice of an option” to the user. We will also provide them with two custom fields; “Approve” and “Reject”
This will allow the approver to make the right decision on each invoice.
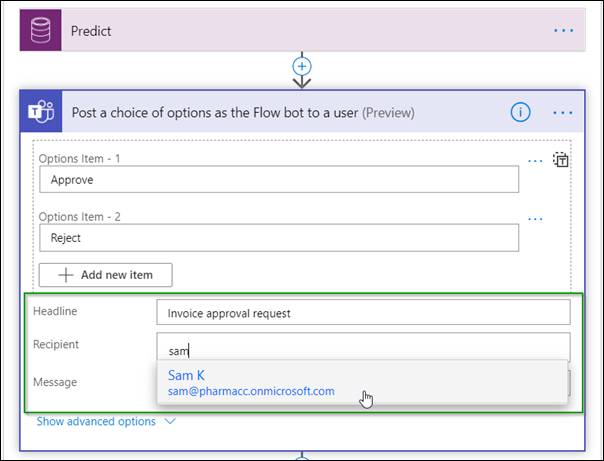
We will specify a relevant headline and an approver as a recipient.
We will update the message field as shown below since we want to be able to see who the invoice is from and also the total invoice amount (we are extracting this amount value from AI builder and building a relevant approval request sentence for an approver with the information they need using dynamic content)
Note – we can specify the fields into this “Message” field depending on which of the information you want a flow to bring from the AI builder, so pop the dynamic contents into the message field accordingly.
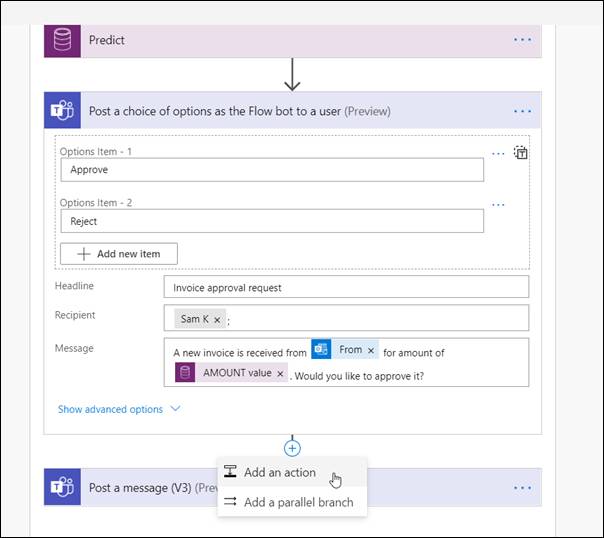
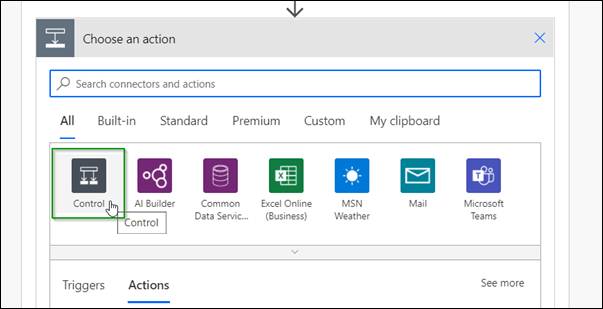
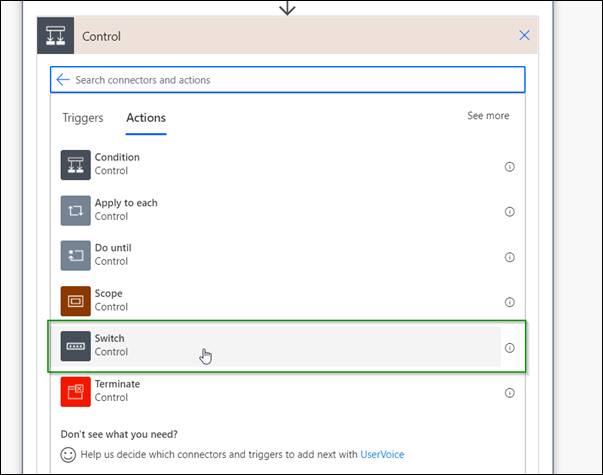
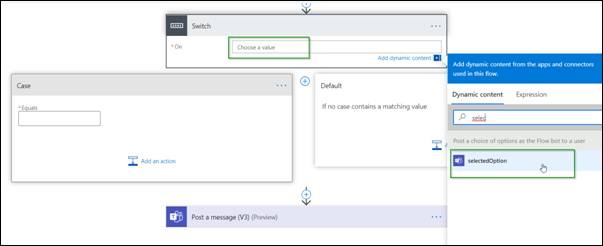
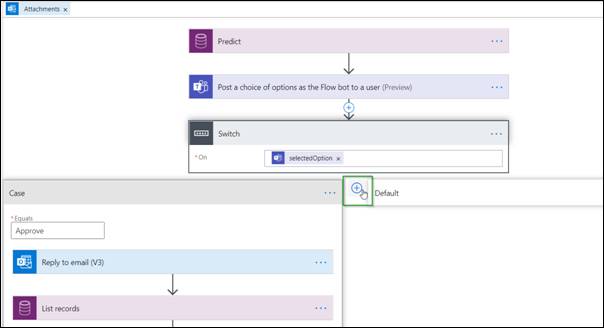
Since we have two possible outcomes “Approve” and “Reject”, we will configure a “Switch” to handle these two options.
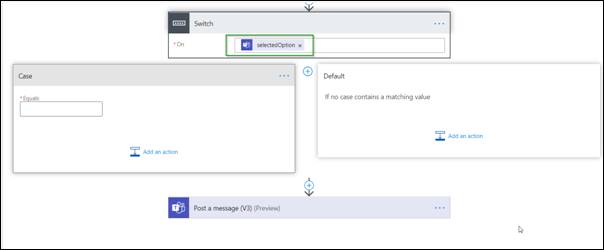
We will select a dynamic content for “On” field as shown below
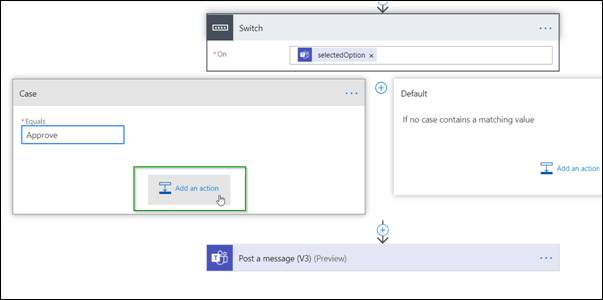
Using the concepts that we covered earlier above, let’s create two different cases for “Approve” and “Reject”
Case 1 – Approve
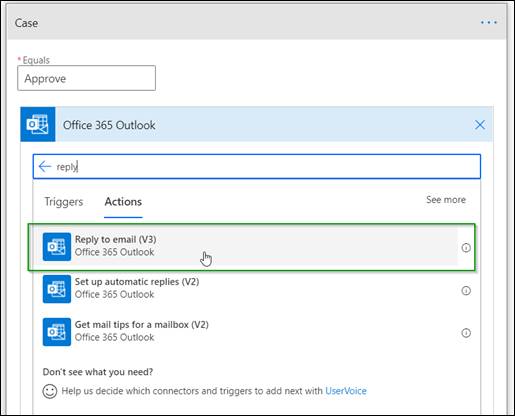
This will automatically reply back to the sender with an invoice approval and create the invoice into CRM with some of the field values extracted from the invoice through the AI builder.
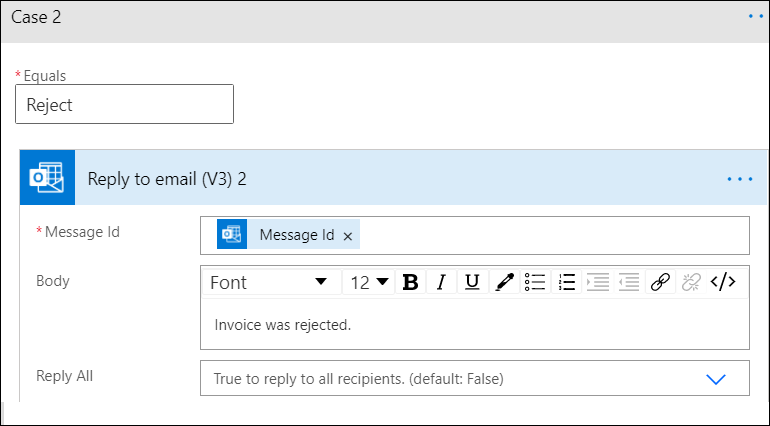
Case 2 – Reject
This will automatically reply back to the sender with an invoice rejection.
Case 1 – Flow configuration (If the invoice is approved)
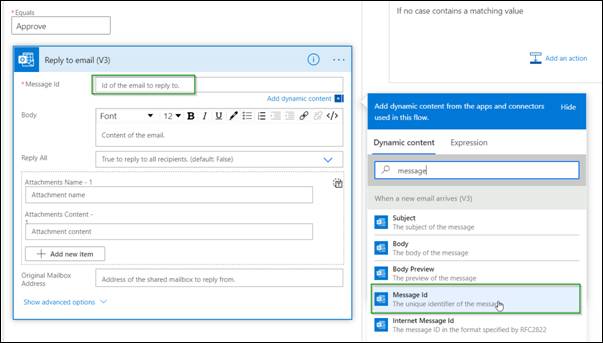
Let’s add an action
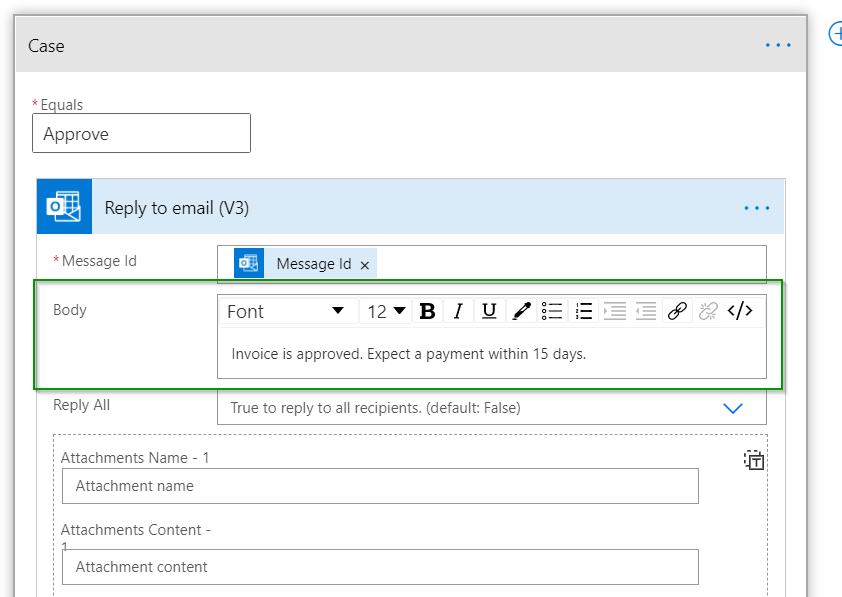
Enter a relevant line that you would want to send as an invoice approval reply to the sender
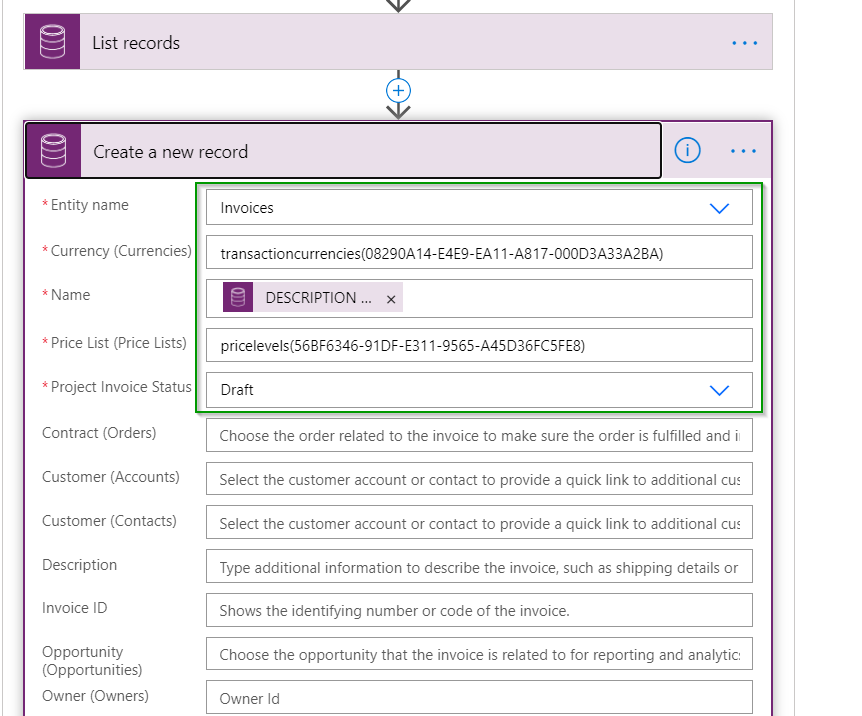
Since we want to create a new invoice in CRM, we will add CDS action “Create a new record” as shown below.
The currency and price list we set here will be applied to the new invoice being created in CRM. The newly created invoice will have a currency and the price list set.
Note: These values have been hardcoded here in this circumstance. However, you can still populate it dynamically, if required.
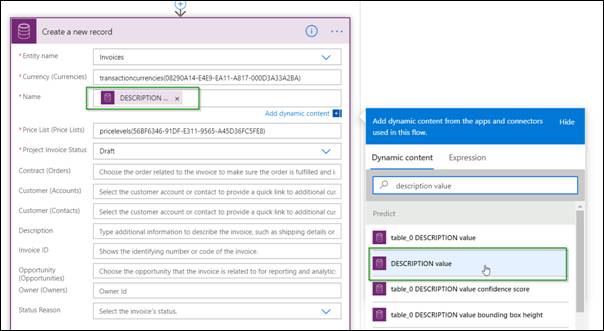
Since we want the name of an invoice to be the value of the field “Description” extracted from invoice using AI builder, we will choose the selection shown below. User can perform any dynamic content selection based on the requirement
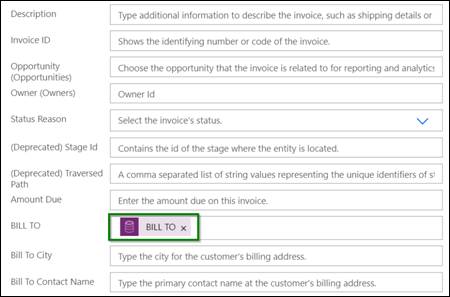
We also want to fetch the address from the extracted field from invoice through AI builder, so let’s choose the selection shown below. Here “BILL TO” is the field that is pulled out using the AI model earlier. We will have the same address applied to the invoice that is new going to be created in CRM(based on the requirement, the user is always allowed to do the relevant mappings here between the entity fields and the values that are extracted through AI)
Note: We have created a custom “BILL TO” field on the Invoice. Later on, using custom logic, the necessary parts of addresses can be extracted.
Case 2 – Flow configuration (If the invoice is rejected)
Let’s add another case for the option “Reject” and configure it as shown below
If we summarize, the flow looks like the screenshot below:
Now let’s see both these cases in action!
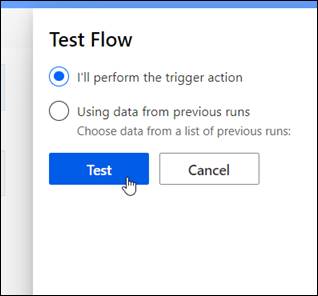
Before we proceed, let’s test the entire flow just to check if everything works fine.
Once you see the below screen post choosing to test the flow, let’s send the email to the approver.
Case 1 (Invoice approved)
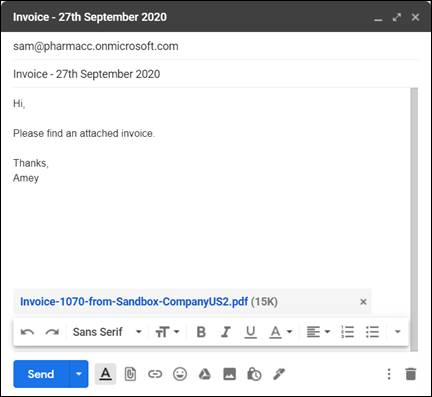
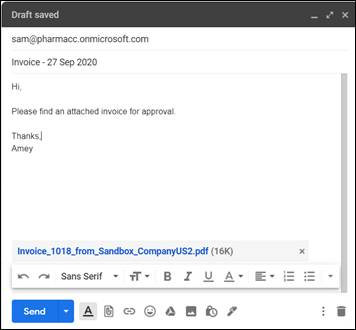
The sender sends an email with an invoice attachment to the approver/stakeholder
Sender
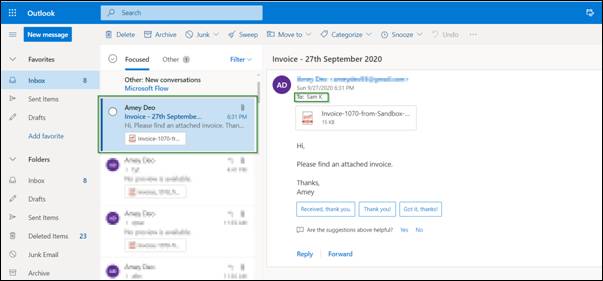
As soon as the above email is received in the inbox, approver sees it in Teams.
Email received in Outlook of the approver/stakeholder
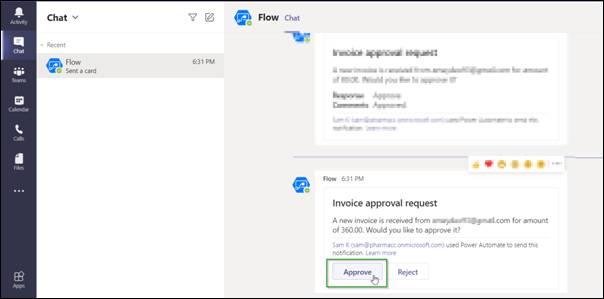
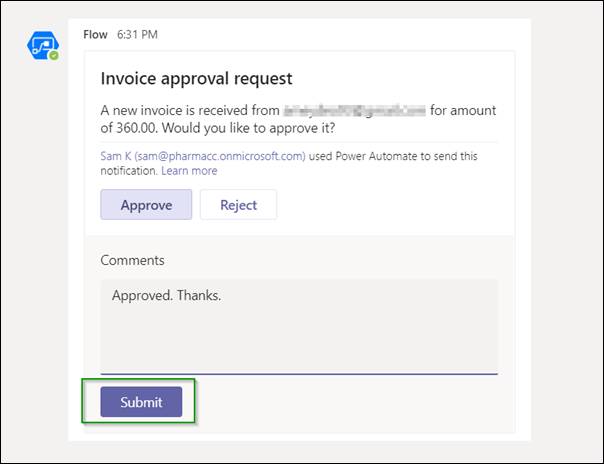
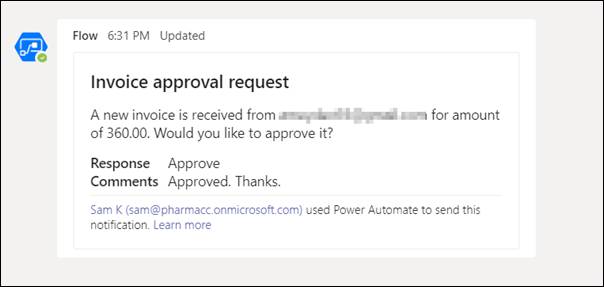
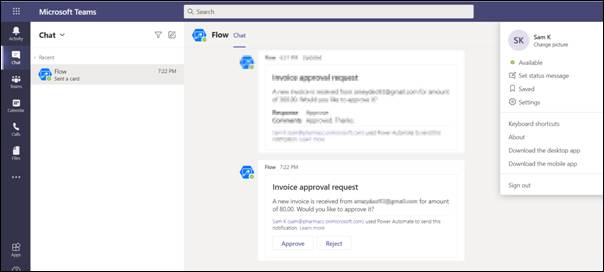
This will be shown to approver in Teams with the values that we extracted through AI
Click on “Approve” and put the relevant comment as required.
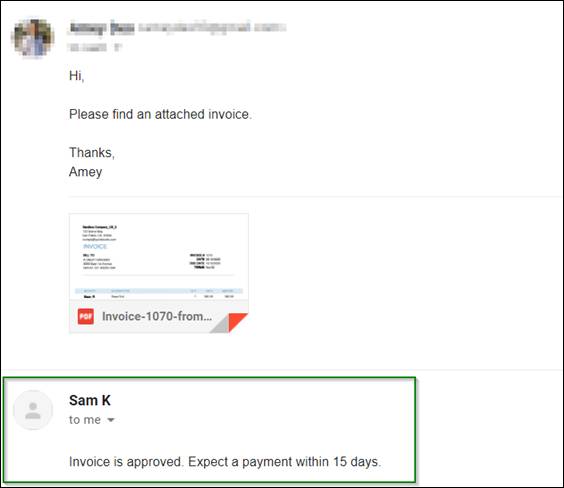
Once the invoice is approved, the reply will be sent back to the sender
We can see the new invoice is created in CRM with currency and price lists that were set in the automated invoice processing flow. Also, the name is fetched as an extracted value of the field “Description” through the AI model.
Quick verification
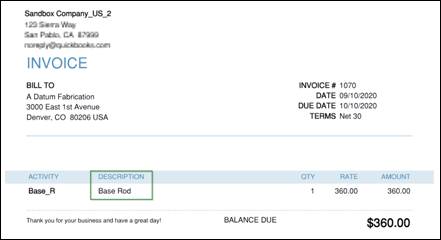
Verify if the Description value is the actual invoice that was sent for approval.
Extracted as a name of the invoice in CRM
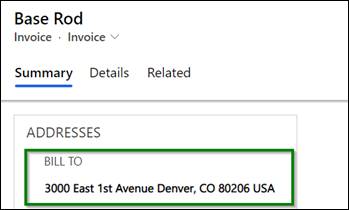
If we check further down, the address is set correctly. This address is also brought from the same invoice which the approver/stakeholder approved in teams.
Quick verification
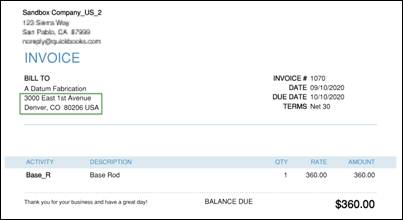
Verify address on the actual invoice which was sent for an approval
This is the address on the newly created invoice in the CRM. This shows that the field value extraction was successful through AI builder
Case 2 (Invoice rejected)
Sender sends an email with an invoice attached to the approver/stakeholder
Email received in the approver’s/stakeholder’s Outlook
Approver sees it in Teams.
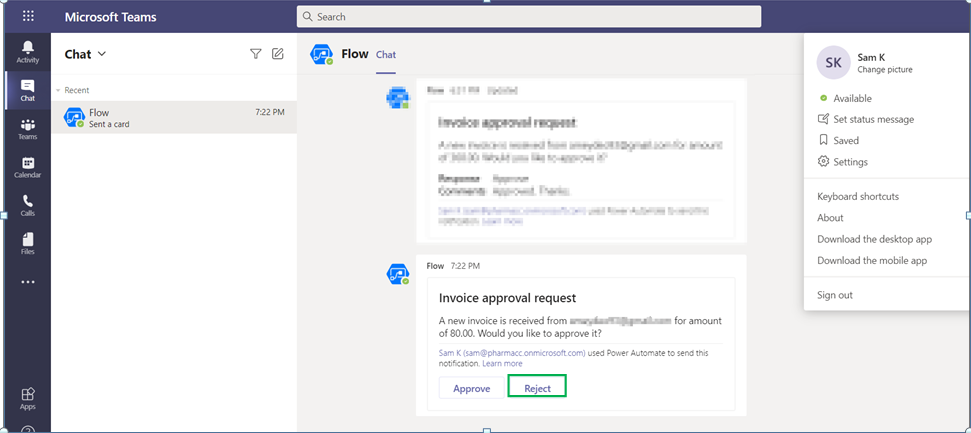
Approver rejects the invoice
As soon as the invoice is rejected, the rejection notification is sent back to the sender via email.
Conclusion
The whole invoice approval process could run in just about a minute. So with the help of these automated operations, we greatly reduce approval time and the possibility of human errors. This can be done even more efficiently and as quick as possible with these external integration services and AI capabilities. Legacy apps can successfully be integrated alongside, infusing the AI intelligence in just a fraction of the time using Power Automate.








Thanks for the useful information about the invoice approval process using Microsoft Teams. The software is very useful for team collaboration.