Introduction
EasyRepro provides automatic testing in Dynamics 365 CRM. It also gives the power to interact with Subgrid of Dynamics 365 CRM. However, it carries some limitations along with its benefits, like adding an existing record in the Subgrid, which we are going to cover up in this blog.
We will show you a generic method to add an existing record in any Subgrid of both one to many relationships and many to many relationships in Dynamics 365 CRM.
Scenario
Let us take a scenario on the Account record where we need to add an existing contact in the Contacts Subgrid. For this, we will call our generic function:
AddExistingRecord(client, xrmApp, “Contact”, “Contacts”, “Mike Ross”);
Note: The xrmApp and client are XrmApp and WebClient respectively, which are both classes of EasyRepro.
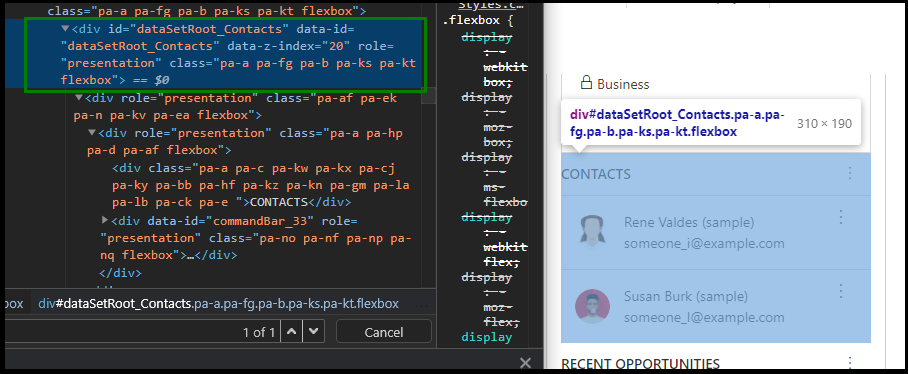
The third parameter is to display the name of the entity of Subgrid, which will be used to get the Overflow and Add Existing buttons. Now, moving on to the fourth parameter, which is the Subgrid name. If you do not know the Subgrid name, you can check in the form, or else you can also quickly check it in the dev tools. As shown below, in the attribute data-id with the value ‘dataSetRoot_Contacts’, remove ‘dataSetRoot_’ and what remains (Contacts) is the Subgrid name.
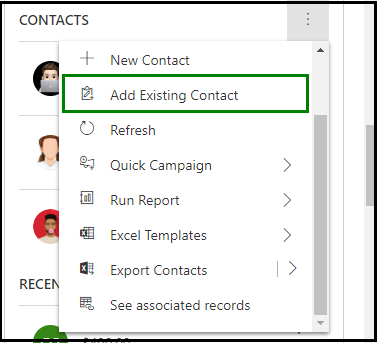
After calling our function, it will search for Add Existing button on the Subgrid and click on it, following with the input of the record name in the search box and adding it on the Subgrid along with the Add button.
Now, let us understand our generic method in the below steps.
Step 1:
Staying on the current window is necessary to find the elements. The below code will make sure that we are on the current window where the Subgrid is present.
var xrmBrowser = client.Browser;
var win = xrmBrowser.Driver.SwitchTo().Window(xrmBrowser.Driver.CurrentWindowHandle);
xrmApp.ThinkTime(2000);
Step 2:
In this step, we will check whether the button is on the command bar of the Subgrid. If it is there then it will use the SubGrid. ClickCommand method to click on the Add Existing button.
if (win.HasElement(By.XPath(“//button[@aria-label=’Add Existing ” +entityDisplayName + “‘]”))){
xrmApp.Entity.SubGrid.ClickCommand(subgridName, “Add Existing ” + entityDisplayName, null, null);
}
Step 3:
However, if not found then it means it is under the Overflow button. So, next, it will find that Overflow button by using XPath and click on it to show the buttons underneath. Now we can find the Add Existing Button from the list of buttons present under the more commands. And when we get to our Add Existing button, it will click on it, which will open a Lookup dialog box.
else
{
var moreCommandbar = win.HasElement(By.XPath(“//button[@title=’More commands for ” + entityDisplayName + “‘]”)) ?
win.FindElement(By.XPath(“//button[@title=’More commands for ” + entityDisplayName + “‘]”)): null;
if (moreCommandbar != null)
{
moreCommandbar.Click();
xrmApp.ThinkTime(2000);
var button = win.HasElement(By.XPath(“//*[@aria-label=’Add Existing ” + entityDisplayName + “‘]”)) ?
win.FindElement(By.XPath(“//*[@aria-label=’Add Existing ” + entityDisplayName + “‘]”)) : null;
if (button == null)
Assert.Fail(“Add Existing ” + entityDisplayName + ” button was not found”);
else if (button != null)
button.Click();
}
else
Assert.Fail(“Overflow button was not found”);
}
xrmApp.ThinkTime(2000);
Step 4:
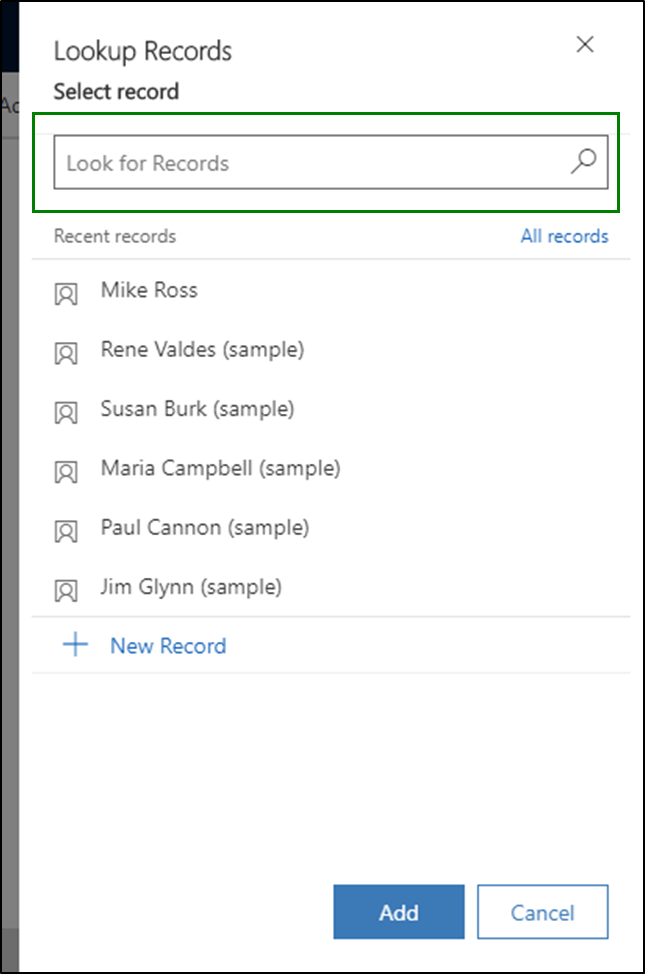
Here we will find the search text box to input our record name with SendKeys method, which in our case is Mike Ross.
As shown below, the record will be set in the ‘Look for Records’ text box.
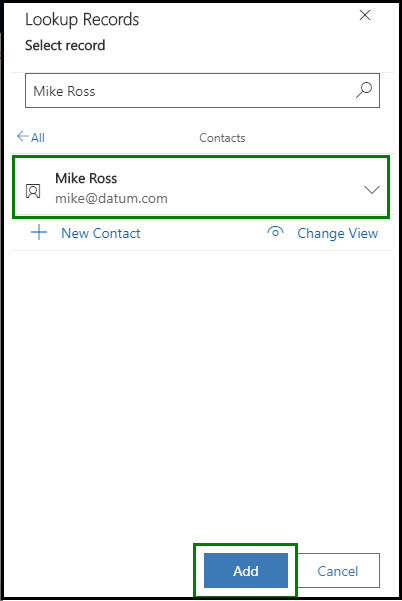
After we input our record name, it will give us the list which will have our record as the only available option making it easy to select that option and add it with the help of the Add button as shown in the below image.
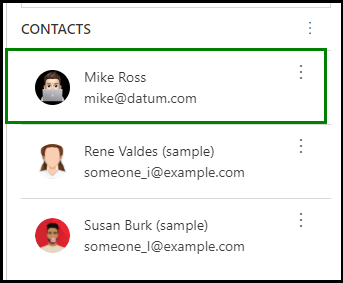
Finally, our record is added to the Subgrid.
Given below is the complete function to add existing item into Subgrid:
private void AddExistingRecord(WebClient client, XrmApp xrmApp, string entityDisplayName, string subgridName, string recordName)
{
try
{
var xrmBrowser = client.Browser;
var win = xrmBrowser.Driver.SwitchTo().Window(xrmBrowser.Driver.CurrentWindowHandle);
xrmApp.ThinkTime(2000);
//Find Add Existing Button on the Subgrid command bar
if (win.HasElement(By.XPath(“//button[@aria-label=’Add Existing ” + entityDisplayName + “‘]”)))
xrmApp.Entity.SubGrid.ClickCommand(subgridName, “Add Existing ” + entityDisplayName, null, null);
else{
//If not found search for Overflow button
var moreCommandbar = win.HasElement(By.XPath(“//button[@title=’More commands for ” + entityDisplayName + “‘]”)) ?
win.FindElement(By.XPath(“//button[@title=’More commands for ” + entityDisplayName + “‘]”))
: null;
if (moreCommandbar != null){
//If we get Overflow button Click on it
moreCommandbar.Click();
xrmApp.ThinkTime(2000);
//Find Add Existing Button under the more commands button list
var button = win.HasElement(By.XPath(“//*[@aria-label=’Add Existing ” + entityDisplayName + “‘]”)) ?win.FindElement(By.XPath(“//*[@aria-label=’Add Existing ” + entityDisplayName + “‘]”)) : null;
//If not found throw error
if (button == null)
Assert.Fail(“Add Existing ” + entityDisplayName + ” button was not found”);
//If found then click
else if (button != null)
button.Click();
}
else
Assert.Fail(“Overflow button was not found”);
}
xrmApp.ThinkTime(2000);
//Search text box and add input
win.FindElement(By.XPath(“//input[@role=’searchbox’]”)).SendKeys(recordName);
xrmApp.ThinkTime(2000);
//Search and Click on the record from the list
win.FindElement(By.XPath(“//li[contains(@aria-label,'” + recordName + “‘)]”)).Click();
//Click on Add button to add the record
win.FindElement(By.XPath(“//button[@aria-label=’Add’]”)).Click();
}
catch (Exception ex)
{
throw new Exception(ex.Message);
}
}
Conclusion
As illustrated, the above generic function will help you to add an existing record in Dynamics 365 CRM Subgrid using EasyRepro. In addition, to interact with Business Process Flow with Easyrepro do check out our blog here.
