Introduction
Microsoft PowerApps Portals provides us the configuration surface which allows users to add forms to collect data in the portal without custom development. Entity Forms provides the ability to create, update and display CRM entities records and they are placed into webpages in the portal or used in conjunction with sub grids and entity lists to build out complete web applications.
Recently, we had a business requirement to create Account entity record from PowerApps Portals with Contact lookup selected and ‘on submit’ of Account record, redirect to Contact selected on newly created Account record. We can achieve this with the help of below On Success Settings configuring options of Entity Form,
- On Success: This defines what will be the next step on successful submission of entity form. This field has below options and Display Success Message is the default one:
- Display Success Message
- Redirect
- ‘or Web Page’: Set a Web Page from the current website on which user wants to redirect on successful submission.
- Append Attribute Value to Query String Parameter Name: Name to give to the parameter that correlates to the attribute value on the target entity that gets appended to the Query String of the redirect URL.
- Append Attribute Value to Query String Attribute Logical Name: Logical name of an attribute on the target entity to get the value to be appended to the Query String of the redirect URL.
To be able to create Account entity record from PowerApps Portals we need to do following configurations in portal
-
- Create new Entity Form for Account entity with Insert mode as shown below,
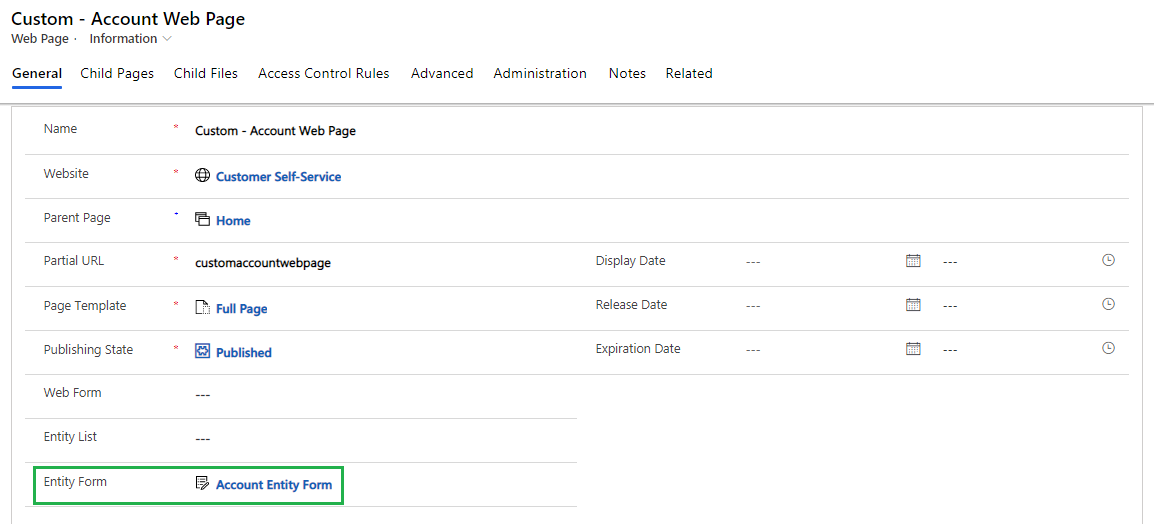
Account entity form: - Then create one Web Page to access the account entity form from portal as shown below,
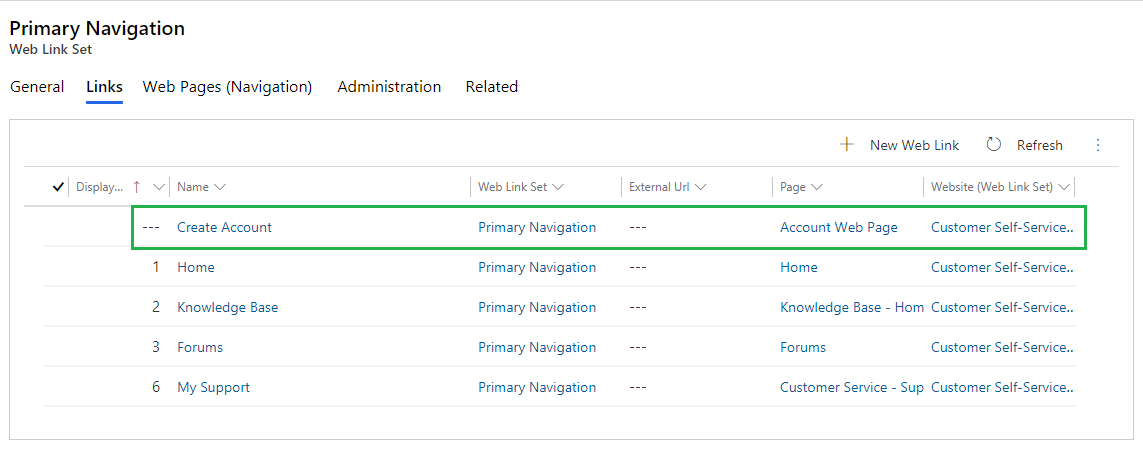
Account web page: - After that configure the Link in Primary Navigation Web Link Set to access Account Web Page from Portal Navigation as shown below,
Link in Primary Navigation Web Link Set:By doing the above configurations we can access the Create Account Form in the portal on Create Account navigation click as shown below,
Below are the configurations which have done to navigate to Contact selected on newly created Account record on successful creation of Account record,
-
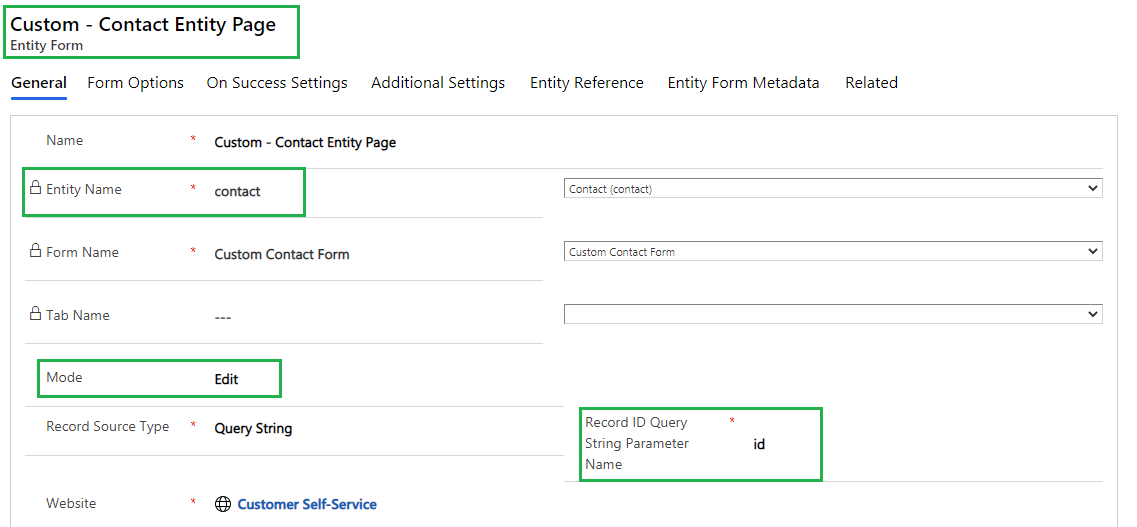
- Configure another Entity Form which will be for Contact entity with below configurations,
- Entity Name: Contact
- Mode: Edit/ReadOnly
- Record Source Type: Query String
- Record ID Query String Parameter Name: id
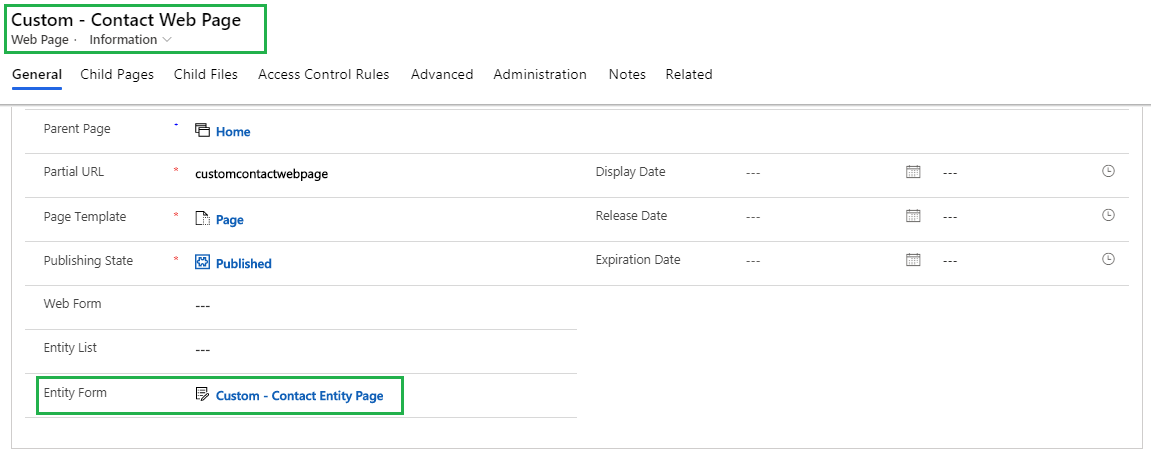
- Then create one Web Page as well for Contact entity and set the Contact entity form as shown below, Contact web page:
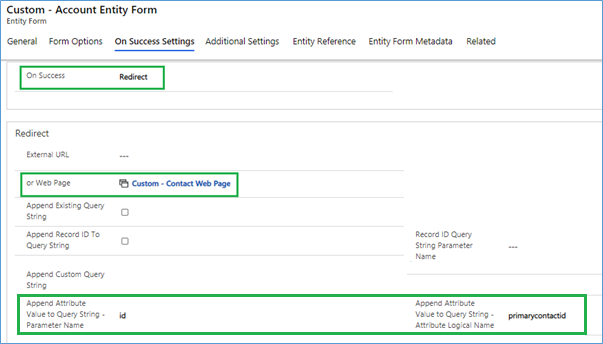
- After that go to Account Entity Form and add below configurations in On Success Settings,Configurations:
- On Success: Redirect
- or Web Page: Custom – Account Web Page
- Append Attribute Value to Query String Parameter Name: id
- Record ID Query String Parameter Name: id
- Append Attribute Value to Query String Attribute Logical Name: primarycontactid
In the above configurations,
Custom – Account Web Page is a Web Page name that has Contact entity form set with Edit mode. And, id is Record ID Query String Parameter Name added on Contact entity form. - Configure another Entity Form which will be for Contact entity with below configurations,
- Account entity form:
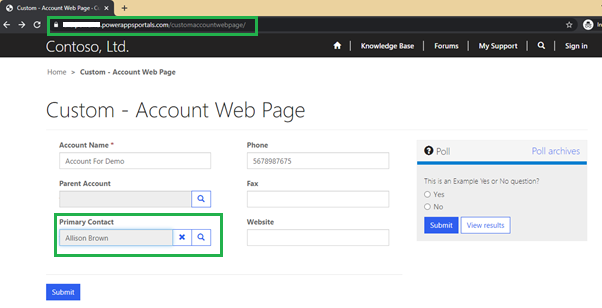
After all these configurations, once you navigate to Create Account navigation from the portal you will see the create form of account entity as per below screen clip,
-
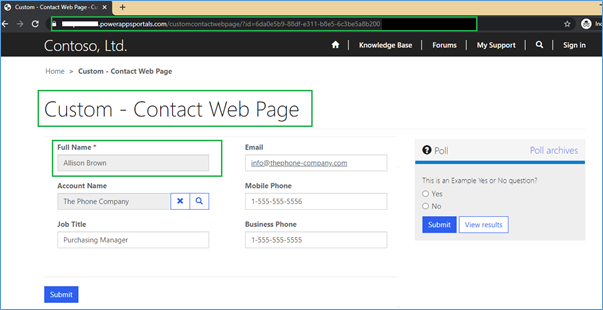
And, on submit button click of the above form, it will redirect to Custom – Contact Web Page and will display details of selected contact selected in “Primary Contact” field of account form as shown in below screen clip,The navigation URL format will be as below,
<portal url>/<partial url of web page>/?id=<selected contact record id>
For example: <portal url>/customcontactwebpage/?id=6da0e5b9-88df-e311-b8e5-6c3be5a8b200
In a similar way, we can pass the value of any other field as well which is present on entity form as a query string parameter.
Conclusion
-
In this blog, we have seen how we can pass the field value from one page to another using query string parameter configurations of entity form.
- Create new Entity Form for Account entity with Insert mode as shown below,
Free 70% of storage space in CRM with Attachment Management Apps!
Attach2Dynamics – Store and manage documents/attachments in cloud storage of your choice – SharePoint, Dropbox or Azure Blob Storage from within Dynamics 365 CRM.
SharePoint Security Sync – Robust and secure solution to integrate Dynamics 365 CRM and SharePoint Security Sync thereby ensuring secure access to confidential documents stored in SharePoint.
