Introduction
Data can be stored in spreadsheets, databases, or any other systems from where you can import that data into Dynamics 365 CRM.
Dynamics 365 CRM allows us to import data using different file types. In this blog, we will see how to work with each file type and import data.
- XML Spreadsheet 2003 (.xml)
- .csv
- .txt
- .xlsx
- .zip
The below screen clip from Dynamics 365 CRM data import wizard displays all the supported file extensions which you can use to import data.
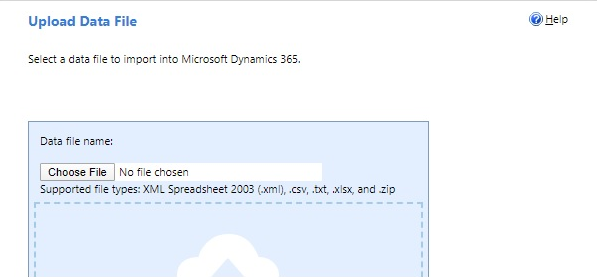
The details regarding each file type are as follows:
1. XML Spreadsheet 2003 (.xml): We can create this file type using Microsoft excel and save as shown below;
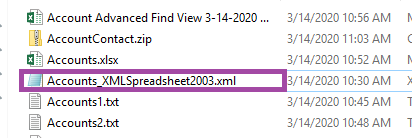
Below is the screen clip of the file in directory.
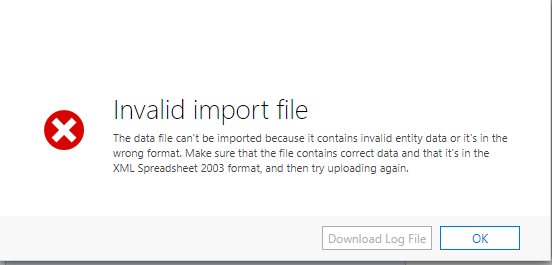
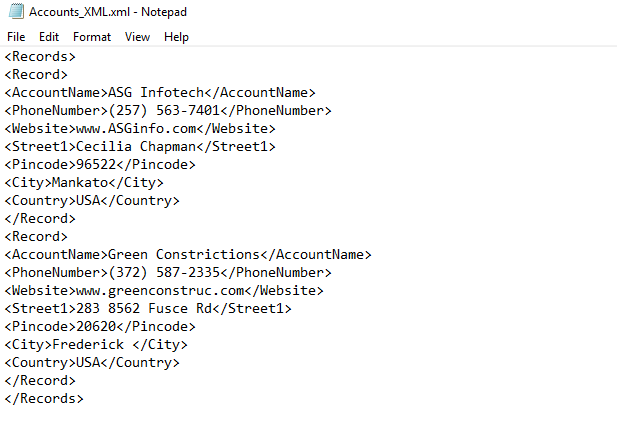
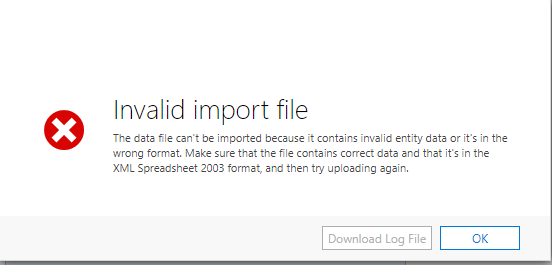
Note: If you try to import data by creating an XML file by yourself it won’t work and will give you the following error;
Below is the screenshot of the XML file created by manual data.
2. .csv: Similarly, we can create a file using Microsoft excel with the below file type;
Or, we can also create file manually as shown below.
In both the above cases, we need to verify the delimiter we have used so that it won’t affect the data. Delimiters are the characters that are used to separate the content of fields and pieces of data. There are different delimiters supported for data import as shown below. You can use any one of them.
3. .txt: As the extension indicates, this will be a text file which works similar to above .csv file. We can also create a .txt file by adding the data manually.
Here again, we need to make sure the right data delimiter is used so that the delimiter does not conflict with data. For example, if data delimiter you are using is comma “,” then make sure your data does not contain commas as a part of data. If so, consider using another delimiter. Although, using comma “,” as delimiter is common practice.
4. .xlsx: Here you have to use file with extension .xlsx, but if you create file using Microsoft Excel then it won’t work and will give you the following error;
For this, you have to export data from CRM of the same entity and replace data with new data that you want to import and try again.
For example: Here we exported accounts using advanced Find View and added new data inside the file to import. The data was then imported successfully in Dynamics 365 CRM. Below is the screen clip of the file exported using Advanced Find View file.
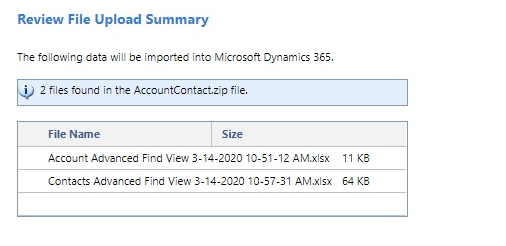
5. .zip: To import data of different entity type we can use this file type. Zip file is a single compressed file that is a collection of more than one file or folder. Hence, to create a zip file, we must include multiple files. For example, we created a zip file by compressing multiple files that consists of .xlsx files for Account and Contacts and they were imported successfully in Dynamics 365 CRM.
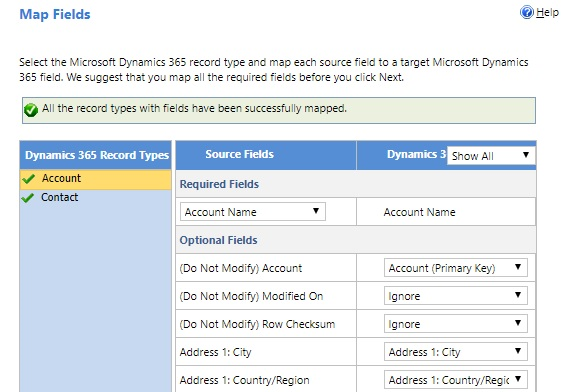
Here while importing user have to provide mapping for all the files that are part of .zip file as shown below.
This will create independent imports for files in zip as shown in the clip below.
Conclusion
We hope that with the help of this detailed guide, you will be able to work with all the file extensions and easily import data in Dynamics 365 CRM.
Marketing4Dynamics – Mailchimp and Dynamics 365 CRM integration to plan effective sales strategies, increase sales and improve ROI
- Sync Audiences, Members and Tags from Mailchimp to CRM
- Sync CRM Marketing List (Contacts/Leads) to Mailchimp
- Sync Campaigns and Member activities from Mailchimp to CRM
- Monitor and analyze Mailchimp campaign statistics through Dashboards in CRM





Please mention to use blank file from the advance find other wise if will has data then there will be problem for importing(Other records will get modified).
Hi,
Thanks for the feedback. Yes, we have already mentioned to replace data in the downloaded file for .xlsx type in the following line – “For this, you have to export data from CRM of the same entity and replace data with new data that you want to import and try again.”
Hope this helps.
Thanks!