Introduction
This blog is especially for users who have recently started working on Woodford solution for the field service mobile app for Dynamics 365 CRM.
If you are developing in field service Woodford solution you must be aware that we need to redo the work for views on field service separately as we do in Dynamics 365 CRM Web UCI. But even then it isn’t possible to implement all the user requirements of user and have separate views for each scenarios. For this, we would need to make use of ‘Advanced Find’.
How to Allow Advanced Find on Woodford solution for field service app?
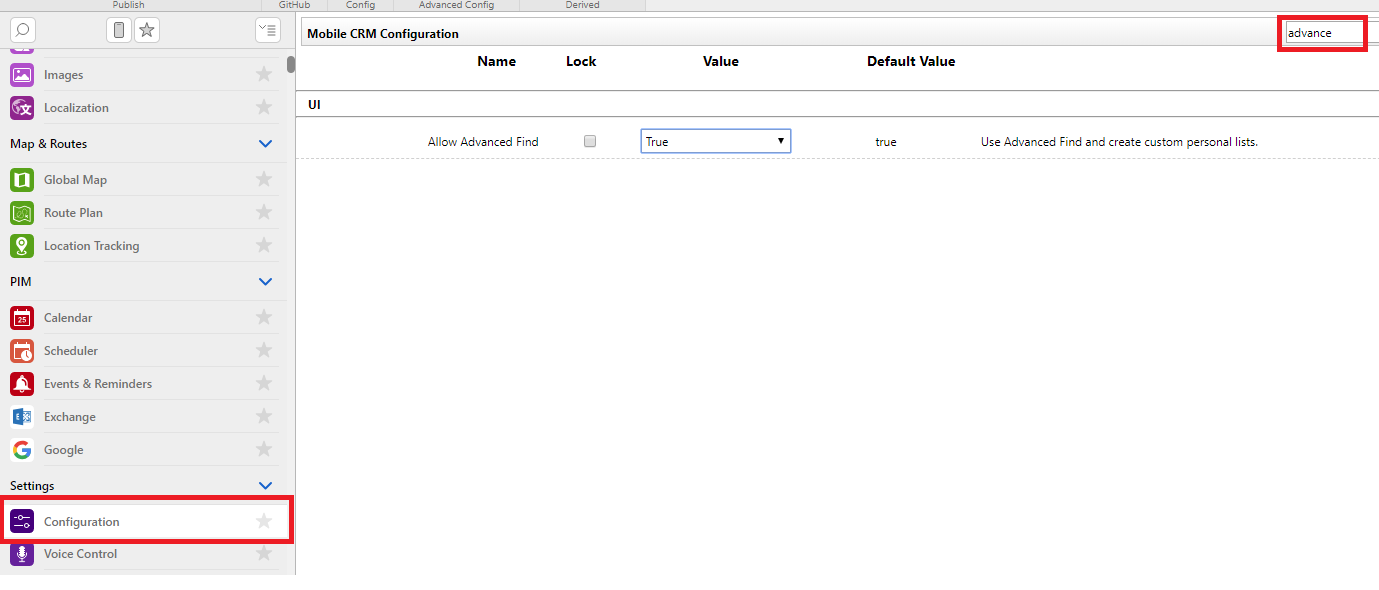
To enable Advanced Find on Woodford solution, navigate to Configuration tab on Home screen and search for Allow Advanced Find option. You can search it with the help of search box as well. Type in advance in search box. This will populate the settings to ‘Allow Advanced Find’ as shown below:
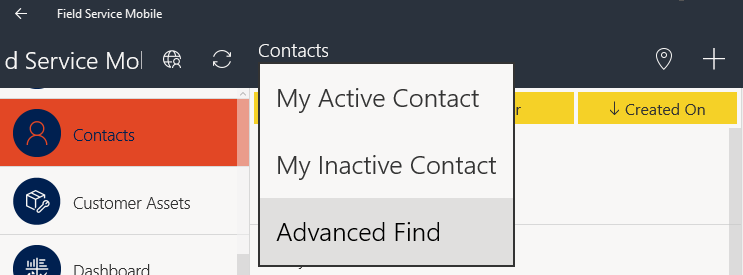
In case there is a particular custom view the user wants for his app, then the user will have to use the existing Advanced Find option on every entity list, select the required conditions and save that particular advanced find view as new view, as shown in below screenshot:
In the above example, I have opened the default list view of Contacts and under the view drop down have selected Advanced Find to set my private views on FS app.
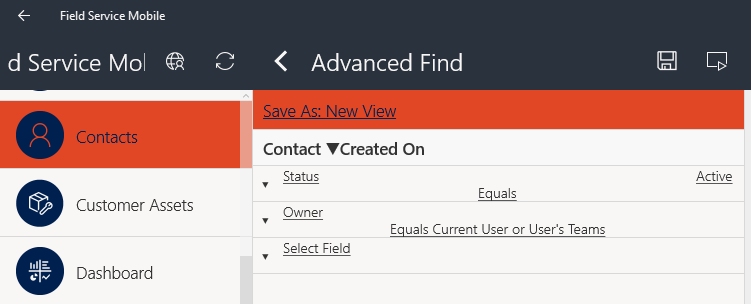
This will open up the Advanced Find page with the condition filters selected of the default view as shown below:
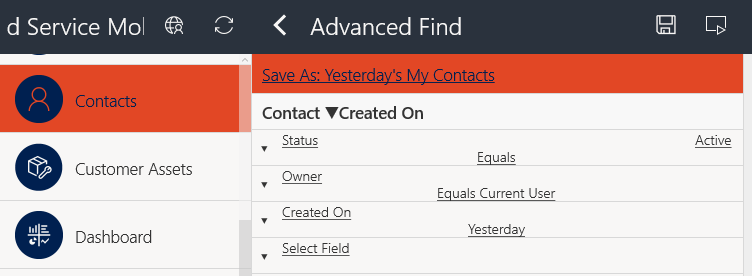
Now select your conditions and apply them on filters provided. Here, I am applying filter to show only those records with Status as Active and Owner as Current user.
I have named the view as Yesterday’s My Contacts.
I have named the view as Yesterday’s My Contacts.
It could so happen the user wants to save this view for future reference and hence clicks on the save icon provided rather than just the preview icon on top right corner
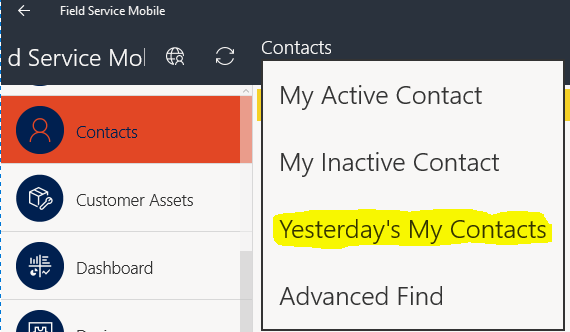
or unintentionally the user just ends up saving the advanced find view by clicking the save button. This saved advanced find view will be now listed in the entities listed views as shown below:
Now when user wants to delete these views created intentionally or unintentionally there is no option provided on the list view itself nor the user can open the view and delete it through app.
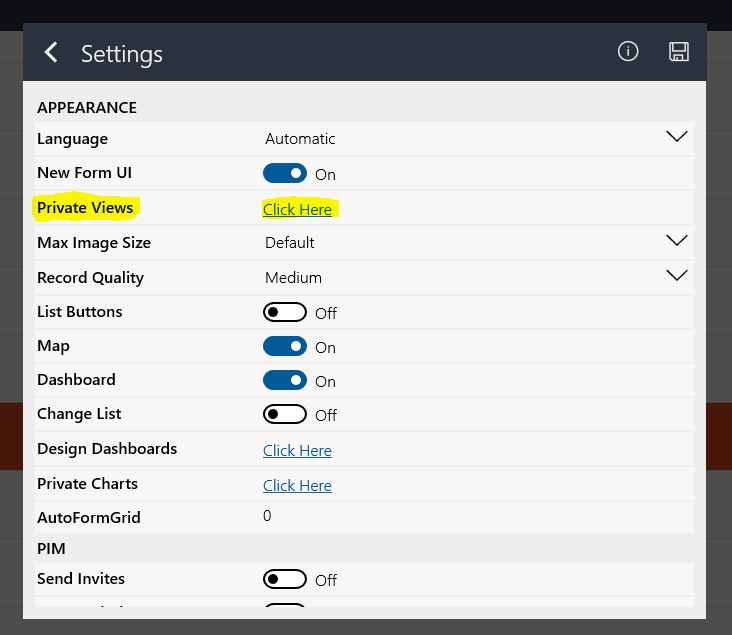
To delete these views one needs to navigate to Settings -> Private views, as shown below:
Click on Private Views -> Click Here, this will open up the dialogue listing all your Private views which is nothing but your saved Advanced Find views. Upon selecting the view you can find the delete option as shown below:
On clicking the delete button command it will ask for confirmation whether to proceed or cancel with delete. Select Delete and your private views will be deleted from your Field Service Mobile App.
Conclusion
In this way, user can reduce the cumbersome efforts and avoid the hustle to delete private views. This may be small tip but sometimes these minor things are the cause of many issues and delays.
Need any help with Microsoft Dynamics 365 Field Service module / Microsoft CRM / Power Platform development?
Want to manage your field services portal more effectively? Contact us at crm@inogic.com and our Inogic- Professional Services Division will help you modify, optimize, and automate all our requirements within Microsoft Dynamics 365 Field Service!
Happy Servicing!
