Introduction
In Dynamics 365 CRM, we have views which gives quick reference for records. While exploring Canvas apps, we found a new feature which helps us to display the views in the Canvas apps.
In this blog, we are going to display the views in Canvas app using CDS connector. In Dynamics 365 CRM, we have provision to see different views on different entity such as; on Account we can see different views as shown in below screenshot:
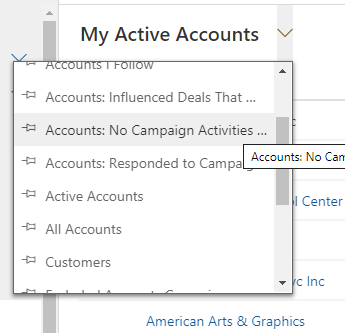
To achieve the same in PowerApps, create a Canvas app with Common Data Service as Data Source and select the required entity as shown in below screenshot:
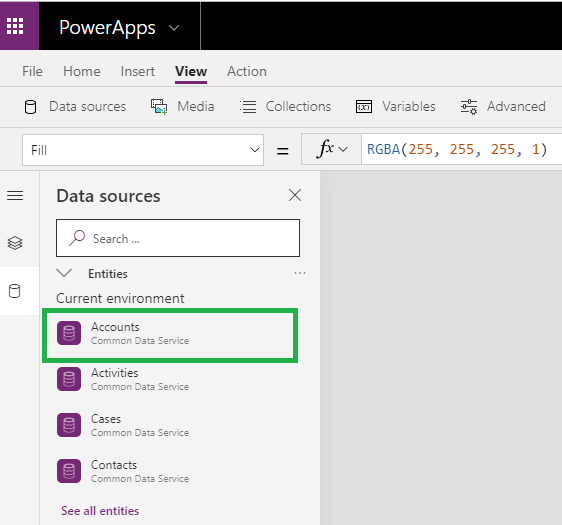
Here, we have selected the Account entity.
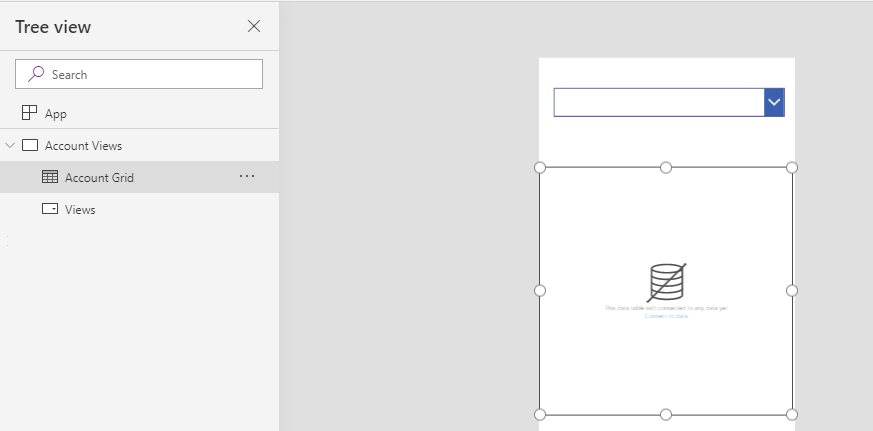
1. After adding Data Source, add below controls on Canvas app screen as shown in screenshot:
Here,
- Account Views – Blank Screen
- Account Grid – Data Table Control
- Views – Dropdown Control
Add the Dropdown and Data Table controls as highlighted in below screenshot:
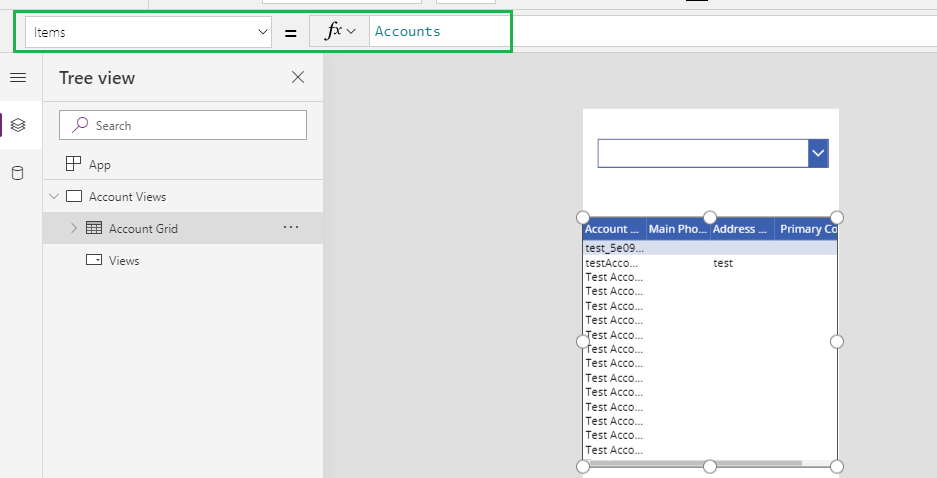
2. Set Account entity as source entity for Account Grid (i.e. set items property of Account Grid). See below screenshot:
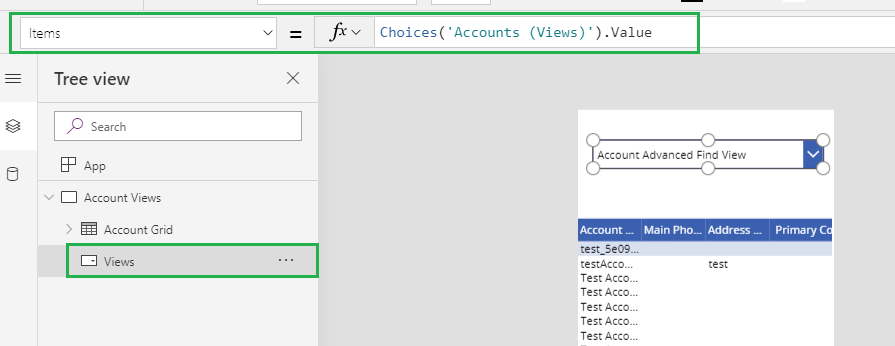
3. Change the item property of Dropdown (i.e. Views) to show the available views of Account entity as shown in below screenshot:
The ‘Accounts (View)’ is present in the account entity data source. It stores all account views name.
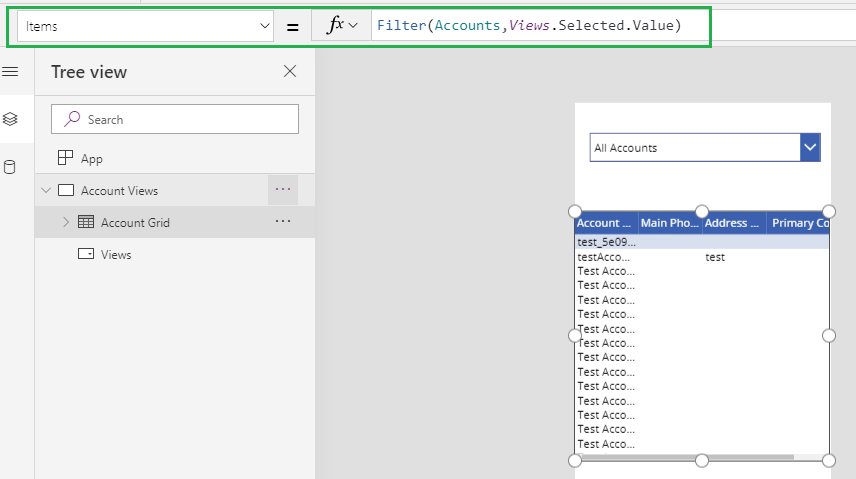
4. To filter the Account Grid, we need to again change the Items Property of Account Grid as shown in below screenshot:
We used both choice and filter functions in our canvas app.
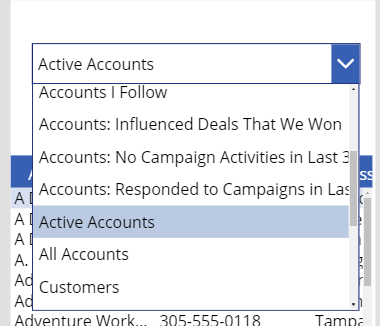
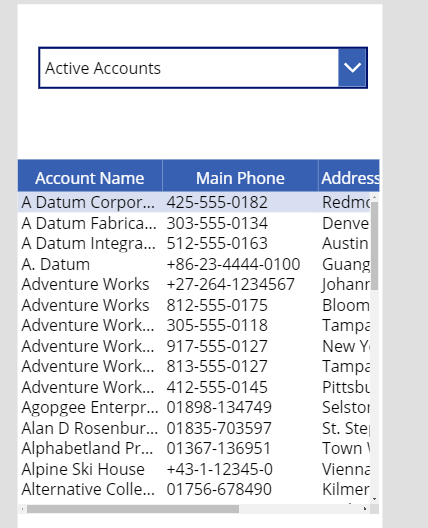
We are done with changes, now simply run the application and Account Grid will show data based on selected value of dropdown:
Views:
Results:
Conclusion
Thus, with the help of CDS connector you can easily display Dynamics 365 CRM ‘Views’ in Canvas app.

Hi Roohi,
I have followed your guide however note the datatable below does not automatically refresh based on the selection made.
Do the fields need to be added to the data table which will then be filtered according to the selection made?
Yes, you need to add fields in the data table to see the filtered according to the selection made in the Combo box. Please follow the below steps to add the fields in Data table:
1. Select the data table and click on Edit Fields as shown in below screenshot:
2. Now click on Add Fields and add the required fields in the table as shown in below screenshot:
Hope this helps.
Thanks!
How can we use this method with Saved Personal Views?
The ‘Personal views’ belong to a particular user in CRM and they are visible to only that particular user in CRM.
Hence, this method won’t be applied to Personal Views of Dynamics 365 CRM in Canvas App.
Hope this helps.
Thanks!
I followed the steps but replaced Accounts with Contacts. I can filter the views but some of the fields in my view are not visible in the “Add Fields” . For instance, my view in CRM includes Display Name “Company Name” Name (parentcustomerid). That field is not available in the canvass app list of available fields. That field isn’t available in any of the views including “All Contacts”.
Hi,
Currently, Polymorphic lookups are unavailable to be added in the lists as well as forms. In case if you want to check how polymorphic lookups can be added on forms, below is the link which suggests a workaround for the same.
https://www.inogic.com/blog/2020/07/working-with-complex-data-types-in-canvas-apps-using-common-data-service-current-connector-lookups-polymorphic-lookups/
Hope this helps!
Thanks.