Introduction
With the commencement of Wave 2 Microsoft has introduced another cool feature – ‘High Density Header’. Well, High Density Header is a different approach towards the visual representation of form headers. This is also a step towards making the Unified Interface the primary Interface as this feature even though is implemented by default only gets implemented in the UCI forms and can only be edited from the very new form designer.
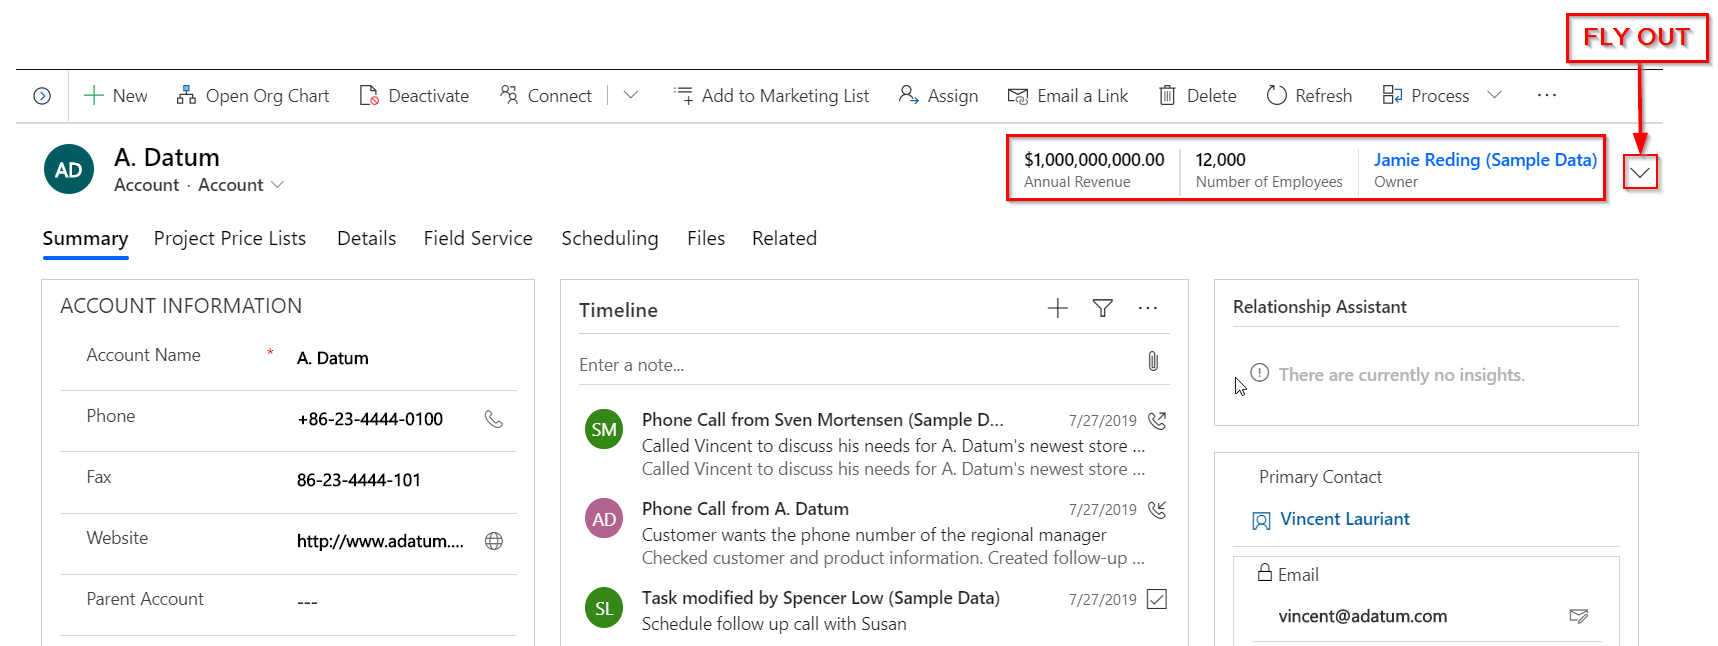
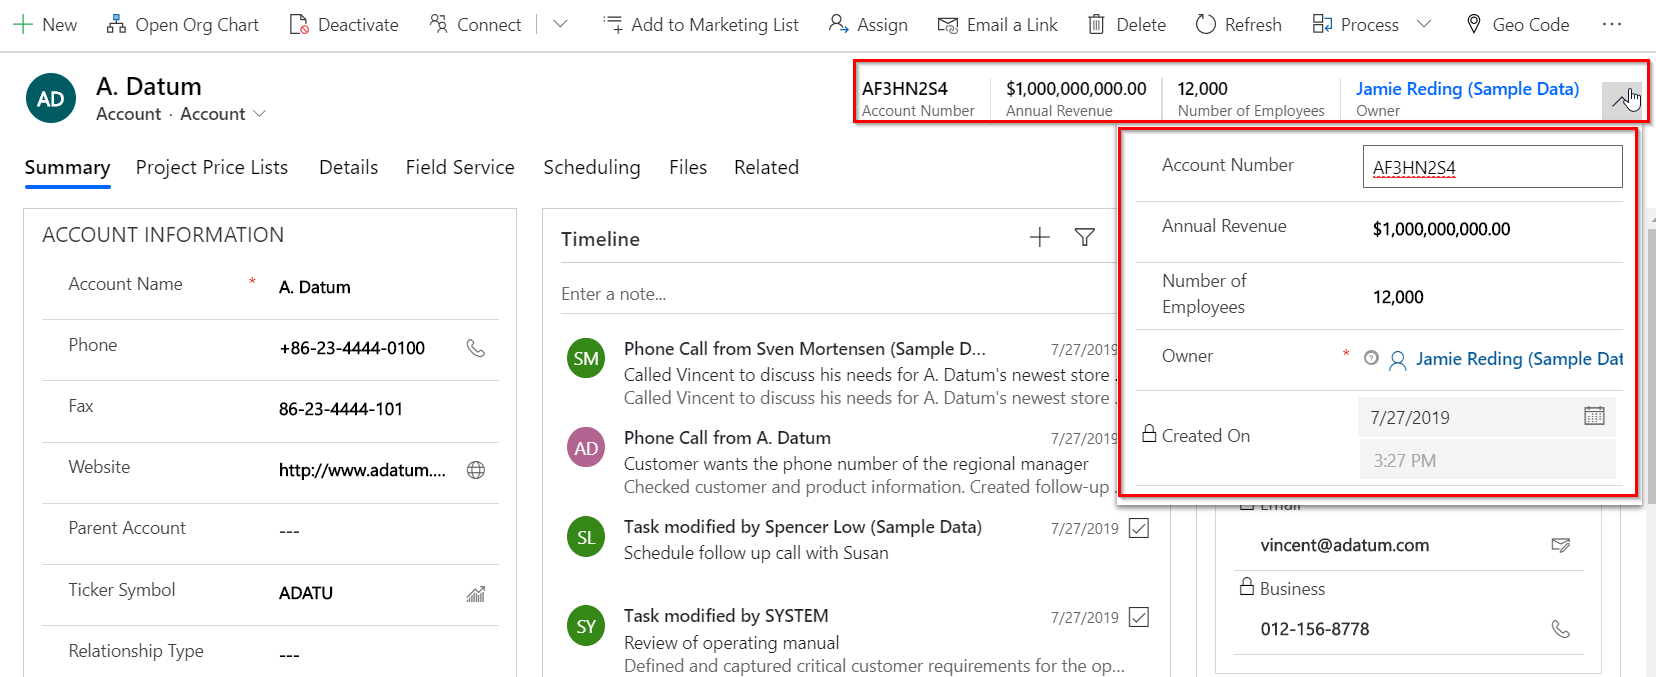
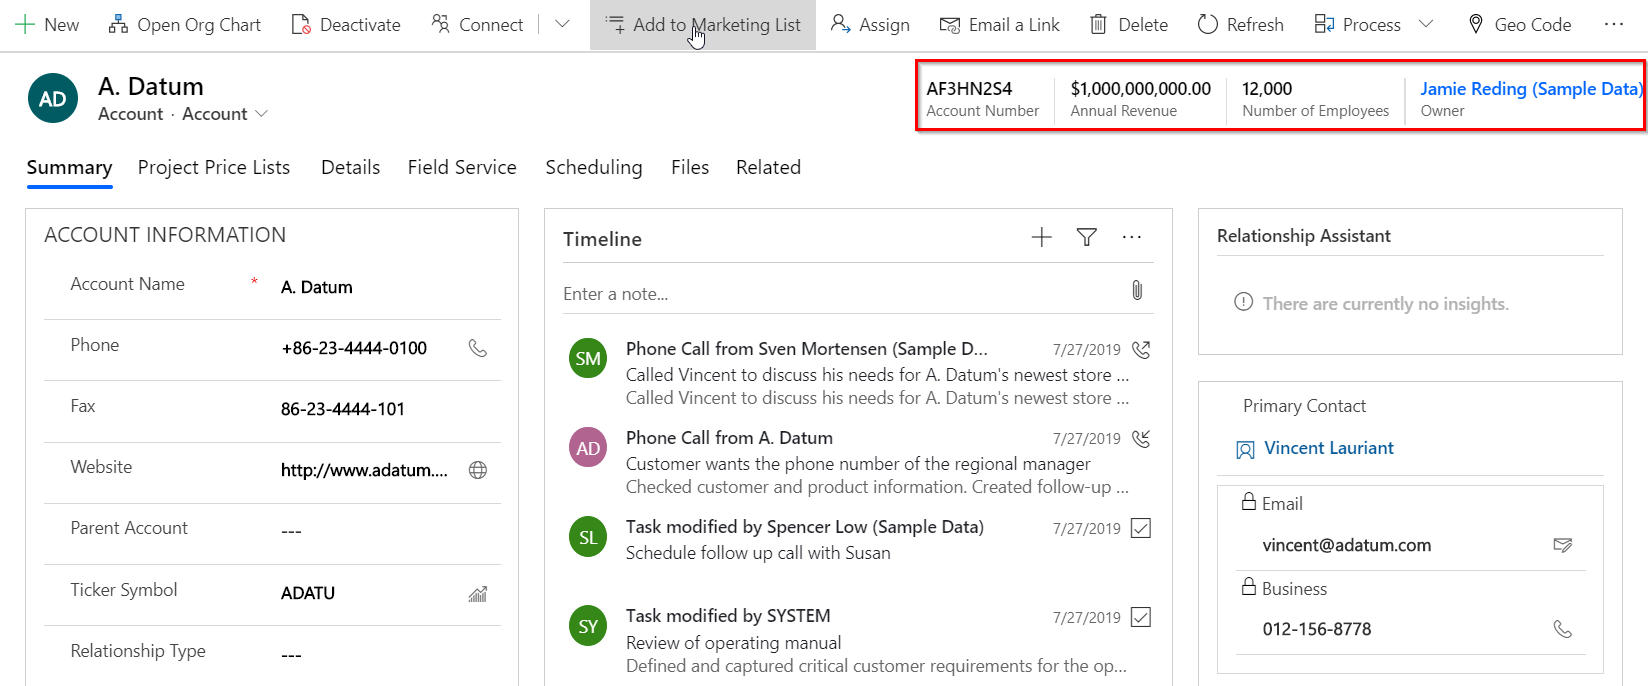
Now if we go to an Account record in the unified interface it can be seen that the High Density Header is already implemented and the fields placed before the flyout on the form header are read-only and thus, not editable.
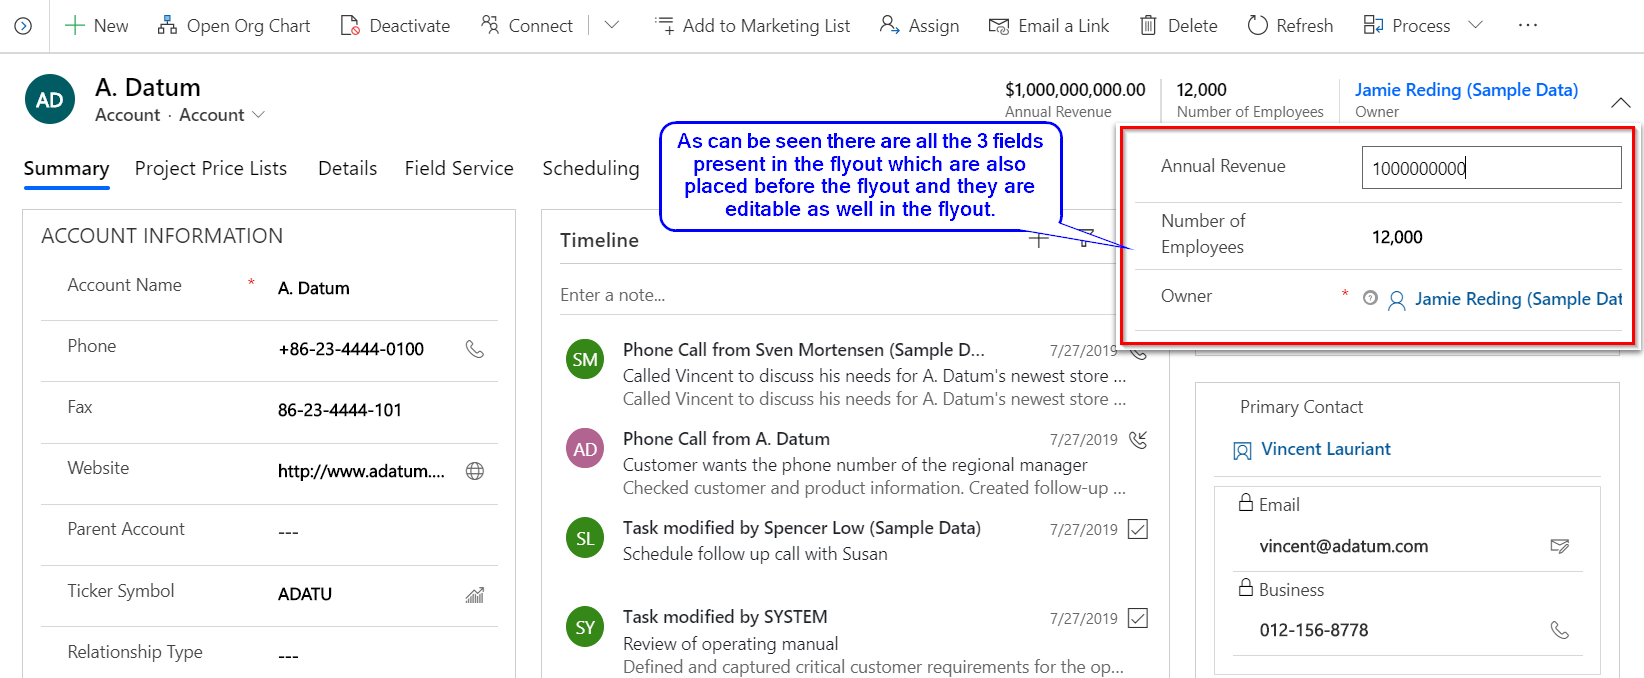
Also on clicking on the fly out button we can see all the fields placed in the header including the ones already getting displayed before the fly out. The fields displayed under the fly out are either editable or read-only depending on whether or not they have been made read-only from the form editor as below:
Note: The High Density Header only shows the first 4 fields from the list of fields before the fly out and in read-only mode. The remaining fields along with those first 4 fields gets displayed in the fly out.
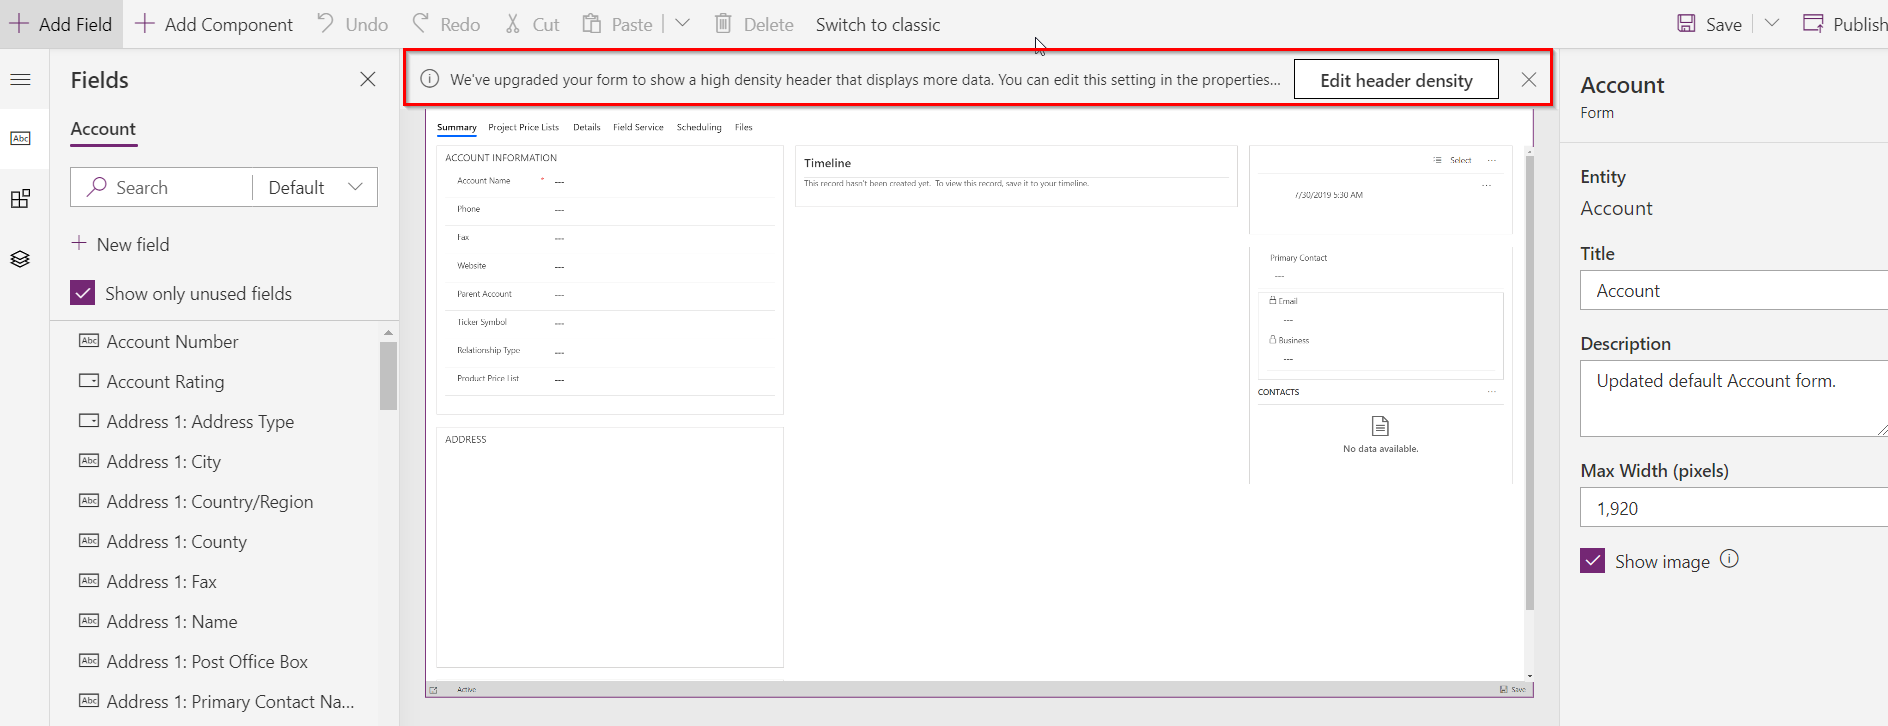
Now, from the new designer when you open the Account form you shall see a message to edit the header density as highlighted in the image below, using which you can navigate to the header properties.
Or you can click on the header and edit the header properties as shown below:
Note:
- The fields seen before the fly out are by default in read-only mode irrespective of the fact that whether or not they have been made read-only from the form editor. But the behaviour of the same fields in the fly out totally depend on whether or not they have been made read-only from the form editor.
- In the screenshots of the Account form you see only 3 fields in the read-only mode before the fly out because there are only 3 fields placed on the Account header. You can add more than 4 fields as well and while trying to do so you will get the following message as shown below:
Once you have added more than 4 fields in header, it will be displayed on the form as shown below:
And finally if you have unchecked the option to show header fly out then you will only see the read-only fields and there will be no fly out available on the header as shown below:
Well the High Density Header is definitely a welcoming feature by Microsoft which will be very useful in incorporating more than the usual basic details in the header itself.
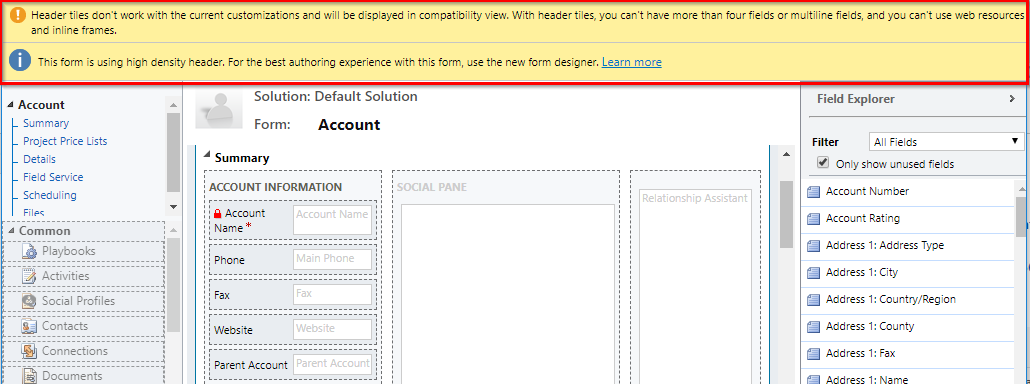
However, it should be noted that even though we are in the process to totally move over to the unified interface and leave behind the classic web client, adding more than 4 fields in the high density header kind of breaks the header in the classic interface as shown below:
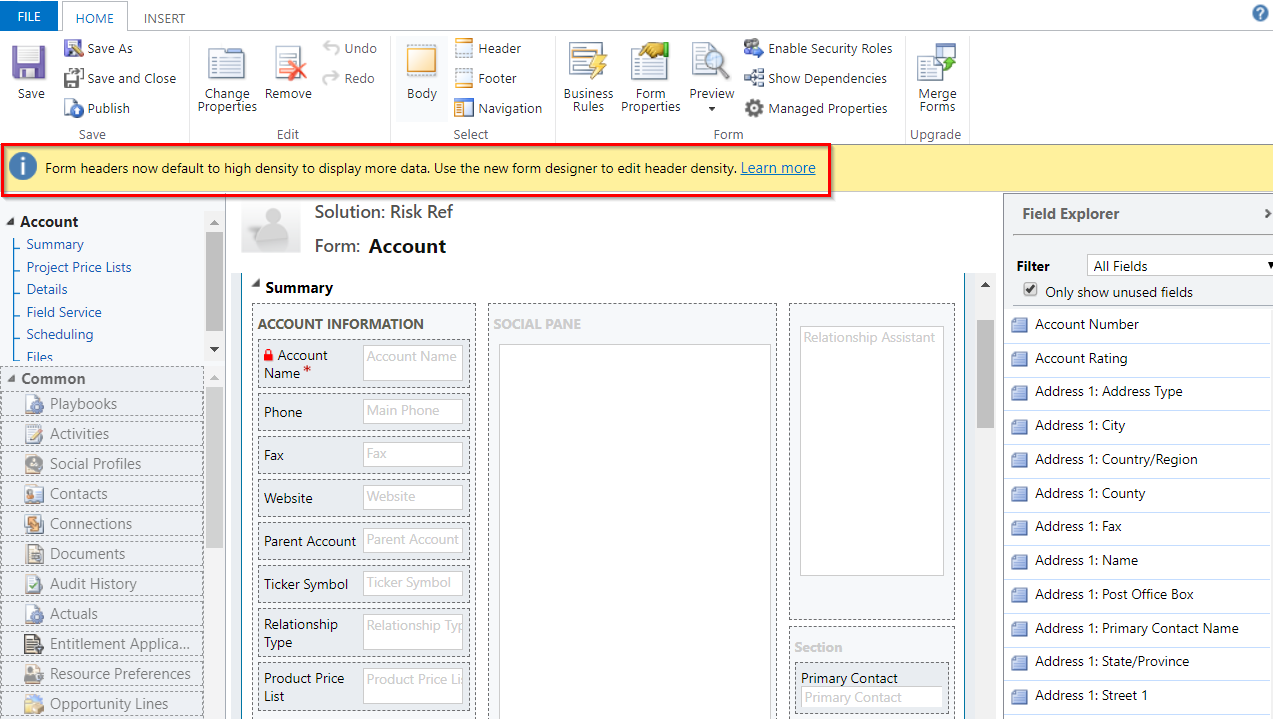
This can also be witnessed by the notifications displayed on the classic form editor as shown below:
For Developers
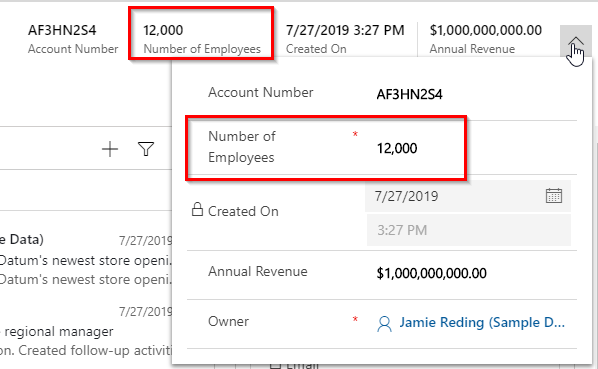
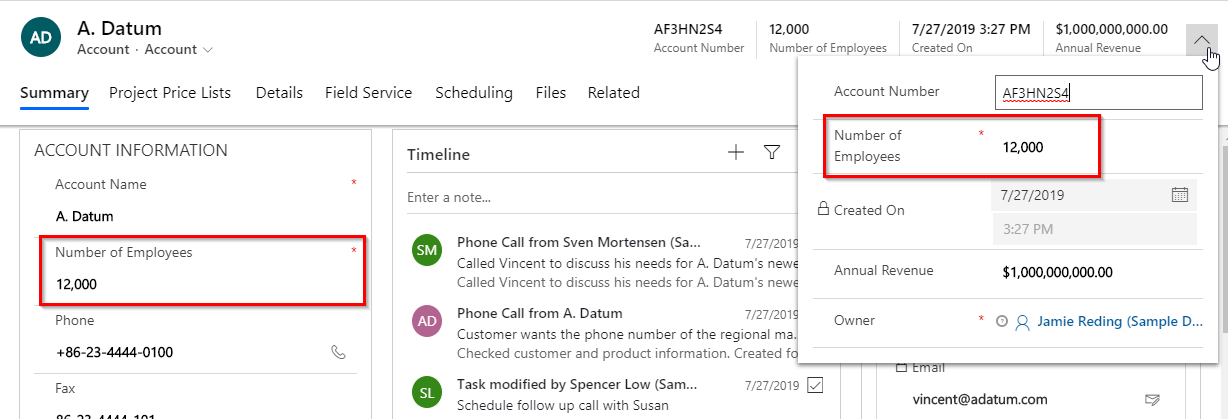
The header attributes can be accessed normally from the JavaScript. So let’s say if we want to make the field ‘Number Of Employees’ on the header required programmatically using script, we can do it with the help of the piece of code given below:
formContext.getAttribute(“numberofemployees”).setRequiredLevel(“required”);
This will give us the below result, where the field in the fly out becomes required and not the one before that.
And if this field is present on the form then it will also become required as shown below:
Conclusion
As illustrated above Microsoft Wave 2 – High Density Header – is a very useful and welcoming feature which incorporates more than usual basic details in header making it more effective and functional.
