Introduction
In this blog, we will explore more on how to import and export records from one PowerApps application to another PowerApps application just like import/export functionality of Dynamics 365 CE.
Import and Export controls are controls used for importing and exporting data from the local file in PowerApps application.
Let’s just start exploring this control by first simply creating a default App for contact entity. For more information you can refer the blog here.
Now follow the steps given below to import and export records in PowerApps:
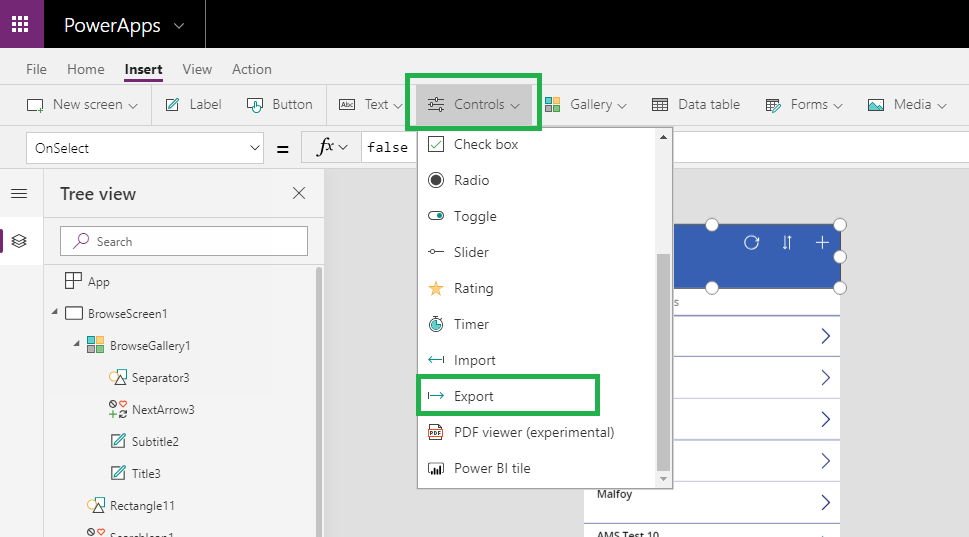
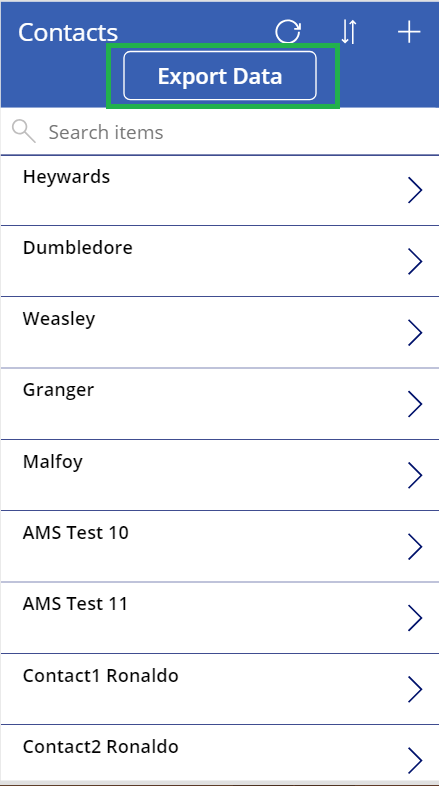
1. Select “Export” control from the given list of controls and add on the rectangle provided in Browse Gallery of the app as shown in below screenshot:
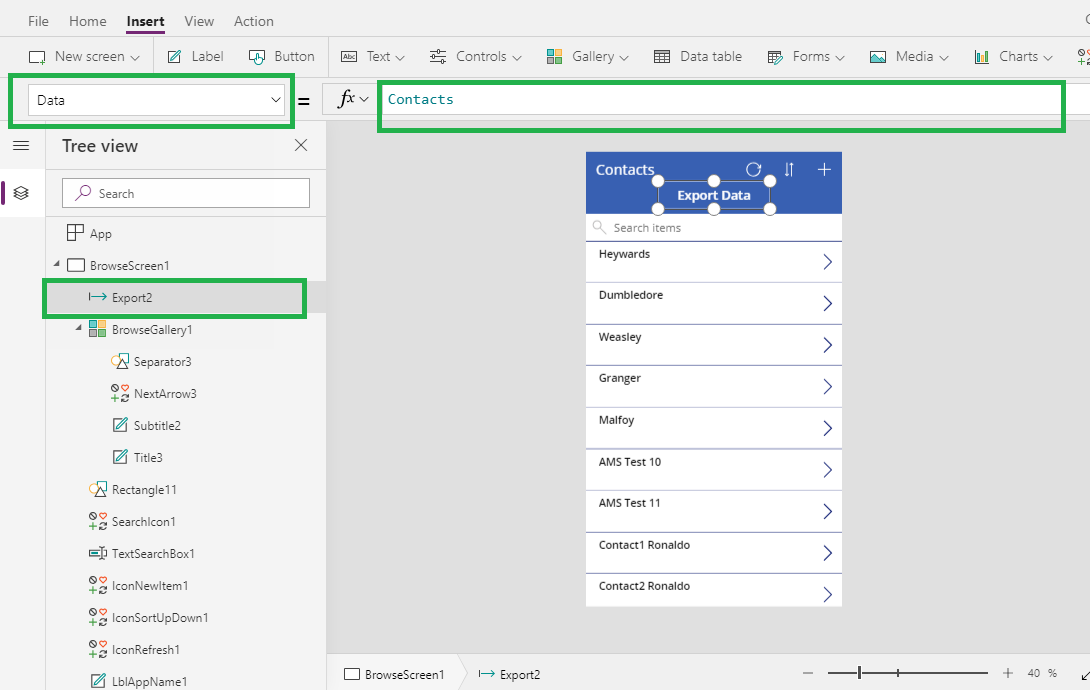
2. Now on “Data” property of “Export” control, add the data source name as “Contact” as shown in the below screenshot:
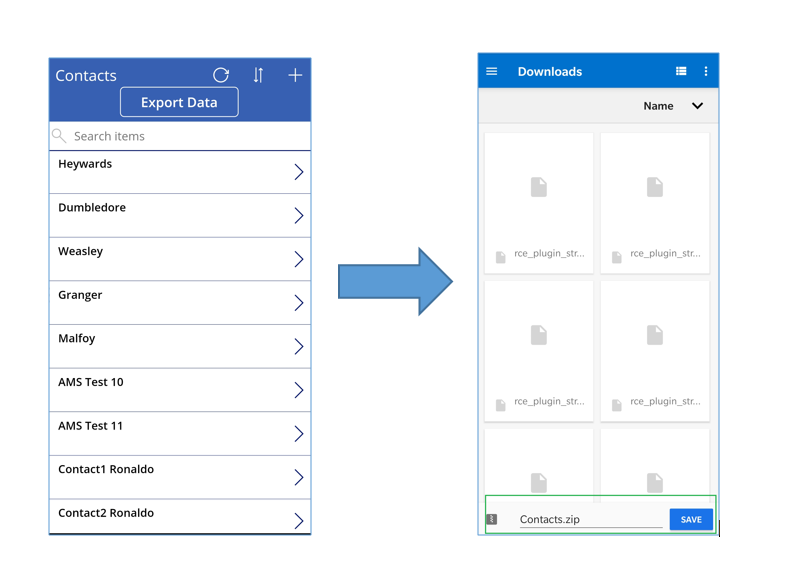
3. Let’s run the app. Click on the Export button. After clicking on Export button you will see that the zip files have been downloaded in your phone memory.
Please see the screenshot below:
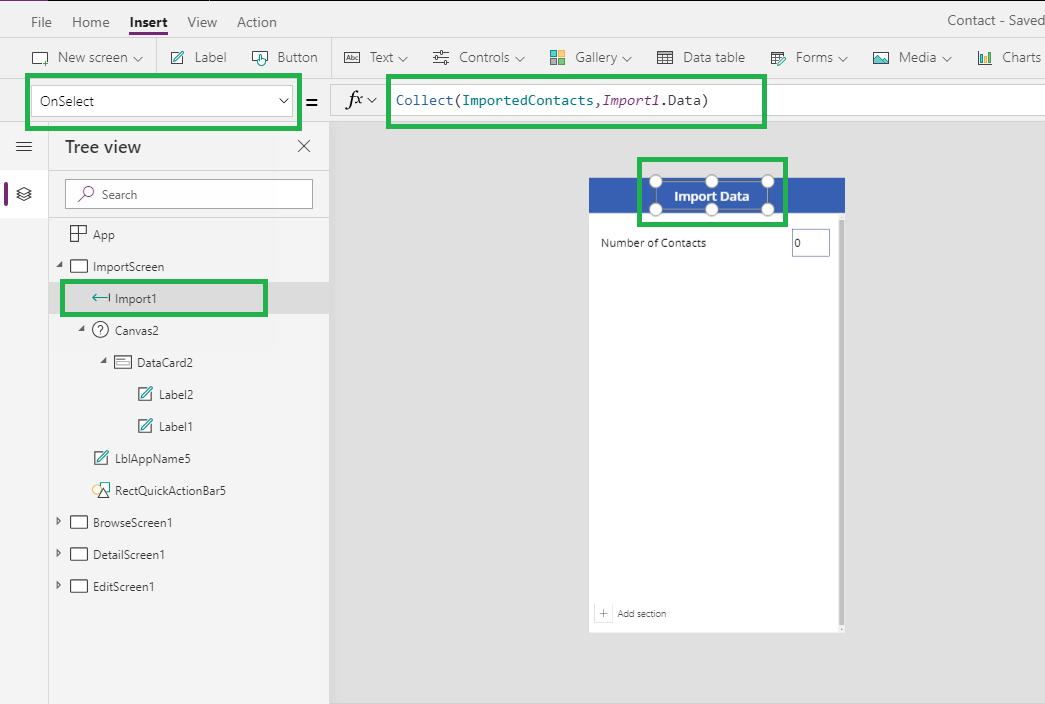
5. Now on “OnSelect” property of Import control add the formula given below:
The above formula will create a collection as “ImportedContacts” using Collect function and add the records in the collection which are imported through Import Control using “Import.Data”.
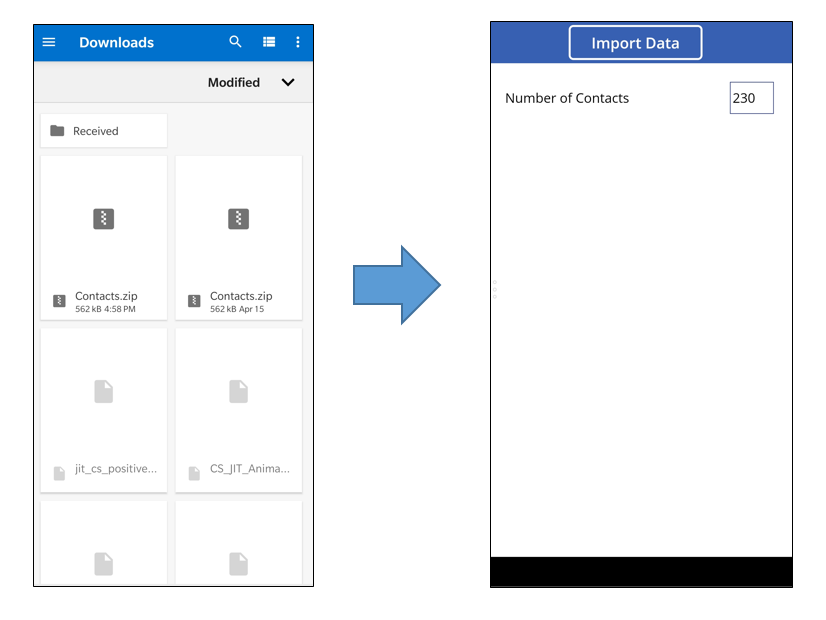
6. Now let’s run the app and import the contact.zip file by selecting the import control.
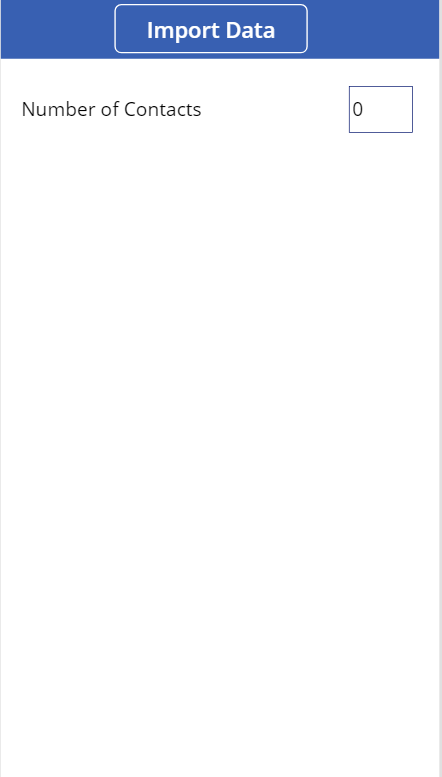
7. Now after importing the contact records using import controls you can see the 230 contact in the app. The columns exported in the contact.zip are now added in another collection in the app using “Export” control. So, “ImportedContacts” collection will have all the columns present in the “Contact” collection.
Conclusion
Using Import and Export controls we can import or export records in PowerApps just like Dynamics365 CE.
