Introduction:
Now, it is possible to build the business apps without having coding experience. Microsoft provide service named PowerApps using which users can build the apps as per the requirement and can run on the Browser, phone and tablets.
With the help of Microsoft PowerApps, we can build the apps that run on browser, tablets and on Phone. PowerApps has three major components:
- Canvas Apps
- Model-Driven
- Common Data Service
In this blog we are focussing on Canvas Apps of Microsoft PowerApps. Canvas apps allow to work with the 200 data sources.
So, let’s create small Canvas app with few controls to create records in Dynamics CRM. Below are the steps to create the records in Dynamics CRM.
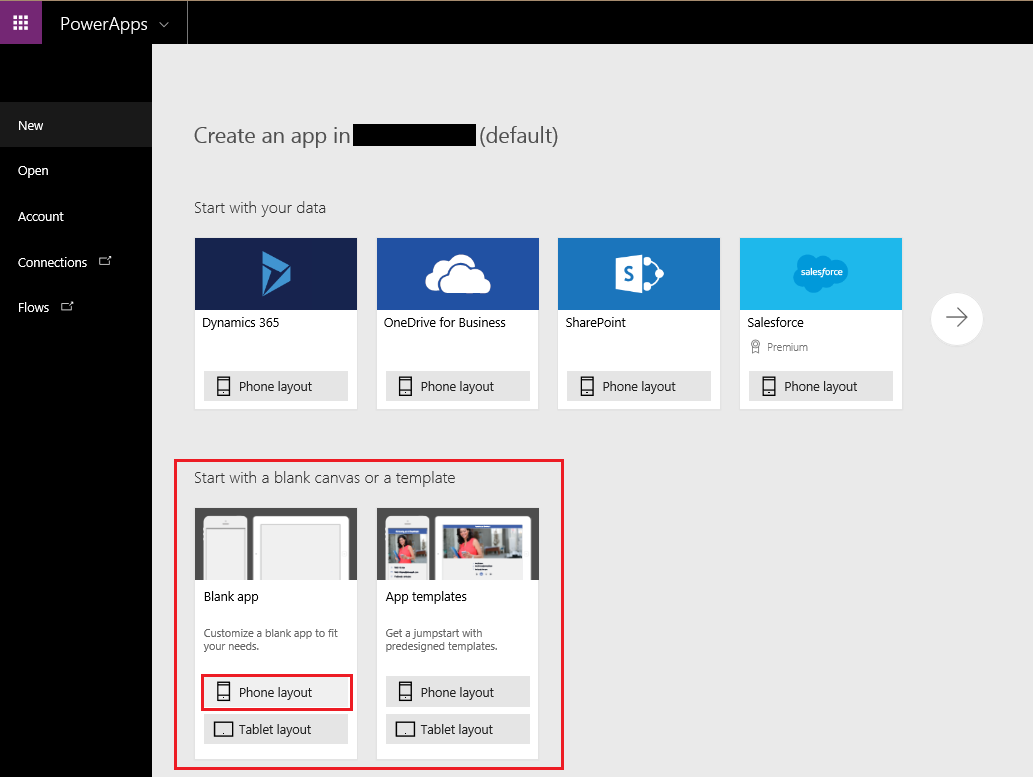
1. Sign in to the PowerApps site https://powerapps.microsoft.com/en-us/ with the Microsoft work email id. After signing you will see the below screen:

a. Click on Create an app and it will navigate to another screen. Then select Phone Layout under the blank Canvas blank.
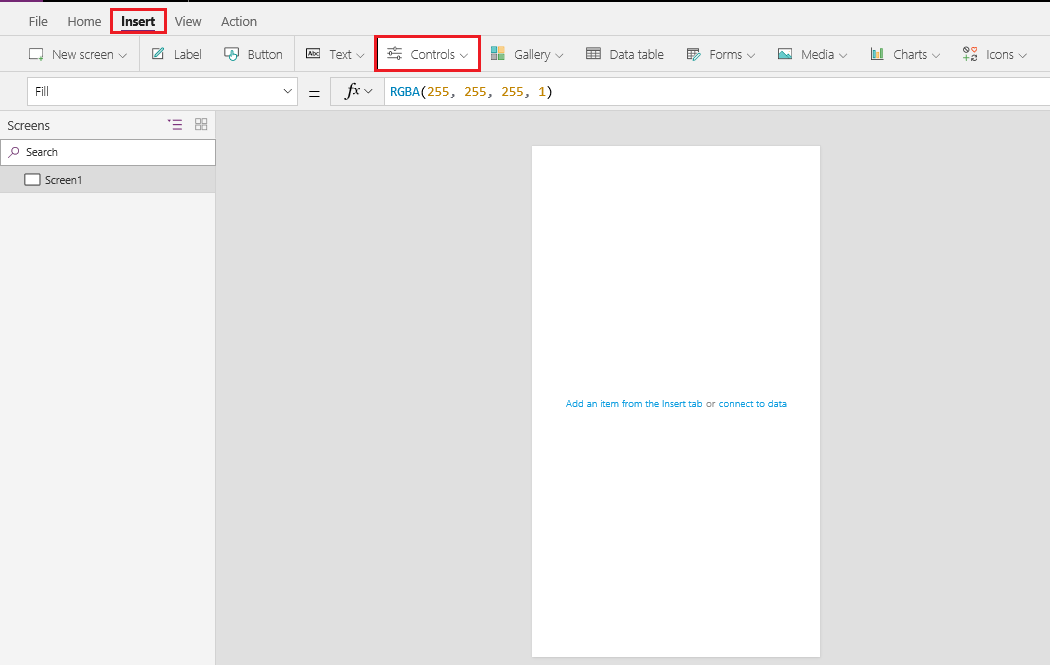
2. A blank screen will appeared as below. You can rename it if you want.
Note: Here we have used scrollable screen and all control placed inside sections. You can use blank screen.
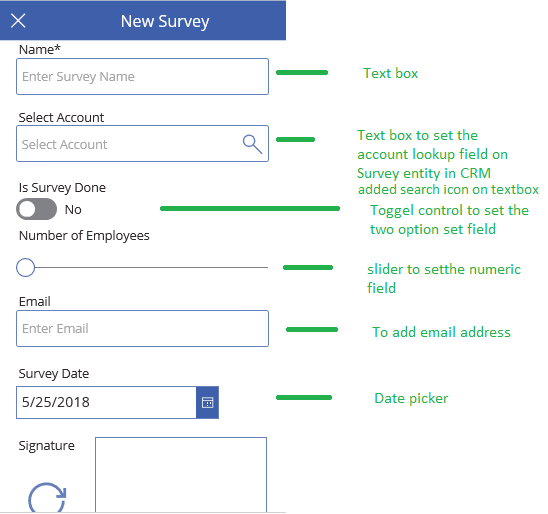
Add controls from the Insert Tab to the blank screen so that we can take input to save the record in CRM.
Here we are going to create the custom entity (survey) record in CRM. You can use other entity as well.
Set the Min, Max, Default property of slider control.
3. configure the Account Lookup
To set the Account lookup on Survey entity we added another screen to select the Account record
To add blank screen: Go to Insert -> New Screen -> select Blank Screen.
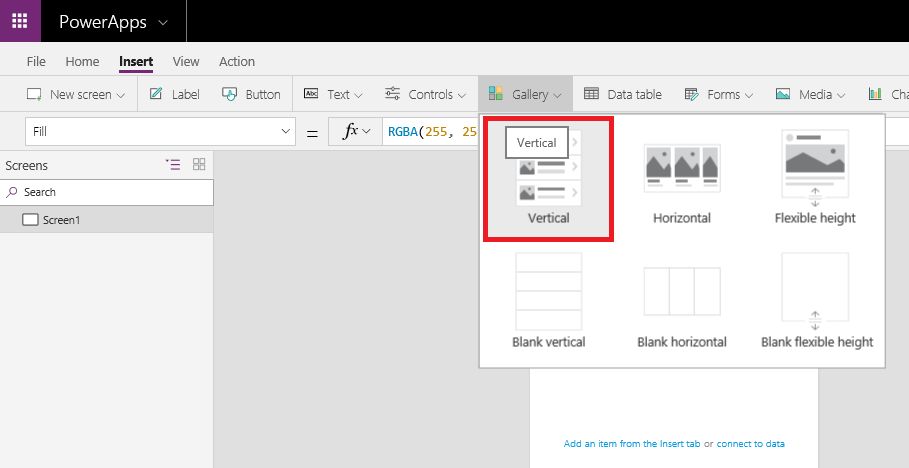
Add Gallery control to display the list of existing Account records in Gallery control.
To add Gallery control; Go to Insert -> select Gallery -> Select Vertical Gallery control.
4. Now set the property for Account Lookup on textbox control.
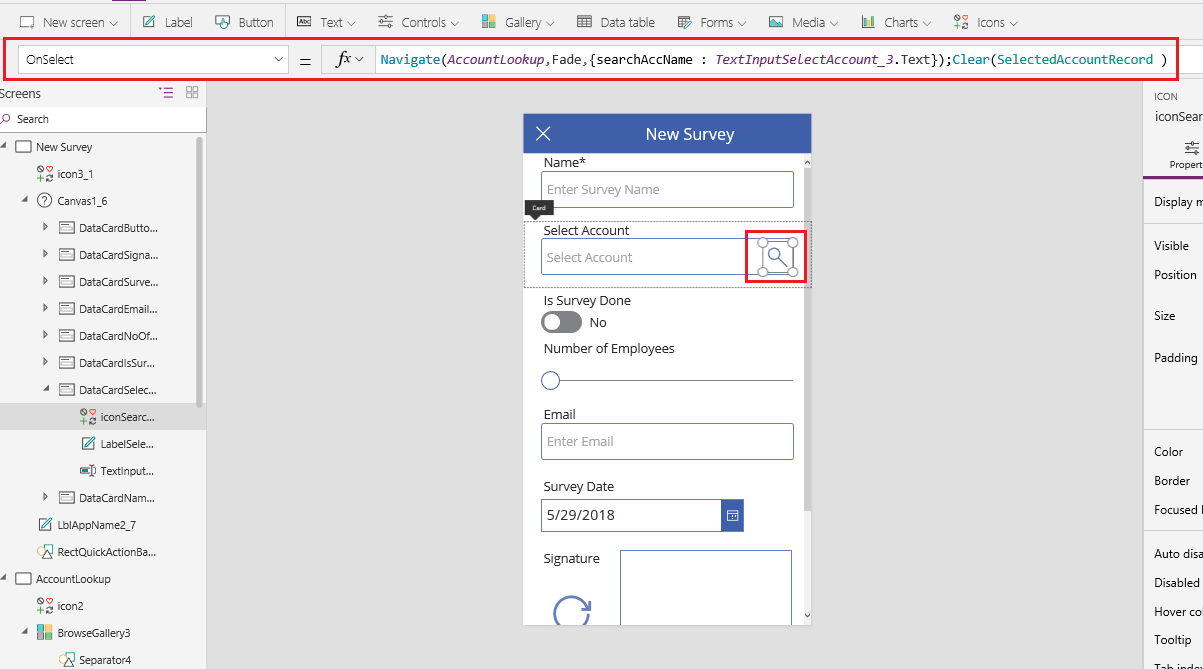
a. Set On Select property of search icon to
Navigate(AccountLookup,ScreenTransition.Fade,{searchAccName : TextInputSelectAccount_3.Text }) ;Clear(SelectedAccountRecord )
Here we are navigating the screen to select the Account record and also passing the value as SearchAccName of Select Account Textbox.
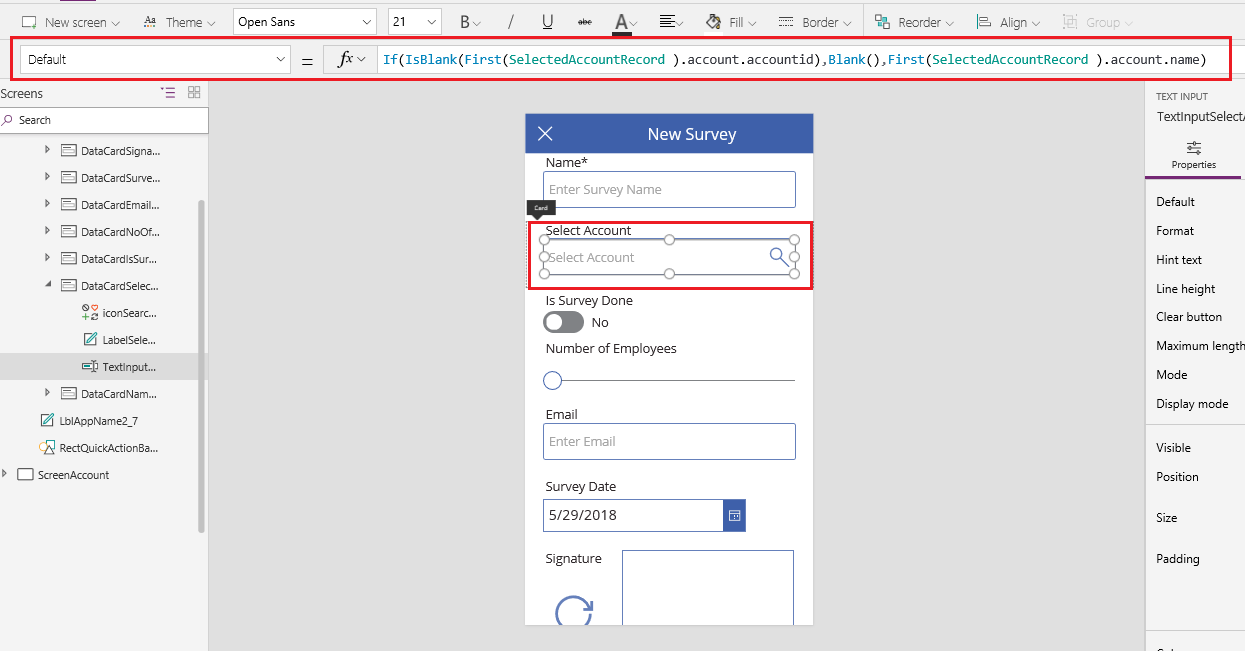
b. Set the Default property of Select Account textbox to
If(IsBlank(First(SelectedAccountRecord ).account.accountid),Blank(),First(SelectedAccountRecord ).account.name)
Here we are displaying the selected account name from the Account Gallery in the textbox. Initially it will display blank.
5. To select CRM Account Record we added the another blank screen.
Insert – > New Screen
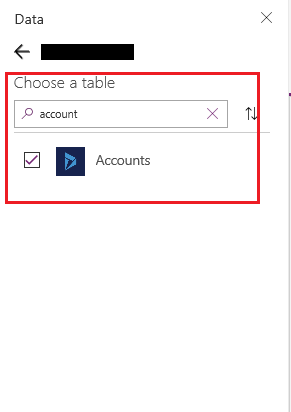
a. Now add Account data source:
Select view -> Data Source – > Select the connection and then add the Account Data Source
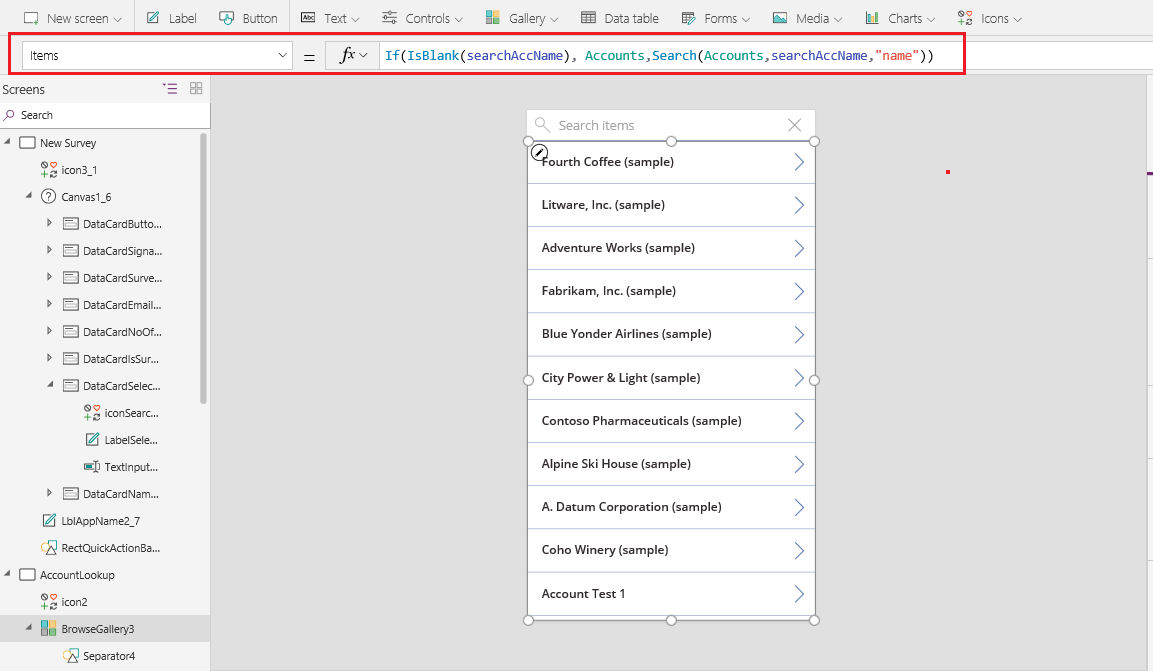
b. Now set the Gallery Item Property to
If(IsBlank(searchAccName), Accounts,Search(Accounts,searchAccName,”name”))
Here the Gallery will display the list of the accounts with matching name in searchAccName variable from previous screen. If searchAccName is empty then it will show all accounts.
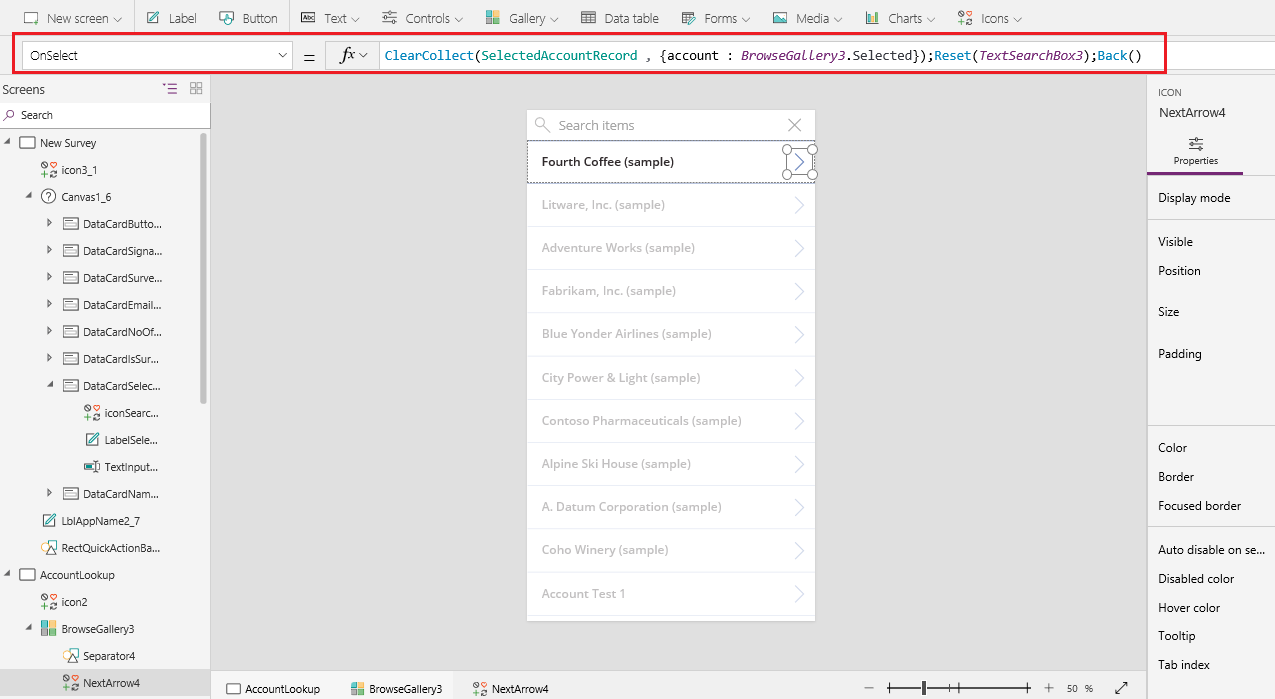
c. Set On select property of Arrow on BrowsGallery to
ClearCollect(SelectedAccountRecord , {account : BrowseGallery3.Selected});Reset(TextSearchBox3); Back()
Here we are storing the selected account record in the separate collection i.e. SelectedAccountRecord.
6. Set the On select property of Submit button
Here we need to add the Data source for the Custom entity (Survey)
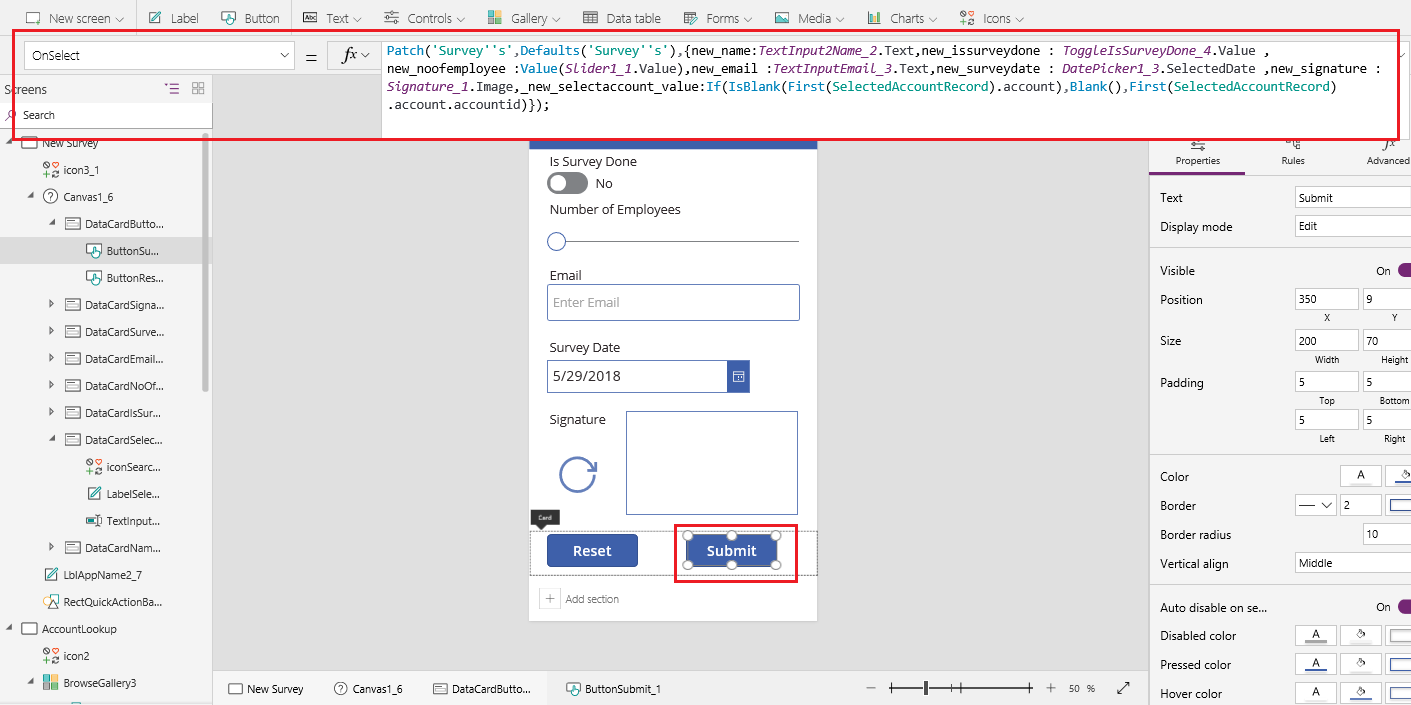
Set the On select property of Submit button to
Patch(‘Survey”s’,Defaults(‘Survey”s’),{new_name:TextInput2Name_2.Text,new_issurveydone : ToggleIsSurveyDone_4.Value , new_noofemployee :Value(Slider1_1.Value),new_email :TextInputEmail_3.Text,new_surveydate : DatePicker1_3.SelectedDate ,new_signature : Signature_1.Image,_new_selectaccount_value:If(IsBlank(First(SelectedAccountRecord).account),Blank(),First(SelectedAccountRecord).account.accountid)});
In Patch function we will set the values of controls to the Survey data source columns.
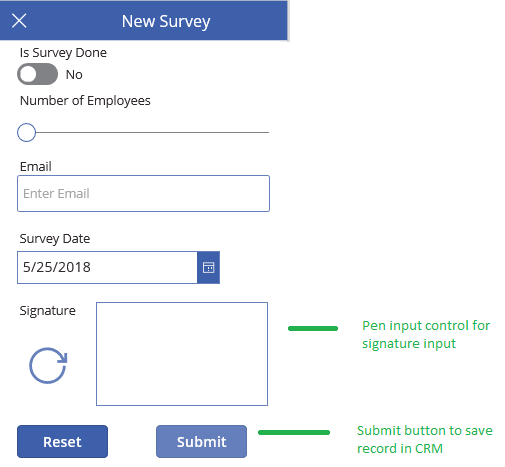
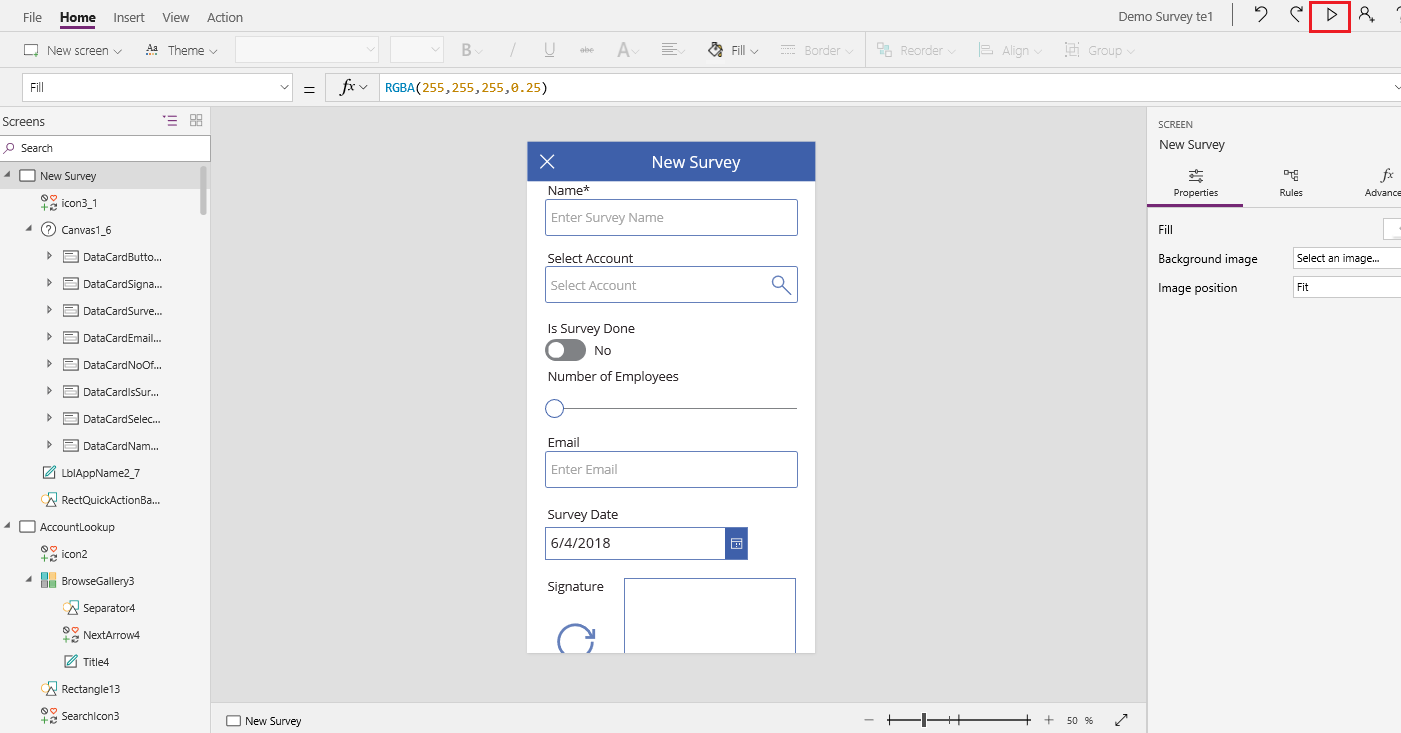
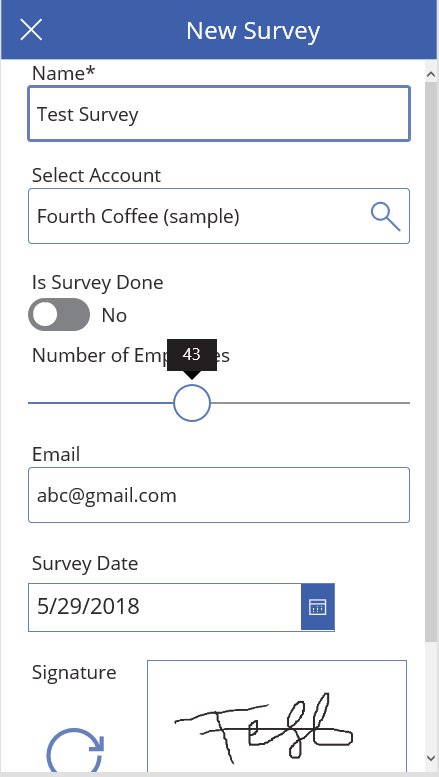
7. Now save and publish the app to reflect the changes on mobile device. Now play the App from PowerApp Studio as you can see in the below screenshot:
To use Canvas App from mobile device you have to download the PowerApps from App Store or Google Play. After login, you will see your canvas apps, choose the app which you want to use.
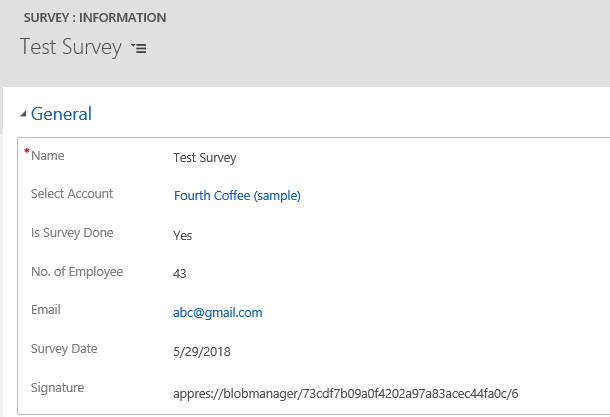
Note: The pen input control will give BLOB data string and this signature will not be displayed on the Dynamics 365 for Phone app.
Conclusion:
In this way we can create the records in Dynamics CRM with the blank canvas app using Patch function.
Free 70% of storage space in CRM with Attachment Management Apps!
Attach2Dynamics – Store and manage documents/attachments in cloud storage of your choice – SharePoint, Dropbox or Azure Blob Storage from within Dynamics 365 CRM.
SharePoint Security Sync – Robust and secure solution to integrate Dynamics 365 CRM and SharePoint Security Sync thereby ensuring secure access to confidential documents stored in SharePoint.
Where did “_new_selectaccount_value” come from, that’s not a schema name in CRM
Yes, “_new_selectaccount_value” is not the schema name in CRM. The name of the field in the CRM is “new_selectaccount” and “_value” and “_type” are suffixes.
To set the lookup in Power App we have to specify its type(entity name) and its value(GUID).
In patch request, to set the lookup we have to specify its type and value in the following format “__type” and “_ _value” respectively.
Hope this helps.
Thanks!
Will this app work for web client ? Or only on Mobile device.
Yes, this app works for web client as well.
You can simply select the app and click on the play as shown in below screenshot:
You can also refer the below link for more details:
https://docs.microsoft.com/en-us/powerapps/user/run-app-browser
Thanks!
Superb article. It’s helping me get to grips with canvas apps a lot quicker.
Somehow I could not find from where you have got SelectAccountRecord. Could you please elaborate on this?
The ‘SelectAccountRecord’ is a separate collection created using ClearCollect function.
So, this ‘SelectAccountRecord’ collection is used to store the selected Account record from the Account screen to update the Account lookup.
Hope this helps!
Hi,
I have embedded the Canvas app in D365CE. Once I fill the data in the Canvas App fields and submit the form, I don’t see the values again when I reopen it. And due to this if I dont fill any field value it gets set to null. Please let me know how this can be solved
To show the submitted data on the form you can follow the steps given below:
1. You need to store last submitted value using UpdateContext Function in OnSuccess property of the same form which you are using for submitting.
UpdateContext({varlastsubmit:EditAccount.LastSubmit});


Here,
UpdateContext = function to create a context variable, which temporarily holds a piece of information
varlastsubmit=local variable name
EditAccount=Form Name
LastSubmit= LastSubmit formula would return the last successfully submitted record.
2.Pass UpdateContext variable name to the items property of form i.e. varlastsubmit
3.On Click of submit button Navigate the form to same form using OnSelect Property of submit button.
SubmitForm(EditAccount);Navigate(EditAccount,ScreenTransition.None);
Here,
SubmitForm = Used to save any changes in a Form.
EditAccount = Form name.
Navigate = Function to change which screen is displayed.
Thanks!