Introduction:
Recently, we had a business requirement to show customer lookup in PowerApps similar to the customer lookup in Dynamic 365.
For example – In Dynamic 365, we have customer lookup of contact and account, using this we can select contact and account.
To achieve the same thing in PowerApps, we have to use “Context” parameter of navigation methods.
For more details about navigation, methods refer below link.
https://docs.microsoft.com/en-us/powerapps/maker/canvas-apps/functions/function-navigate
Solution:
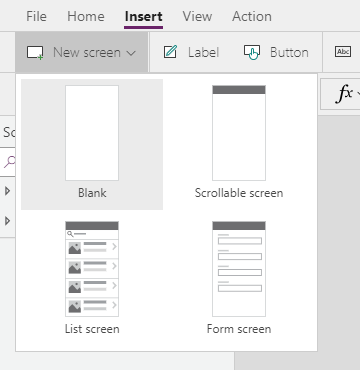
Step 1: Select a Blank application as shown in below screenshot.
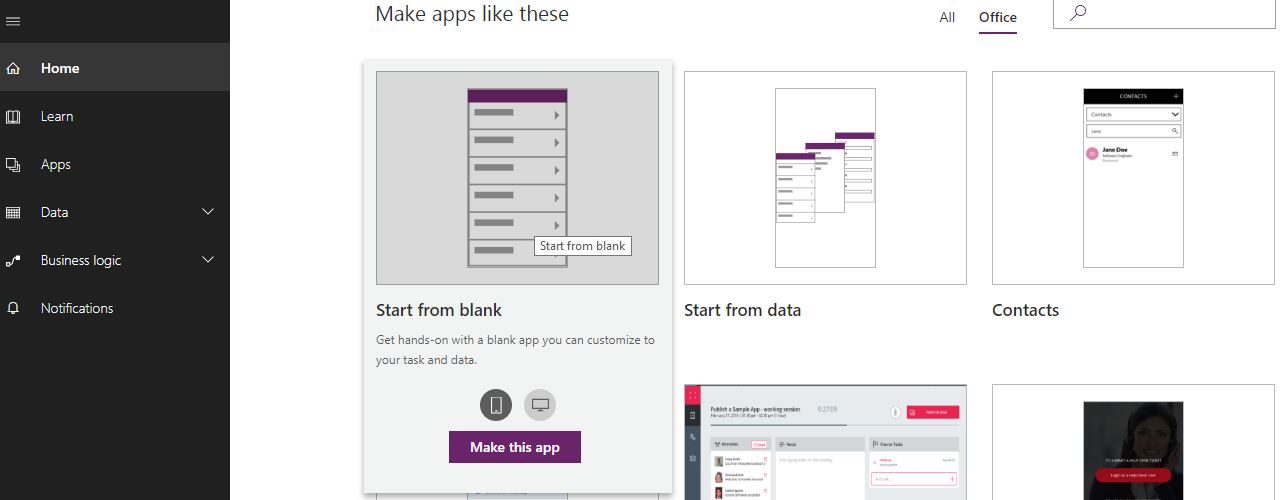
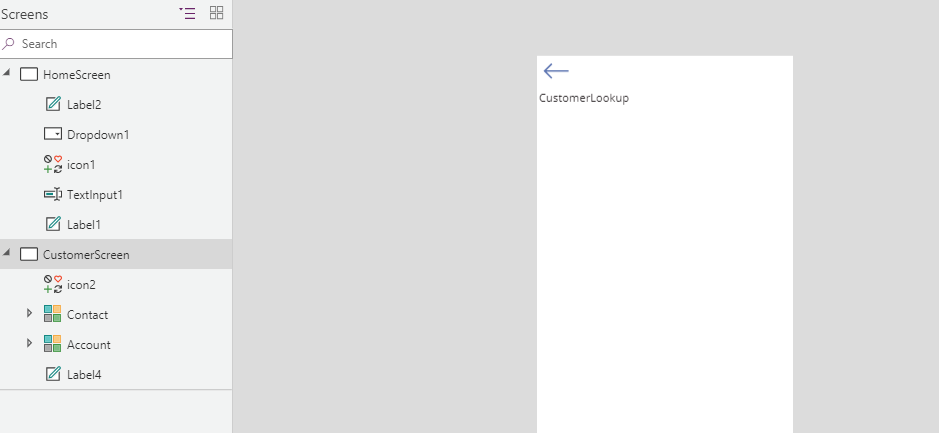
Step 2: Add two Blank Screen one is Home Screen and Customer Screen which will display account and contact list.
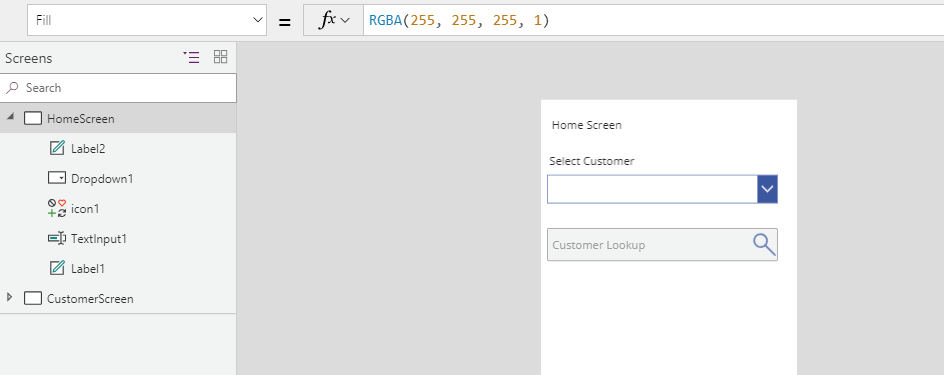
Step 3: Add Dropdown Control, Textbox, search icon on Home Screen as below.
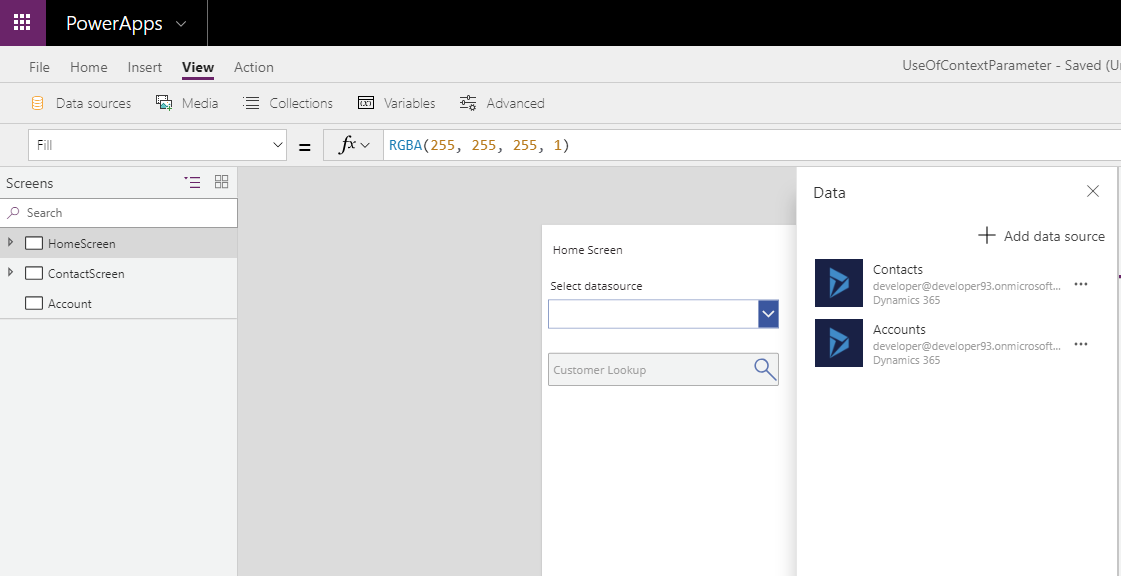
Step 4: Add data source of account and contact in PowerApps as shown in the below screenshot.
To add Source Go to View-> Data Source -> +Add data source
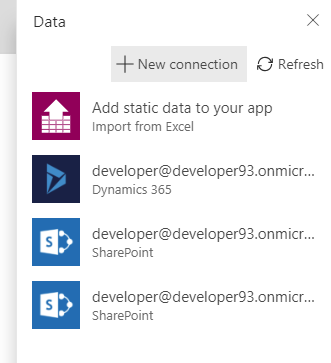
After that Click on Add data Source, the below screen will appear,
If u have different data source then select that one. Here we have selected a Dynamic 365.
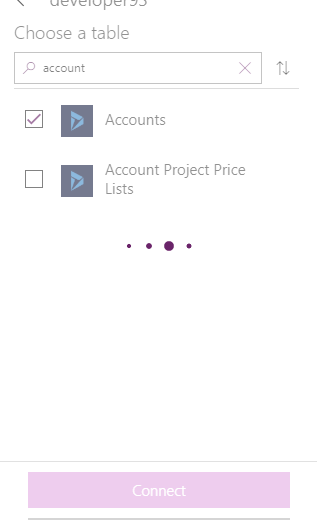
Click on Dynamic 365 then select required entity. I have selected Account. After selecting entity click on Connect, data source will get added to PowerApps. Similarly we can add Contacts data source as shown in below screenshot.
After successful setup it looks like below.
Step 5: Add gallery two controls to “CustomerScreen” as shown in below screenshot.
Step 6: Go to HomeScreen select dropdown, to set dropdown value, I have define entityList collection which consist of entityName as property. These will display data on dropdownlist.
Step 7: Now set Items property of dropdown to entityList Collection as shown below.
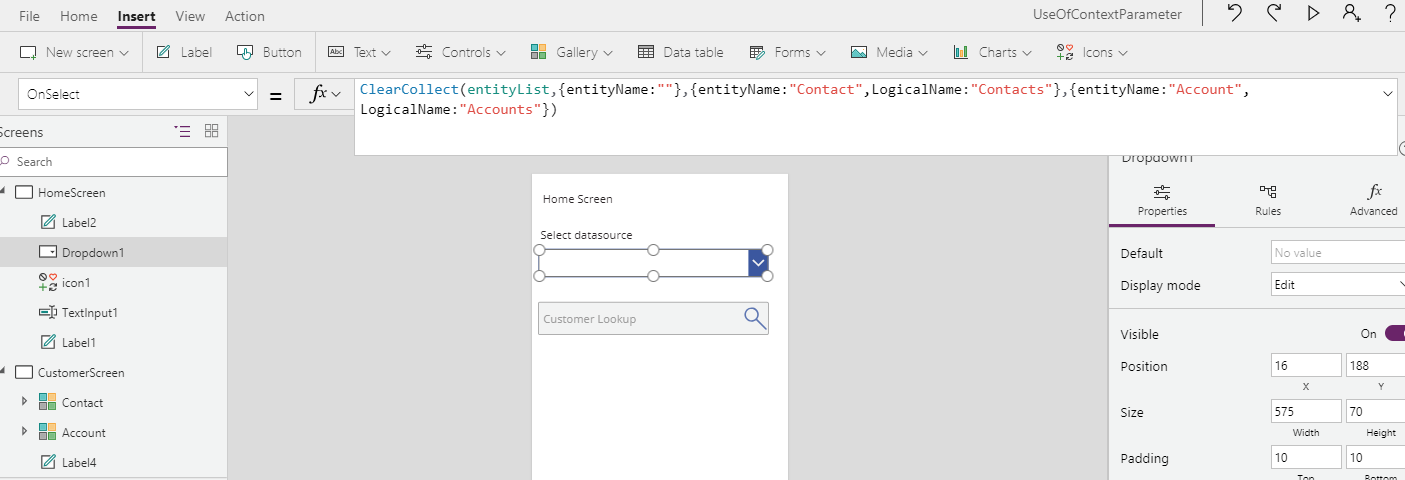
Step 8: Now add below lines of code in onSelect property of dropdown.
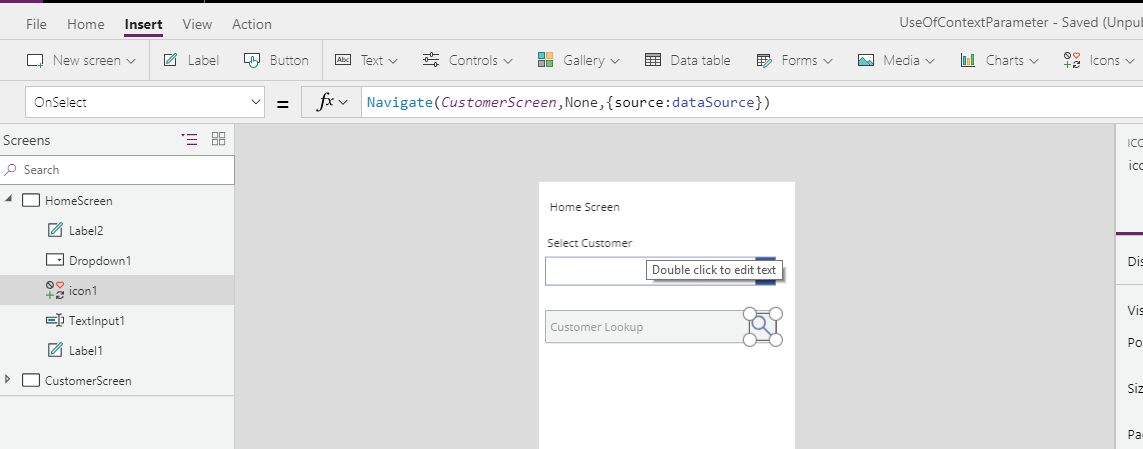
Step 9: Select Search Icon of Textbox then add navigate function as shown below.
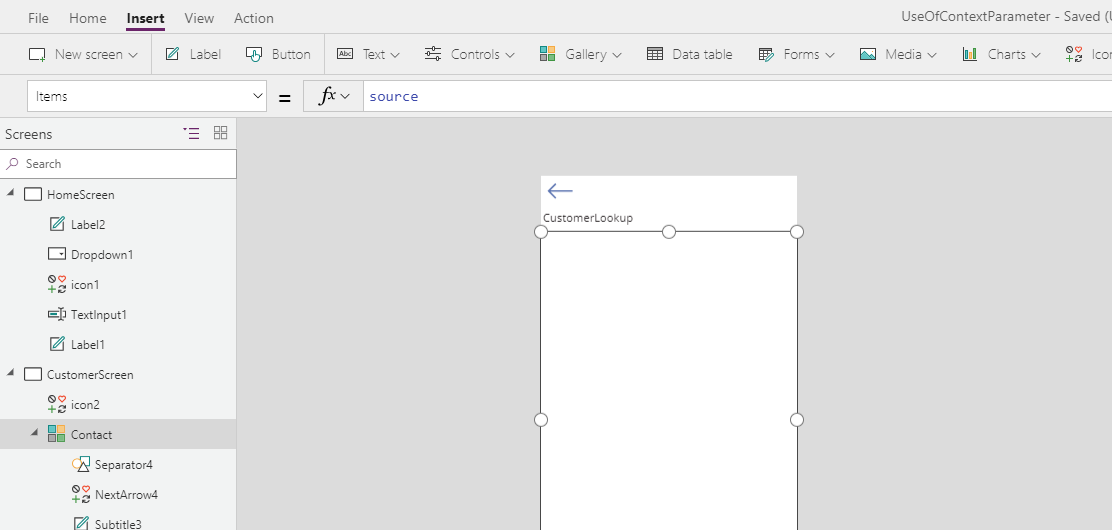
Step 10: Go to CustomerScreen and set Items property Contact and Account Gallery to Source collection that define in navigate function.
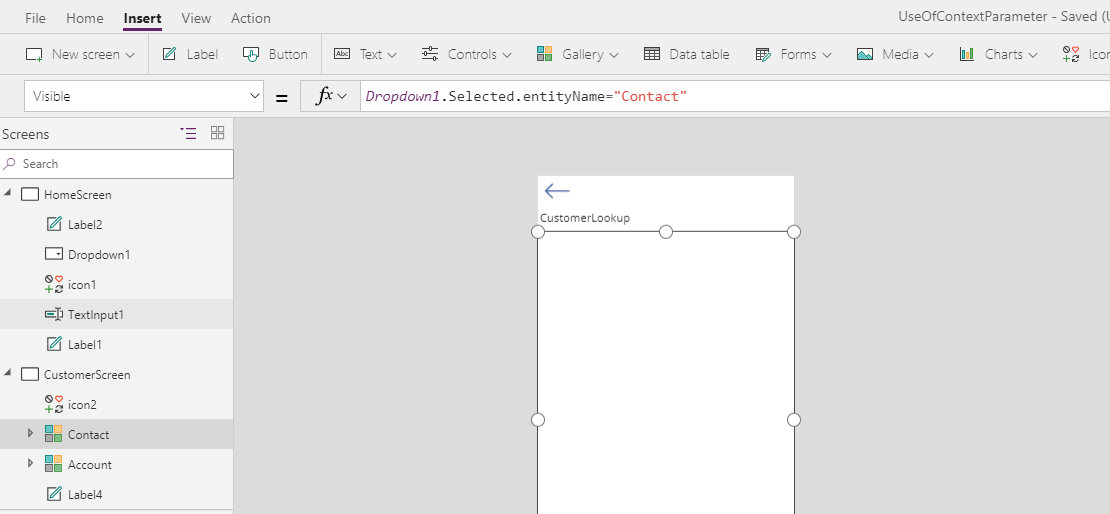
Step 11: To display only one gallery at a time set visible property of account and contact gallery as shown below
Contact Gallery
Account Gallery
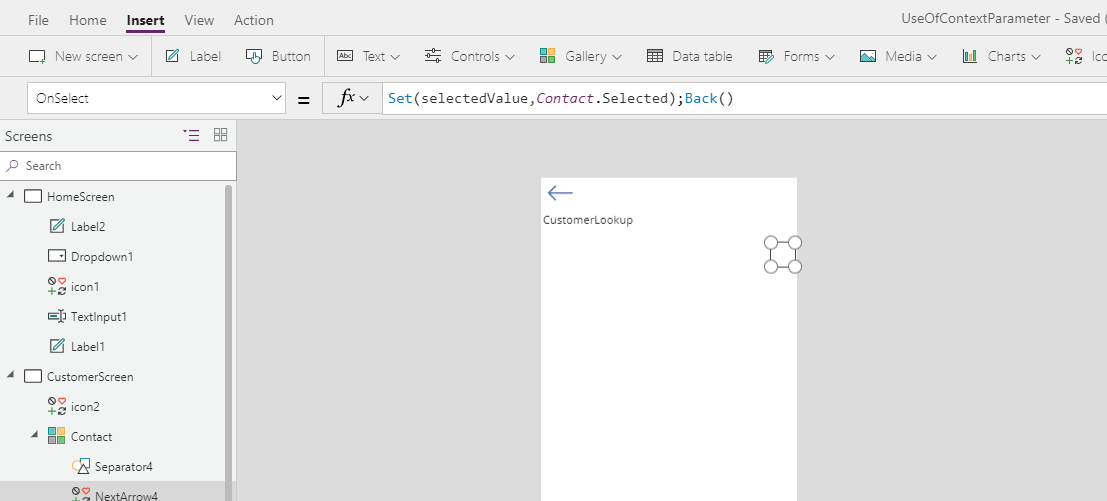
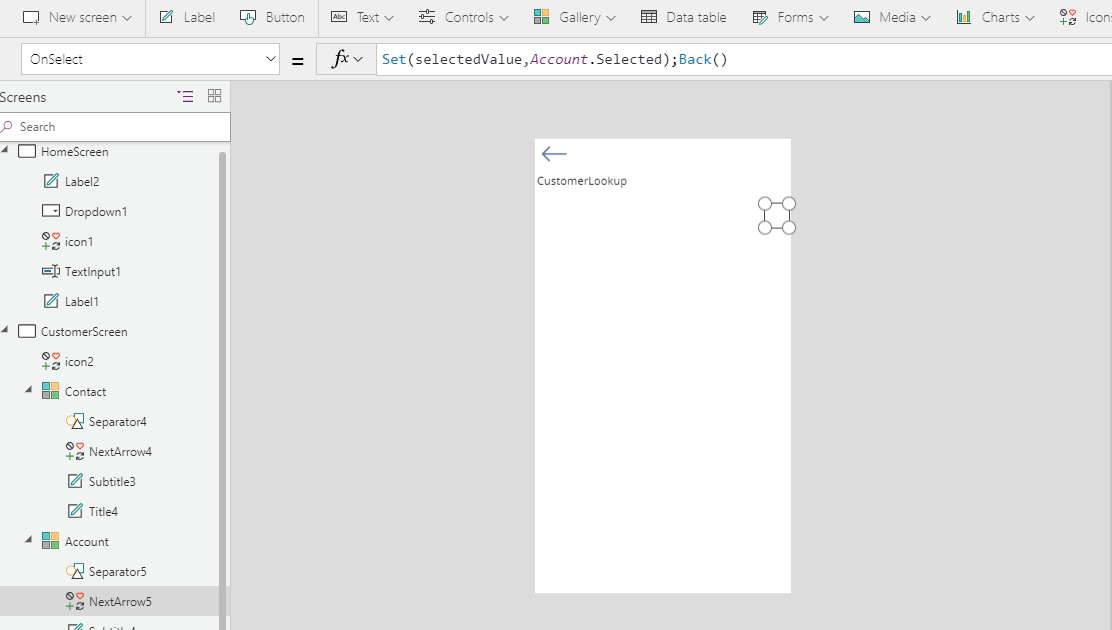
Step 12: To display selected data on HomeScreen Textbox, use Set function on OnSelect property of nextArrow Icon as shown in screenshot.
Contact Gallery
Account Gallery
Step 13: Go to HomeScreen and set default property of textbox as shown in below screenshot.
Note: Instead of Dropdown control, we can use radio Button. Now simply run the application.
Conclusion:
Using the simple steps above user can create customer lookup in PowerApps using data context.
70% of global 2000 companies apply gamification to improve productivity and returns!
Gamifics365 – Spin the magic of games within Microsoft Dynamics 365 CRM to improve user adoption, enhance productivity, and achieve company goals!
