Introduction:
Field Service remains a critically important component for most of the organizations. It radically drives customer satisfaction and builds stronger trusted relationship with the customers.
Recently, while working on field service, we came across an entity “Payments” and “Payment Details”, this created curiosity to explore more on this. And we did some research and play around to find how this entity could be related to work order/Invoice.
In this blog, we will discuss, how entities ‘Payments’ and ‘Payment Details’ could be related to Work Order and Invoice.
Payments related to Work Order and Invoice:
When field service is installed, the user would not be able to see the Payments entity. In order to bring the payment entity in the navigation of work order, the user needs to visit a form editor on work order form -> Add the Payment entity to the navigation of work order and then the payment entity will be ready to use.
Now let’s have a glance on how Payment section is related to Work Order and Invoice.
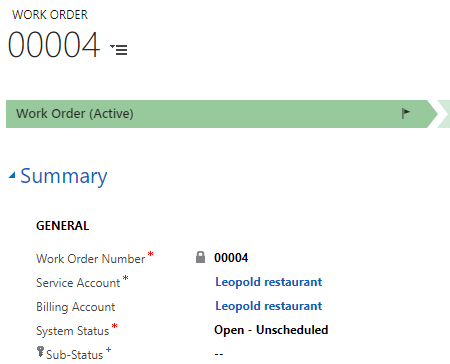
Consider a scenario, create one work order and add a product to it.

Now next step is select the product and set the Line Status option as “Used”.
When the work order product’s Line Status changes to “Used” and work order is “Closed-Posted”, then the Invoice product and also the invoice related to work order is created.
In order to create invoice record, when the work order is “closed posted”, the user needs to configure the following field service setting.
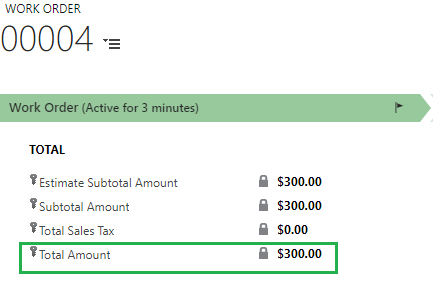
Now the Total Amount of the work order is “$300”.
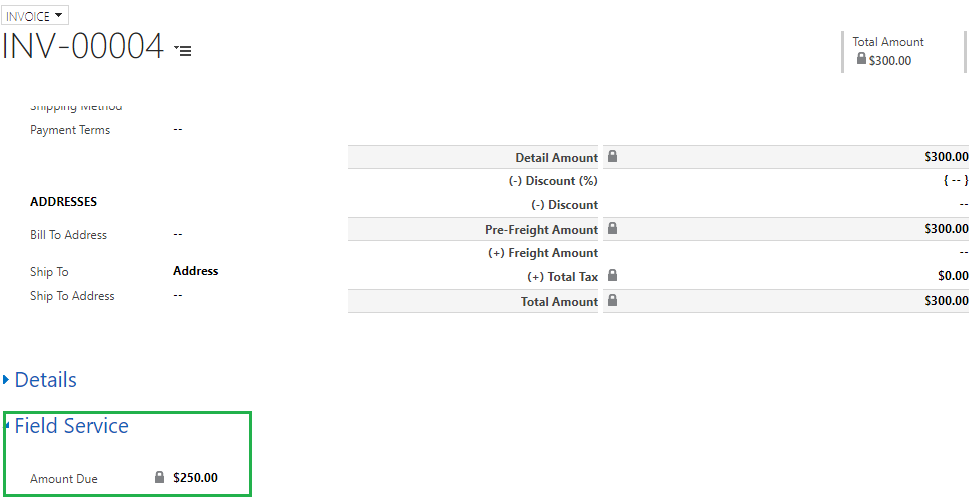
The invoice created for the work order “00004” and total amount to be paid is “$300”.
As we have added the Payment entity in the navigation of work order, click on “Payment” and create a new payment.
Select the Work Order, Account, Amount, and Payment Type for which the payment should be made. “Unapplied Amount” is the calculated field.
Now, go to the navigation of the Payment. Here we can find another entity called “Payment Details”.
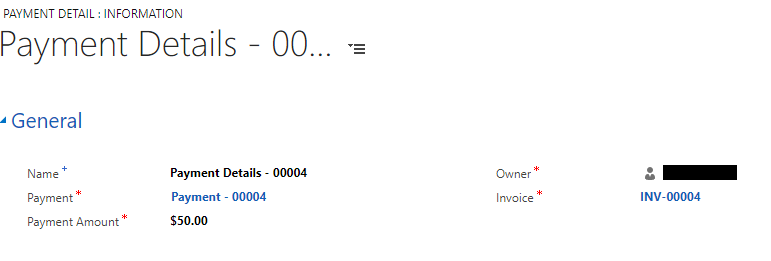
Create a new Payment Details. Here we need to select the invoice i.e. invoice for which the payment should be made. If the customer does not pay full amount which is on an invoice, but the customer paid some amount, then let us see how this calculation is done.
The total amount was “$300” of the invoice. When the Payment detail was created, the “Payment Amount” paid by the customer is “$50”. Hence, the Amount due on the invoice is “$250” i.e. $300 – $50 = $250.
Now from this we understand that the total amount on the invoice was “$300”, but the customer paid “$50” and hence amount due i.e. to be paid is “$250”.
So if we go and check the “Payment – 00004” in the Payment entity, the “Unapplied amount” field which is a calculated field also shows “$250”.
This is how the Payment section works.
Conclusion:
The field service has added the Payment section to Work Order and Invoice through which we can calculate the amount due i.e. to be paid by the customer. The Payment section is also used in the Field Service mobile app.
Need any help with Microsoft Dynamics 365 Field Service module / Microsoft CRM / Power Platform development?
Want to manage your field services portal more effectively? Contact us at crm@inogic.com and our Inogic- Professional Services Division will help you modify, optimize, and automate all our requirements within Microsoft Dynamics 365 Field Service!
Happy Servicing!


Thank you. This was a very helpful post!
hi ,can you explain me what do you mean by “ment entity in the navigation of work order, the user needs to visit a form editor on work order form -> Add the Payment entity to the na” here what do you mean by form editor and how it
While working with work orders in Dynamics 365 Field Service, the user cannot navigate to related Payment because the OOB Work Order form does not include Payment in the Navigation.
For this we need to customize the work order form to have the Payment entity in the navigation, so that the user will be able to see Payment records related to the Work order. Initially, Form editor was used to customize the form within web client but now all customizations can be done using ‘make.powerapps.com’. Given below are the steps to customize the work order form to include the Payment entity in the Navigation.
• Navigate to make.powerapps.com and click on solutions. You can use the default solution or create a separate solution for the customizations.
• Open the Work Order form and click on the Switch to Classic button.
• Now, click on navigation as shown in the below screenshot.
• The next step will be to double click on the Payment from Relationship Explorer. This will add the Payment Entity in navigation for the work order.
• Save the form and click on Publish. Now you can refresh the Work Order record and see the related Payment records.
Hope this helps.
Thanks!