The following instructions will help you to set up Adxstudio Portal websites for your Dynamics CRM.
You would require ADX Studio setup before getting started with configuring ADX Portal for your Dynamics CRM. ADX Studio Setup is available for download on below link:
https://community.adxstudio.com/products/adxstudio-portals/releases/adxstudio-portals-7/download
After downloading and installing ADX Studio setup. Go to the installed folder, mostly that will be present (depends on the path you choose at the time of installation) in below mentioned path:
Now you need to configure your Dynamics CRM for ADX Portal and build ADX Portal for your Dynamics CRM.
Configure Dynamics CRM for Your ADX Portal:-
- Import ADXStudioInstaller.zip into your CRM. You will find ADXStudioInstaller.zip file on below mentioned path:
“C:\Program Files (x86)\Adxstudio\XrmPortals\7.0.0022\Customizations”
- Once ADXStudioInstaller Solution is installed in your system you will see a ADXStudioInstaller button as shown in below screenshot. Click on it. Accept license agreement.
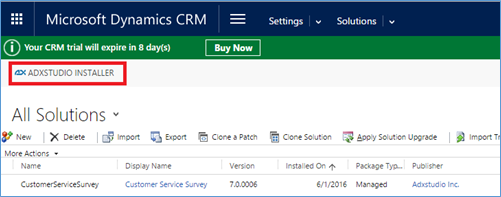
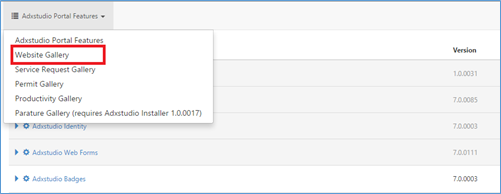
- Select Website Gallery in the upper most picklist as shown in below screenshot.
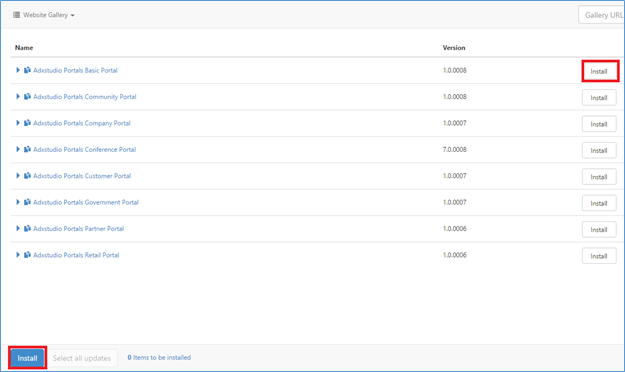
- Select the type of Portal you want to install by clicking on install button present at the right side of the available templates. After selecting portal template click on install button present at the bottom of the page.
Configure ADX Portal for Dynamics CRM:-
- Visual studio solution for ADX portal will be available at below path
“C:\Program Files (x86)\Adxstudio\XrmPortals\7.0.0022\Samples”
You can either run ADXPortal locally through Visual studio or you can host the given solution on your IIS.
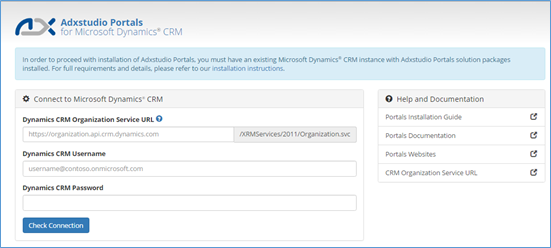
- For first time use you would require to fill CRM details as shown in below screenshot. Once the details are filled, click on Check Connection.
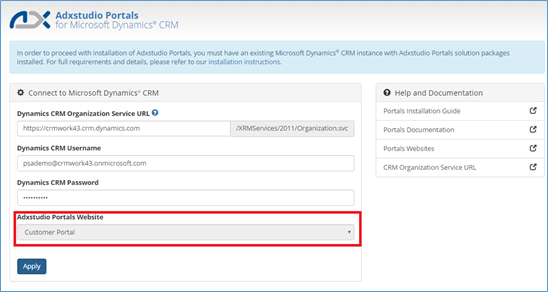
- Select Website from the list of ADXStudio Portal Website dropdown, that shows the list of available ADXStudio website that are installed in your Dynamics CRM, then click on Apply.
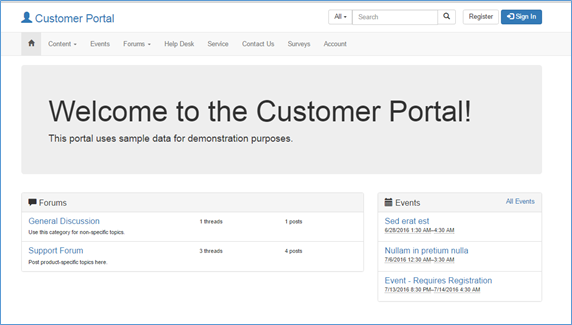
That’s all you need to do, your ADX portal will get automatically configured for your Dynamics CRM. Main page for customer portal will look like below screenshot.
You can now create new pages, assign security roles to existing pages.
NOTE: Default user login credential for the portal will be:
UserName: administrator
Password: pass@word1
We will be posting blog on creation of new Web Page, Entity List page, configuring pages for Dynamic HTML Content shortly.
Now do Accounting without leaving your Dynamics CRM – Try InoLink – Dynamics CRM QuickBooks integration tool!
