Introduction:
In the previous blog here. We learned about the installation and deployment of ADX portal, now we will see how to display the views of entities in ADX portal. This basically is used to display the particular entity records to the portal user. For instance, if Dynamics CRM user wants to display the active cases records to the portal user, then CRM user will create a view to be displayed on the ADX portal.
In order to display the views in the ADX portal we have to do below two tasks:
- Create the Entity List
- Create the Web Page
Create the Entity List:
- For creating the entity list, Go → Portals → Entity Lists and click on New button then following form will open. Here, enter the name and select Entity Name.
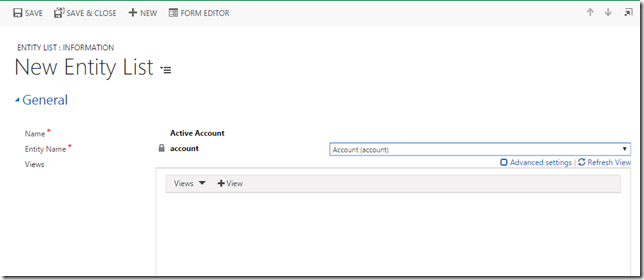
- Once you select the entity name, then Views option will open. Here in views field, click on +View button, it will display the view list as shown in the screen shot.
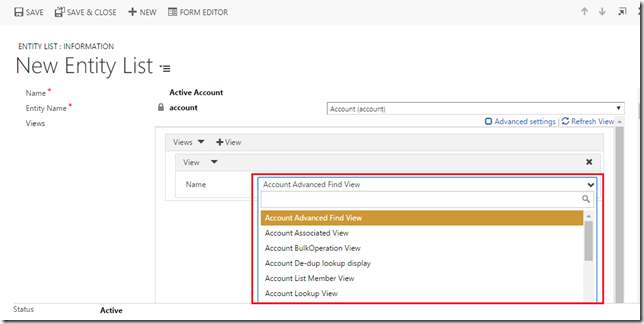
- Select the view from the given look-up field as shown in the below screen shot and then save the record. You can add multiple views.
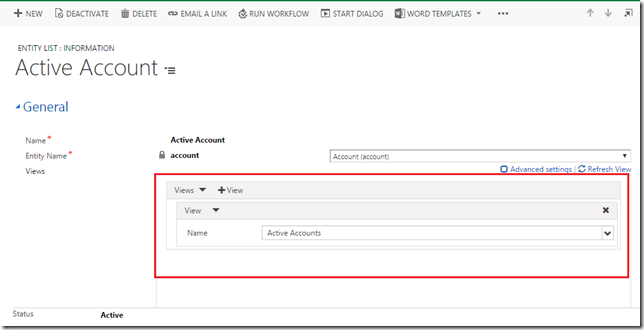
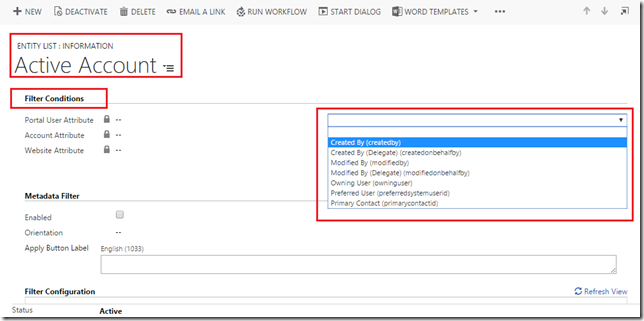
- Also for the grid you can add filter as shown in below screen shot. Filtration can be done for current logged in portal user.
Create the Web Page:
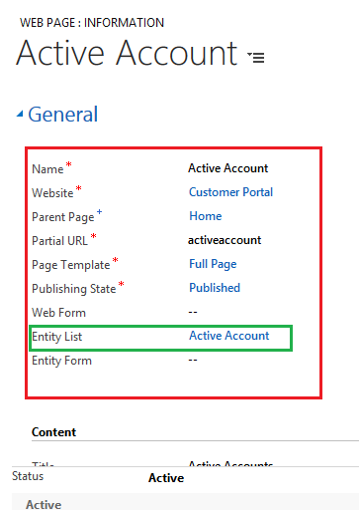
- For creating a new web page, Go → Portals → Web Pages and click on New button then following form will open, here enter the entity list name.

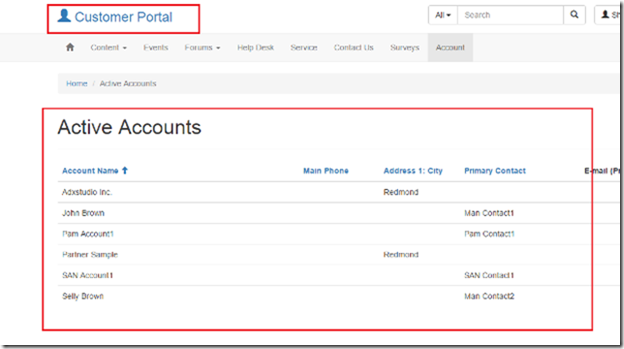
Once you complete these two tasks, this list will be seen in the view of entity on of customer portal of ADX as per below screenshot.
Conclusion:
In this way, a Dynamics CRM user can create a view to be displayed on the ADX portal to display the active cases records to the portal user.
Now do Accounting without leaving your Dynamics CRM – Try InoLink – Dynamics CRM QuickBooks integration tool!
