Introduction
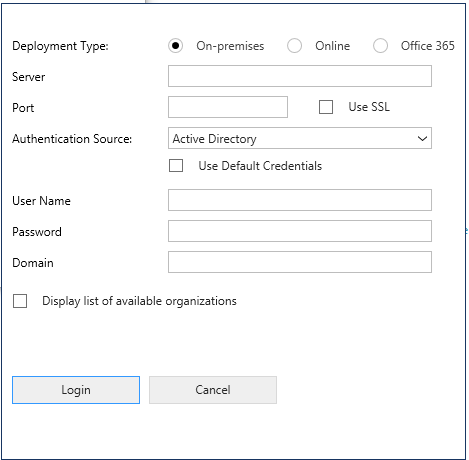
Microsoft Dynamics CRM SDK provides a common login control template to connect Dynamics CRM with custom WPF application. CRM credentials authentication, its storage, and error logging is all done by this common login control. The only thing we need to do is to add login template to our WPF application in order to leverage the benefit of common login control in our application. Common login control will be available as shown in below screenshot;
To install visual studio extension for common login control, follow the below mentioned steps;
- Go to your CRM SDK folder, search for Templates folder.
- Double click on “CRMSDKTemplates.vsix” this will install CRMSDK templates in your visual studio.
Implement Control for your new WPF application:
Follow the below mentioned steps:
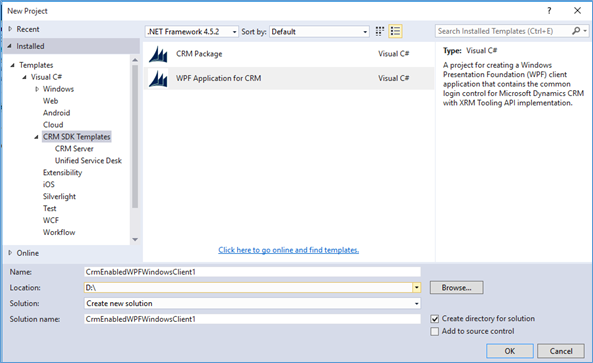
- Go to new project in visual studio and select CRM SDK Template in Visual C# section. Select WPF application for CRM in it as shown below.
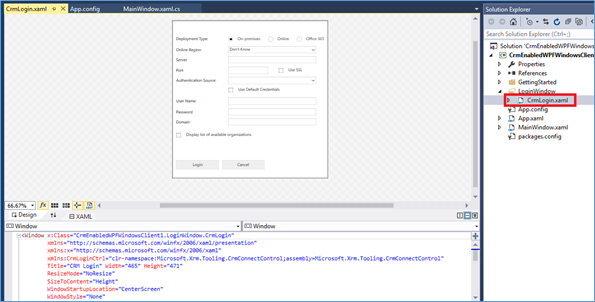
- Go to “CRMLogin.Xaml” file present in Login Window folder in your project, as shown below;
You don’t need to code for CRM login, it will be automatically handled by the login control.
You can set your own application logic, after authentication to CRM.
Conclusion:
This blog discusses about the template for Microsoft Visual Studio rendered by Microsoft Dynamics CRM SDK enabling you to use common login control in the client applications. This is helpful in leveraging the capabilities in the CRM’s Windows client application.
Before moving to the next post, have a look at our new productivity add on Click2Clone : Clone your Dynamics CRM records in 1 click.

