Introduction
Before we explain you how to integrate OneDrive with Microsoft Dynamics CRM 2016 Online, let’s see what OneDrive is all about.
OneDrive can be the most preferred option to store private documents. While you can use Office 365 Groups for collaborative storage, SharePoint can be used for public documents.
For instance, when there is a need to work on a document which is often used in the Sales department you can opt for ‘OneDrive for Business’. With this storage option the documents are stored and are synced to desktop and mobile devices. Now it’s easy to work on documents with others in your organization at the same time.
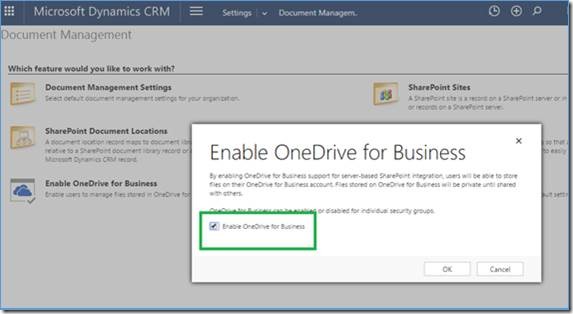
In Dynamics CRM 2016 Online, there is a new feature ‘Enable OneDrive for Business’ in the Document Management which helps us to integrate OneDrive with the CRM as shown below.
If you directly click ‘Enable OneDrive for Business’ and try to enable the feature you won’t be able to do so. Instead, the system will direct you to a popup as shown in the screenshot below.
The popup asks you to enable server-based integration and have at least one active SharePoint Site in order to use this feature.
So make sure you have integrated SharePoint with CRM by the Server Based method.
Later, once you have integrated SharePoint, the CRM returns back to the screen where you can click ‘Enable OneDrive for Business’ again.
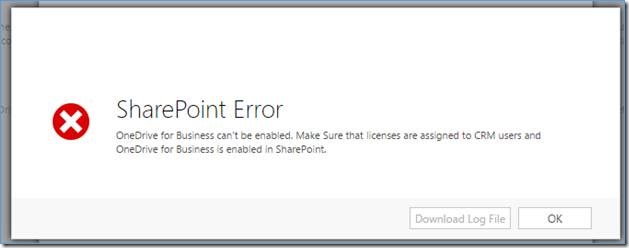
If the user does not have License for OneDrive then he/she may face the error as below.
So make sure that the user has the License for using this product. In our case we will assign the Office 365 Enterprise E5 to the user.
Next, again click ‘Enable OneDrive for Business’ from the ‘Settings’ >> ‘Document Management’ as shown below.
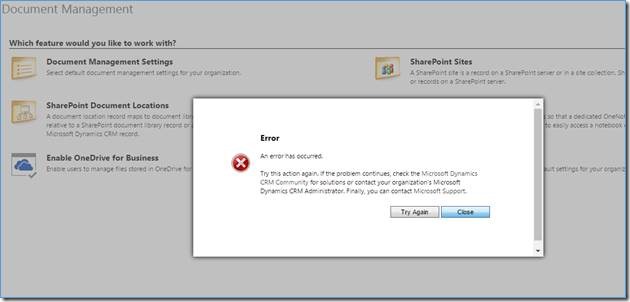
Even then you might not proceed ahead and you would face an error.
Now, this issue arises as you don’t have the OneDrive app ready for use. So, you need to configure OneDrive by following the steps as below.
1. Go to portal office page i.e. https.//portal.office.com
2. Click on the below highlighted part to select the OneDrive app as you can see below.
3. It will redirect you to the start page of the OneDrive where we will configure the OneDrive for the first time.
4. After it is configured the OneDrive app would open as shown in the screenshot below.
Now again navigate to ‘Settings’ >> ‘Document Management’ >> ‘Enable One Drive for Business’.
After it has been successfully enabled you will see a new option in ‘Document Management’.
Now the OneDrive Folder Settings can be configured by clicking on the ‘OneDrive for Business Folder Settings’. The system will then direct you to a popup on the system.
Here you can specify the folder name which OneDrive will use to store the data.
Let’s keep it as ‘MSCRM DATA’. Next, everything is done once you have clicked ‘OK’.
Now, let’s navigate to an Existing Account Record and go to ‘Documents’.
It will ask to create a folder in SharePoint. Once you have clicked ‘Confirm’, a folder will be created in SharePoint under Accounts. This folder is usually created when we integrate Dynamics CRM & SharePoint.
Now let’s see how you could upload files in OneDrive.
For instance, if want to upload an image in this Document Library Location then click ‘Upload’ to select the file.
Once you have selected the file to be uploaded, then you can see the CRM Folder option.
Select the OneDrive option and Click ‘OK’.
You may get the popup as shown below just in case you are uploading the file for the first time.
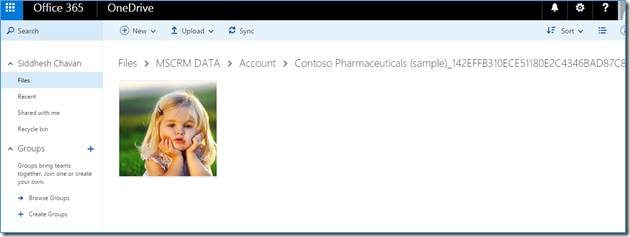
Click ‘Continue’ and it will create the folder ‘MSCRM DATA’ (which we specified earlier) under the Files section in the OneDrive and the file will be uploaded at the ‘MSCRM DATA/Account/AccountName_AccountGuid’.
It will then appear as shown below:
To view the image which has been uploaded, click ‘Open Location’ to open the path where the uploaded file is stored as shown below
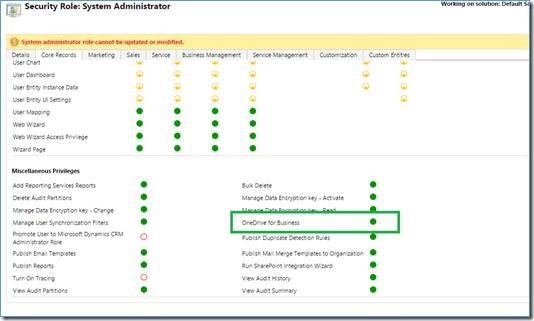
Besides, you can see below that there is a new Privilege option ‘OneDrive for Business’ which can help you to control OneDrive in the Dynamics CRM.
Navigate to ‘Settings’ >> ‘Security’ >> ‘Security Roles’
Select a security role, and then click the ‘Core Records’ tab.
Under the Miscellaneous Privileges, you can find the ‘OneDrive for Business’ privilege as shown in the screenshot below.
Some Advantages of OneDrive
- Since mobile devices are synced with this storage option, documents, and other digital content gets stored automatically on the storage space thereby keeping files secure in case of accidental hard disk failures.
- With OneDrive, you can access files from any location. You are good to go with an internet connection, device, along with a web browser.
- This storage option enables you to share files with anybody you wish. This prevents unauthorized access.
Join us for first look of Maplytics at Microsoft Envision 2016, Booth no 1000.


