Introduction:
A new concept of timer control has been introduced in CRM 2013 SP1 which can be used against date fields on customizable OOB entities or custom entities. This timer control has been designed to help users notice the nearing SLA or resolution times.
For example, if your organization has certain process to be followed which needs to be completed in specific time and be noticed by agents as well then timer control is a powerful tool which would help you keep tab on the process. We have illustrated this through a lead process and an example below:
Working:
This timer control gets date/time field value as its time limit and from that time begins the timer countdown. You can place multiple timer control on a single form which you can assign to different date & time fields.
How to use Timer control:
Before using Timer control you must consider following points:
1) First you need to plan on what are the fields you will be going to use.
2) Then decide where to place the control on the form.
3) When you add the control on the form, you will be required to select the associated date/time field as well as configure the desired conditions.
Note:
1) Timer control is currently available in CRM web application and CRM Outlook Client but is not available on CRM for tablets.
2) The timer control refreshes on the OnChange form event, and also when the form is loaded.
The following example describes how to use timer control on lead entity:
Here, we need to set process and timer control on lead entity to monitor when the lead is first created in CRM, the first Email response should be sent to lead within specific minutes of time interval. If response is not sent, we should update the “Response status” field and send email to owner to notify no response has been sent as yet to that lead.
We have created fields called Response status, First response sent and First response by on lead entity. Response status is OptionSet with different options, First Response sent is a Boolean field and First response by is a date time field. We will associate First response by field with Timer control.
Customize Timer Control:
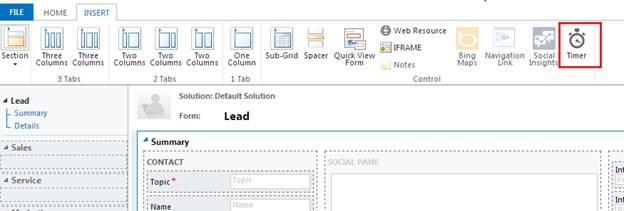
1) Customize lead entity –> drag timer control on lead entity as shown below:
2) Then you need to set Timer Control properties as shown below:
Here you need to set the name and label of the timer control, a unique name should be specified.
Then you need to provide the data source for this timer.
i. Specify Failure time field (Date time field), in our case it will be First Response by field (the Timer Control will start working once the first response by date time is set).
- Then set the Success condition: Our success condition is when Response status is “Process Followed” (if Response status is “Process Followed” the timer will show status as “Succeeded” with green color).
- Set warning condition: Our warning condition is when Response status is “Send Response”. (It means that if Response status is “Send Response”, timer control will show time in orange color), this color specifies that the time is about to expire.
- Set Cancel condition: Our cancel condition is set Response status as Process not followed.
Once all the properties are set click on OK and save the customization and publish them.
Working of timer control with example:
Here we have criteria, when a lead is first created in CRM, the phone response or email response should be sent to that lead within 10 minute time interval.
As explained above, we will be setting timer for response by time field. Here, we have created workflow to calculate First response by time, so our timer will be set for that field. Also this workflow will wait for specific time and check for lead first response sent status and on that basis it will update Response status and email will be sent to owner of that lead. If no response is sent to the lead then that lead will get disqualified with Response status as “Process not followed” and timer will be set as “Cancelled”.
Workflow to Update Response status and send mail: This workflow will get executed on lead creation.
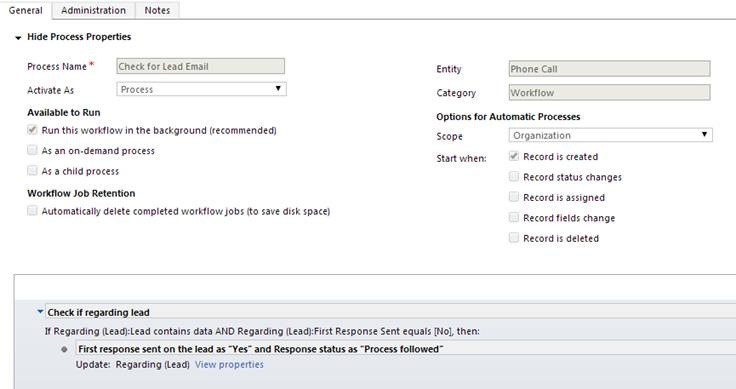
Also we have another workflow to set First response sent on the lead as “Yes” and Response status as “Process followed”.
Working of timer on lead:
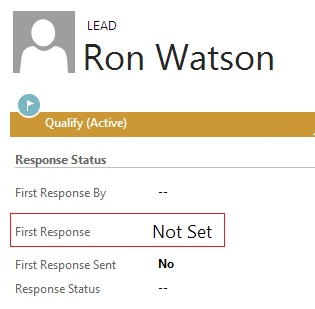
1) As seen below, when First Response By date field is not set, the timer is set with default status as “Not Set”.
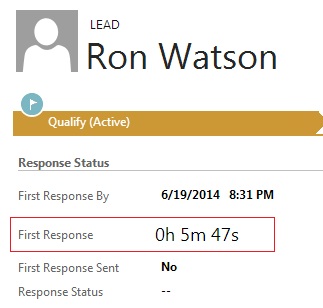
2) When first lead is created, its First Response by time is calculated with the time interval remaining to close the lead as shown below. Note that the First response sent is set to “No”.
3) Once time elapses, workflow gets executed after timeout and it will set Response status as “Send Response” which is a warning condition that we have specified while setting timer control properties through customization. As you can see below, Response status is set as “Send Response” and timer displays timing with orange color as warning.
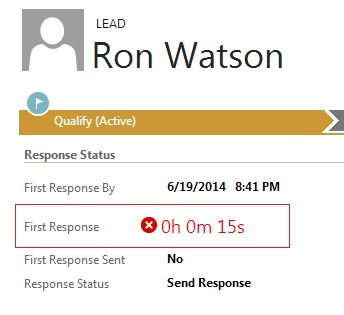
4) If first response is not yet sent to lead and timer is about to reach the specific time its color get changed to red to highlight that no response has been sent to lead. As seen in below screenshot, it shows the timing in red color:
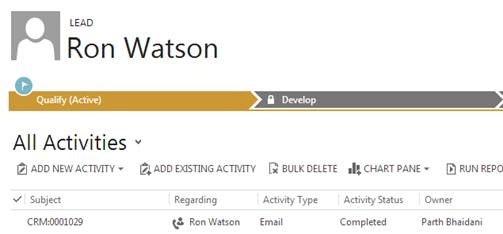
5) Once the time expires and First Response sent is No, the email is sent to the owner of the lead as shown below:
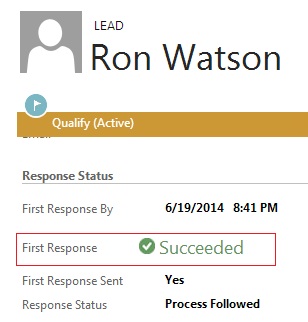
6) If First Response is sent and Response status is set to Compliance, the timer success condition gets fulfilled and timer status will be set as “Succeeded” as shown below:
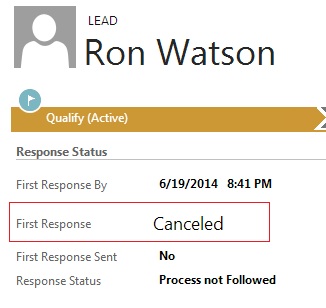
7) If you set status as the lead, Timer status will be set as “Canceled” as shown below:
Hope this helps.



Great job, thanks