Every time Microsoft comes up with some new features and extension to their services and this is one of them. You can now customize and personalize your office 365 portal experience by using one of the new features provided by Microsoft called themes. You can now have your own custom themes applied to the portal website and can be customized as per your requirement.
If you are an Office 365 admin then you can create custom themes for your organization similarly your users will also be able to personalize their experience by selecting an Office 365 theme.
In order to customize the office 365 portal you need to follow the below steps.
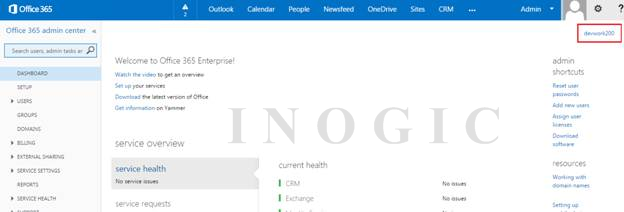
1. Open your office 365 portal as shown below.
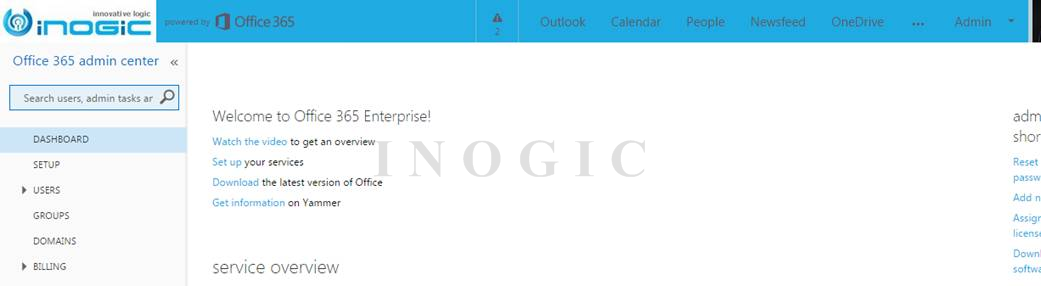
From Dashboard view you can able to see your organization name in our case its devwork200, Now click on that organization name.
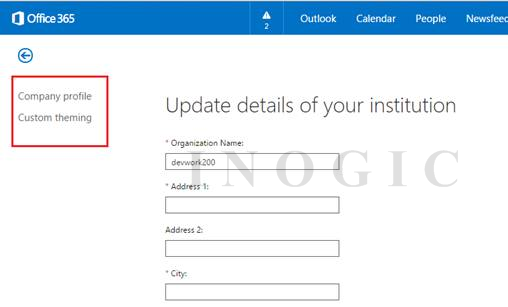
2. It will open following page which will show options like “Company Profile” and “Custom theming” as shown below:
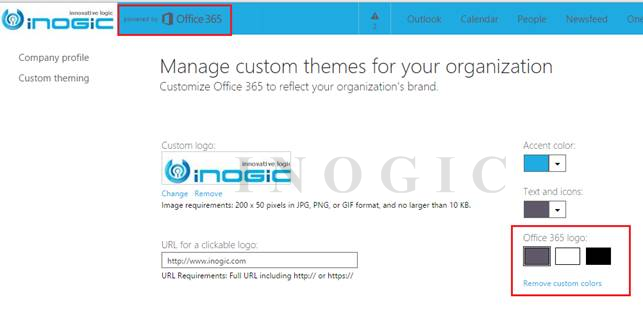
3. Now click on option Custom theming it will show following page from where you can customize the Office 365 portal
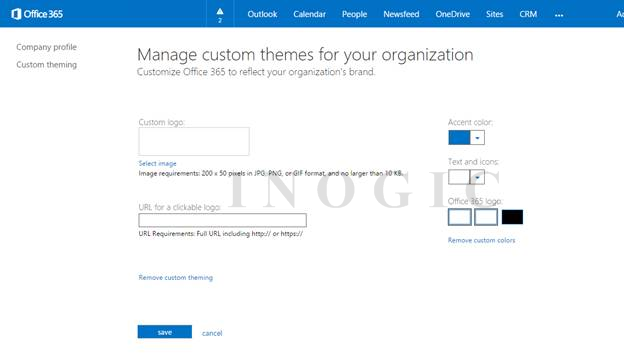
As you can see in above screenshot, it will allow you to manage Custom themes for your organization.
Here you have following options to customize the theme:
- Custom Logo
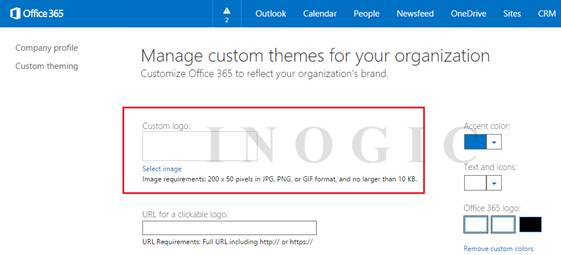
Here you can select your company logo for your organization which you would like to appear on office 365 portal. But note that that logo must be of specified size i.e. 200 X 50 pixel format and of type PNG, JPG and GIF and its size must be less than 10 KB.
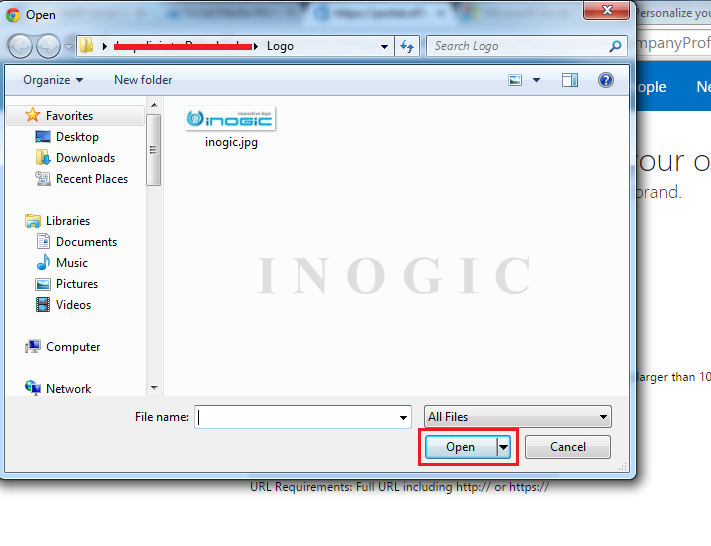
Here you can click on Select button which will allow you to upload the image from your computer.
Select Logo and click open as shown below:
Once the image is selected it will give notification as successfully uploaded message and logo start showing on top left corner of the portal as shown below:
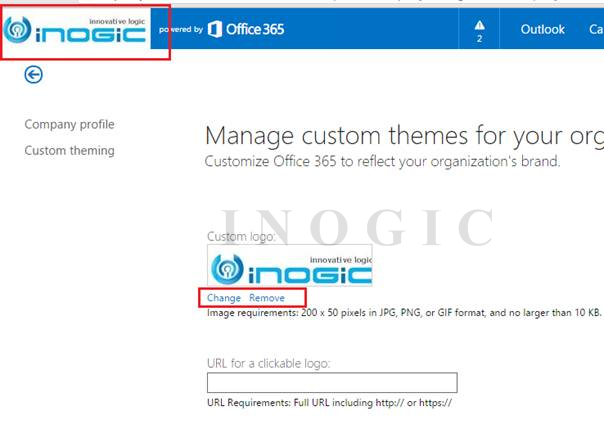
In case if you want to remove or change this logo then that can be done using option Change or Remove.
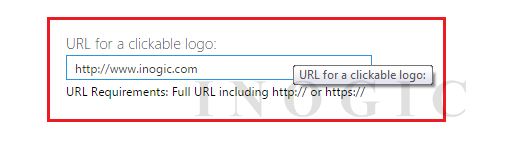
- URL for clickable logo
Now on click of logo if you want to get redirect to your company website then you can provide your company website URL here as shown below:
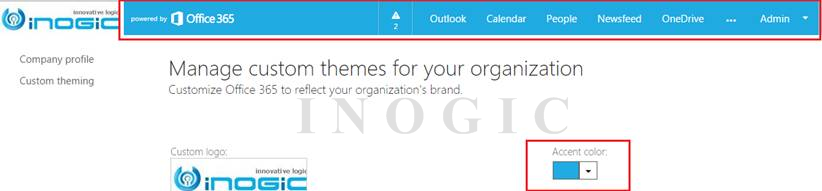
- Accent color
This option is used to change the portal theme color in our case we are keeping it as black as shown below:
- Text and icons color
Change the text color using this option:

- Office 365 logo
If you wish to change the color of the Office 365 logo then you can use this option you can keep it either in white color or in text color as you selected or of theme color.
Once the color is set, you can click on Save button to save the changes and can see the custom theme as below:
Also, if you like to remove the custom theming, you can select remove themeing option.
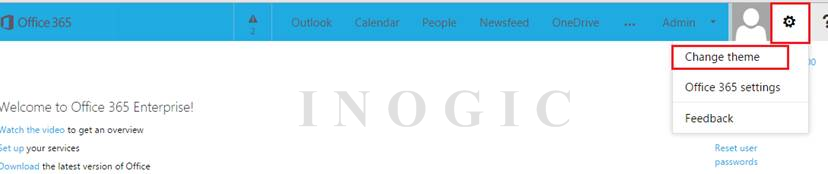
At the same time, if you wish to use some predefined themes instead of creating custom themes, you can do that also.
Click on Setting icon and it will show “Change Theme” option listed as shown below:
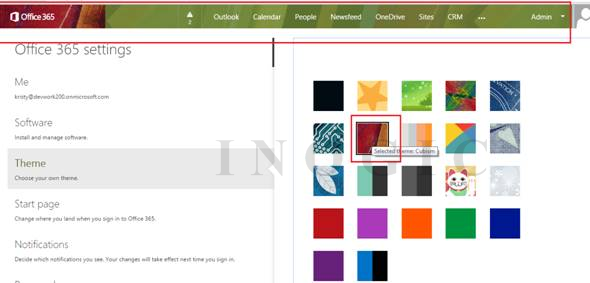
Once you click on Change theme it will get redirected to Theme section as shown below:
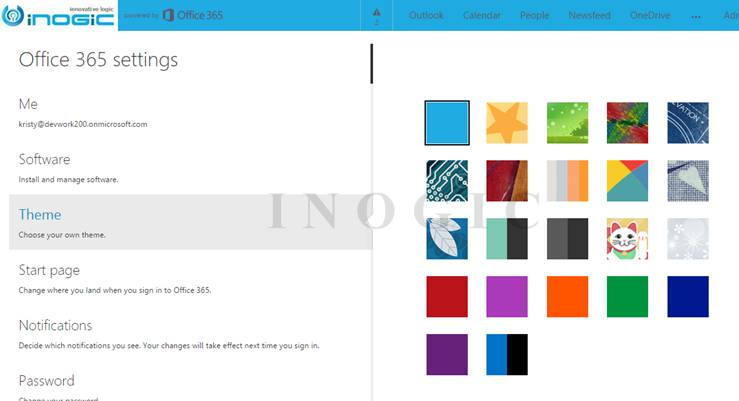
If you select any of the theme from the following options then that theme will get applied to the portal. Click on save button in order to continue using the changes.
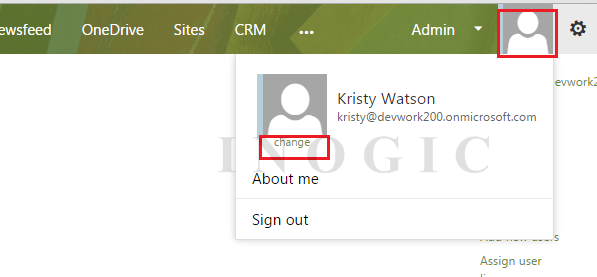
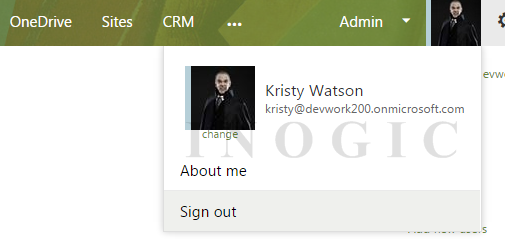
Also, to make it more personalized, you can add your photo on top Nav bar as shown below:
Hope this helps you to personalize your office 365 portal as per your needs.